

Hey there!
I’m still here. Not crafting or sewing, but still here.
I thought I would re-post this bag I guest posted for Jenny from The Southern Institute last month.
I’ve been using it as a church bag mostly, but it’s been warming up this week. We might venture outdoors tomorrow for Natalie’s first outing and finally use this bag for what it was actually intended! Wish us luck.
It’s kind of weird to see my pregnant belly again. Jenny astutely pointed out that the circular pocket looked like a pregnant belly. I guess you can tell what was on my mind! 🙂
Have a great weekend! I hope you are able to get out and enjoy some lovely weather!

Hmmm…When I think spring I think of the park. The air is brisk but the sun is warm and we are itching to get out of the house!
I thought it would be fun to make a bag that is big enough to carry all the stuff we seem to need to take to the park. Snacks, sometimes lunch, a blanket, sunscreen, water…

So I came up with this nice big:
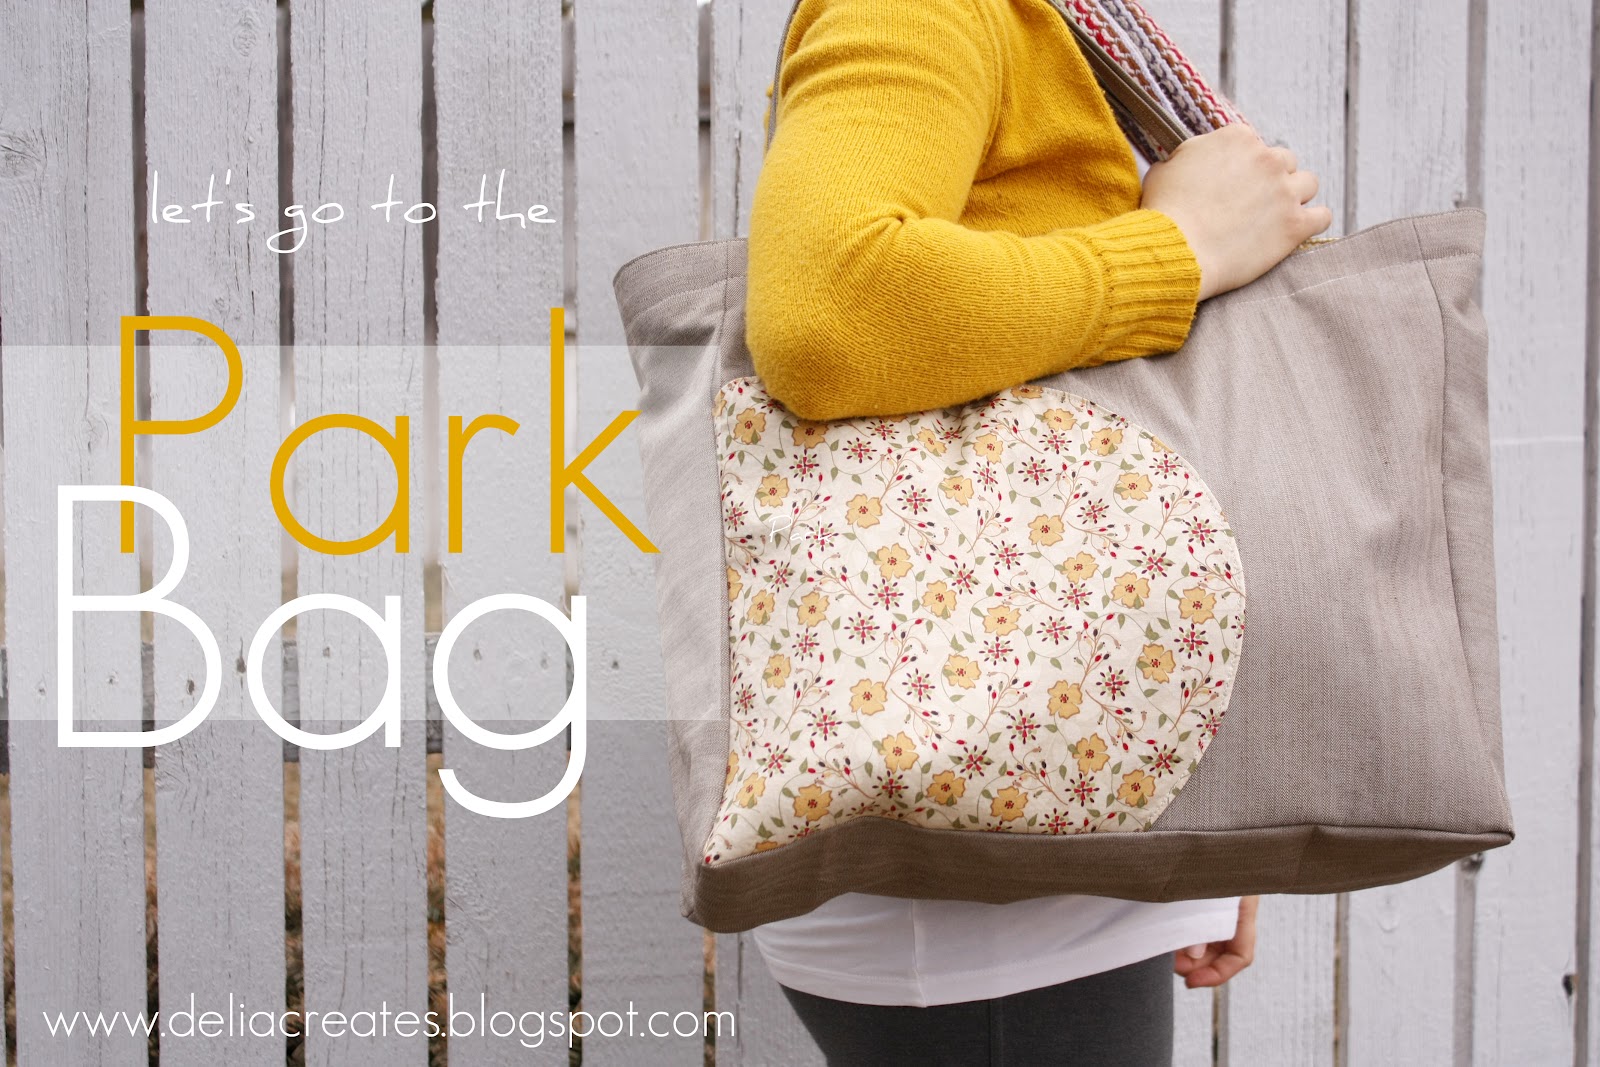
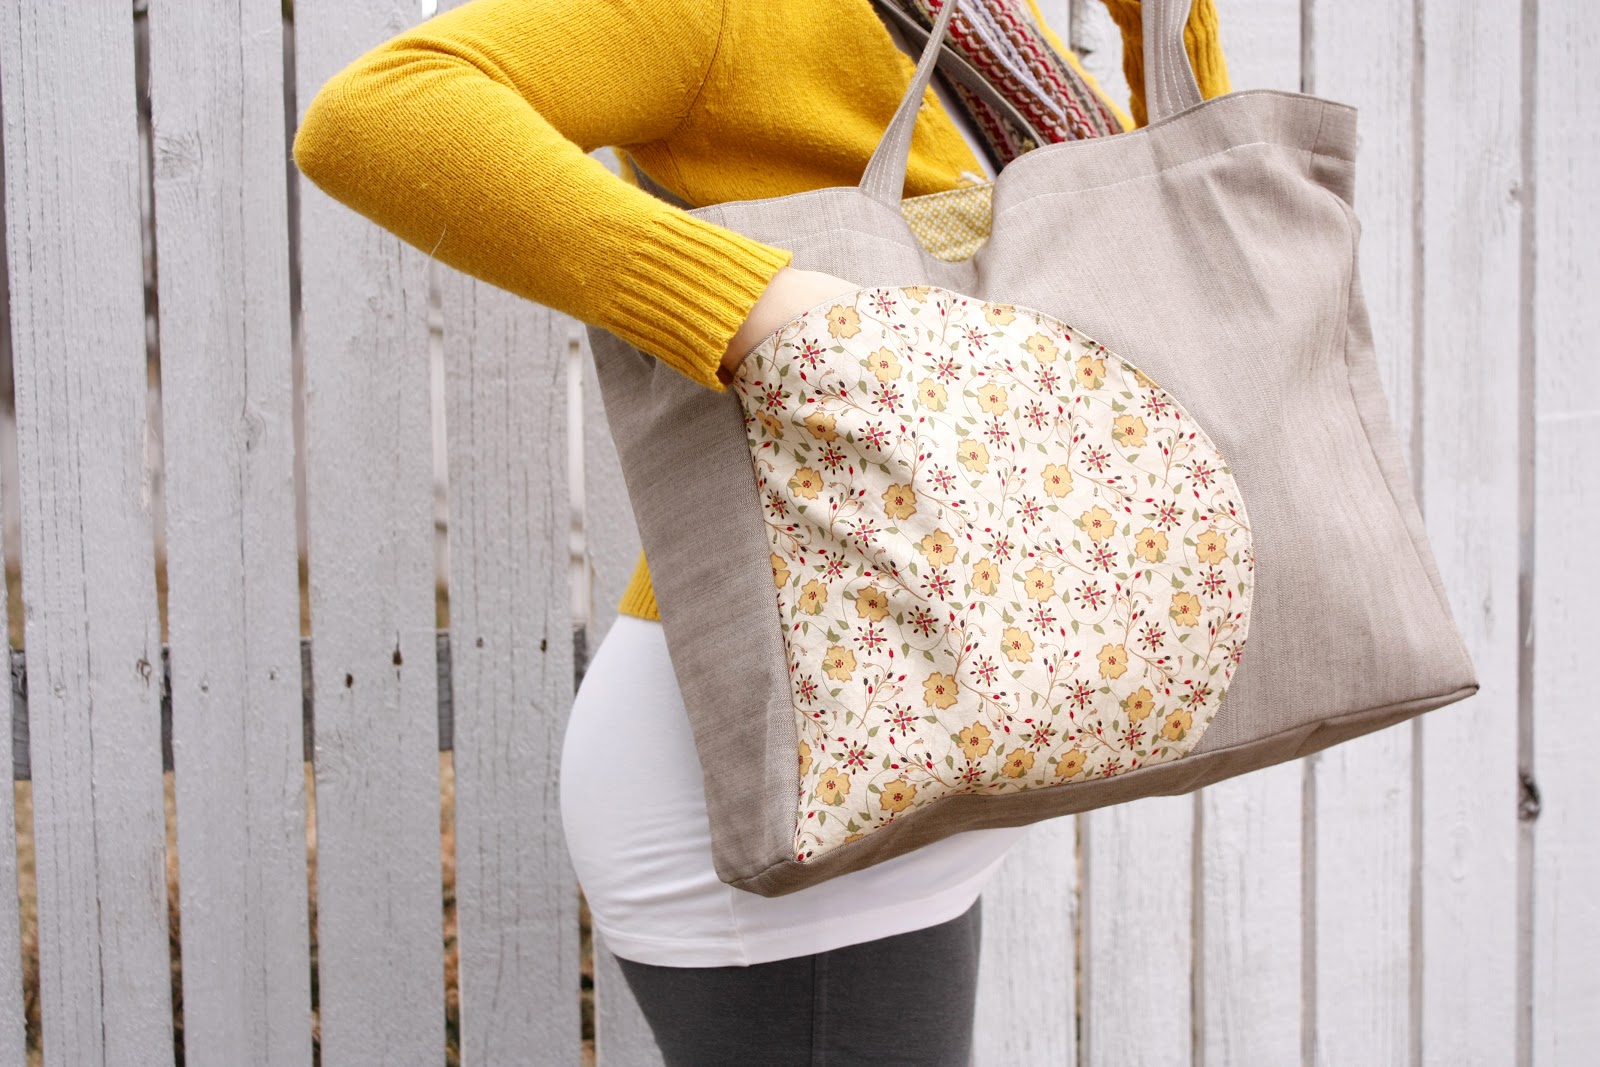
It has gathered inside pockets, water bottle elastic straps, and a surprise circular pocket on the outside just perfect for keys and a cell phone.
I have not included a pattern, I only provide measurements of what I did. I also used only fabric I had in my stash so that dictated my measurements quite a bit.
It’s a bag though, so of course do whatever you want to personalize it and make it your own!
Supplies:
3/4 yd. Duck canvas or heavy weight fabric for the outer bag
1/2 yd. Cotton for liner
1/2 yd. or so of contrasting or coordinating fabrics for pockets and such – mix and match as needed
1 yd. of 3/4 inch elastic
basic sewing supplies and sewing machine
universal sewing needle is all I used but get a heavy duty needle for the duck canvas if you like
optional – fabric glue

Step One –
Cut all your pieces. I cut mine and labeled them with scraps of paper and pins, to keep everything straight.
Cut your circle pocket pieces last. The size of this doesn’t matter as much as the others. You want to make sure you have enough fabric for everything else first.
Here’s your cut list –
Outer bag pieces – Duck Cloth/Denim fabric
2 – 17 x 16 inch rectangles (long sides)
2 – 6 x 16 inch rectangles (short sides)
1- 17 x 6 inch piece (bottom of bag)
2 – strap pieces 23.5 x 3.5 inches
save the remainder for a circular pocket in size of your choosing
Liner bag pieces – in Cotton fabric
2 – 17 x 16 inch rectangles (long sides)
2 – 6 x 16 inch rectangles (short sides)
1- 17 x 6 inch piece (bottom of bag)
1- circular pocket piece to match the outer bag circular pocket piece
Pocket pieces – in Cotton
1 – 21.5 x 13.5 inch rectangle (long side gathered elastic pocket)
1 – 11 x 17 inch rectangle (long side flat, divided pocket)
1 – 13.5 x 7.5 inch rectangle (short side gathered elastic pocket)
2 – 3 x 9 inch pieces (short side elastic water bottle strap casings)
Step Two –
Assemble your circle pocket.
Using the fabric you have leftover after cutting your other pieces…

Use a pot lid or something circular to make your pocket. Make sure you cut two pieces for this.

Sew your circle pocket pieces right sides together along the curved edge only. I used pinking shears to reduce the bulk {thanks Kate for the tip!} instead of snipping little notches all the way around.

Also sew your casing pieces in half and turn them right side out.

Step Three –
Ironing.
Iron everything flat if you haven’t already.
Iron your casing pieces with the seam to one side.
Turn your circle pocket right side out and press it flat.
Fold under the top of your pocket pieces twice and press. For the ones with elastic in them fold them over 1/2 an inch and then again a full inch or so. For my flat pocket I just folded it over 1/4 an inch two times.
Iron in your straps 1/4 inch inward and then in half (like bias tape).
Step Four –

Sew your circle pocket onto one long side of your outer pieces. I originally was going to put another canvas piece with contrasting grain on the front, but chose to let my liner piece shine instead.
I pinned the pocket close to the edge but only sewed from the bottom up to where I wanted the pocket to open. I reinforced the opening with a small, tight zig-zag stitch.

Step Five –

Sew all outer pieces together.

The bottom can be a trick. I just sewed within a 1/4 inch to the end, turned and sewed it as flat as possible.
Step Six –

Sew elastic casings in pockets and thread your elastic pieces through your pockets.
You also want to gather the bottoms of the elastic pockets.
*The easiest way to do this is to increase your stitch length and tension as high as it will go. Sew without going back and forth at the beginning and ending. Pull a long tail of thread off before you cut your threads.
Elastic Measurement Guide:
For the long side elastic pocket you will need about 15-16 inches of elastic (or even less)
For the side elastic pocket you will need 5 – 5.5 inches of elastic.
For the water bottle straps you will need 6-7 inches of elastic each (2).
Step Seven-
Pin all pocket pieces and straps to liner pieces.
For the flat pocket I sewed a divider up the – almost – middle.

The water bottle straps were placed just slightly lower than I show here…eventually. I sewed up the bag with them like this, found they were too high, unpicked it and did it over. So, you can learn from my mistake. You want the straps closer to the bottom of the bag and a bit closer together. Consider the water bottle you plan on putting in the bag to help you determine spacing.

I also redid the long side elastic pocket by tightening up the elastic. I think I could have tightened it up even more…or adding a dividing line like I did with the flat pocket would have been a good idea. So you may want to consider that or just do two flat pockets instead.
Step Eight –

Sew all liner pieces together like you did with the outer bag pieces.
Step Nine –

Sew your straps together. I added more lines of stitching in across the strap which gave it a nice look.

I lengthened my stitch to a 3.5. You could even go to a 4. It gives a more polished, professional look. Also…sew slow/medium speed. If you sew too quickly your machine may skip stitches, especially with this thicker fabric.
Step Ten –
Assemble the bag! You’re almost there.

Iron in the tops of the outer bag and liner bag about 1.5 inches. I found it easier to turn the liner right side out, iron it and then turn it back to wrong side out.
Place the liner inside the outer bag.
OPTIONAL – use fabric glue to adhere the bottom of the liner to the bottom of the bag. I also reinforced the sides with some of the glue as well. This is not necessary but helps the bag stand up nice, and help the pockets to stay where they are supposed to go a lot better. The glue is completely washable after 24 hours. It’s pricey but I think makes the bag better.

Use a ruler to mark the center of the bags. I put the straps four inches out from the center mark.

Sandwich the straps in between the outer and liner bags and pin all the way around. I made sure the straps were sandwiched in about 1 1/4 inches at each end for each strap.

Using a longer stitch length ( 3.5 or 4) stitch all the way around twice like so.

And you’re done!

Now stock that baby up and head out the door.

*You can see my long side gathered pocket was too loose before I tightened it up.

Better. I’m still itching to pull it tighter. 🙂 Blah…

Thanks so much for having me over Jenny! Have a marvelous day!
What a great bag with so much storage! The circle is great–don't see too many round lines on bags 🙂
i love how in the top pics of you holding the bag the pattern mimics your baby belly! cute
Very cool! Love the inside pockets
gandacummings.blogspot.com
It does mimic your baby belly!!! How cute and perfect for you!!!! Thank you for such a cute tutorial!
love this bag.. the colors and the inside pockets are creative 🙂
I would like to invite you to take part in my hangbag giveaway on my blog. So please do check it out: http://raindropsofred.blogspot.com/2012/03/raindrops-in-march.html
xoxo
I absolutely adore this bag Delia!! XO
Great bag! All the inside pockets…and my favorite, the rounded outside pocket! Just beautiful! Thanks for sharing!
Love it! Thanks for posting how to make it!
love this bag, so cute!
Wow, love this bag. Thanks so much for sharing the tutorial. I have been looking for a tote bag to make for the summer for school. I bookmarked it!
Thanks again.
holy cow this tutorial was a lot of work. VERY cool bag. Nice work!
I love this bag! It has definitely made it to the very top of my to sew list. Thanks for the wonderful tutorial and congratulations on the beautiful little one.
Hi,
I made this bag yesterday and it turned out awesome. Thansk for a wonderful and inspiring project.
I just made one and LOVE it!
It has been a bit tricky for me, since I’m from Germany and we have completely different metric system…BUT thanks to google I figured it out.
Thanks for the great tutorial!
This bag is fantastic-so much storage. What I hate about commercially made/designed bags is that the designers, usually men, seldom have the foresight to design a bag with more than one or two pockets. This design is just right for the busy woman- the pocket on the outside is brilliant, in the shape of the hand and the entrance on the side, how clever. I’m going to incorporate some of your ideas in my next bag, which will be soon as the handles on my present bag a wearing out. Thanks for sharing a great project!
Hi! I know this post is from a few years ago, but I just came across it and love it! I am almost finished, and I have a question about the fabric glue. I want to use it to firm up the bottom and sides but I have never used it before… Would you mind telling me how you used the glue? Specifically where do you put it? On the seems, all over the fabric…? How much glue do you use? Will it seep into the fabric? Thanks! And awesome tutorial. Very easy to follow 🙂
I can’t wait to make this. THANK you for sharing!!! I agree that it would drive me crazy that the elastic wasn’t tighter so thanks for the warning.
Happy sewing! <3 🙂
do you think its possible to make this but about half the size only?
Hi Gabriela,
I’m sure you could. Bags are so flexible like that. If you want it to be smaller but still a suitable size for an adult, I recommended keeping it the same height and depth, but just making it narrower.
I hope that helps! Let me know if you have any other questions.
Delia
I would like to print this pattern. I can’t wait to make it. Thank you
I’m so glad you like it! I wish I had a printed pattern, but I don’t. This is one of my first detailed sewing tutorials from over 6 years ago and I wasn’t doing patterns yet. The measurements are all listed and most of the cuts are just rectangles. I hope that helps!