

Today, I’m sharing an easy buttonhole tutorial for Brother sewing machines.

Now, I am very aware you can easily follow your sewing machine manual and teach yourself to do the same thing. But…if you are a visual learner. Well, then this tutorial is for you!

Buttonholes can seem daunting to a beginner sewist, but I promise they are a cinch. Especially with a Brother sewing machine.
Even the most of the lower priced machines come with an automatic buttonhole foot like this one:

Let’s walk through how to use it.
1. Mark where you want your buttonhole to go with a washable fabric marker or pencil. Don’t worry about getting the exact width of the button drawn out. The buttonhole foot will take care of that for you. Simply mark a line in the direction you want your buttonhole to go. Then draw a shorter dash perpendicular to the line to form a “T.”

2. Now take your buttonhole foot and open the part that expands and retracts. Place your button in the opening and pull it closed until the button fits snugly (but not too tight) into the opening.
3. Remove your regular sewing foot by pressing on the little lever/tab directly behind the presser foot. It should come right off. Then pop the buttonhole foot on by lowering the presser foot lever over the metal bar on the buttonhole foot. Lift it back up in preparation for adding your fabric.
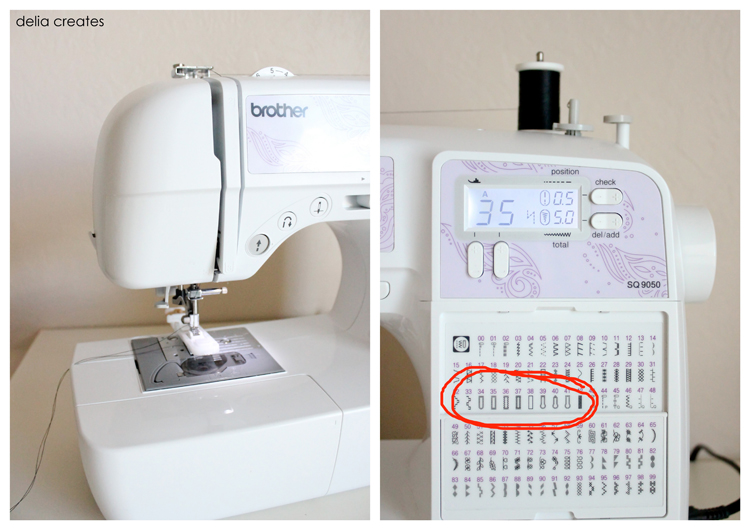
4. Now set your settings to the desired buttonhole foot stitch.
5. Slide your marked fabric under the presser foot with the top of the “T” facing you.

6. Line that T up under the buttonhole foot. Make sure the top of the T lines up with the red and green markings and that the longer line is centered in the middle of the foot.
7. Lower your presser foot and lower your buttonhole guide located to the left of the presser foot. You should be able to simply pull it down. There is a bump on the buttonhole foot where this guide should hit just behind.

8. Now, let’s rock and roll. Simply press down the presser foot and let the buttonhole foot and your machine do all the work!
*If you run into snags: you run out of thread, the thread gets caught and breaks…simply take the fabric off the machine, unpick it and start again.
9. Aha! There you go. A perfect buttonhole.

10. Let’s open it up.
First, trim away all hanging threads.
Next, you can use a buttonhole cutter tool like this one. Or you can use the traditional method and put a pin at the end of the buttonhole (so you don’t rip through the threads) and use your seam ripper. Or… you can simple cut the opening with a pair of super sharp sewing scissors. This is my preferred method because it’s easy, clean and quick.
Take your time and be careful. You don’t want to cut through your buttonhole and ruin all your work, because it is almost impossible to go back and fix it once you cut it.
11. Leave it as is or add fray check to keep the buttonhole looking nice and clean (totally optional).

12. Place your nicely sewn and cut buttonholes over the fabric you want to button it to. Make a mark through the center of the buttonhole with a fabric marker or pencil.
This is where you are going to sew on your button.

You can hand sew it on or if your button is not a shank button you can machine sew it using THIS method from Ruffles & Stuff. If you do machine sew it on, I suggest leaving long thread tails that you can double knot before trimming.
Test drive your buttonhole and button and pat yourself on the back!

Note: If it feels snug at first, do NOT worry. It will stretch out after a few pass throughs. You don’t want the buttonhole too large because you don’t want it to sag over time or not hold your project in the right place. A little bit of snugness is good.

Now wasn’t that completely easy and simple?
You don’t have to just use the buttonhole foot just for buttons by the way! See this dress, this pool duffle bag, and this free cape pattern for more ideas.
Don’t have a Brother brand sewing machine or an automatic buttonhole foot? THIS tutorial from MADE is fabulous.
Fabric credit:
Laid Back in Black & Cream by Karen Harris for Modern Yardage
Tears Drops in Black & Cream By Karen Harris for Modern Yardage
Buttons:
“Luci” from Lots of Buttons
Thank you, thank you, thank you! I have been so scared of doing buttonholes! I too have a Brother machine very similar to yours. I can’t wait to try this 🙂
Awesome tutorial! Buttonholes always seem like they’ll be much harder than they actually are. I’ve got a post on Craft Gossip scheduled for this evening that links to your tutorial. When it goes live, you can find it here:
http://sewing.craftgossip.com/tutorial-making-buttonholes-using-the-automatic-buttonhole-feature-on-your-machine/2013/08/22/
–Anne
Nice tutorial! I have a Brother CS6000i and when I let the machine to do the actual sewing work, I unplug the pedal and push that arrow button on the machine (next to the backstitch) and the machine does the whole thing and stops when it's done. Kinda cool!
"Hart fell in love with traditional Maio embroidery and set out to make some jackets the right way, the old way."
Cheongsam dresses
This article is one of the most interesting and informative content I have come across. Thank you for the information. I will be waiting for more updates from you.
Brother Sewing Machines
Heya just wanted to give you a brief heads up and let you know a few of the images aren’t loading properly.
I’m not sure why but I think its a linking issue.
I’ve tried it in two different web browsers and both show the same results.
That is a good tip especially to those fresh to the blogosphere.
Brief but very accurate information… Appreciate your sharing this one.
A must read post!
Thanks for finally writing about > Easy Buttonhole Tutorial – delia creates < Liked it!
how do I do it on a Janome?
Great question! I am sure there is a similar button holer feature on a Janome but I can’t speak to how to do that with authority since I don’t sew on one. Your best bet is to google bloggers who might have shared a Janome specific tutorial or to contact your Janome dealer. I hope that helps! I hear they are great machines!
i cant get my machine to do button holes, i am just getting a zig zag up and down, not wide enough to cut through
You might have to press a special button to access the buttonhole stitches. What kind of machine are you using?