

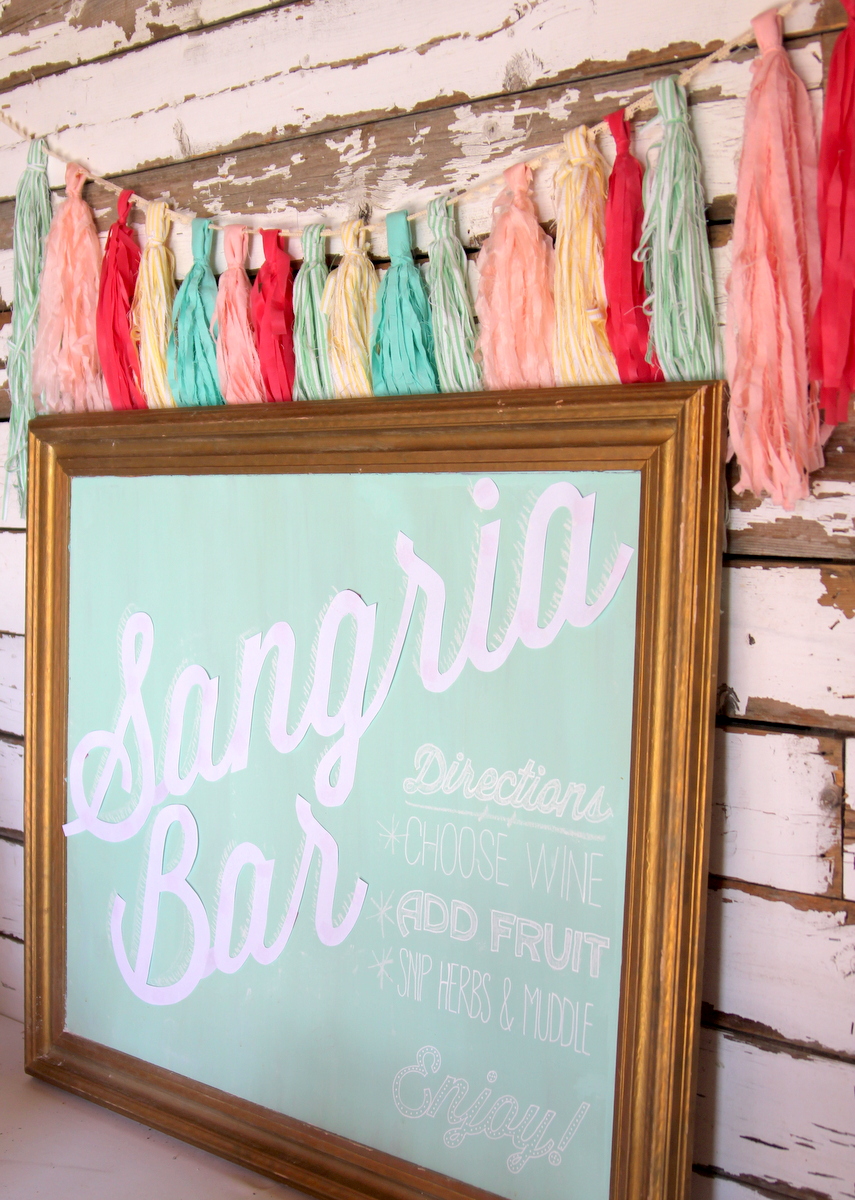

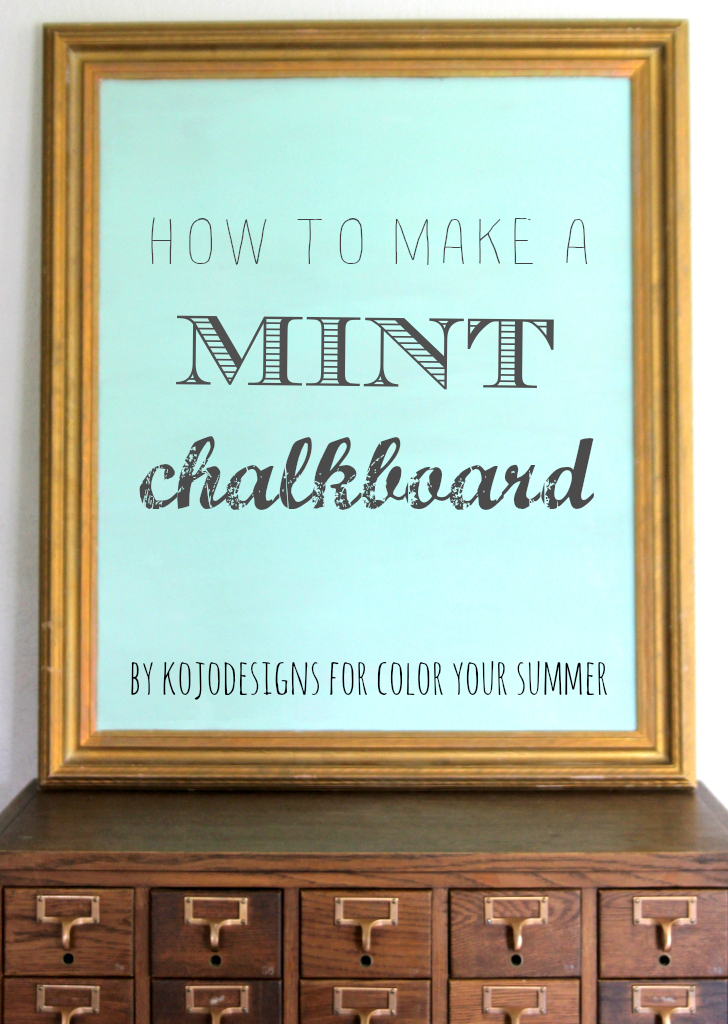
I have to confess, I love the colorful chalkboards that have been popping up everywhere. And isn’t this mint green colored chalkboard perfect for Color Your Summer?
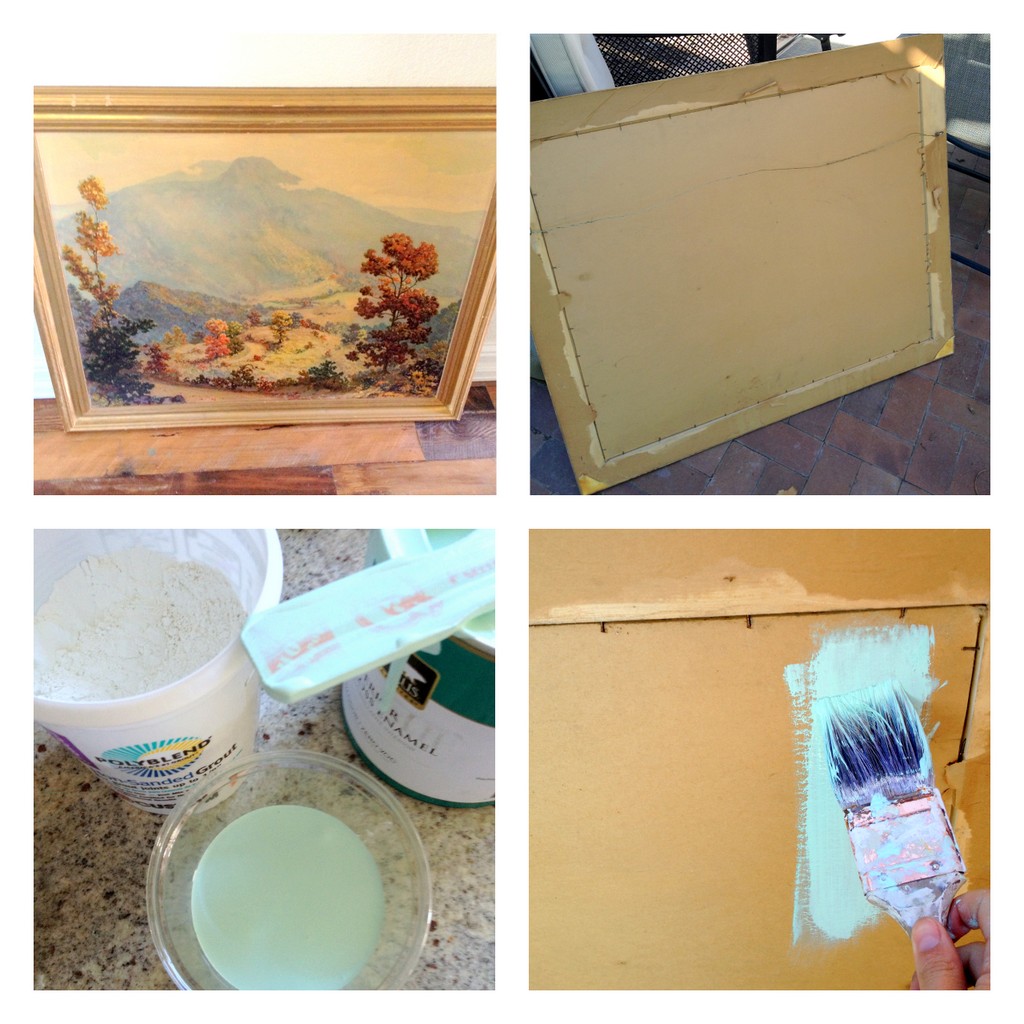 To make one, just collect an old painting with an awesome vintage frame.
Then mix together 1 cup any color paint (I’m partial to mint) and 2 tablespoons of unsanded grout.
Mix well.
Paint the back of the painting with your paint-and-grout mixture.
Flip the painting around so that the chalkboard is facing forward.
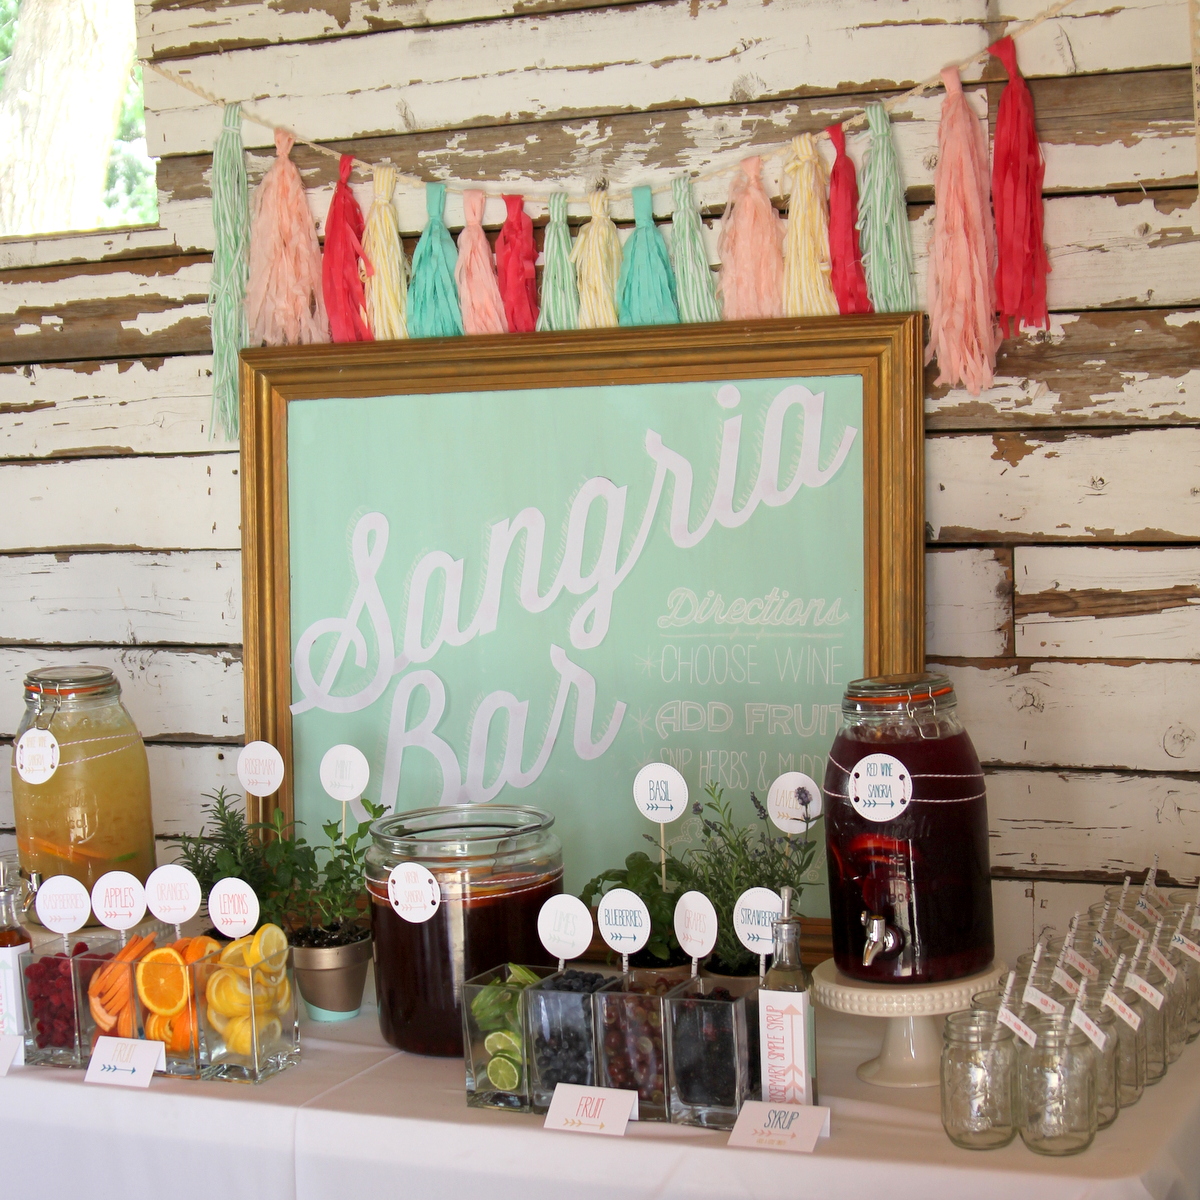
Then use as the backdrop for a Sangria Drink Station…
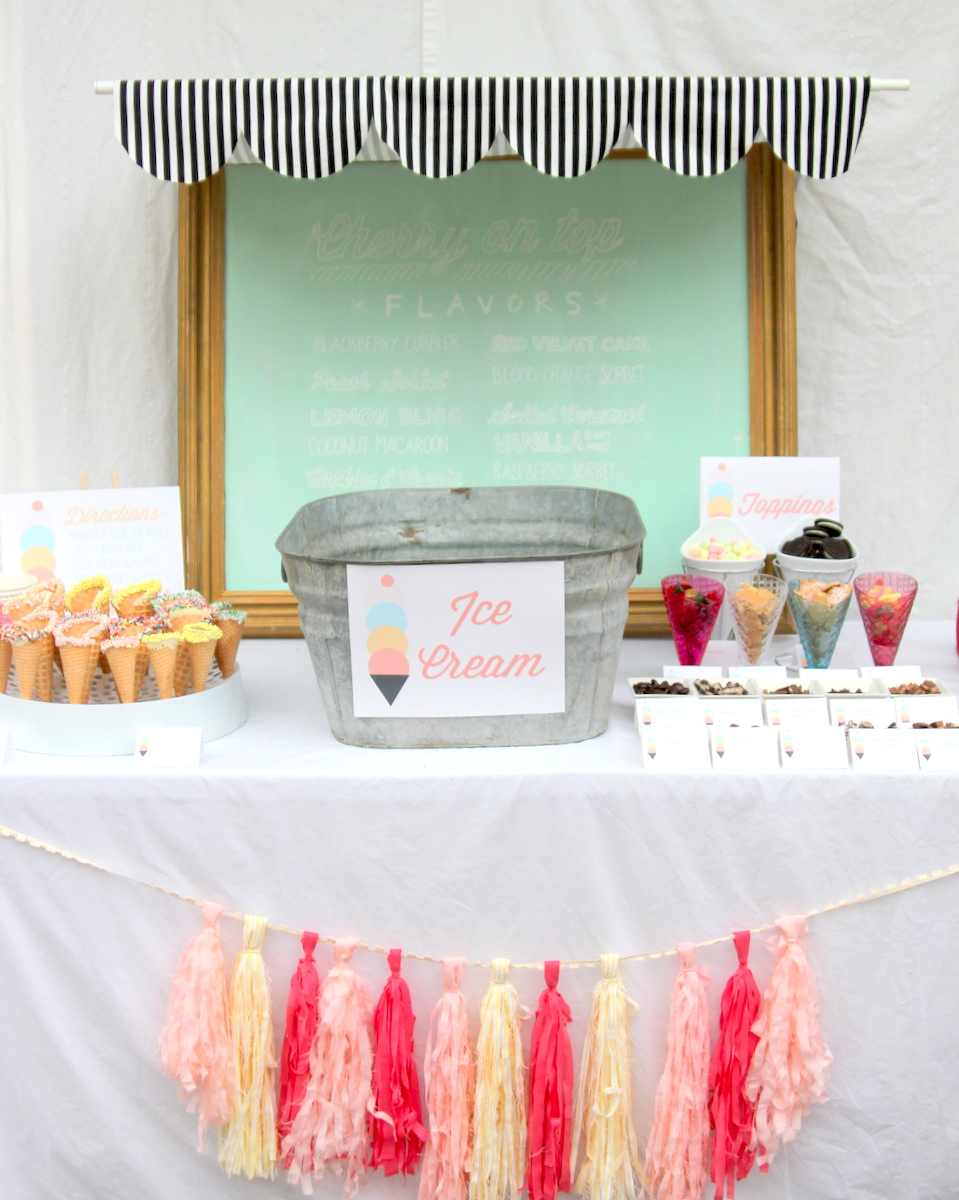
…or an Ice Cream party… or just add a favorite quote and use as decor in your home! Thanks for having us Delia, and even more for co-hosting Color Your Summer with us. The whole series has been more than we expected. Can’t wait for next year!
Are you dying to see more from Kirstin and Jordan? Check out this awesome Ultimate Lego Table, this Anthro-Inspired Oasis Dress, or this way too fun Trail Mix bar Buffet!
And if you get a moment, won’t you come say hi to me over at Kojodesigns? 🙂 Pretty please. 🙂

What a sweet intro- thank you friend. We adore you right back. 🙂
love
k
Colored chalkboards… fun! And that kiwi shortcake looks absolutely delicious.
This is an awesome idea, and so easy to do. I might have to make some for Christmas gifts this year!
I need to ask a question…why did you use the mint green paint on the back-side of the painting? why not just paint over the front?
I have never done this is why I am asking! thanks!