

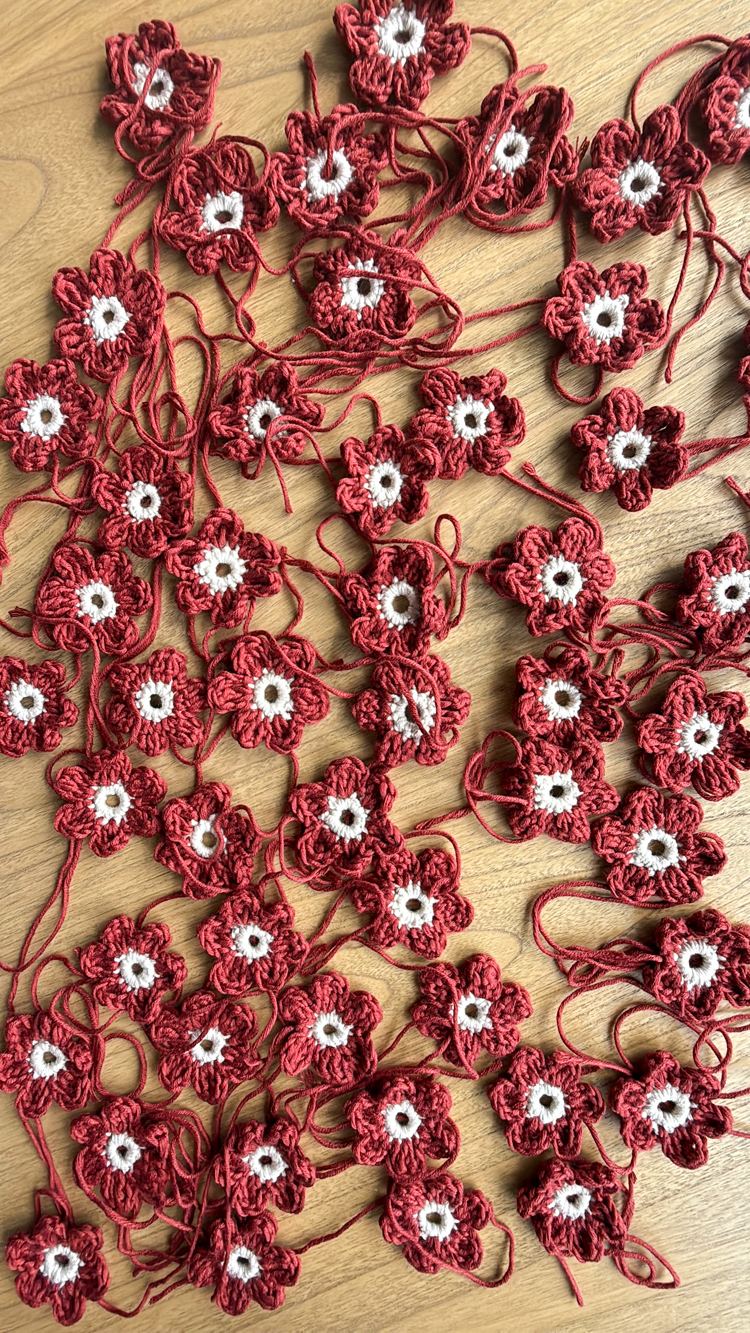
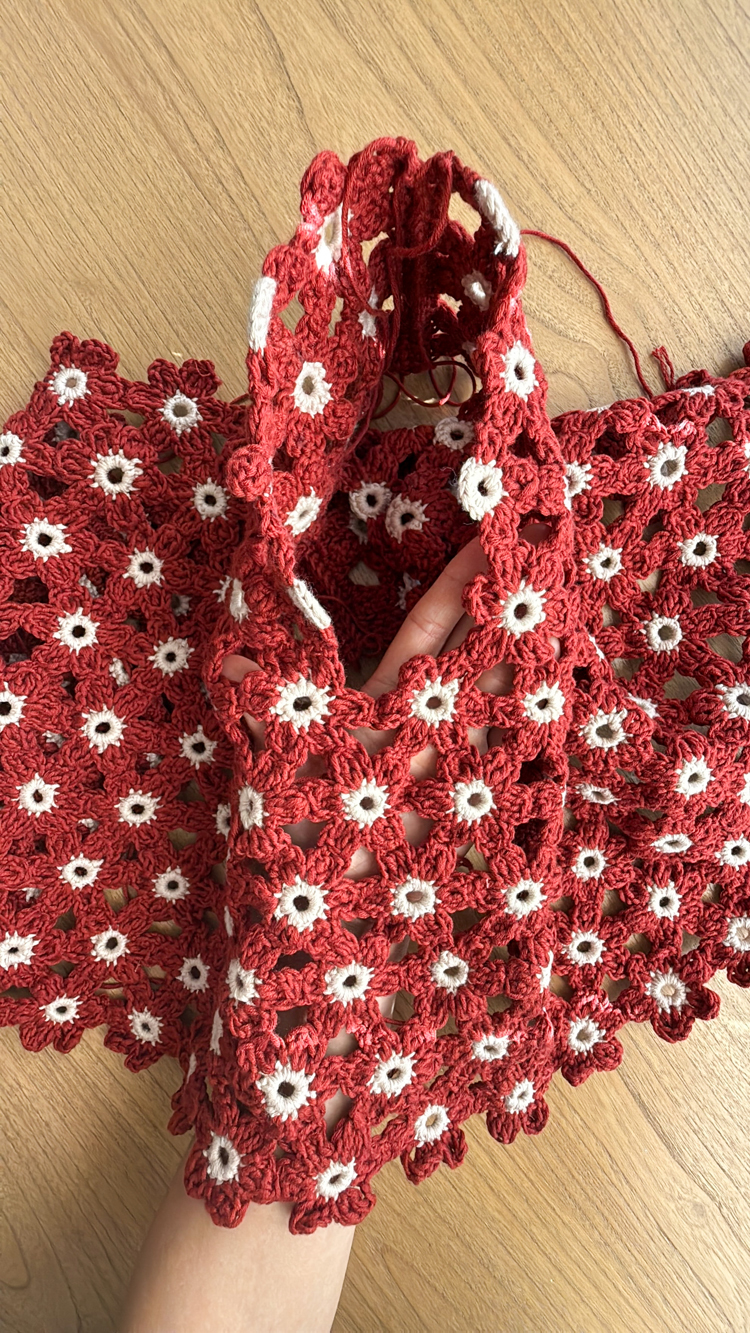
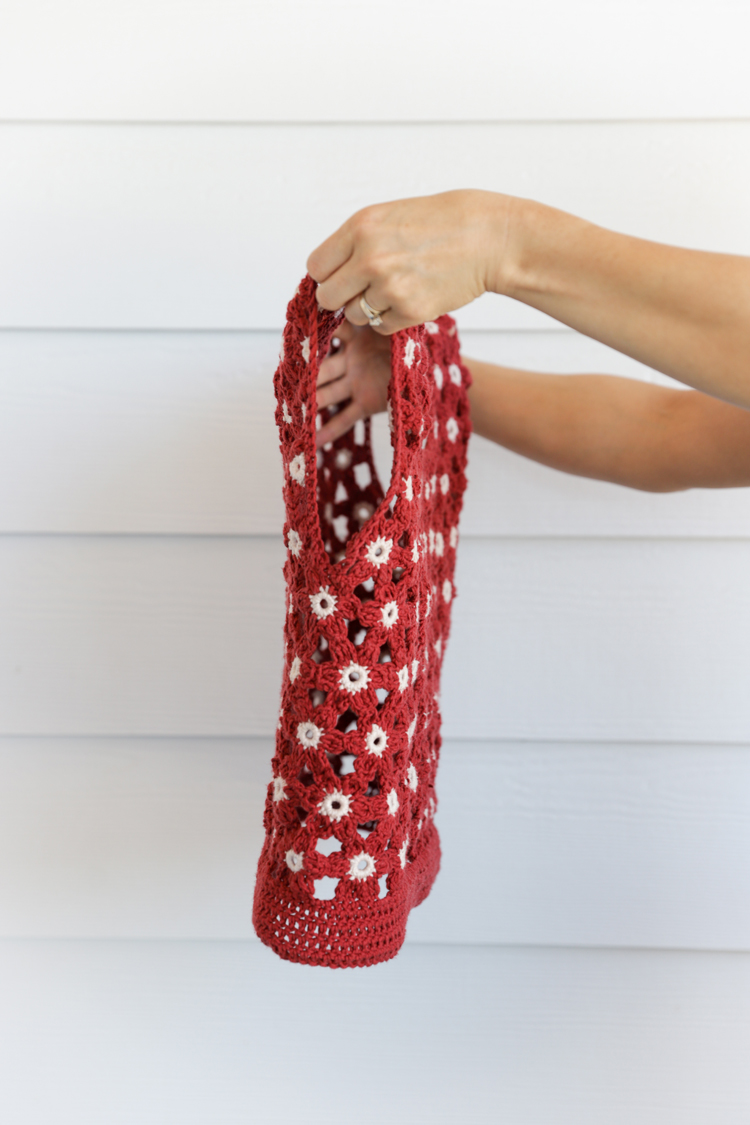
You know the scene at the end of Gilmore Girls, season 1, when Max proposes to Lorelai with “a thousand yellow daisies?” I was *this* close to naming this top after that scene, but it would be an exaggeration – there are actually more like 200 daisies (still a lot!), and I opted red yarn instead of yellow. 😉
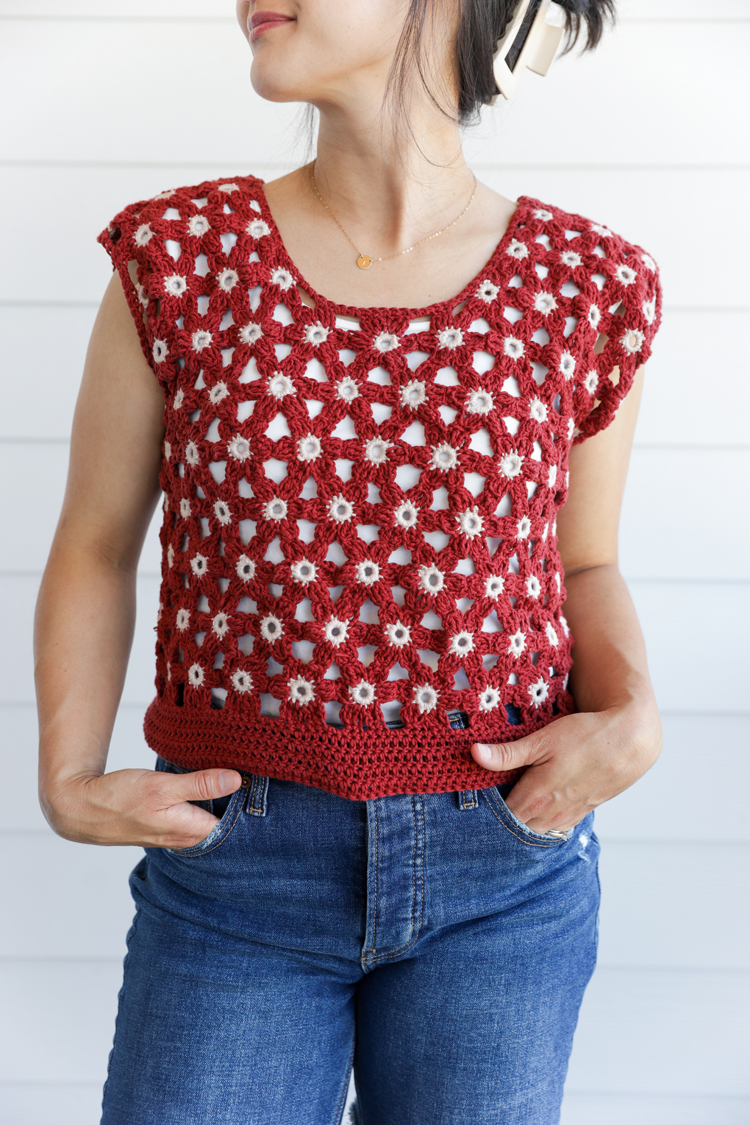
If you remember the Daisy Chain Crochet Garland I shared at the beginning of the summer, I took the same simple daisy pattern, added a sixth petal, and swapped out the bulky yarn for a thinner DK cotton blend yarn. Fairly beginner friendly!
You only need to know basic stitches for this project: chain, single crochet, double crochet, triple crochet, and working in the round. If you’re brand new to crochet, I have a Crochet Basics series that goes through each of those stitches and techniques except for triple crochet. I’ll show you how to work that stitch in the video tutorial for this project.
This pattern is FREE and includes sizes Child XL/Adult XXS through Adult XL/XXL. See the sizing section for more…
Let’s get started!
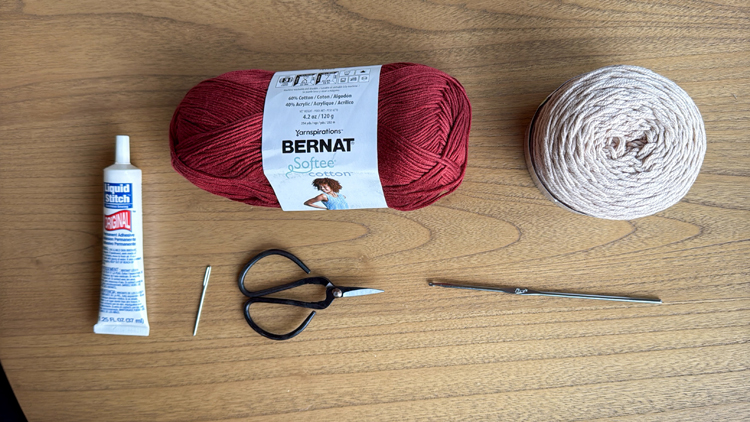
MATERIALS
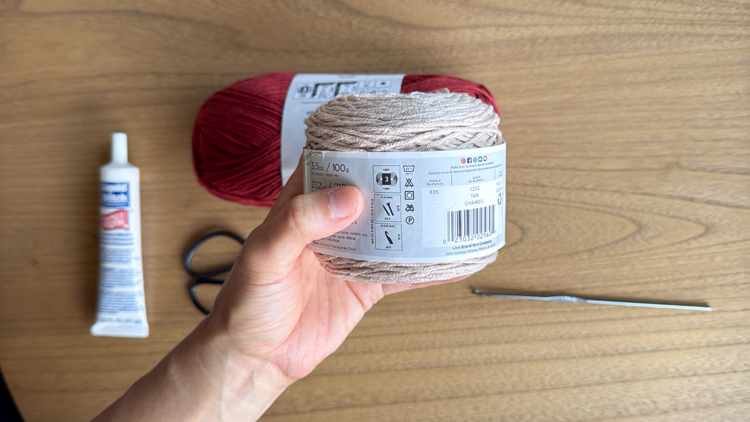
- 100 – 150 g of DK cotton blend yarn in flower center color
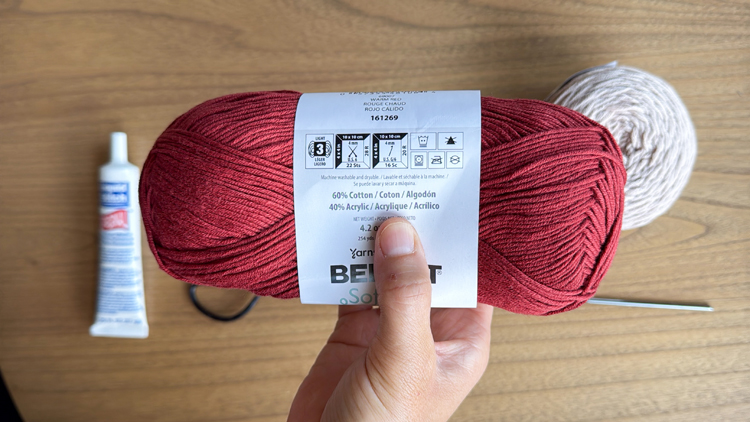
- 275 – 400 g of DK cotton blend yarn in main or flower petal color
- 3.5 mm hook
- small yarn needle
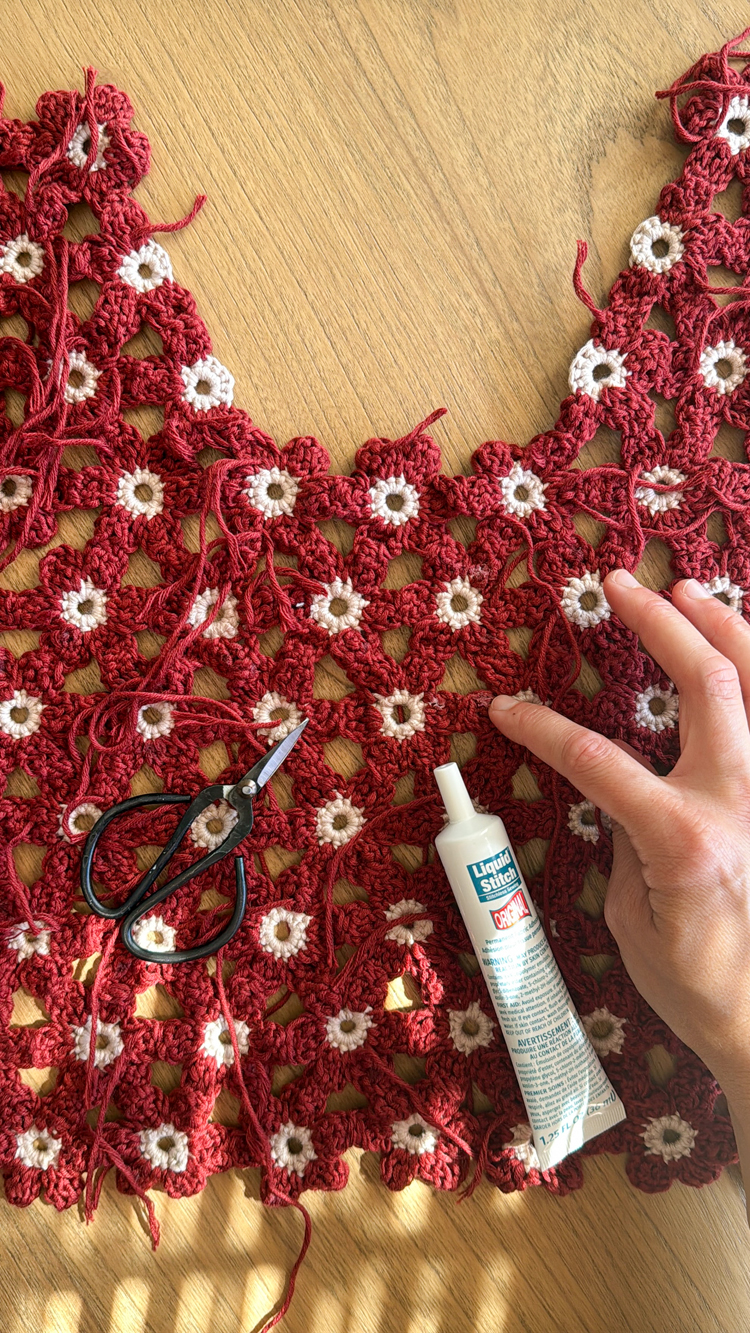
- scissors
- fabric glue
Material Notes
- I used 1 cake of Coboo yarn from Lion Brand in the color “tan” and less than 3 skeins of Softee Cotton yarn from Bernat in “warm red.”
- For fabric glue, I like the brand Liquid Stitch. Whatever you choose, make sure it will dry flexible and clear.
- You can use any yarn needle, but since the flowers are small it helps to use a smaller needle. Mine was about 2 inches long.

SKILL LEVEL
Adventurous beginner to Intermediate.
Because this pattern uses only basic stitches: chain, sc, dc, and tc. I think it’s reasonable that a beginner could try it. You’ll be a pro at crocheting flowers after making around 200+ of them.
Sewing the flowers into a blouse/top shape is the more challenging part of this project but it doesn’t really depend on crochet skill. It’s kind of a fun puzzle. That said, crocheting the finishing stitches around the sleeve and neckline might feel awkward, so I wouldn’t make this your first crocheted garment.
SIZING
This section is a must read.
Determining Size:
Measure the widest part of your torso. Because this is a boxy, straight top, it doesn’t differentiate between the waist and the chest, so just choose whichever is largest and go off that measurement.
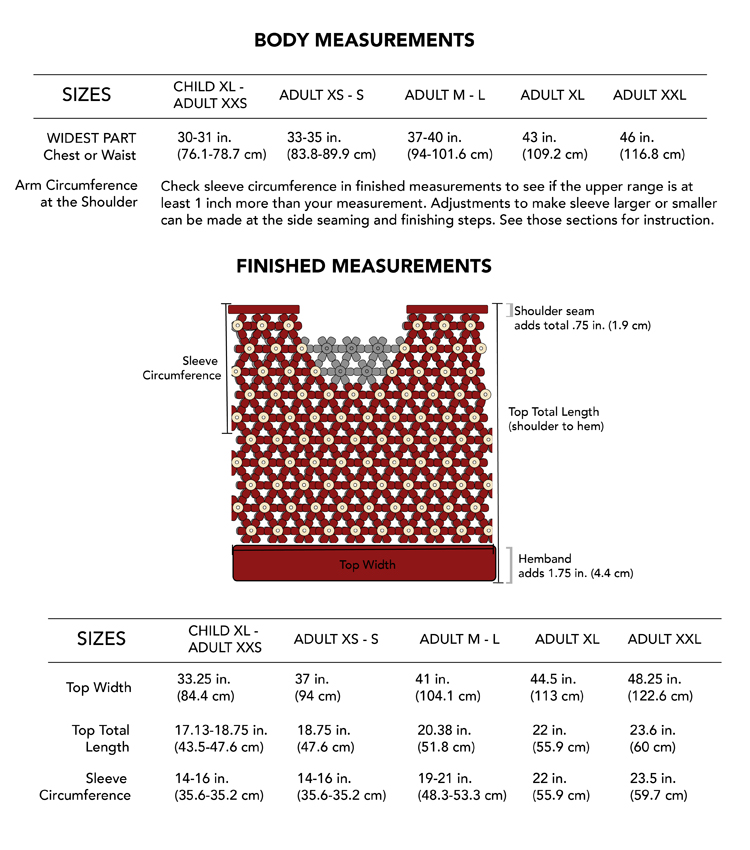
Because the flowers are a set size, adding or a removing a flower to each piece can make the difference of almost 4 inches. This is because whatever you do to one piece you have to do to the other. That’s why I’ve listed the sizing as ranges. There are small changes you can implement to make the garment feel tighter or looser and to help customize the fit. Pay attention to the “sizing adjustment” sections in the Daisy Count and Finishing Stitches for more details.
If you have some sizing discrepancies, you can alter the pattern to customize the fit. For example, if you have a large chest but a smaller neck and arms, you may want to make the larger size that fits your chest, but then make sizing adjustments to cinch in the neckline and sleeve openings. Or maybe you have a larger neck or want a lower neckline but don’t want the rest of the top to fit looser. Instead of going up a size, you can add finishing stitches at the end to make the flowers stretch a little to fit the way you want.
DISCLAIMER: This FREE pattern has not been tested in all sizes. Instead of hiring a pool of testers and putting this out as a paid pattern, I’ve decided to put it out for free and update it as needed. Please send feedback to [email protected]. Email or instagram dm (@deliacreates) is the best way to get a hold of me and I do actively update patterns as I hear from you.
GAUGE
It doesn’t work to list a traditional gauge, so I recommend making one flower and measuring that.
1 flower should measure at 1 7/8 inches from single petal across to single petal. If measuring what we will use as the “height” of the flower, it should be 1 5/8 inches. See the diagram below.

ABBREVIATIONS
This pattern uses U.S. crochet terms.
- ch = chain
- sl st = slip stitch
- sc = single crochet
- dc = double crochet
- tc = triple crochet
VIDEO TUTORIAL
If it hasn’t already popped to the top or side of your screen the video will play here, and it will play after the initial ads. If you “x” out of the video pop-up, you will need to refresh the page to get the video tutorial back.
I recommend watching the video AND reading the written pattern. The diagrams in the sizing section are especially helpful.
DAISY PATTERN
First, let’s learn how to make a daisy flower.
Flower Center
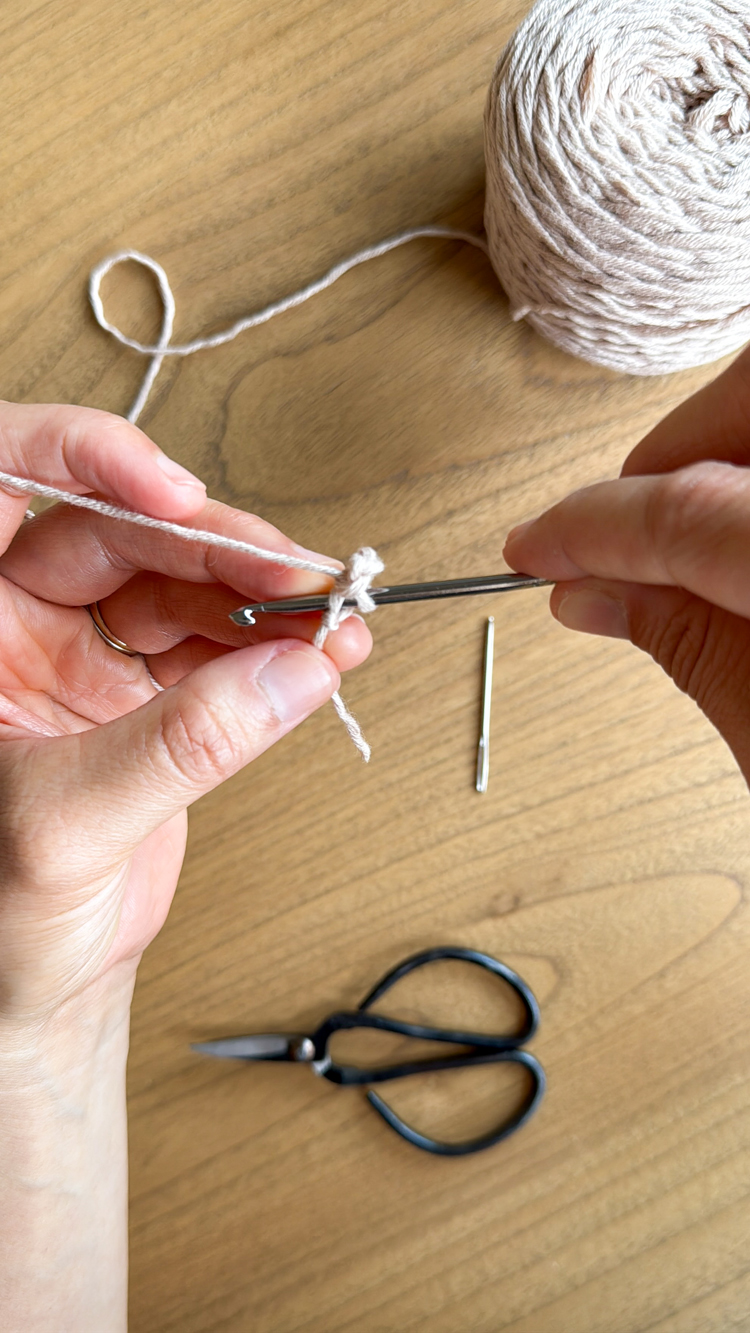
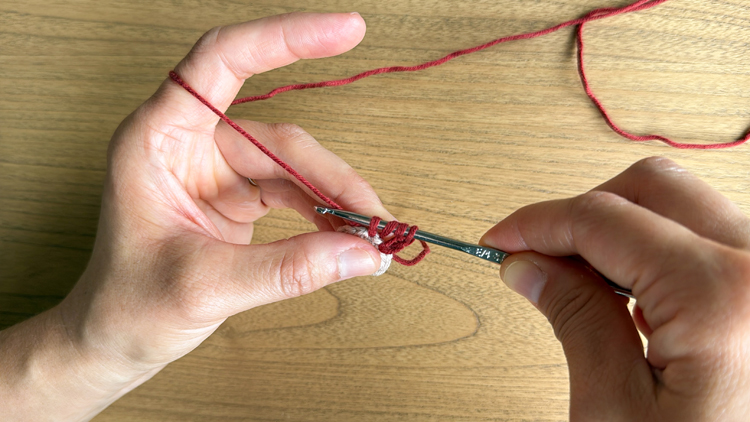
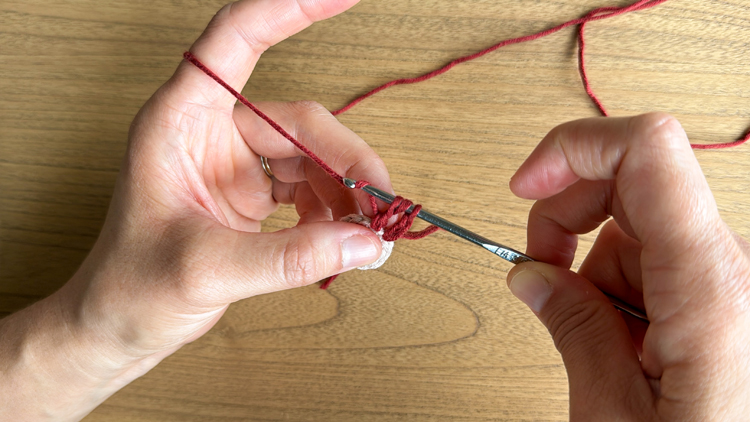
Start with a short tail, about 2 inches (to reduce waste), and tie a slip knot.
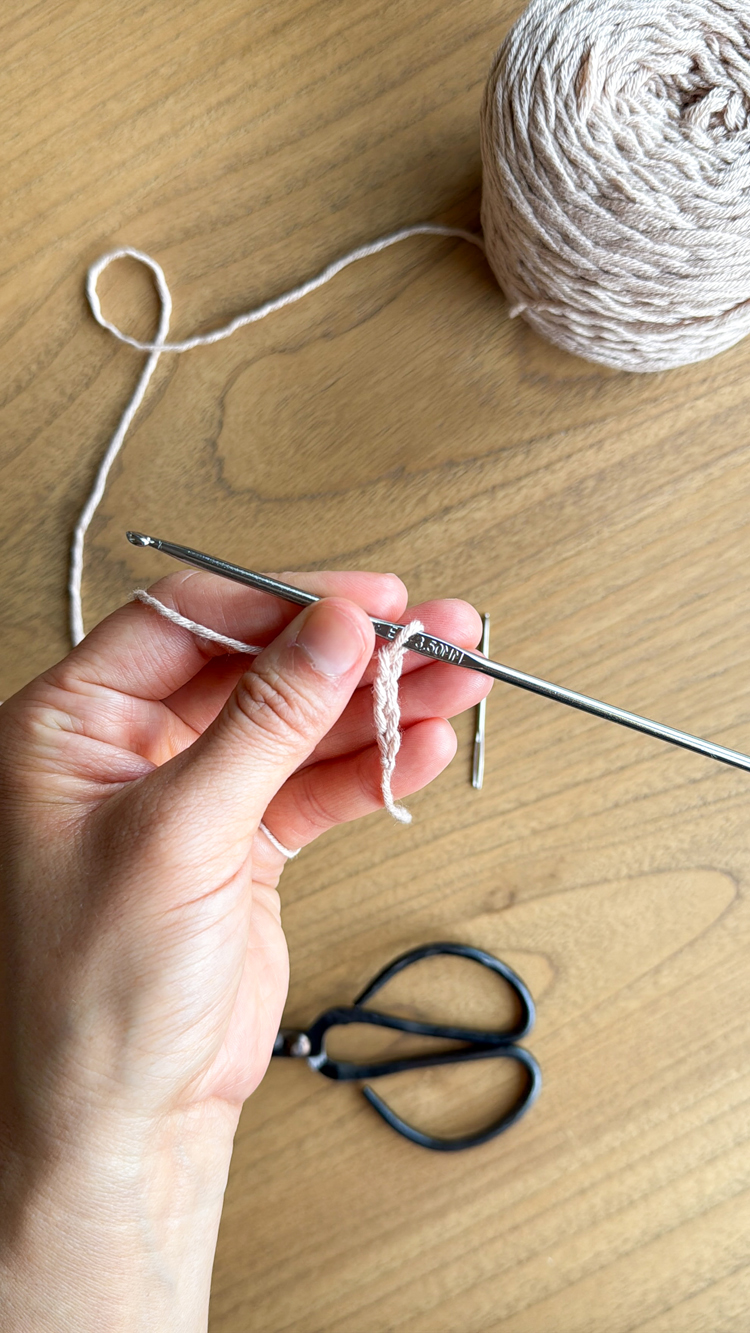
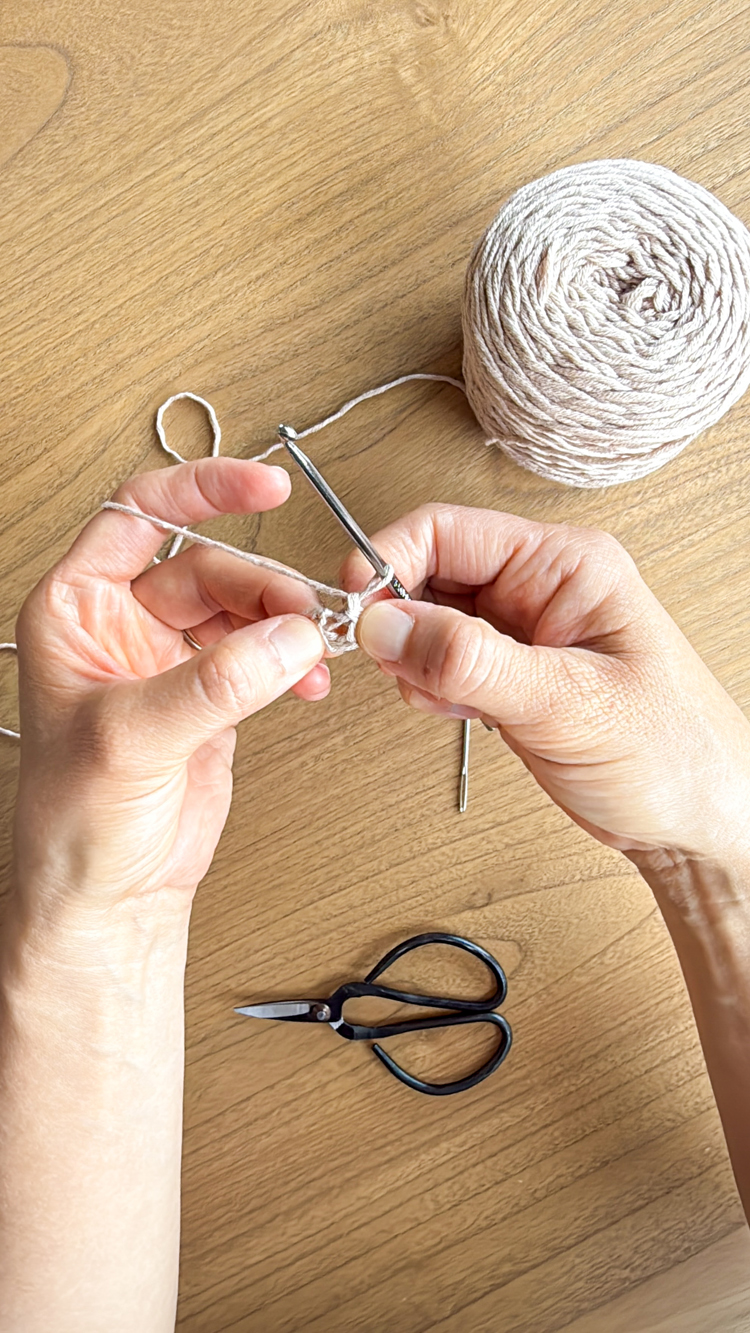
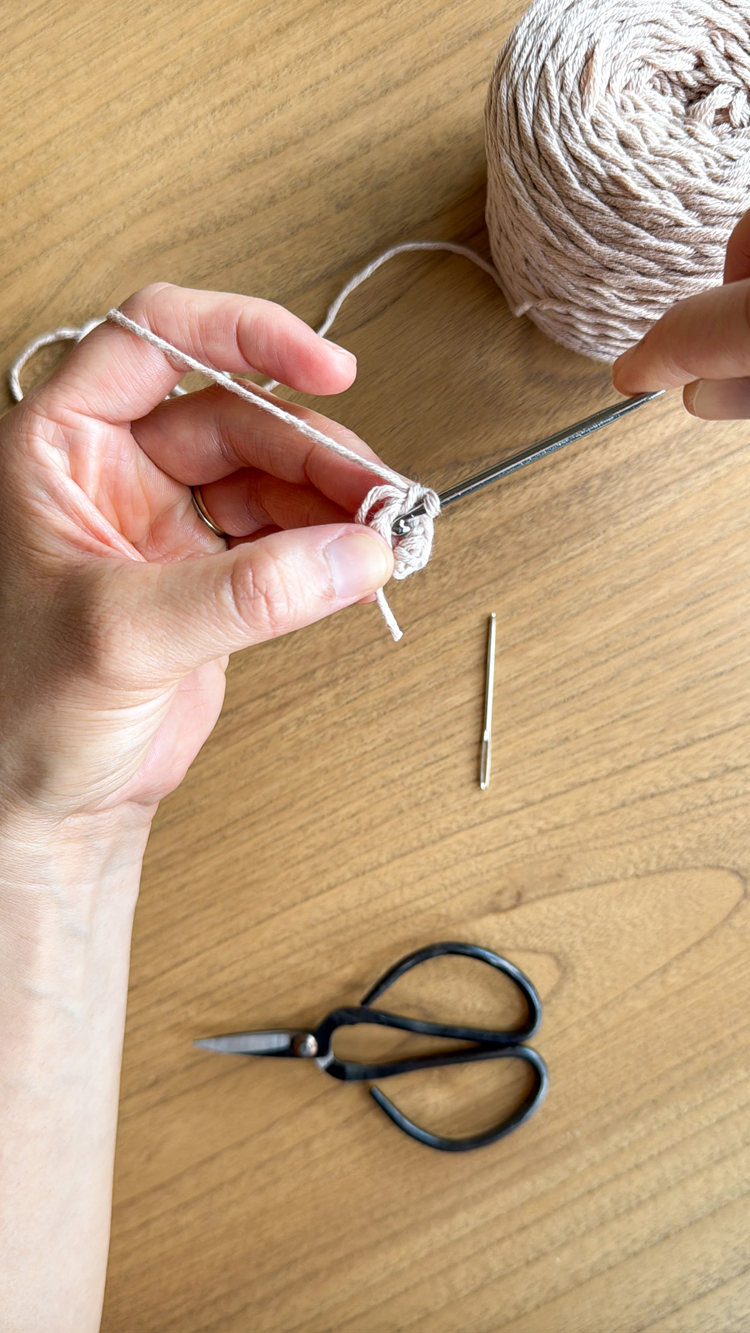
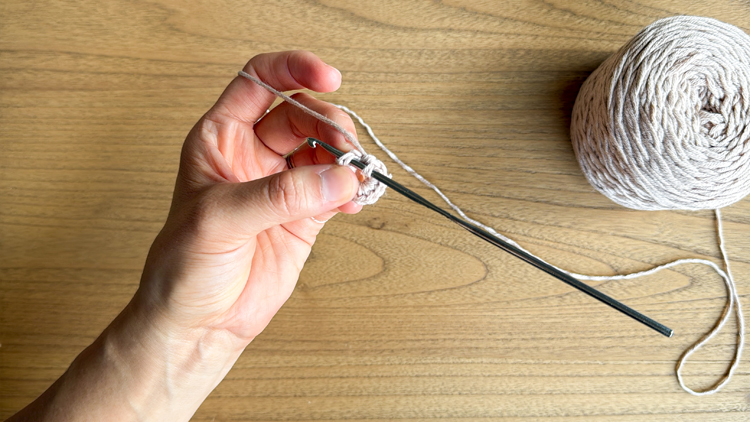
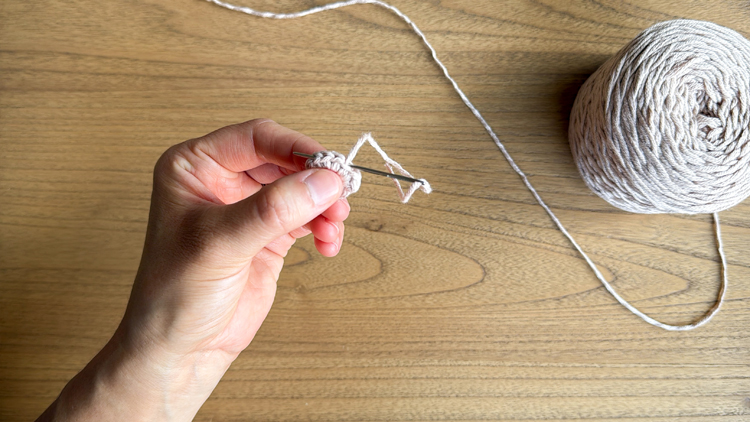
Ch 4. Sl st into the first ch to form a ring. Ch 1. Sc into the ring a total of 12 times. Sl st to the first sc. Cut a 4 inch tail and pull the tail through to tie off the end.
Using a yarn needle, sew the tail in between the top two loops of the nearest sc stitch. Weave the needle through the stitches and pop the needle back up between the top two loops of a stitch a few stitches away. Continue weaving the needle into the stitches through the top two loops until you run out of tail. (See the video if you need more clarity). Then cut off the excess.
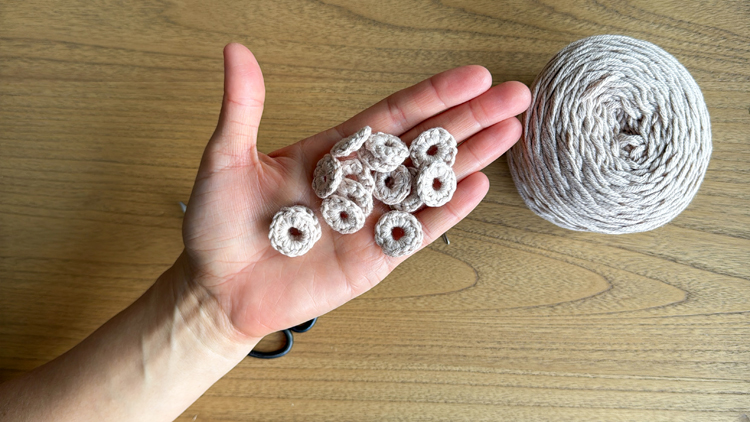
TIP: I found it helpful to batch each step together. Once you have made a few flowers, and you have the process down, it can be faster to make all your flower centers at once before moving onto the next step. See the flower count to see how many you’ll need to make for your size.
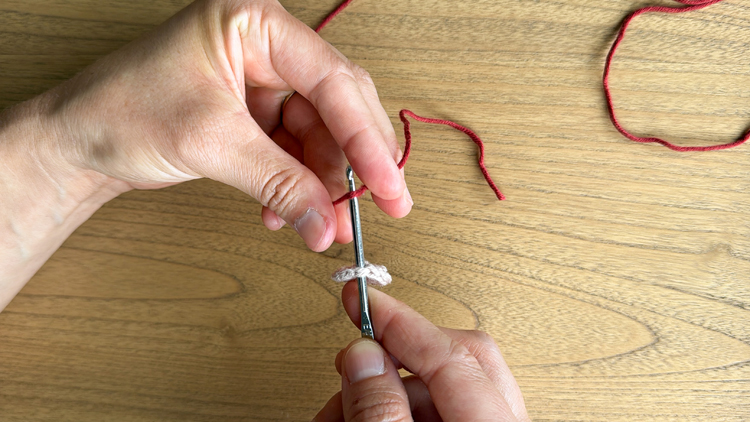
Adding Flower Petals
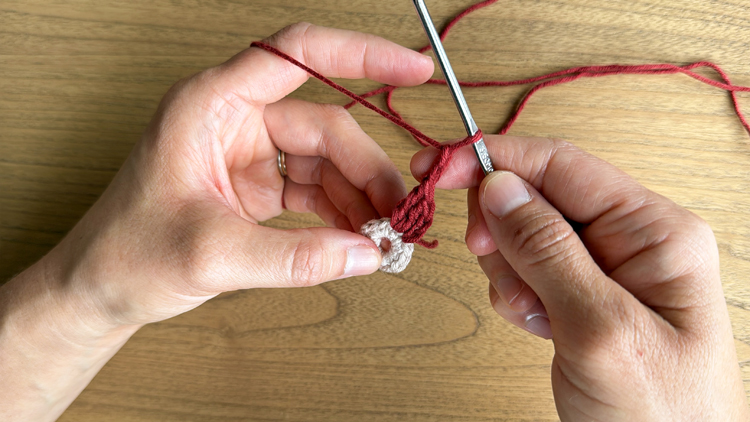
Make sure the flower center is facing right side up. The top two loops are more visible on the “right” side. Insert your hook under the top two loops of any stitch. Lay the petal yarn onto the hook, leaving a 6 inch tail.
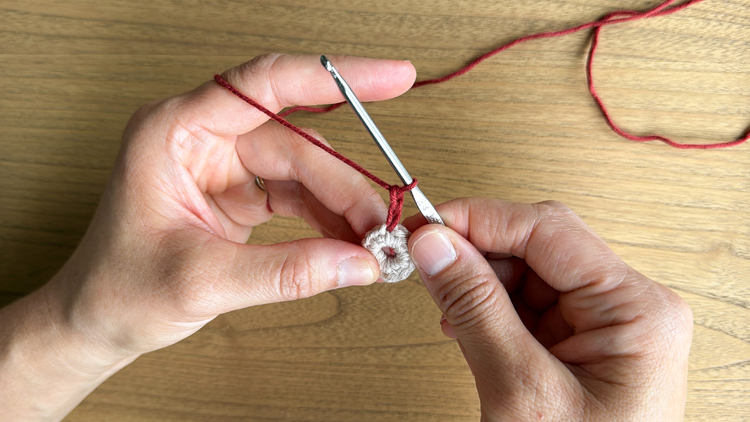
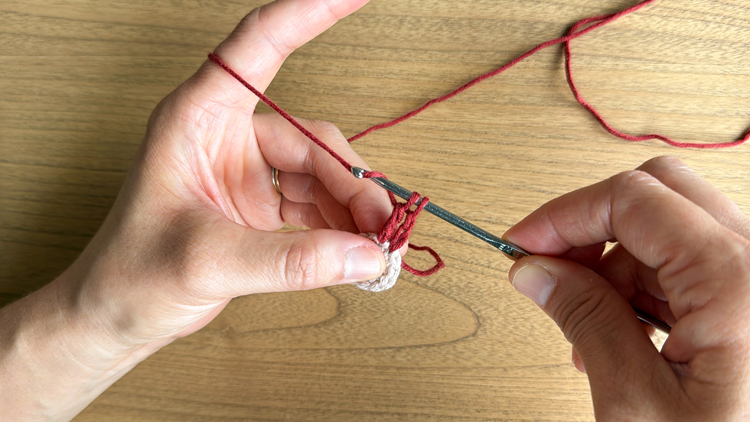
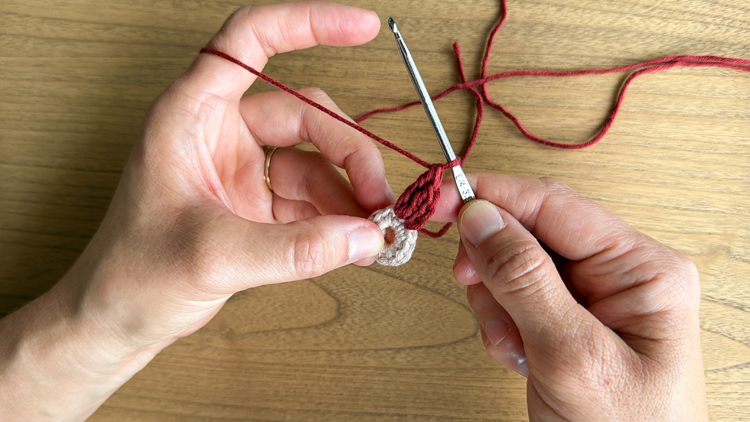
Petal 1: Pull the yarn through to pull up a loop. Ch 2. Work 2 tc into the next stitch. Ch 2. Sl st into the next stitch to complete the petal.
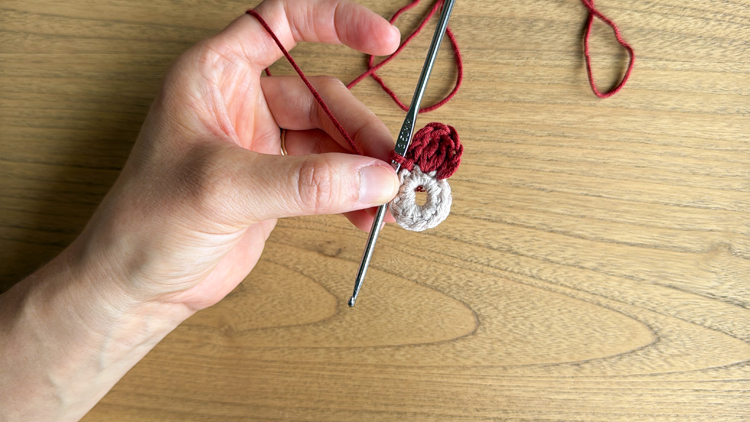
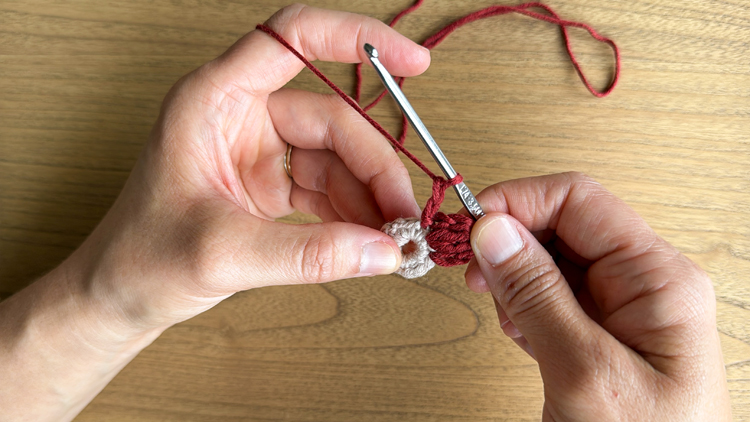
Petal 2: Ch 2 right from where the previous petal ended, to start the next petal. Work 2 tc into the next stitch. Ch 2. Sl st into the next stitch to complete the petal.
Petals 3, 4, 5: Repeat Petal 2
Petal 6: You should have only 1 stitch left unworked. Ch 2. Work 2 tc into the last stitch. Ch 2. Sl st into the same stitch as you start the ch 2 for the first petal.
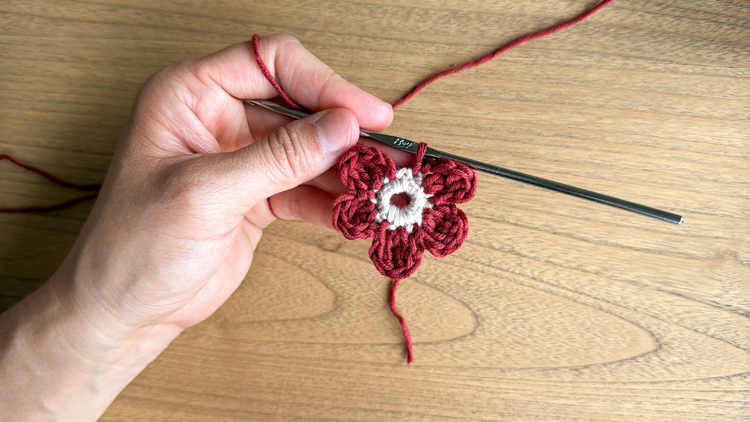
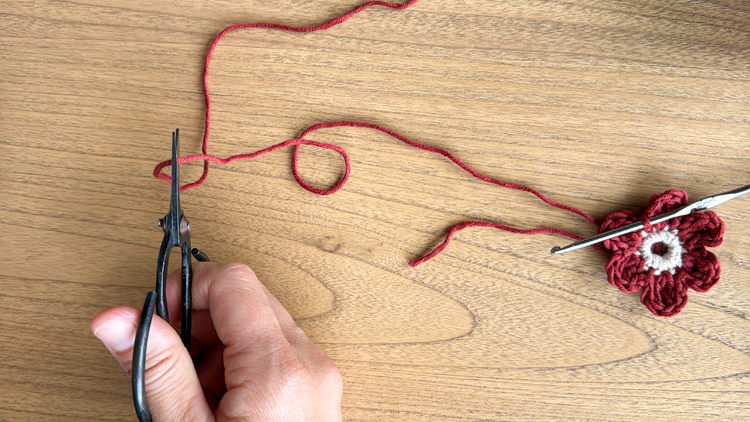
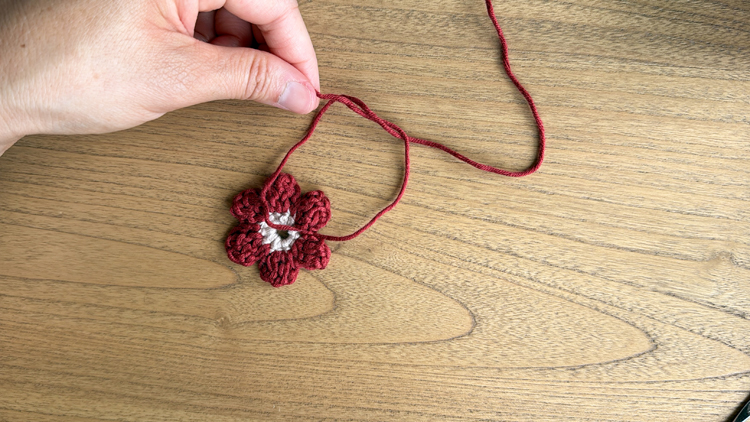
Cut an 8 inch tail and pull it through. Square knot the tails together. We will be using these later to sew the flowers together.
Partial Flowers
You will also need to create some partial flowers.
- 1/2 flowers need just 3 petals.
- 2/3 flowers need 4 petals.
See your size below to determine how many you will need. Keep in mind that if you make a sizing adjustment to the neckline, this will affect how many partial flowers you will need.
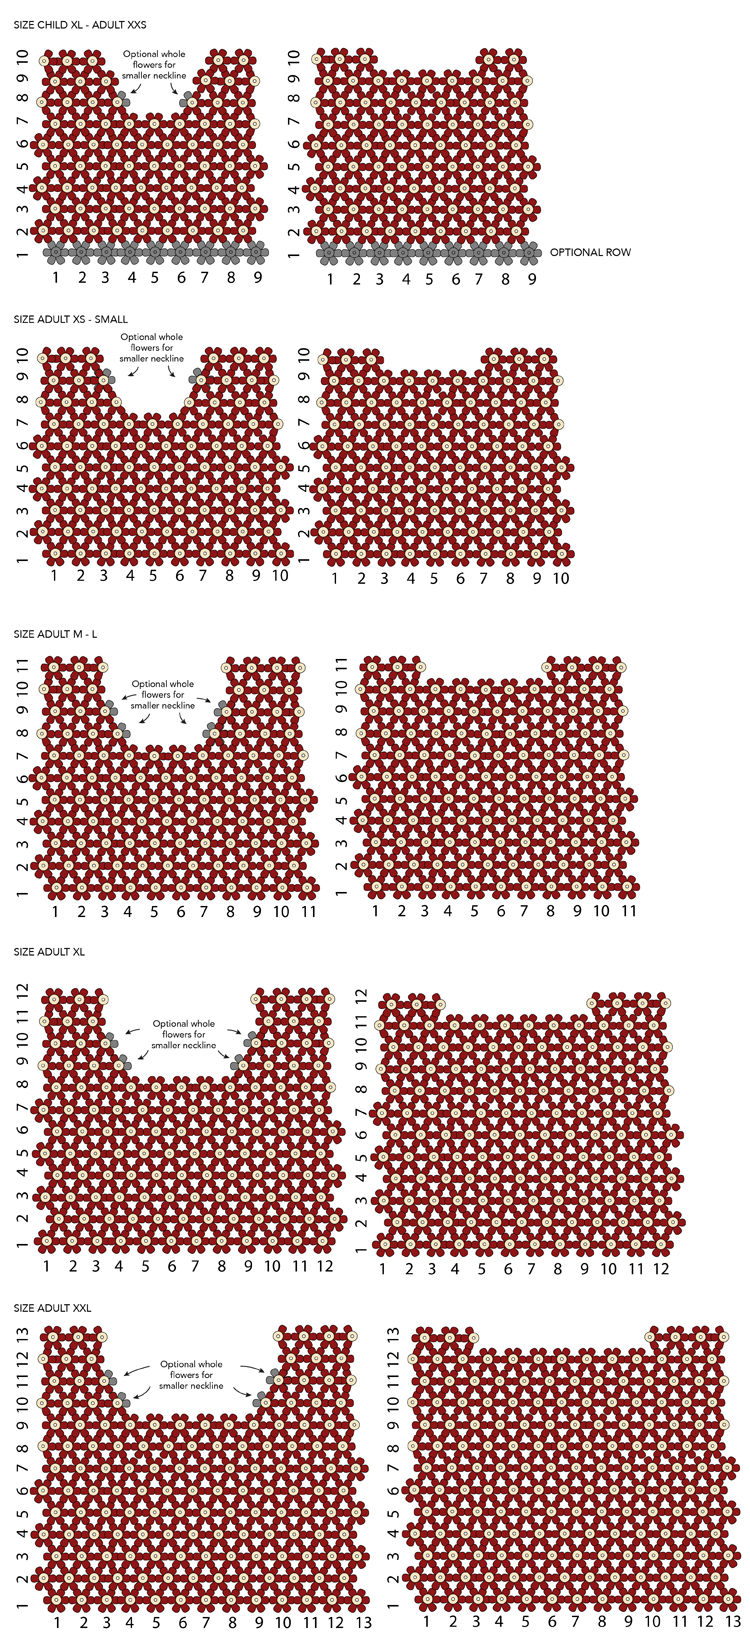
DAISY COUNT
I like to batch crochet the flowers to make it easier. Here’s a breakdown of how many flower centers, 2/3 flowers, 1/2 flowers, and whole flowers you’ll need for each size. This may vary if you decide to replace 2/3 flowers with whole flowers, remove a row, or make any other adjustments.
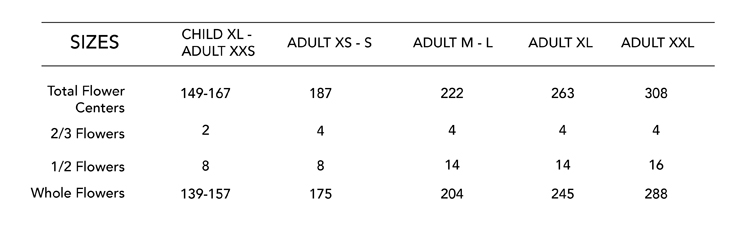
Sizing Adjustment:
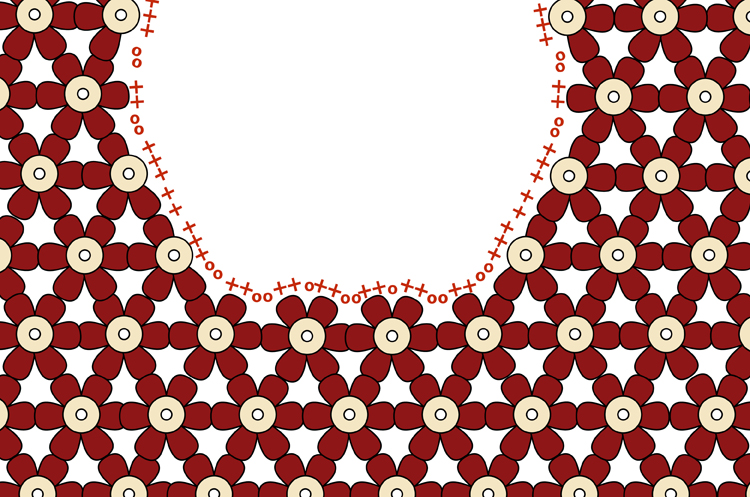
To make the neckline bigger or smaller, adjust your use of partial flowers. See the diagram below to get an idea of how many partial flowers to add or remove to your final daisy count. You can tailor this to suit your preferences.

DAISY TOP ASSEMBLY
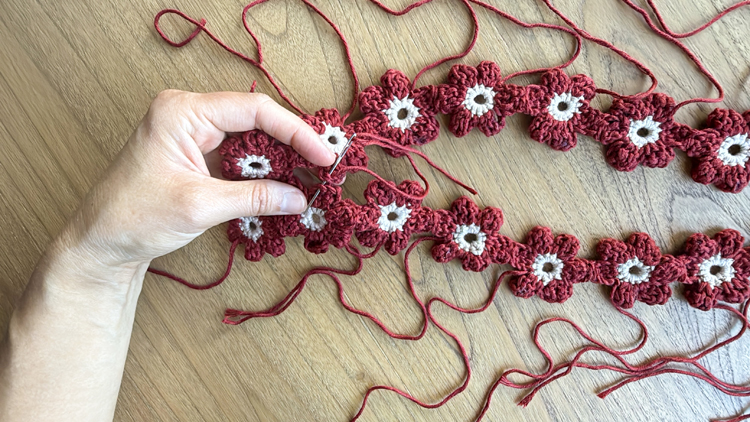
Creating Flower Strips
To build the shape of the top, we first need to make strips or chains of flowers.

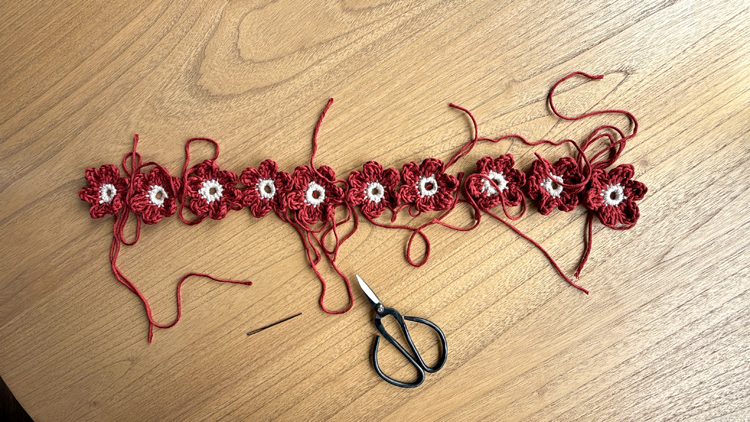
Refer to the chart (below the tutorial steps) to determine how many flowers you will need in each flower strip and how many flower strips you’ll need. Note that some of the flower strips require a half flower or 2/3 flower at one end. This will accommodate the sleeves on the sides and/or the curve of the neckline. The smaller strips will help form the shoulders of the top.
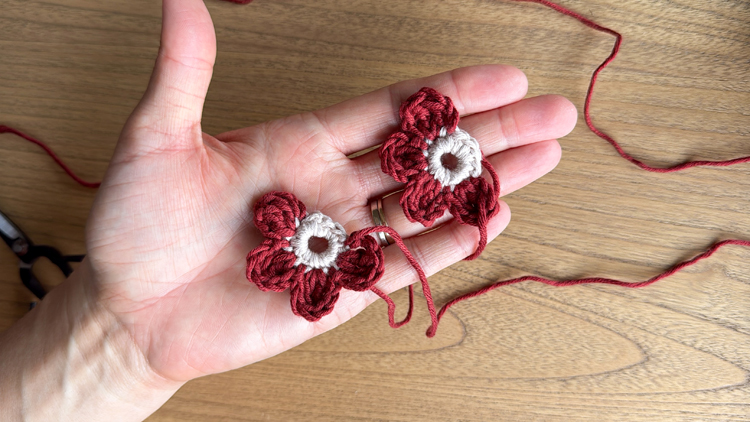
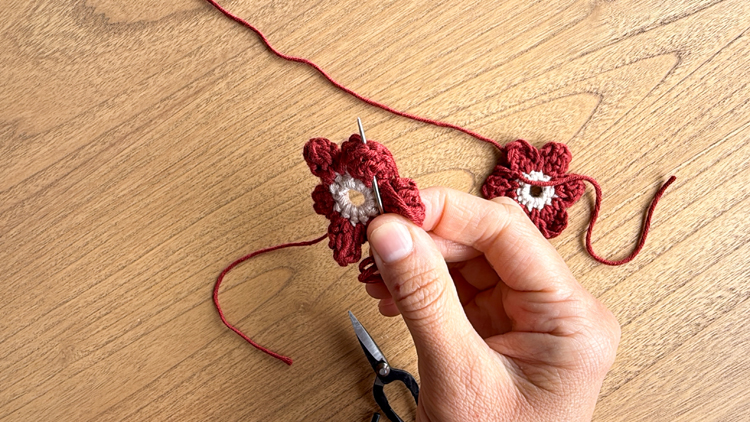
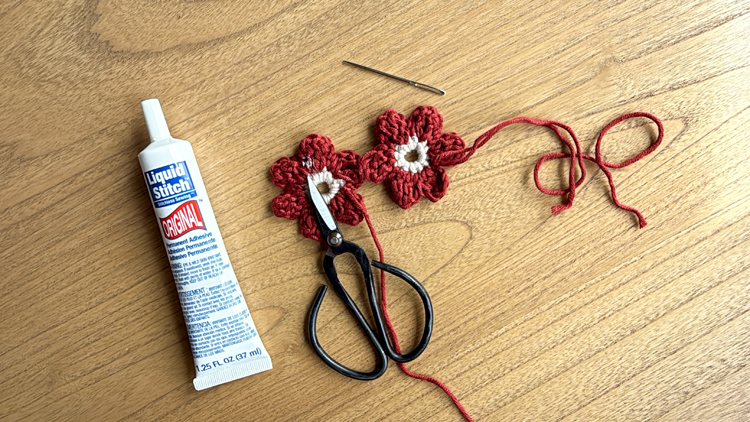
- Identify the right side and wrong side of the flower. You can simply determine which side you like best. I consider the “right” side of the flower, the side that faces toward you as you crochet the petals. Turn the flower right side facing down. We are going to join the flowers from the “wrong” sides.
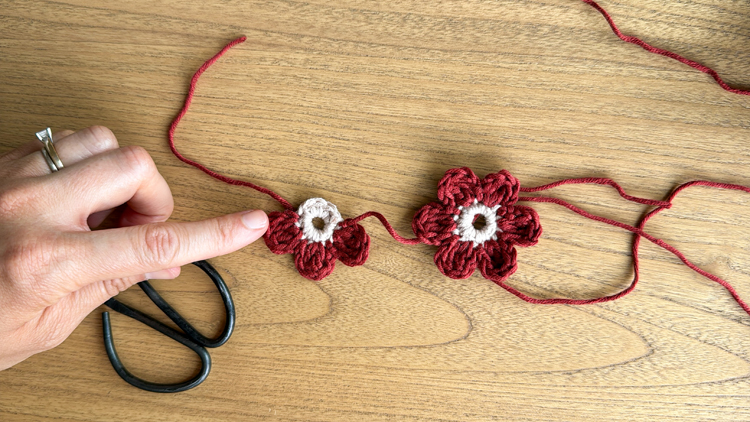
- Take the shorter tail of one flower and thread it onto the yarn needle. Weave the tail to the tip of the closest flower petal.
- Orient a second flower with the tails facing away from the first flower. Join the first flower to the tip of a petal of the second flower with whip stitches and by sewing the tail back and forth.
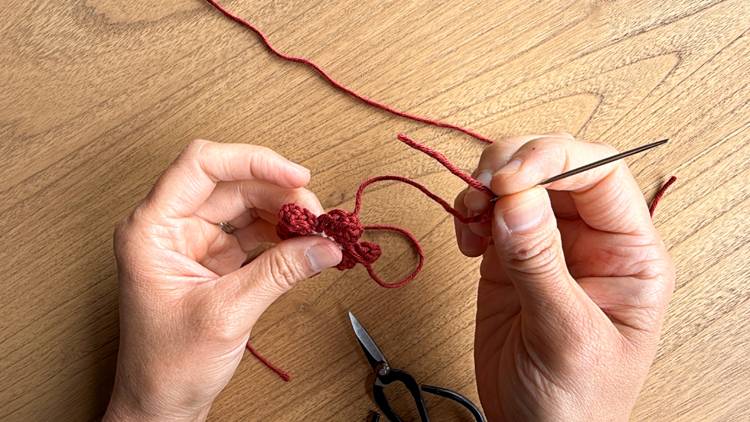
- After about 6-7 passes or when the petals are securely joined (test by tugging on them a bit), weave the rest of the tail into one of the flowers until you run out of tail or you can’t keep the tail on the needle as your weave in the end.
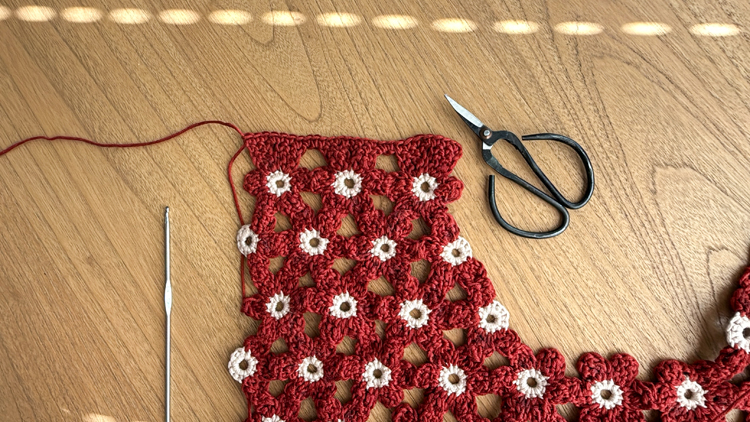
- Trim off the remainder of the tail and leave the scissors at the spot that you just cut, so you don’t lose your place.
- Apply a small dab of fabric glue to the cut tail and blend it into the surrounding stitches with the glue bottle nozzle or your fingers. This project requires SO much weaving in of tails and not a lot of material to weave them through. That’s why I add the glue, to make sure the ends stay secure.
- Leave the other longer tail for when we join the flower strips together.
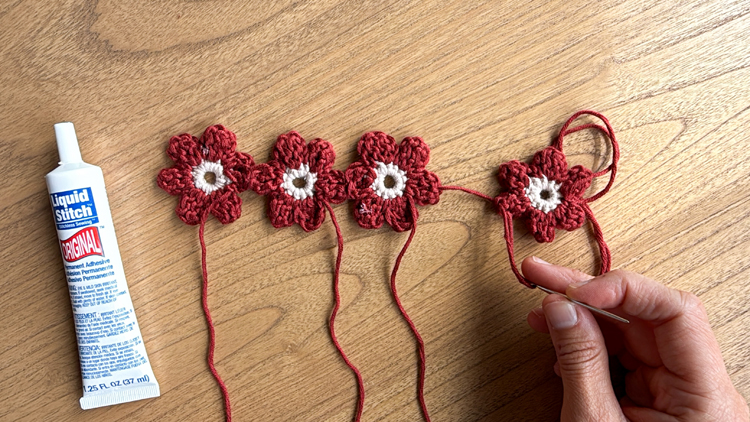
Now take the shorter tail of the second flower and thread it onto a yarn needle. Repeat steps 1-5 to add the next flower. Keeping adding flowers in like manner until you have a long strip of flowers.
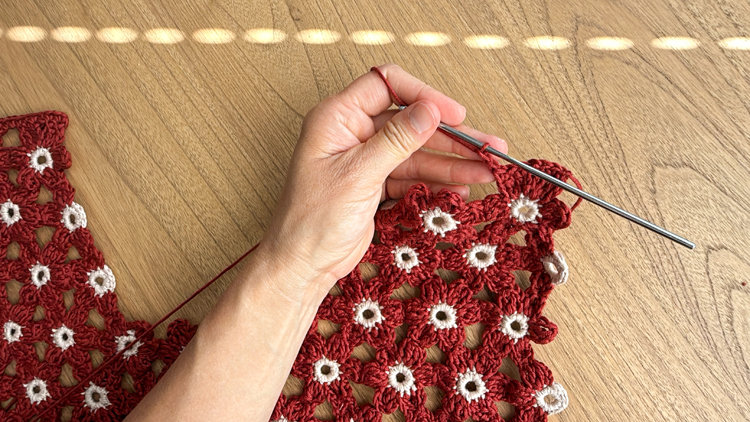
Joining Flower Strips
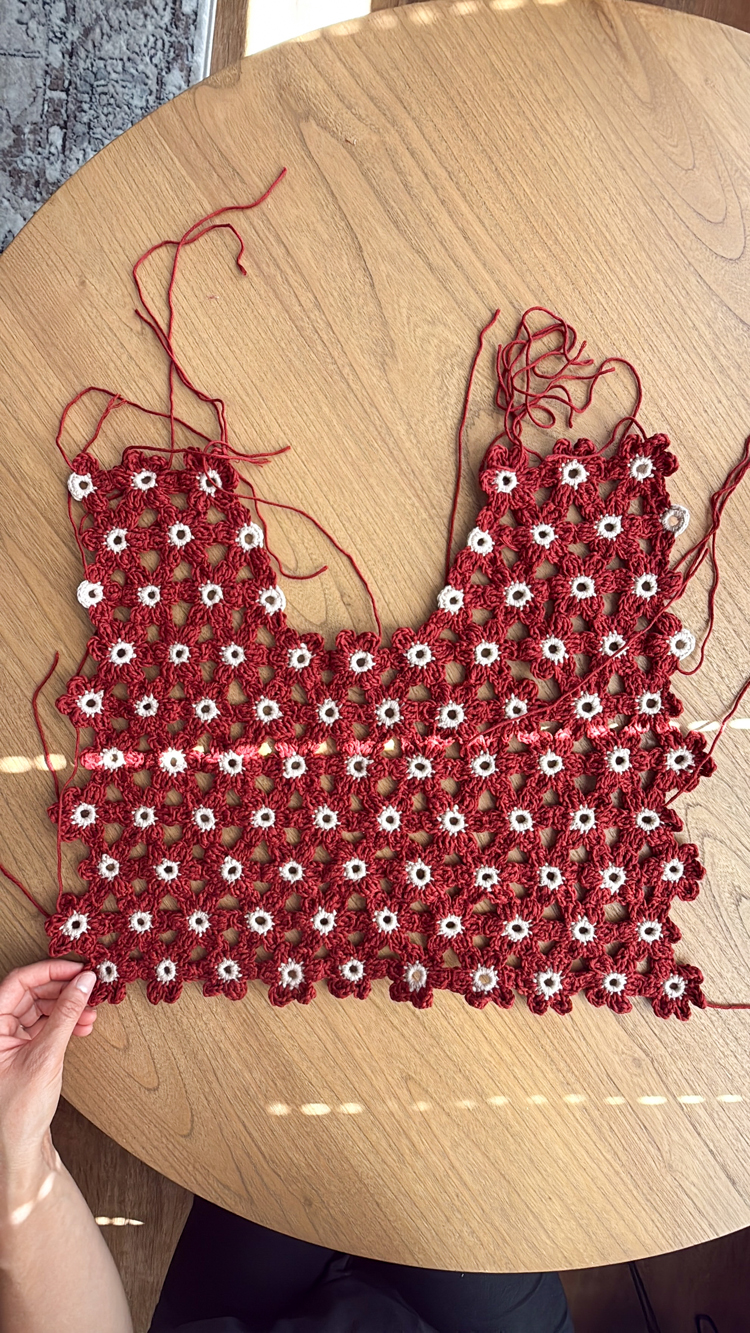
Once you have created all the flower strips, you’re ready to join them together to form the top.
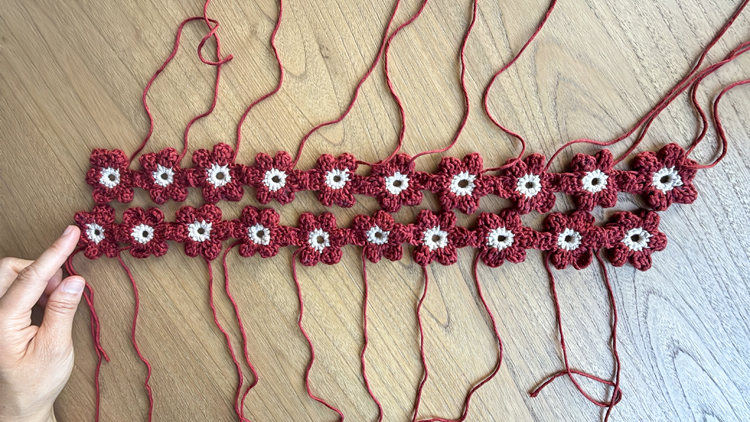
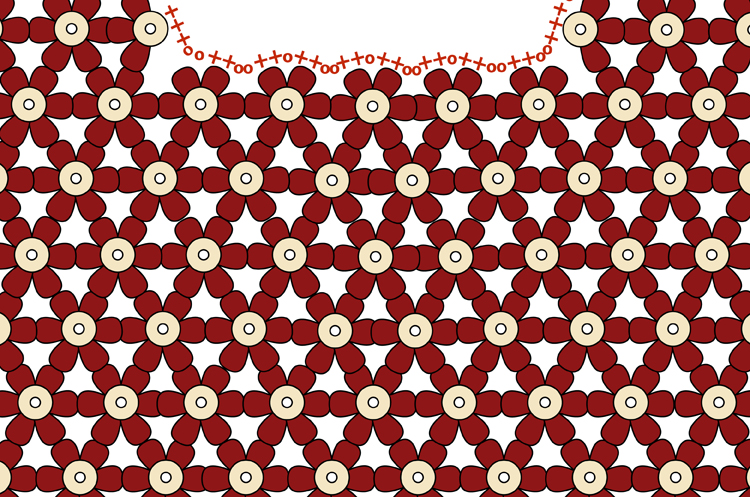
- Flip the flower strip over so that the “wrong” side is facing up. We are going to join the rows of flowers together from the “wrong” side or glued side of the flowers so that any glued ends will be hidden when worn.
- Lay a second flower strip above the first flower strip, right side facing down. Stagger it so that the two bottom petals of the flowers nestle between the flowers of the first flower strip. See the diagram and the video tutorial for clarification.
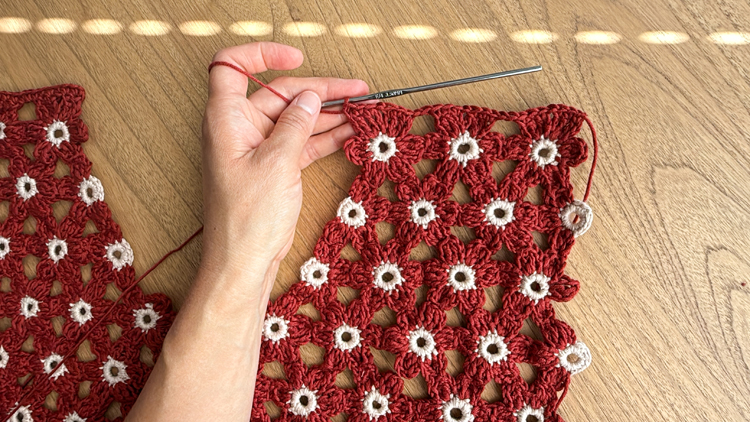
- Use the remaining long tails to join the petals in the first strip to the second strip. Thread one of the long tails onto a yarn needle. Note: Because they are much longer than the tails we used to create the flower strips, one long tail is meant to create two joins.
- Weave the tail to the tip of one petal in the first flower strip. Stitch back and forth through the closest petal in the second flower strip until secure.
- Then weave the tail through the second flower strip to the next petal and join to the next closest petal in the first flower strip.
- Weave the remainder of the tail through the closest flower. Cut off the excess and apply a dab of fabric glue. NOTE: you can also wait to apply glue to all the tails at the very end, which can be a big time saver.
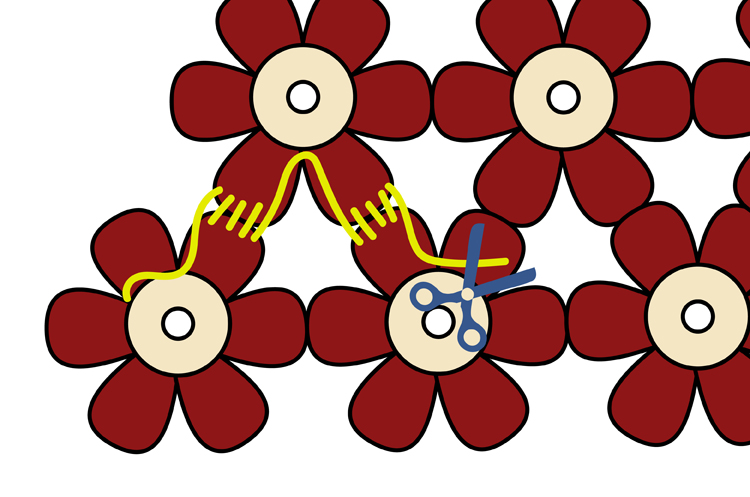
Continue to join the petals together in a zig-zag fashion for all the remaining tails until the two flower strips are joined together. Repeat for the remaining flower strips, following the diagram (see below) for direction on where to connect which petals.
Weave in all the remaining unused tails at the neckline and sleeves, EXCEPT for the sides. The flower strips that are not partial strips or that do not include partial flowers, will be joined to the side flowers of the other piece to create the side “seams” of the top.
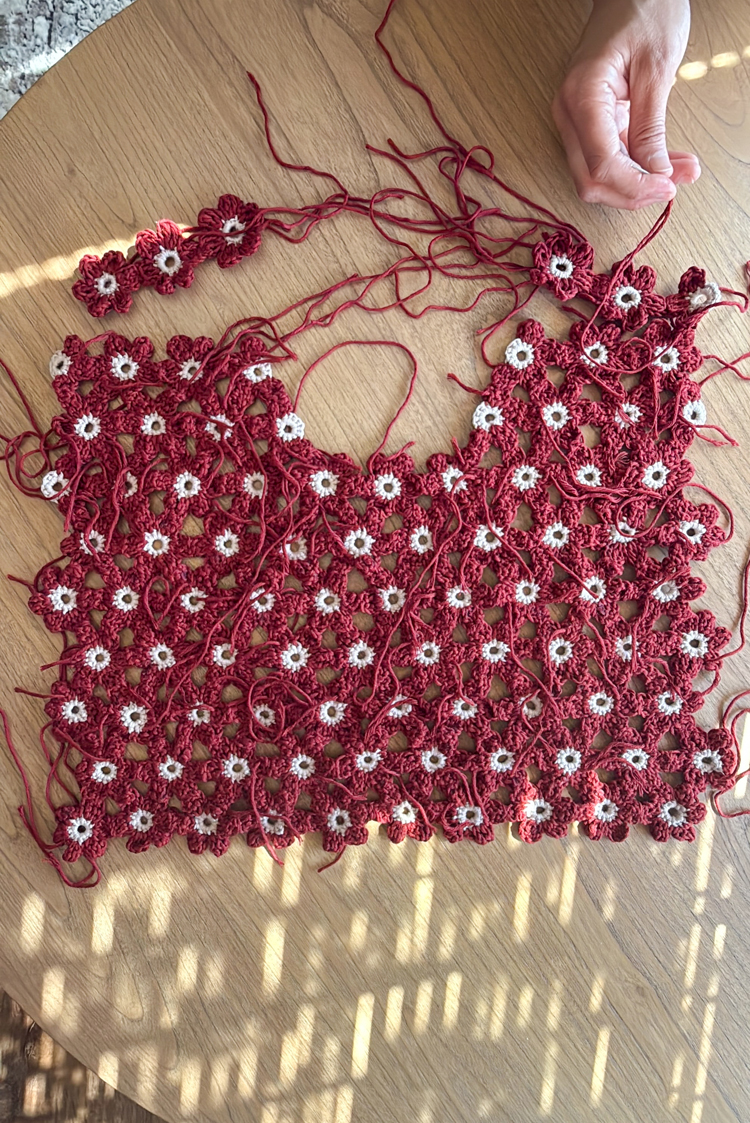
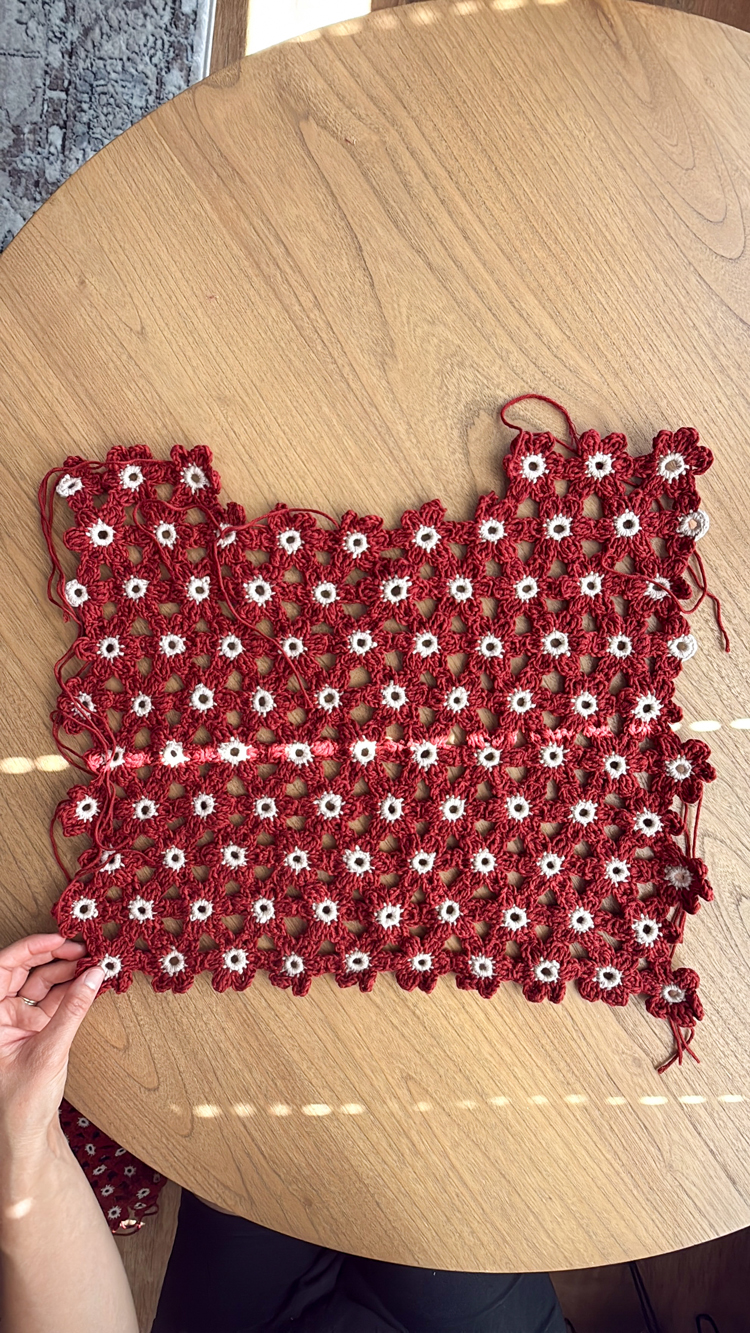
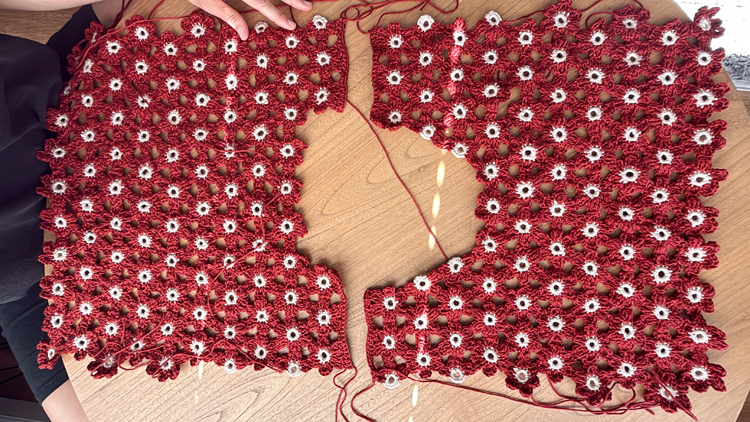
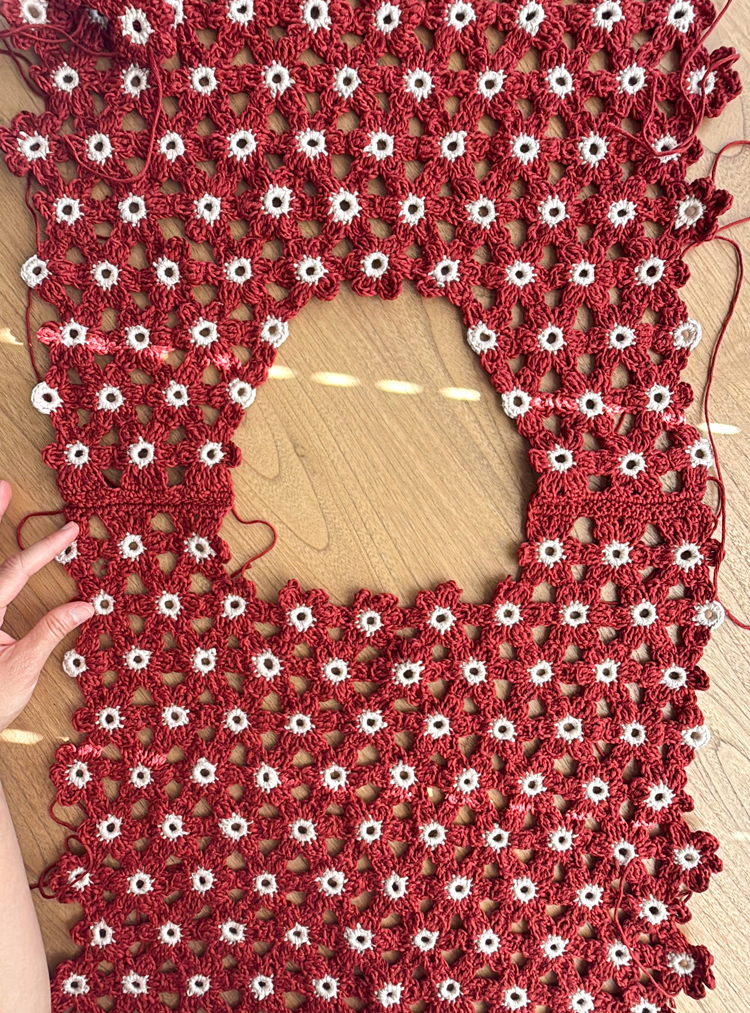
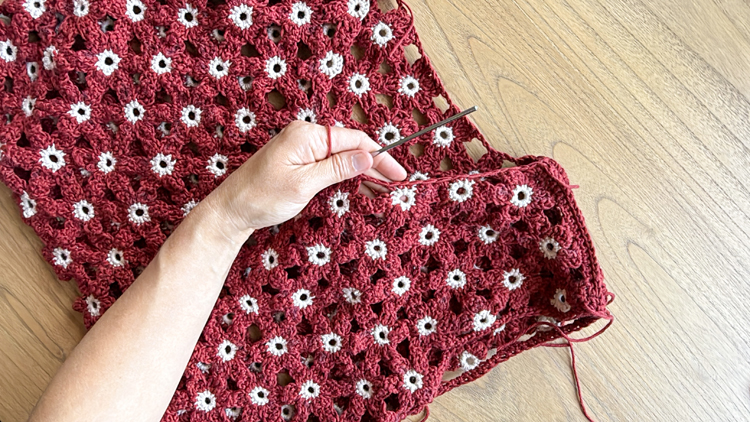
Joining Front and Back Pieces
Once you have joined all the flower strips together, according to the diagram, to create the front and back pieces, and once all the tails, except for the sides, are woven in, cut and glued you’re ready to form the top.
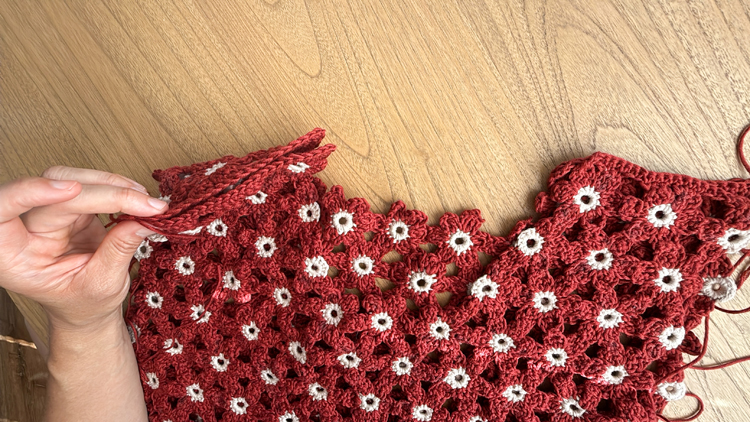
Shoulder Seams
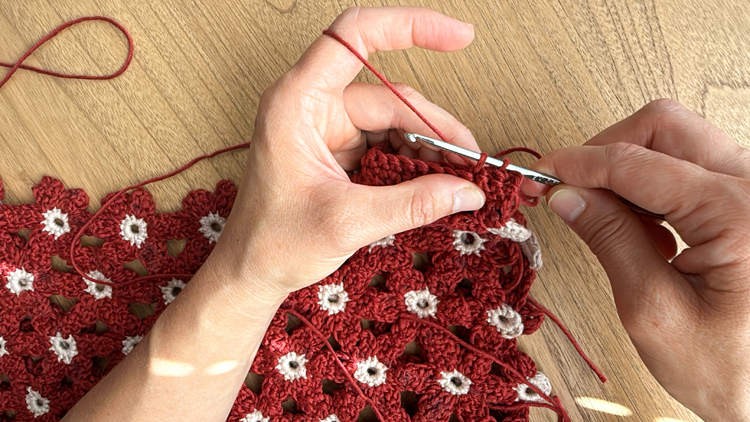
ROW 1: Slip stitch into the outside top of one of the flower petals at the shoulder. Single crochet across the tops of the shoulder following this formula:
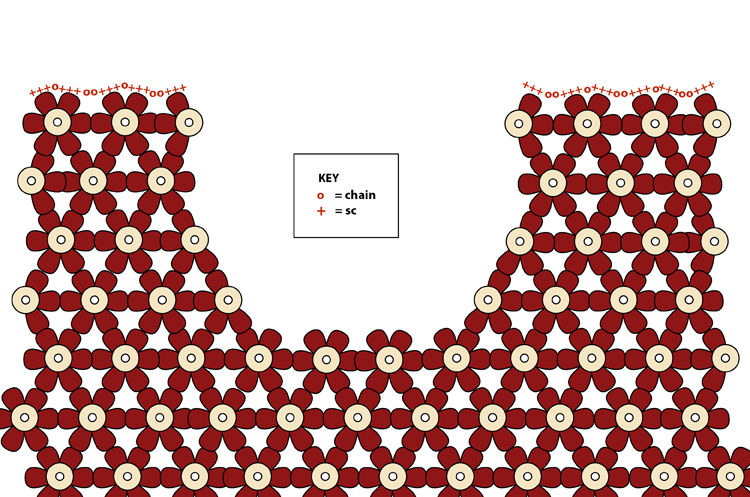
Work 3 sc into each petal, work 1 chain between small gaps between petals of the same flower, work 2 chains between larger gaps between petals of different flowers.*
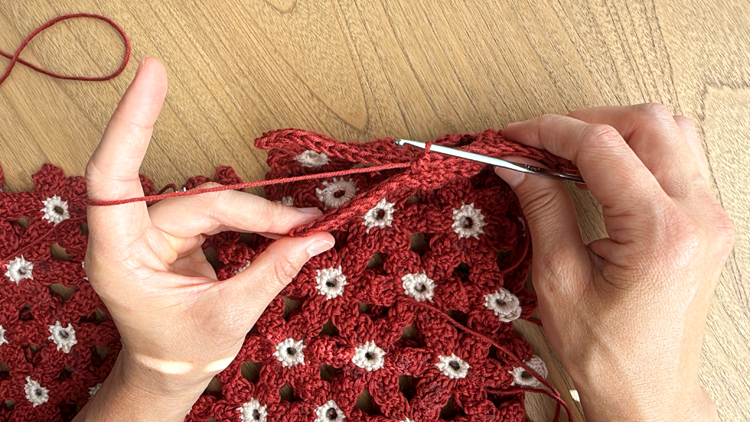
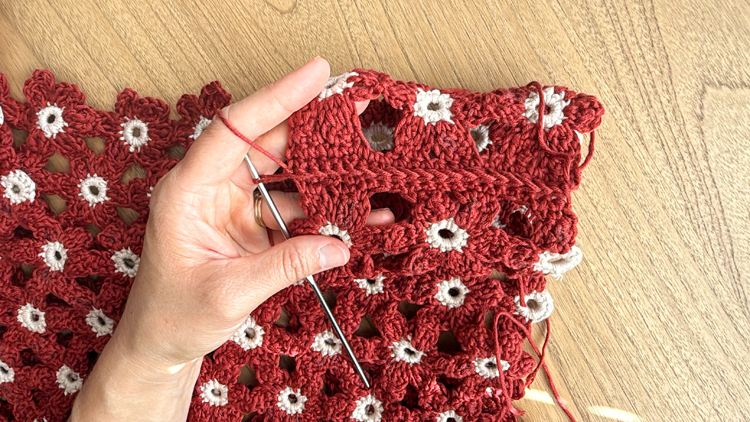
ROW 2: When you get to the end of the shoulder, turn, ch 1, then sc into each stitch and ch.
Tie off the end leaving a 5-6 inch tail on the right hand side. If crocheting across the shoulder of the left hand side, leave a 2 foot long tail. We will use this to seam the shoulders together.
*NOTE: Instead of providing a strictly written out pattern for this step, I provide a formula for how to handle each petal and gap. This will allow you flexibility if making sizing adjustments.
Repeat for all four shoulders. The front piece and the back piece should each have one long tail at their left hand side shoulders.
Sizing Adjustment:
Implement these changes to the regular “formula” to make the shoulders slightly wider or narrower.
- Broader shoulders: Work 3 ch in the larger gaps.
- Narrower shoulders: Work 2 sc into every petal.
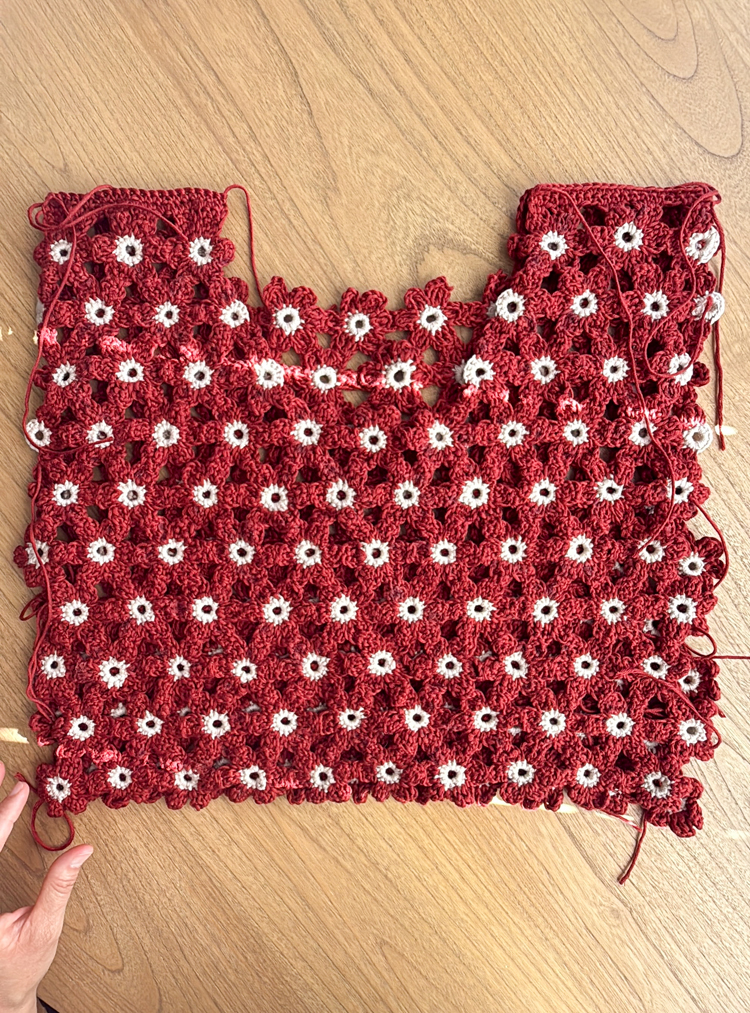
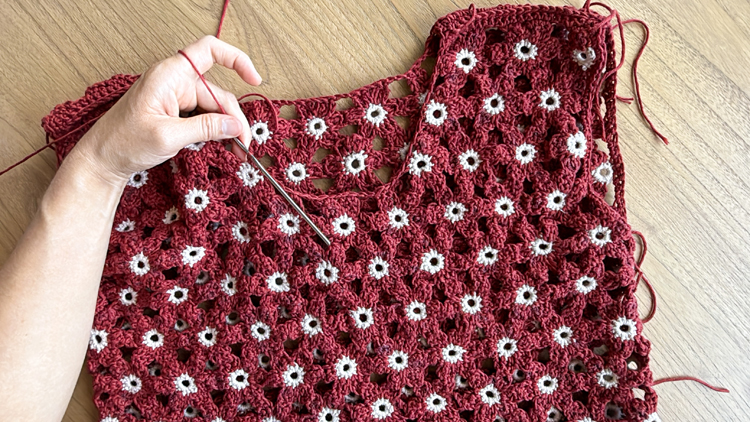
Joining Shoulder Seams
Lay the front piece onto the back piece, with “right” sides facing each other. You should have one slightly narrower shoulder matching up with the slightly wider shoulder on each side. They will stretch to accommodate each other to ensure the finished top is symmetrical.

Insert your hook through the top, outside corner of each shoulder piece, yarn over with the long 2 foot tail and pull up a loop through both layers. Ch 1, then sc through both layers to join the shoulders. You will have to skip a few stitches in the wider shoulder piece to get the narrower shoulder piece to line up. As long as you spread the skipped stitches out, it will not be noticeable at all.
Repeat for the other shoulder.
TRY ON: Try on the top to test the fit. The finishing stitches will cinch things up more, but this try on will help give you an idea of about how long the top will be and how wide you want the sleeve openings. Remember the hem band will add about 2 inches to the bottom.
Sizing Adjustment:
You can also remove the seaming stitches and add another row of sc to each shoulder. Re-seam together the shoulders. The regular finished shoulder seam is about 3/4 of an inch, so adding another row of sc should add just over a half inch.
This would make the top slightly longer, the neckline lower and more open, and the sleeve opening slightly bigger as well. This is a great way to enlarge the top just a little bit, with minimal effort.
If needing to make it slightly smaller, subtract the second row of sc stitches instead. The shoulders likely won’t look as neat or flat when seamed, but in a pinch it can be an easier option for making the openings smaller.
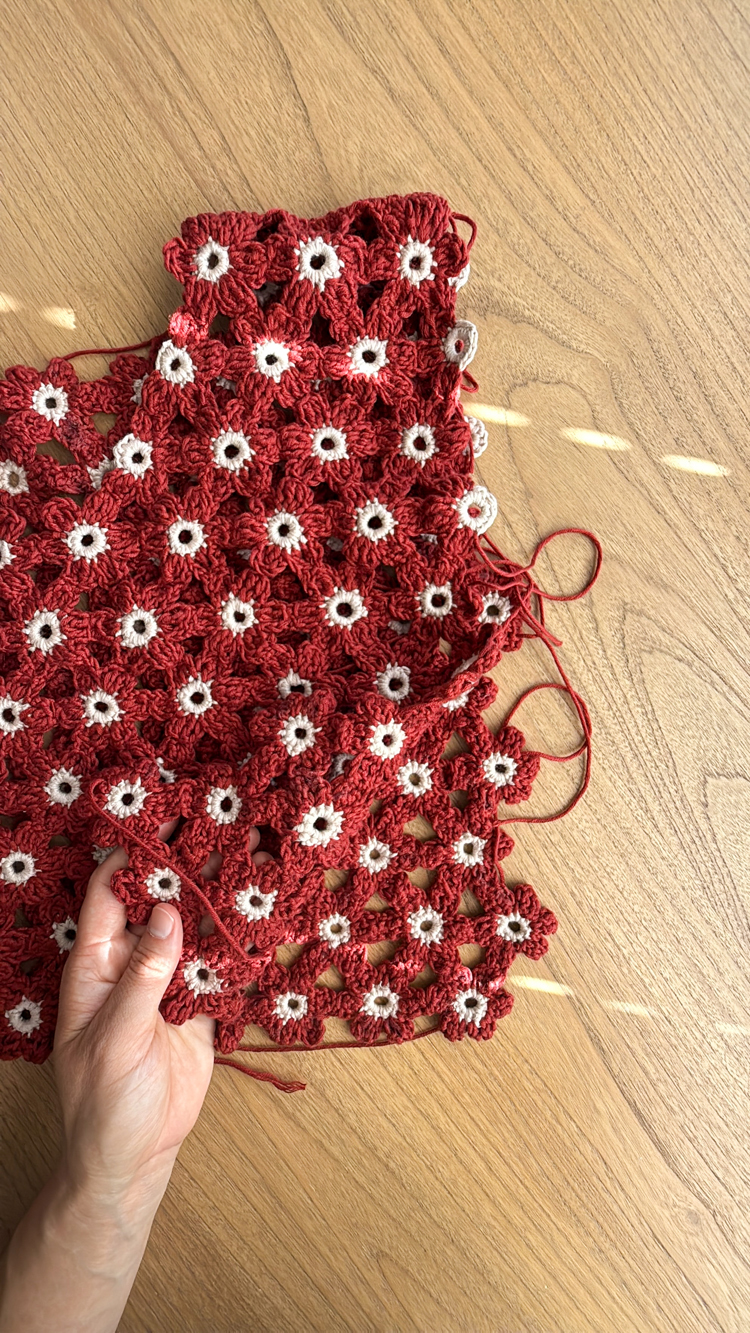
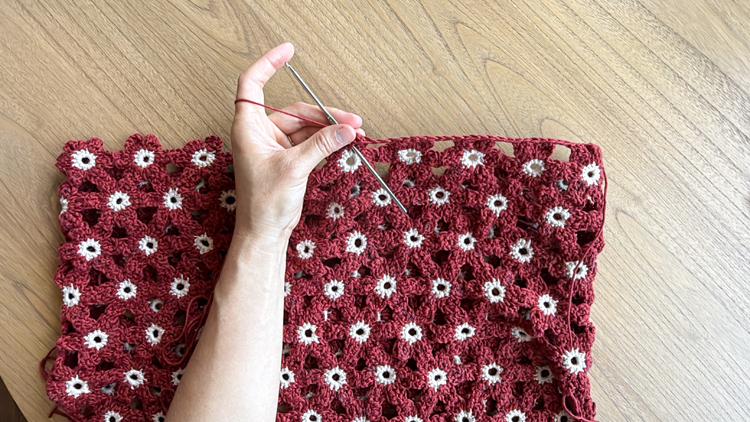
Side Seams
Join the sides in the same way that you formed the flower strips using whatever tails are available.
You can widen or cinch up the sleeve openings by how many rows you join on the sides.
TIP: If don’t have a long tail available. Thread a new piece of yarn, about 12 inches long, onto a yarn needle. Sew into the tip of one petal, leaving a 5 inch tail, join it to the next petal, then weave both the ending and starting tails into neighboring flowers.
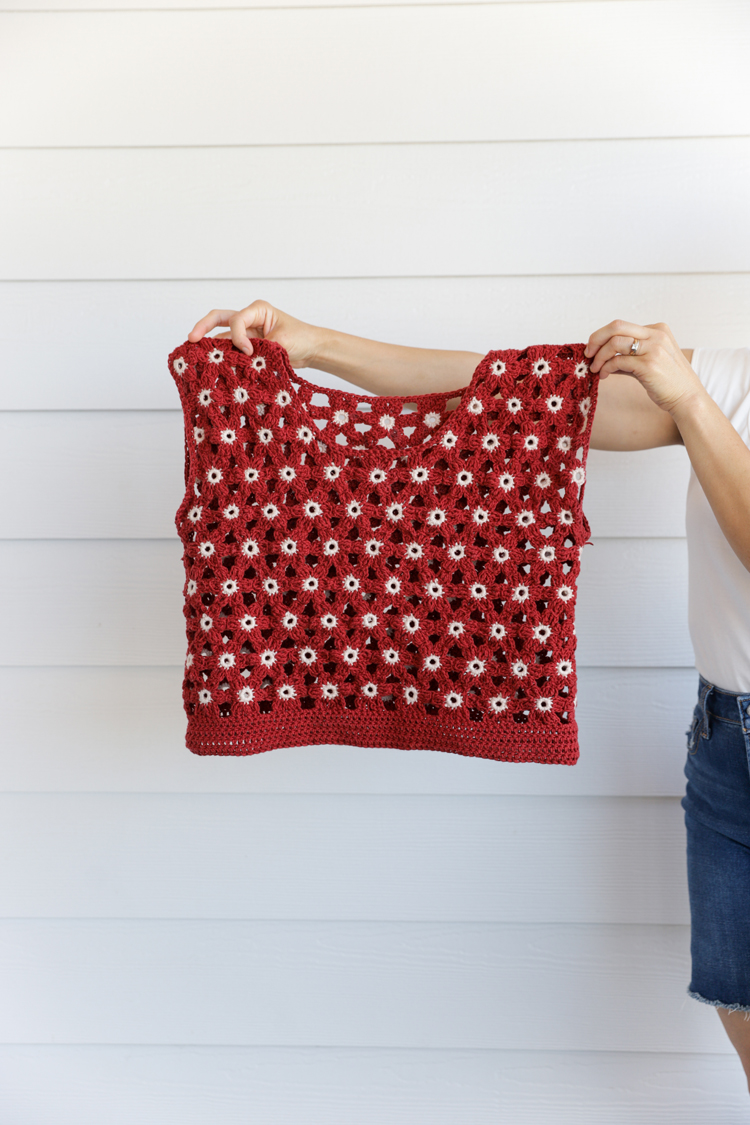
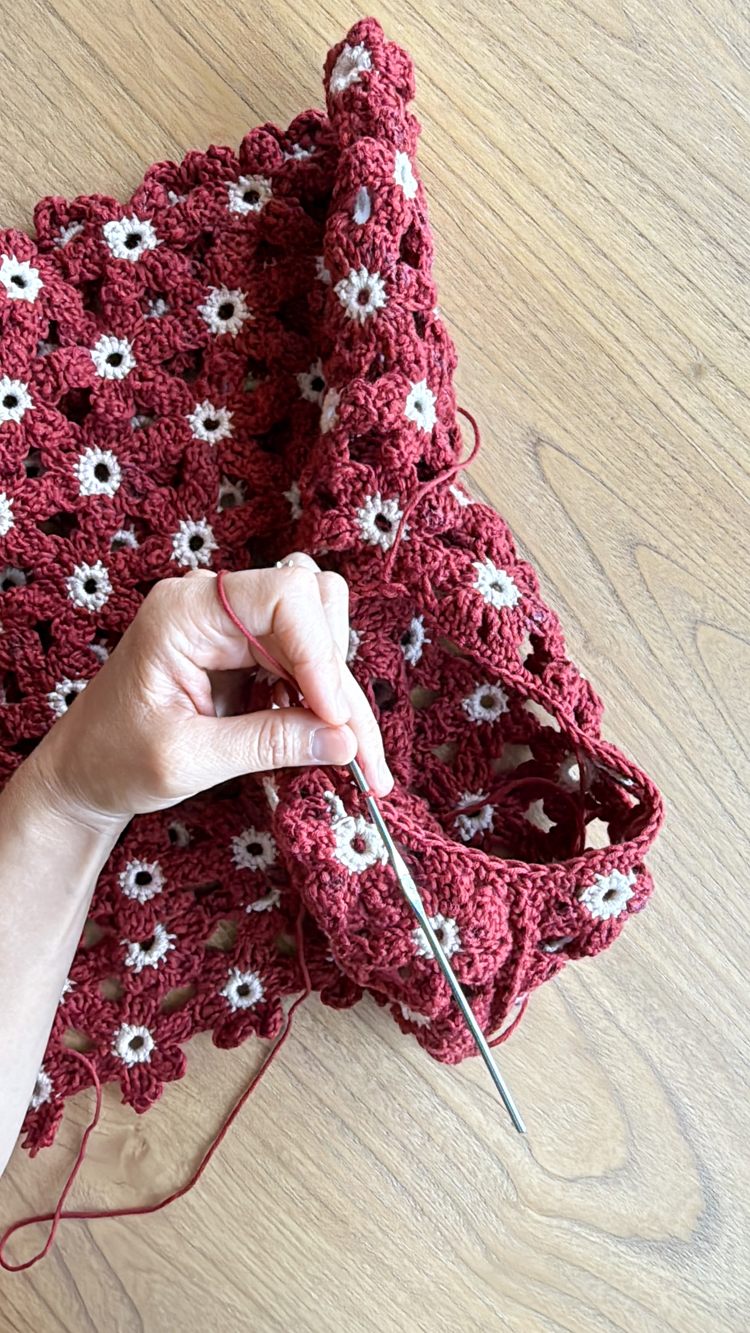
The staggered rows of flowers creates a seamless finish on the sides.
TRY ON: Check the fit. Adjust the sleeve openings if needed. You could even add another row of flowers if you want the top to be longer. Just remember that the hem band will add almost 2 inches to the bottom.
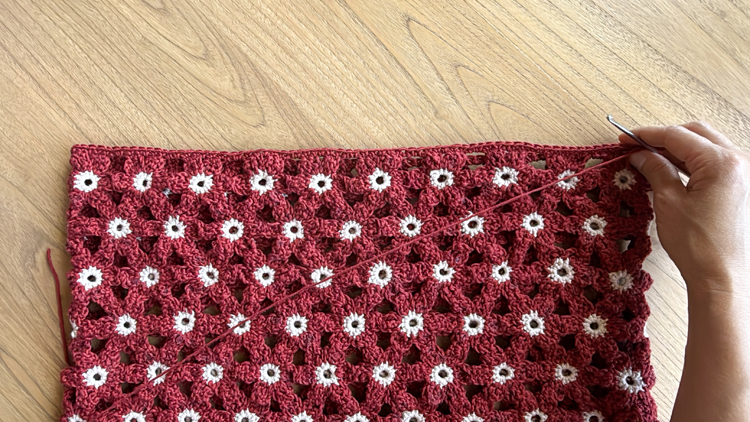
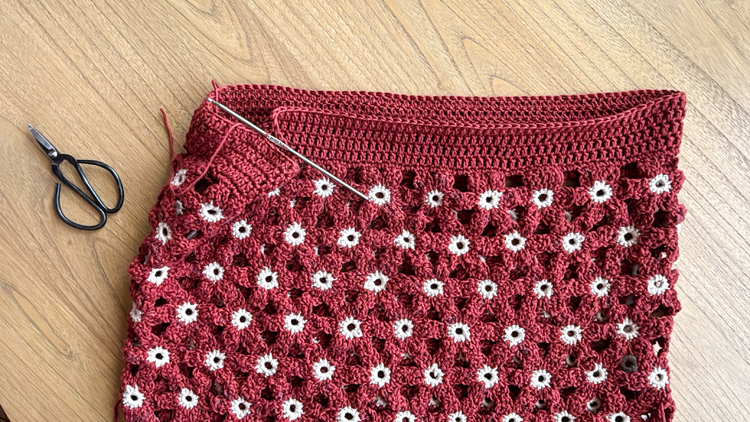
FINISHING STITCHES
Sleeve Openings
ROUND 1: Slip stitch into the bottom of the sleeve opening, ch 1, and sc around the sleeve opening following this formula:
Work 2 sc into each flower petal, 1 chain into the small gaps, 2 chains into the large gaps, 3 sc into the flower centers of 1/2 flowers.
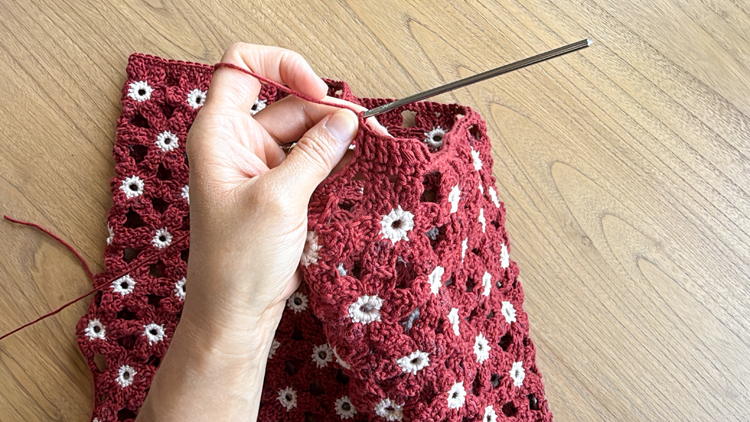
When you get to the shoulder seam, work 1 sc before the seam, work 1 sc into both layers of the seam, and then work 1 sc after the seam.
Sc around the sleeve following this formula. When you make it back to where you started, slip stitch into the first stitch.
TRY ON: Test the sleeve opening fit. These finishing stitches provide structure to the flowers and can make a noticeable impact on the fit and sizing. You can easily pull out your stitches and make adjustments at this step if needed. See below.
Size adjustments:
Do this instead of the stated formula to let out or cinch in the sleeve opening.
- Larger: Work 3 chains in the larger gaps and/or 3 sc into each petal.
- Smaller: Work 1 sc into each petal, 2 sc into the flower centers, and/or 1 ch into the large gap.
Be mindful to not add or remove too many stitches to prevent rippling or puckering.
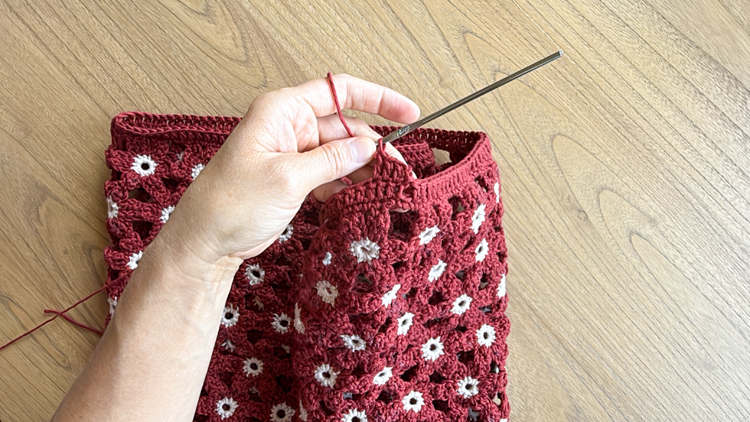
ROUND 2: Simply ch 1 and sc into each stitch and ch. Sl st to the first sc and tie off your end, leaving a 5-6 inch tail.
Repeat for the second sleeve.
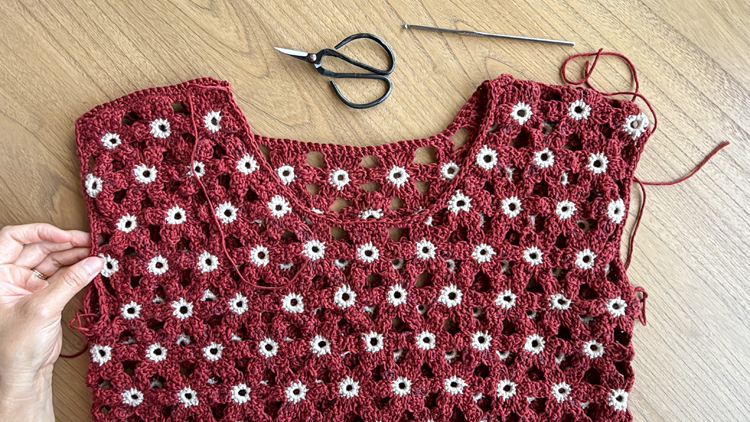
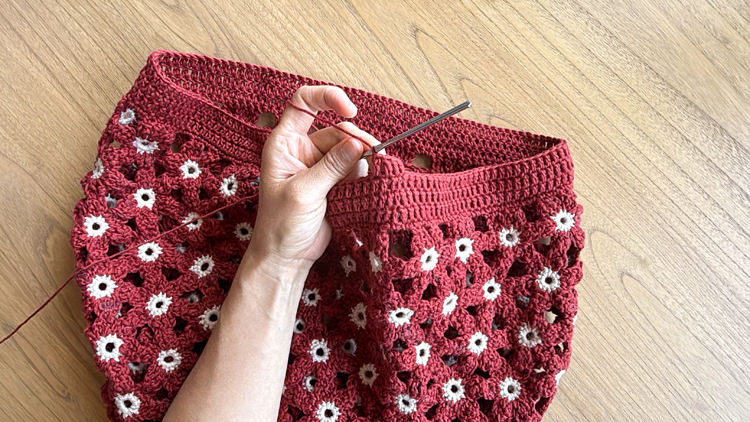
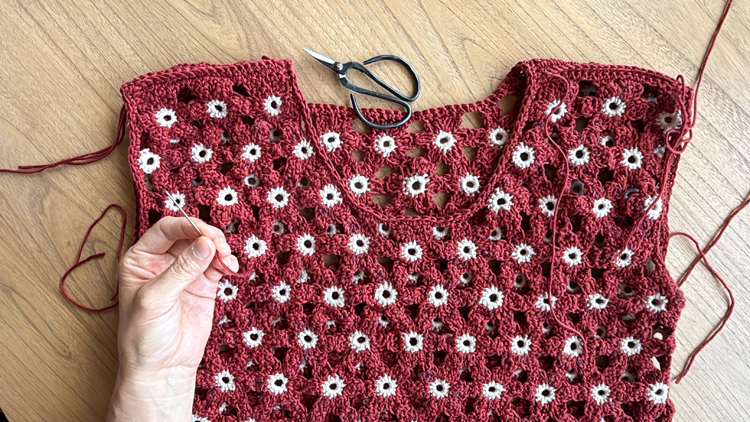
Neckline
ROUND 1: Slip stitch into just before the right hand shoulder seam. Ch 1. Sc once before the seam, work 1 sc through both layers of the seam, then work 1 sc after the seam. Continue sc around the back neckline following this formula:
Work 2 sc into each flower petal, 3 sc into each flower center (if applicable), 1 chain into the small gaps, 2 chains into the large gaps.
When you get to the other shoulder seam, work 1 sc before the seam, work 1 sc into both layers of the seam, and then work 1 sc after the seam.

As you descend into the front part of the neckline, you may encounter some 2/3 flowers.
If you do: work 3 sc into the flower center as mentioned, 1 sc into the sides of the petals near the 2/3 flowers, then proceed with the regular formula.
If you don’t: follow the regular formula.
Mirror on the right hand side of the front neckline to match whatever you did on the left hand side. When you make it back to where you started, slip stitch into the first stitch.
TRY ON: Test the fit. You can pull out your stitches and make adjustments at this step if needed. See below.
Size adjustments:
- Larger: Work 3 chains in the larger gaps and/or 3 sc into each petal. If you have 2/3 flowers in your neckline, consider working 2 sc instead of 1 sc into the sides of the petals near the 2/3 flowers.
- Smaller: Work 1 sc into each petal, 2 sc into the flower centers, and/or 1 ch into the large gap.
Be mindful to not add or remove too many stitches to prevent rippling or puckering.
ROUND 2: Simply ch 1 and sc into each stitch and ch. Sl st to the first sc and tie off your end leaving a 5-6 inch tail.
Hem Band
ROUND 1: Slip stitch any spot (a side or the back is preferred). Ch 1 and sc into the bottom opening following this formula:
Work 2 sc into each flower petal, 1 chain into the small gaps, 2 chains into the large gaps.
TRY ON: Test the fit. Pull out stitches and make adjustments at this step if needed. See below.
Size adjustments:
- Larger: Work 3 chains in the larger gaps and/or 3 sc into each petal.
- Smaller: Work 1 sc into each petal and/or 1 ch into the large gap.
ROUND 2: Ch 1 and sc into each stitch and ch. Sl st to the first sc.
ROUND 3: Ch 2. Dc into each stitch. Sl st to the top two loops of the first dc.
ROUND 4-6: Repeat Round 3. Tie off your end leaving a 5-6 inch tail.
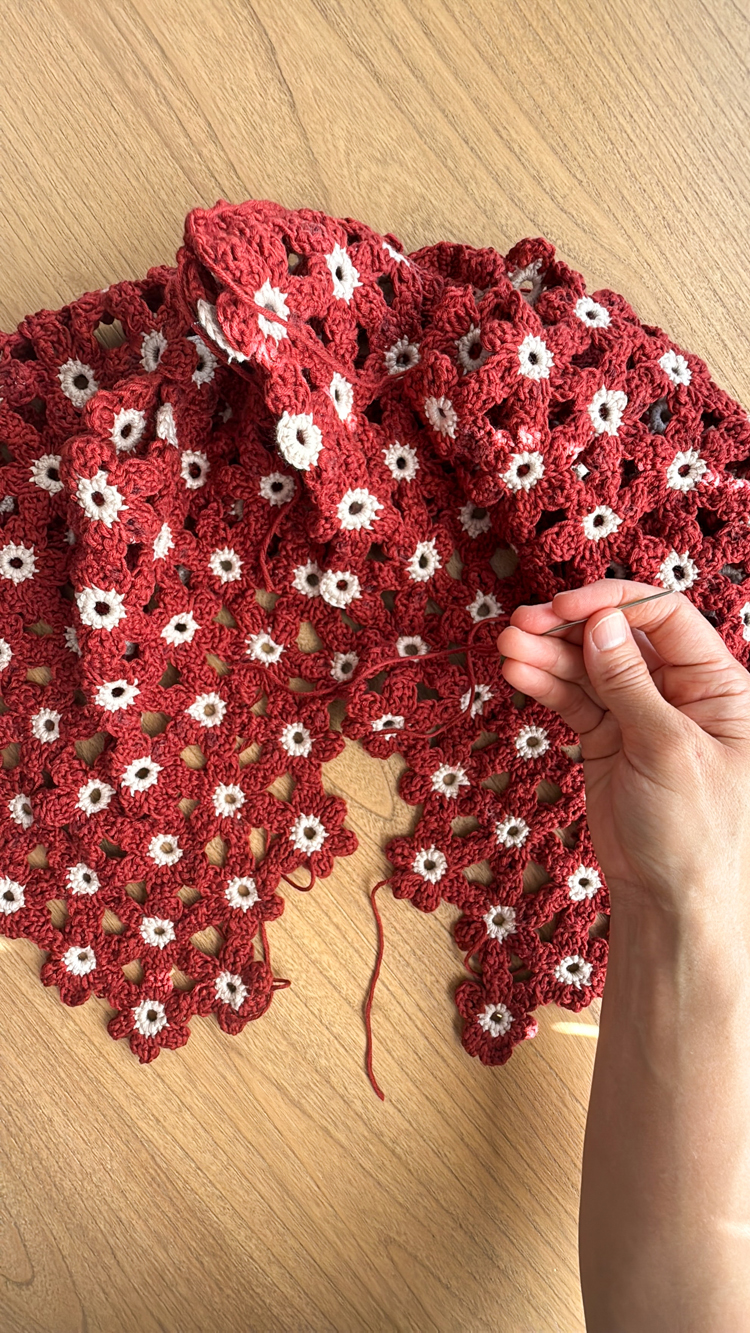
Weave in any remaining tails.
You’re done!
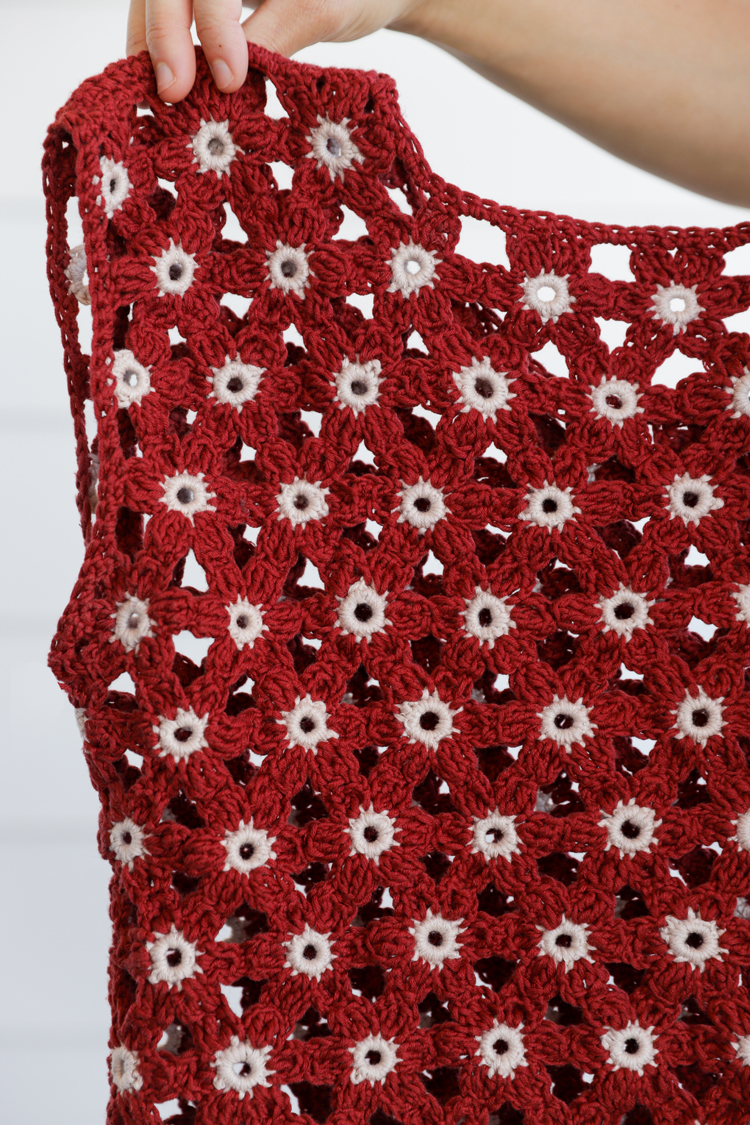

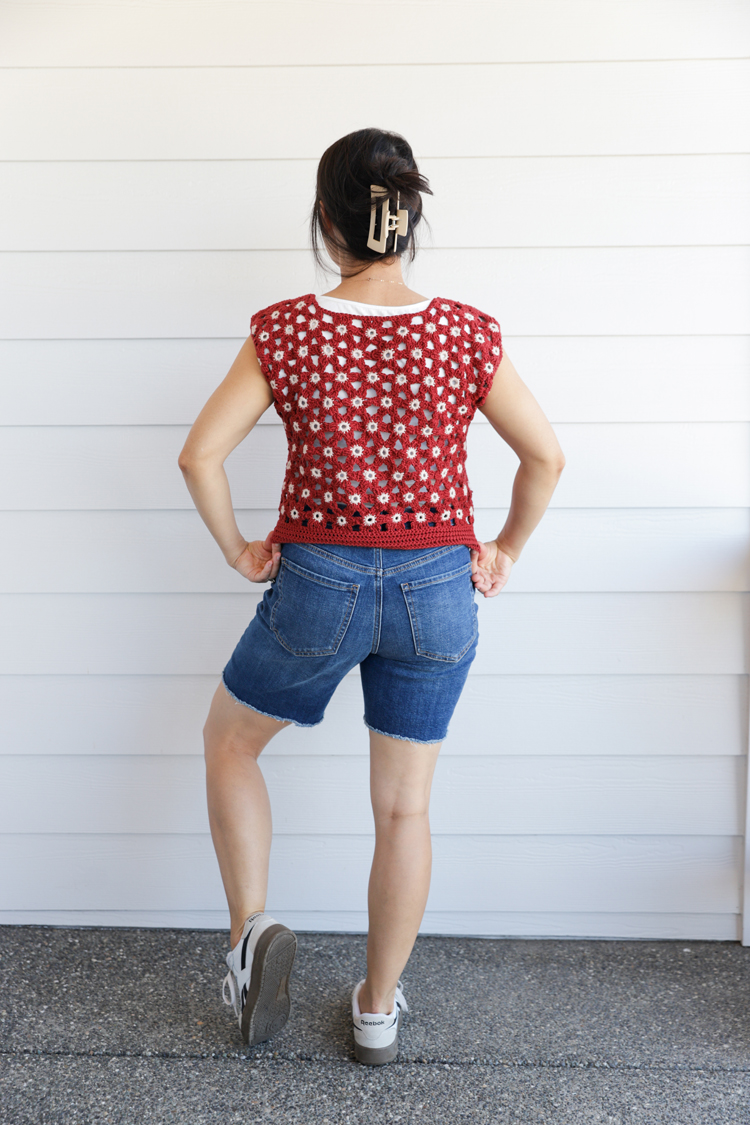
I love the seamless finish on the sides…

Ready to make another crochet top? Check out some of my other free patterns HERE.
Leave a Reply