• Skip to primary navigation
  • Skip to main content
  • Skip to primary sidebar
  • Skip to footer
delia creates
  • FREE TUTORIALS & PATTERNS
  • SHOP
    • SHOP
    • Cart
    • ACCOUNT
    • Refund, Returns, and Shipping Policies
  • CONTACT
  • ABOUT
    • ABOUT
    • Privacy Policy
    • TERMS OF USE
    • PRESS
    • Featured
  • HOME
  • Instagram
  • Pinterest
  • YouTube
X
delia creates
  • FREE TUTORIALS & PATTERNS
  • SHOP
    • SHOP
    • Cart
    • ACCOUNT
    • Refund, Returns, and Shipping Policies
  • CONTACT
  • ABOUT
    • ABOUT
    • Privacy Policy
    • TERMS OF USE
    • PRESS
    • Featured
  • HOME
  • Instagram
  • Pinterest
  • YouTube
delia creates

delia creates

  • FREE TUTORIALS & PATTERNS
  • SHOP
    • SHOP
    • Cart
    • ACCOUNT
    • Refund, Returns, and Shipping Policies
  • CONTACT
  • ABOUT
    • ABOUT
    • Privacy Policy
    • TERMS OF USE
    • PRESS
    • Featured
  • HOME
  • Instagram
  • Pinterest
  • YouTube

Purple with Jessica from A Little Gray

July 2, 2012 · Delia 8 Comments

 I’ve got a pretty great guest today that is sure to brighten your Monday!
Jessica from A Little Gray is here celebrating purple with us. She’s brought her wit (she’s got an understated funny vibe about her that I love), her enviable sewing talent (she WON Project Run & Play after all), and her adorable little boy as her model (she has the cutest little daughter too).
 
I love getting a comment from her because it will always make me laugh or smile. Her sarcastic joy is infectious. She’s one of those girls that you just want to be friends with because she is so fun to be around…I guess in my case digitally speaking. : /
Oh and did I say this girl can really sew? She can really sew. 
Here’s Jessica…
___________________________________________________

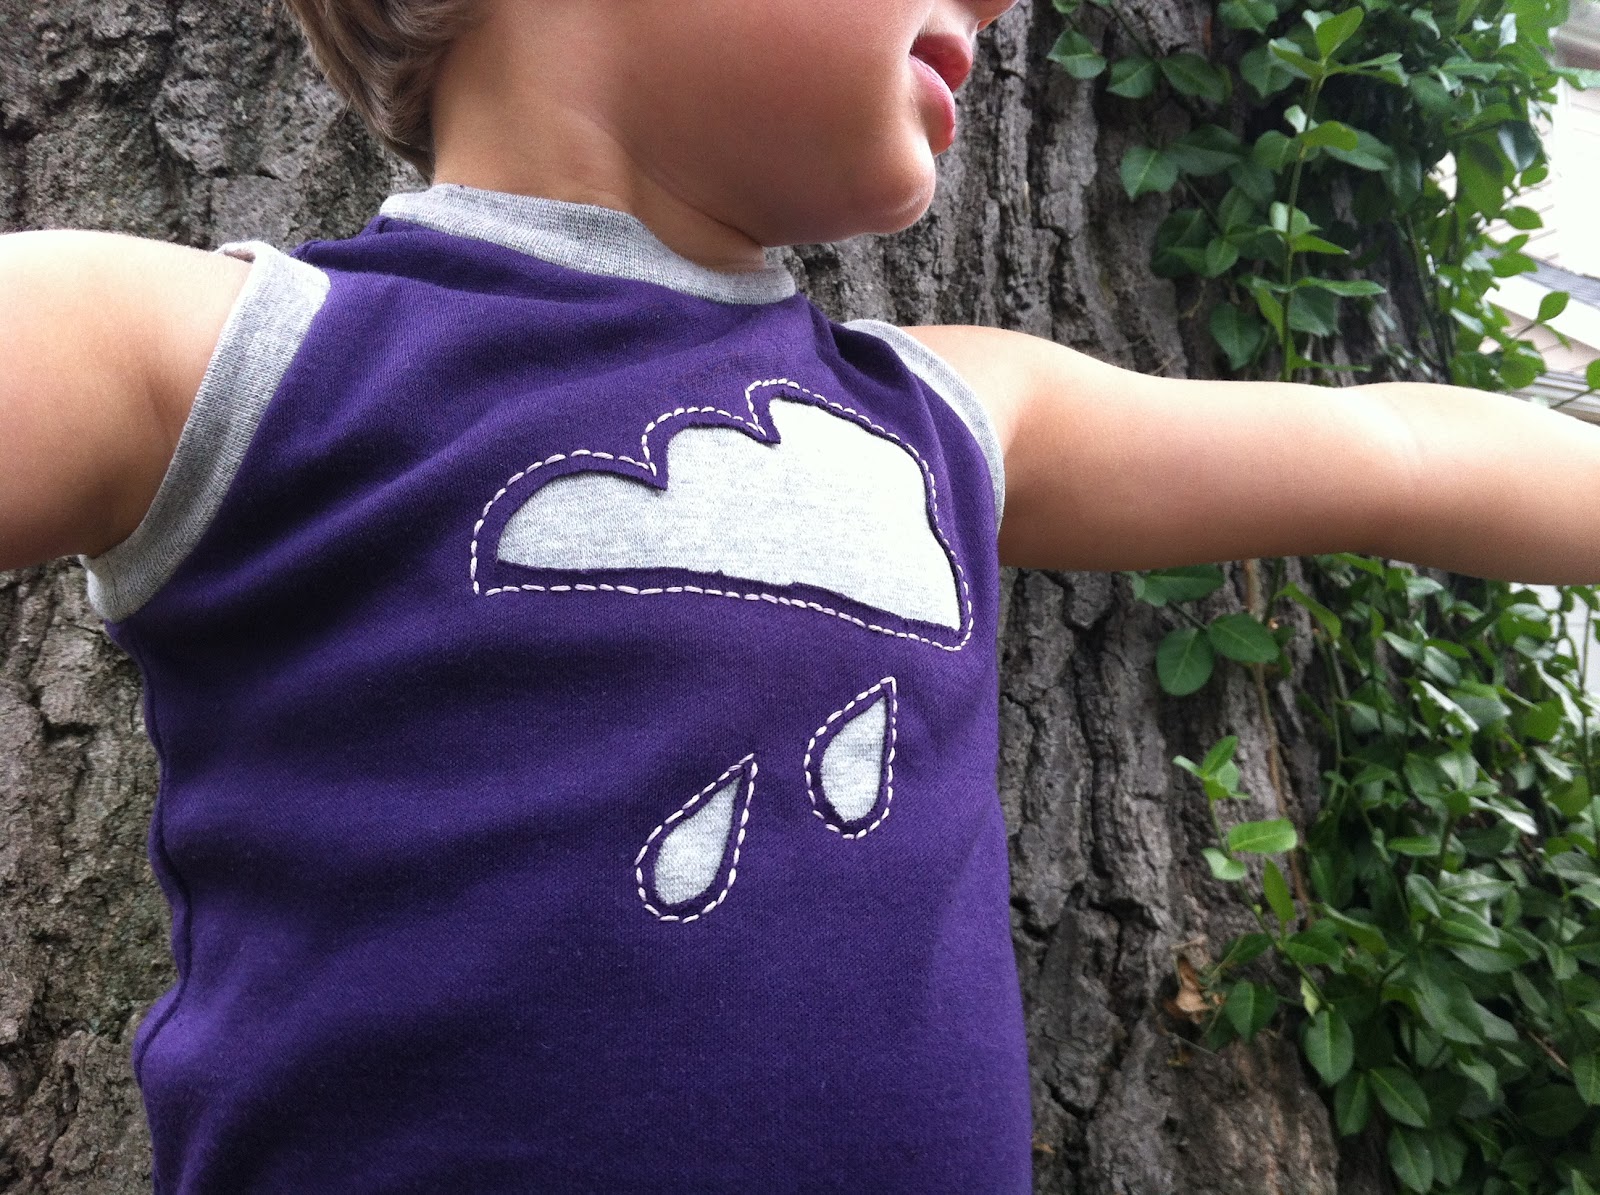
So happy to be celebrating a colorful summer with you today! I’m a big fan of the men-wearing-purple trend right now. But it’s still not something you will likely find in the boy’s section at Target.

So when Delia invited me to play at CYS, I knew I wanted purple, and I knew it would be something for my boy!

This little muscle tee has become my go-to summer wardrobe staple to make for my 3 year old, Hendrix. They are so cute and hip, super wearable, fast to whip up, and the possibilities for embellishment are endless.
So today I’m going to show you how to make the basic tee, and how to add a little hand-stitched reverse appliqué flair. I used to avoid hand stitching anything at all costs. But these days I’m addicted to embroidering on my kids clothes. It’s really not as time consuming as I used to think, and it adds such a special look to knits. As you can see, my stitches are far from perfect, but that’s the look we want here!
And yes, I did make my kid a “purple rain” shirt. It wasn’t the original plan, but I really can’t resist a weird pop culture reference on a three year old 🙂
Ok, here’s what you need:
  • 1/2 yard of interlock knit (More for a kid bigger than 4t,  or you can always upcycle an old adult tee.)
  • 1/4 of contrasting rib knit
  • Thread that matches the interlock
  • Embroidery floss or perle cotton that contrasts the interlock
  • Chenille needle, or other embroidery needle with a large eye
  • 1/4 of Pellon Wash-n-Gone, or other stabilizer
  • Chalk or marking tool
  • Stretch machine needle
First make the pattern. I traced this shirt that I made for the PR&P finale because I know I like the way it fits. If you don’t already have a muscle tee, you can just trace a regular tee and leave the sleeves off. Make sure to add about .5″ all the way around for seam allowance, and a little less than that on the arm holes. I don’t hem these shirts, but if you prefer to hem, add that to the pattern as well. I leave my hem raw and cut it to curve down a little in the middle for a cuter fit over little tummies.
*KNIT TIP: I like to trace my patterns onto freezer paper when I am sewing with knits. Draw on the matte side, then iron the shiny side down onto your fabric and it sticks. This helps me cut the knit more accurately without pulling and stretching.
Cut out your pattern piece and cut two of them from your main fabric.
**KNIT COMMANDMENT: You must cut out the fabric so that the most stretch is going across  the body. Just think of the way your t-shirts stretch.

The front of the neckline needs to go lower than the back, so take just one of your cut pieces and draw a lower curve at the neck, taking off about 2 inches at the lowest point. Cut.

Now pin your two pieces together at the shoulders and the sides. (Right sides together, if your fabric has right sides.) Sew these seams with a 3/8″ seam allowance and make sure to backstitch at the bottom of the side seams, since we are not hemming the shirt.
*KNIT TIP: I like to change my machine to a narrow zig-zag stitch with a width of 1.0 and length of 3.0. This way the seams have a little bit of give in the stretch fabric. (Learned this one from Figgy’s!) On my machine, this also gives me a 3/8″ seam allowance, which is perfect.
*KNIT TIP: If you are having trouble with your machine “eating” the fabric at the edges, just start your seams in the middle of the fabric, then go back and finish the rest from that point.
**KNIT COMMANDMENT: Use a stretch needle. If you don’t, you’ll likely see your needle holes start to tear after a couple washings.

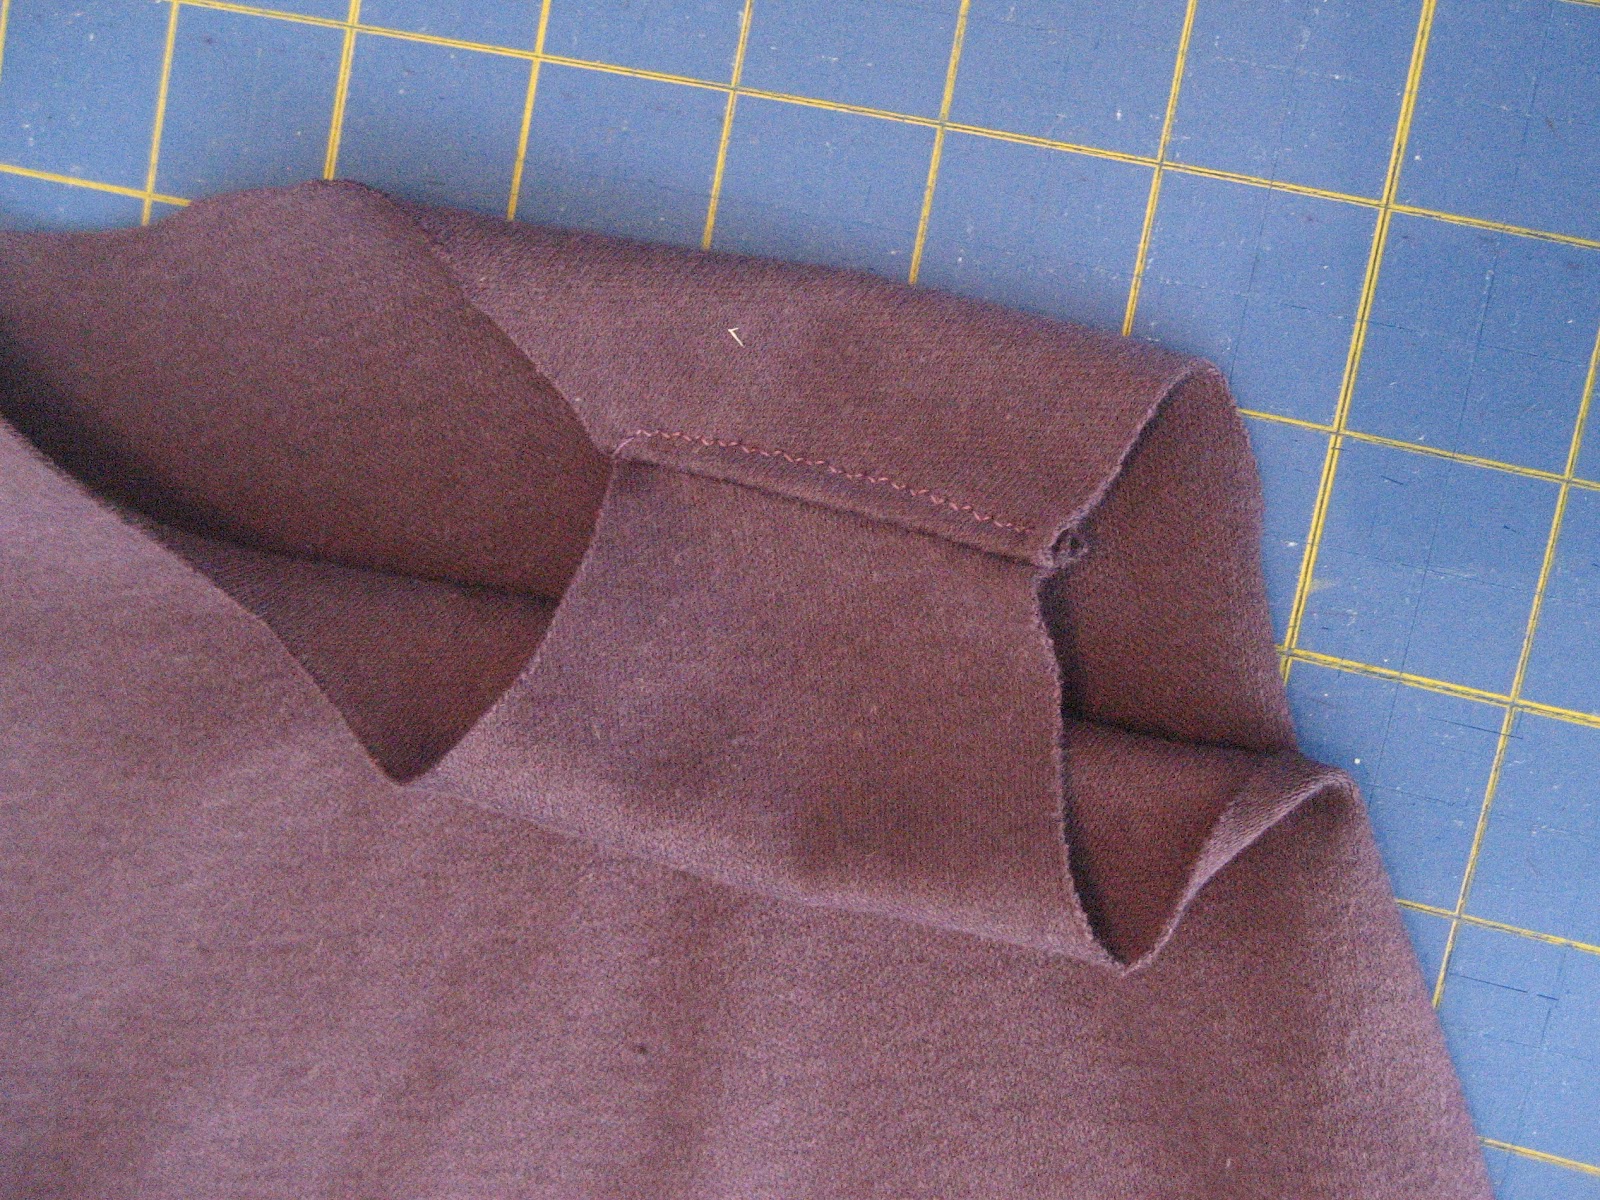
Press all seams toward the back of the shirt and topstitch the shoulder seams to reinforce.

At this point, I always try it on Hendrix to see if I need to cut a little more off the neck or armholes. I almost always need to cut the neck bigger than I think for his giant head.

Now it’s time to cut the ribbing for finishing the arm and neck holes. Measure around the neck by using a string or thread to find the exact distance around. Subtract 1″ from that number and that’s how long your ribbing needs to be, times a width of 2″. For example, my neck was 12.5″ around so I cut it to 11.5″ inches (with the stretch) by 2″ wide. So the most stretch is going from left to right in this picture.

Sew the short ended together on all three pieces. (Don’t get your neck and arm pieces confused!)

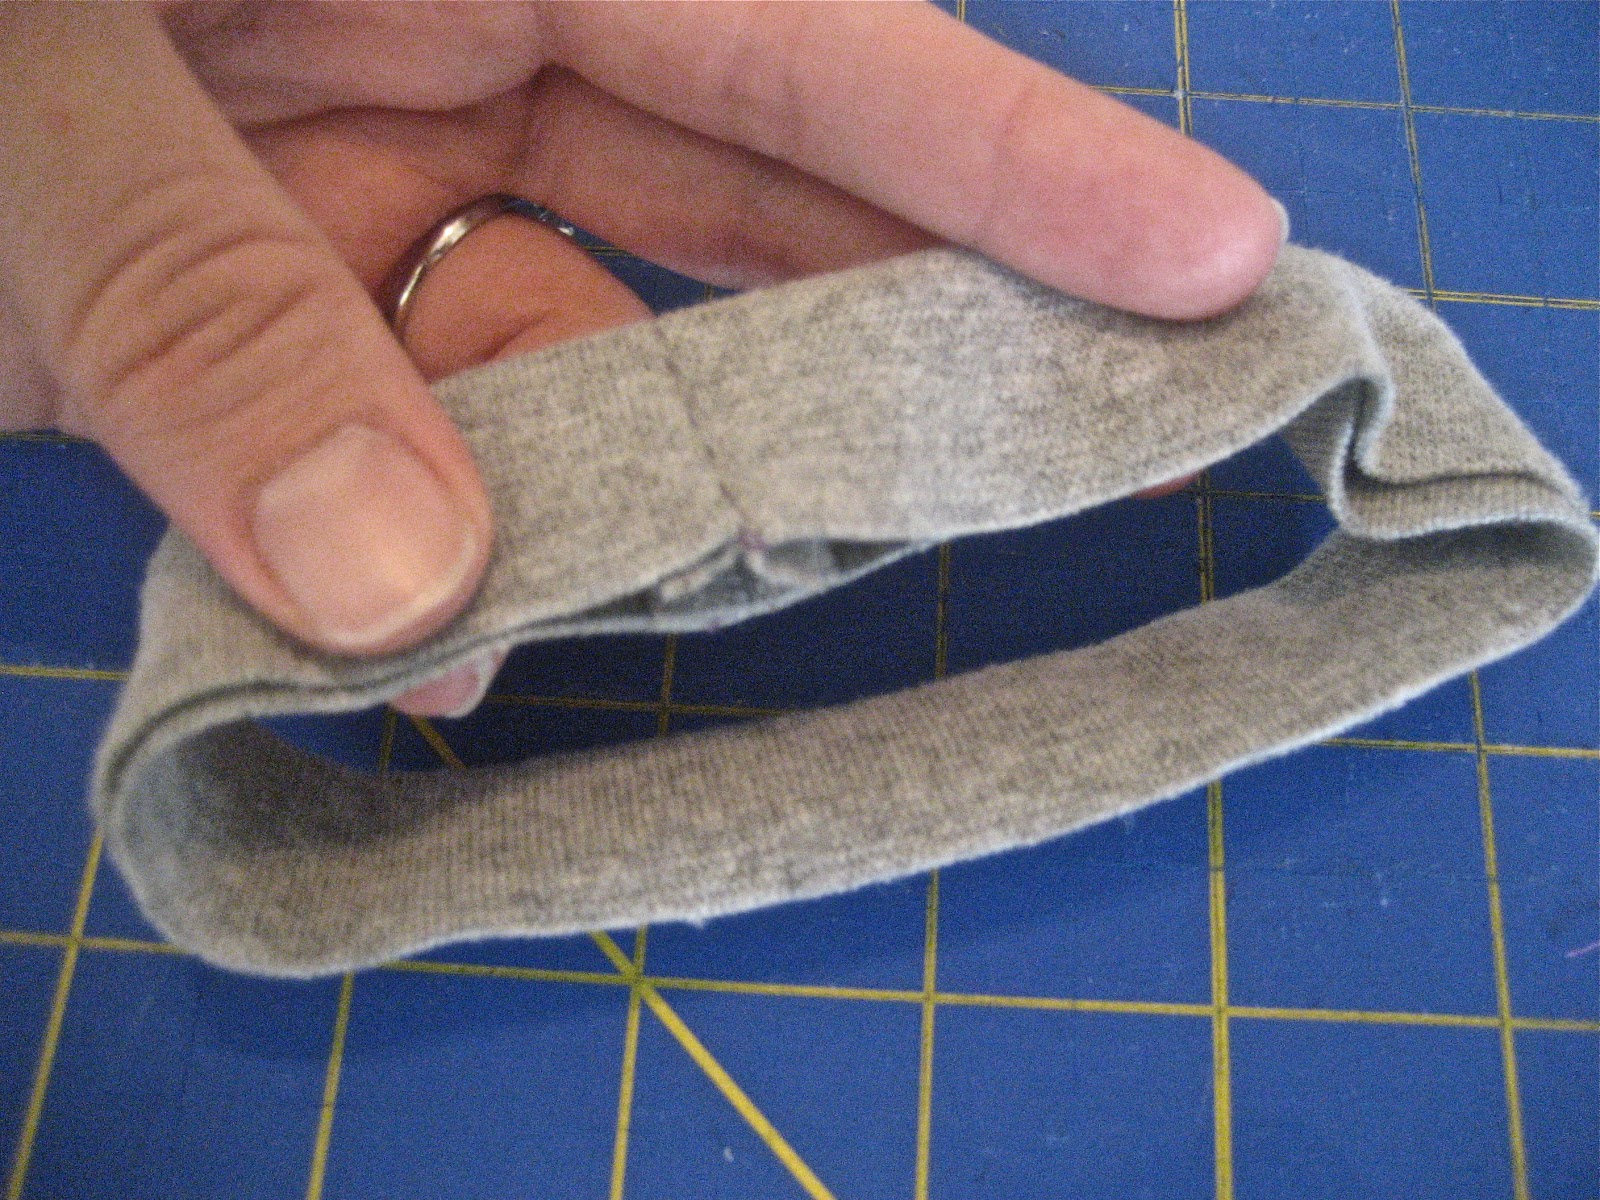
Now fold the circle you have so that the long raw edges are together and the seam allowance is sandwiched inside, so wrong sides together.

Start with the neck. You are going to match up those two raw edges of the ribbing with the raw edge of the neck on the right side of the shirt.

Begin by pinning the seam on the ribbing to one of the shoulder seams. Then find the exact opposite point on the ribbing and pin that to the opposite point on the neck hole (which is not necessarily the other shoulder seam, since the front of the neckline cuts lower.) Keep pinning in quadrants, stretching the ribbing slightly to match the shirt. The idea is to distribute the stretch evenly around the hole.

*KNIT TIP: Use lots of pins for this. LOTS! And just sew over them, much easier than trying to finagle them out while sewing in a tight circle.

Sew all the way around the hole, with the ribbing down against your needle plate, and the shirt fabric facing your presser foot. This way, you can make sure you don’t get any puckers in the main fabric and also make sure you aren’t stretching that fabric at all as you sew. Remember, it’s the ribbing that is stretching slightly to match the neck hole, but if you pin well that will take care of itself.

Flip the neckband up and press. Now repeat the same process for each armhole. Hem it if you want, but otherwise, your shirt is sewn!

Time to make it your own with reverse appliqué. Decide on a simple shape or two that you want to use and draw the design lightly in place with chalk or a water-soluble marking tool.

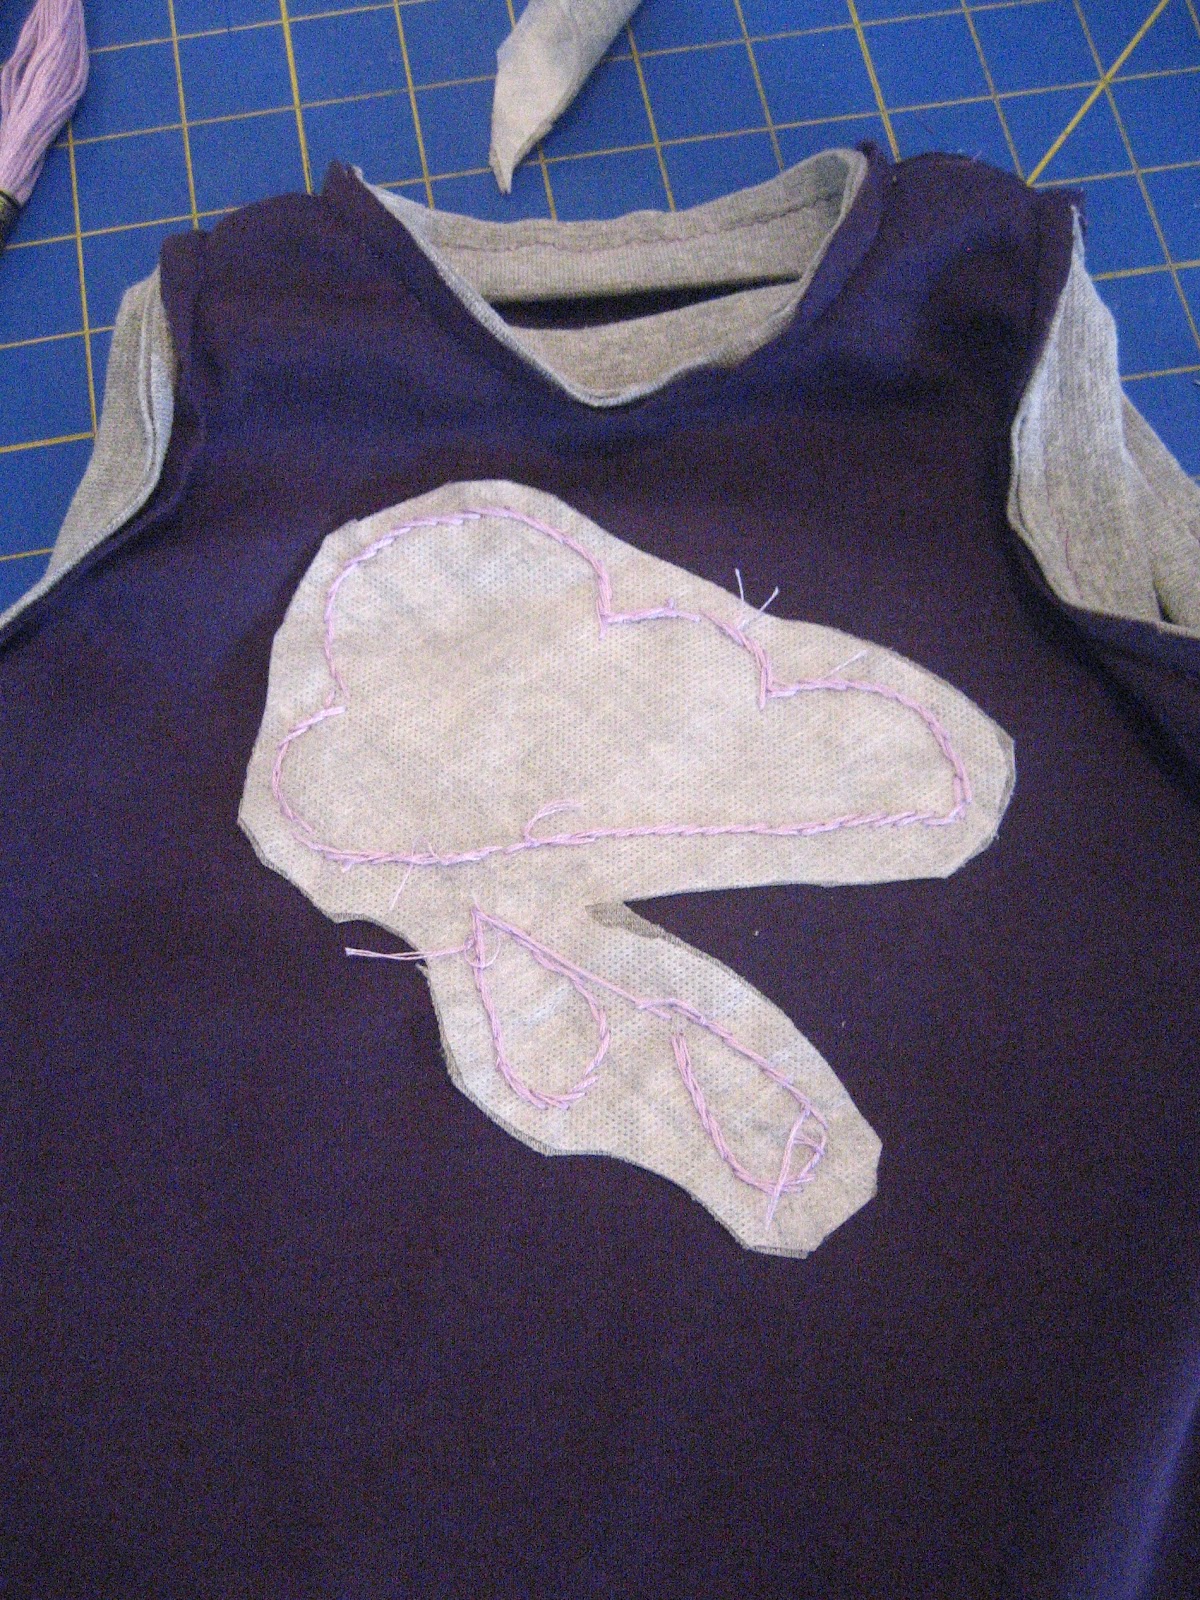
Now cut a piece of Wash-n-Gone stabilizer and a piece of your contrast knit (the ribbing is fine for this) both large enough to cover the space of your design. Turn the shirt inside out and simply pin those down behind the design. The knit will be against the shirt, and the stabilizer on top of that.

Turn the shirt right side out again and use your perle cotton or floss (You only need three of the six strands in the floss) to stitch your design on. There is no magic skill to it, just use a running stitch or a sloppy-ish backstitch like I do. You can find a great tutorial on these stitches right here.

Very carefully pull apart the two layers of fabric in the middle of your shapes and cut out the middle of the top layer.

Finally, turn your shirt inside out again and cut the excess from around your stitches. Here you can see what the Wash-N-Gone looks like on the back, but after you wash it… it will be gone. Hence the name.
Oh so cute, and oh so PURPLE.
Thanks so much for having me today on Color Your Summer Delia!
_________________________________________________
That shirt is so rad Jessica. 
Thank you for sharing so many great tips for working with knits. 
I learned a lot! Ironing the freezer paper pattern on…genius!
 Thanks for coloring our summer!
 
Go say hi to Kojodesigns for another fun summery project!

*Just a note…this week will be a wild card mix of all the colors. Come back each day to see what colors Kojo and I will be celebrating.

Uncategorized

Previous Post: « Pitter Patter Shop and Terra’s Treasures WINNERS and a suprise
Next Post: Red, White, & Blue with Amy from this heArt of mine »

Reader Interactions

Leave a Reply Cancel reply

Your email address will not be published. Required fields are marked *

Recipe Rating


This site uses Akismet to reduce spam. Learn how your comment data is processed.

Comments

  1. rachael says

    July 2, 2012 at 1:45 PM

    love the shirt, love the boy, love the Jess! ps. she's just as super rad in person 😉

    Reply
  2. Tansy Dolls says

    July 2, 2012 at 2:58 PM

    I love this shirt.

    Reply
  3. Jessica says

    July 3, 2012 at 4:39 AM

    You’re so sweet! Sarcastic joy? I like it. I mean, whatever, I’m too sarcastic to care.

    Reply
  4. kristin says

    July 3, 2012 at 6:19 AM

    Love it, Jessica! The purple on a boy shirt is great (H looks so rad), the reverse applique is fun, and the hand-stitching really adds a special touch. Nicely done, lady!

    Reply
  5. ReStitch Me says

    July 3, 2012 at 12:43 PM

    You make it look so easy! This turned out great!

    Reply
  6. Cherie says

    July 3, 2012 at 2:13 PM

    Love it! I’ve always wanted to try reverse appliqué and I love the hand embroidery. And you can’t beat a good Prince reference! Now there’s a man who can pull off purple 😉

    Reply
  7. Emily says

    July 6, 2012 at 4:17 PM

    What a fun shirt! Love the reverse applique and knit tips (except I’m scared to sew over pins ha).

    Reply
  8. Ella Ava says

    September 14, 2013 at 10:43 PM

    its really difficult to design dresses for the babies… this all cutting and stitching procedure is very easy to understand… thanks for your great idea
    http://www.apparelnbags.com/fruit-of-the-loom/index.htm

    Reply

Primary Sidebar

FEATURED POSTS

Granny Square Tote - free crochet pattern and video tutorial // www.deliacreates.com

Granny Square Tote – free crochet pattern

Summer Mesh Sweater - Free Crochet Pattern SIZES XXS-XXL // www.deliacreates.com

Summer Mesh Sweater – Free Crochet Pattern Sizes XXS-XXL

Jute Mesh Tote – Free Crochet Pattern

Basic Easter Basket - Free Crochet Pattern and Tutorial // www.deliacreates.com

Basic Crochet Easter Basket – Free Pattern

Footer

  • Instagram
  • Pinterest
  • YouTube

© Delia Creates, LLC 2010-2025. All Rights Reserved.

All content on this website is copyrighted. Please contact the copyright owner for permission to use any photos, templates, patterns, tutorials and content at [email protected].

Categories

  • FREE TUTORIALS & PATTERNS
  • SHOP
  • CONTACT
  • ABOUT
  • HOME

Copyright © 2025 · Recipe Blogger Theme · Genesis Framework · Privacy Policy · WordPress · Log in