

As a follow up to the spiderweb capes I shared earlier this week, I thought I would talk a little bit about Natalie’s witch dress.

I used Look No.4 from the Five & Ten Designs e-book Volume One designed by the lovely Heidi Kettner from Elegance & Elephants. The fabric is this lovely cotton/wool? suiting blend I found in the Walmart dollar section. At least I suspected there was wool in it, but now I am not so sure. That mystery $1 fabric section at Walmart is such an adventure! 🙂
Okay…back to the dress. Instead of cap sleeves, I added a gathered long sleeve.
This is pretty simple to do. Gathered sleeves can be quite forgiving because you don’t necessarily have to get the sleeve curve precise for it to work.
Here is a quick mini tutorial on how to make a curved gathered/puffed long sleeve.

1. Take the cap sleeve pattern, trace it and then widen it 2-3 inches it so that you can gather (puff) the sleeve.
2. Take the bodice pieces and trace the arm curves to get approximate curves for the sleeve. Be sure to label the front and back curves which vary a little bit.
3. Extend the sleeve pattern to the desired length. Use one of your child’s shirts to make sure it is the proper length if needed. Be sure to include another inch or so to account for the sleeve hem or an elastic casing if you want one.
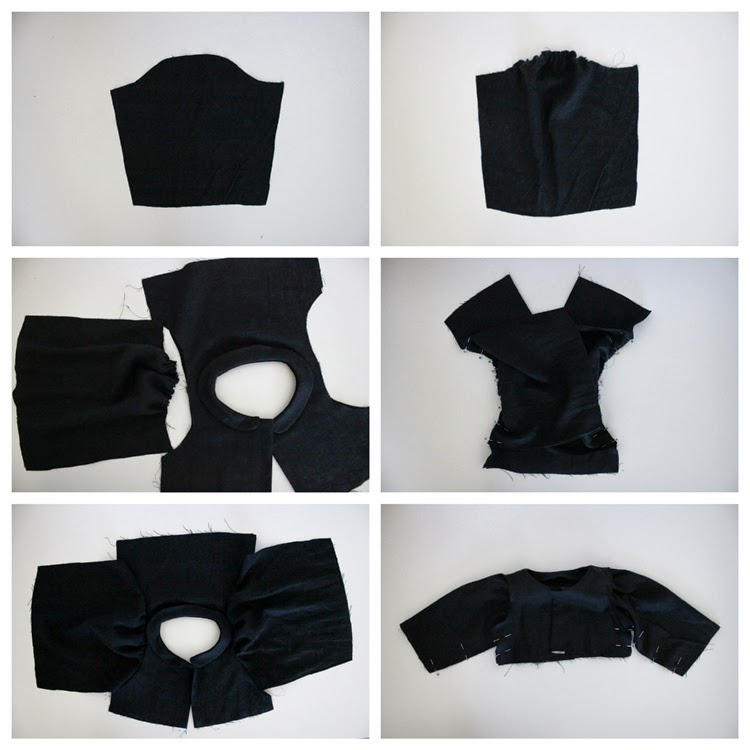
4. Use your new sleeve pattern to cut out two sleeves.
5. Gather the sleeve, sewing just the “hump”of the sleeve.
6. Sew up your bodice except for the sleeves. Pin the gathered sleeves into the bodice, right sides together.
7. Now, fold the bodice together, right sides together. Pin up the sleeves and down the sides of the bodice. Sew. Finish raw seams with an overlock (serged) stitch or a zig zag stitch.

8. Turn the bodice right side out.
9. Finish the raw edges of the sleeves with an overlock or zig zag stitch. Fold and press the edges under to the wrong side about 1/2 inch.
10. Sew around close to the raw edge to create a casing and leave about a one inch opening to thread elastic through. Pull elastic tight to desired width, sew elastic ends together and sew opening closed.
11. Good job. Sleeves are done!
Now, this is a less refined/less clean way to sew the sleeves. You could make it cleaner by adding a lining to the sleeves if you desire, or double rolling the hem casing…etc.
One other change I made to the dress was to add a bleached twilight like sunset. It didn’t turn out as awesome as I imagined, and it kind of gets lost in the volume of the skirt but I’ll share what I did nonetheless.
*I folded a long strip of freezer paper into fourths.

* I drew a scene of houses and cut them out.
* Then lined up the houses along the hem of the dress and ironed them place.
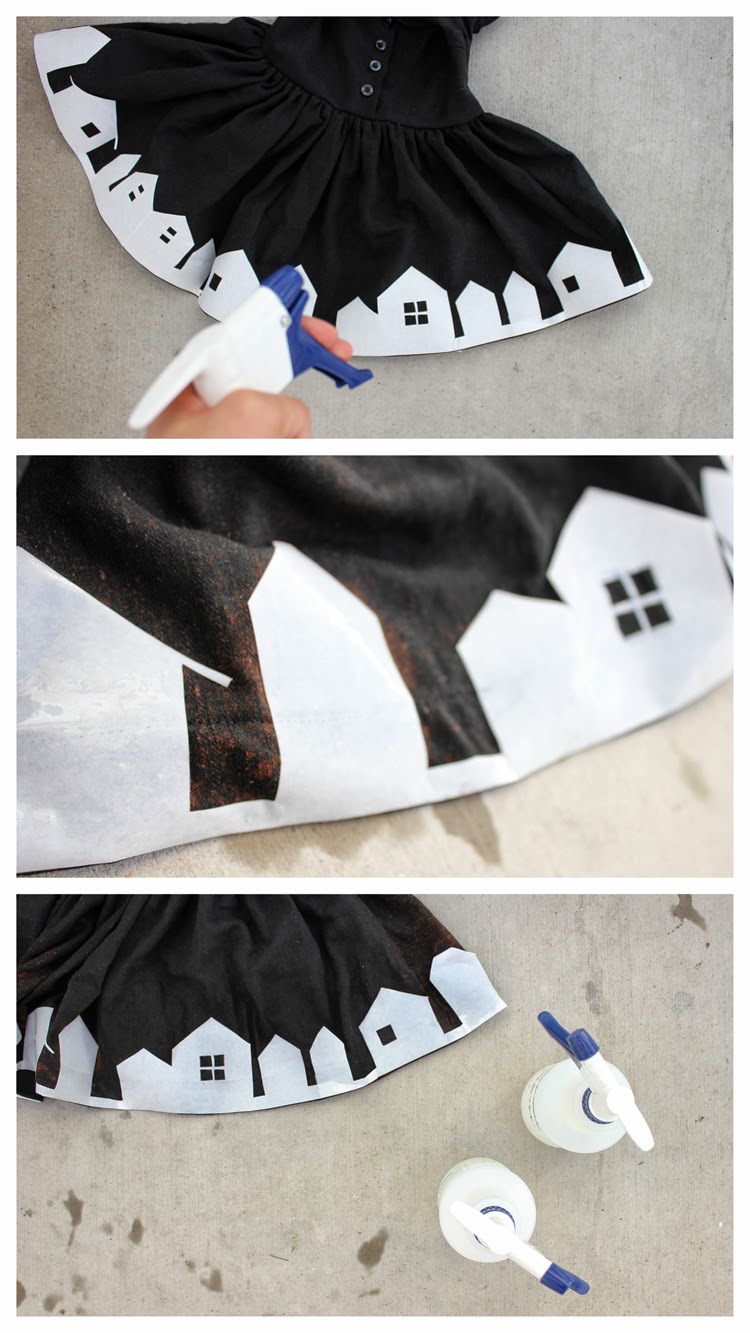
* I diluted bleach about 3 parts bleach to 1 part water and spritzed it around the hem with a spray bottle.
* Once the bleach started to take and I got the effect I desired, I spritzed on some white vinegar to stop the bleaching process (a great tip I learned from my friend Sabra).
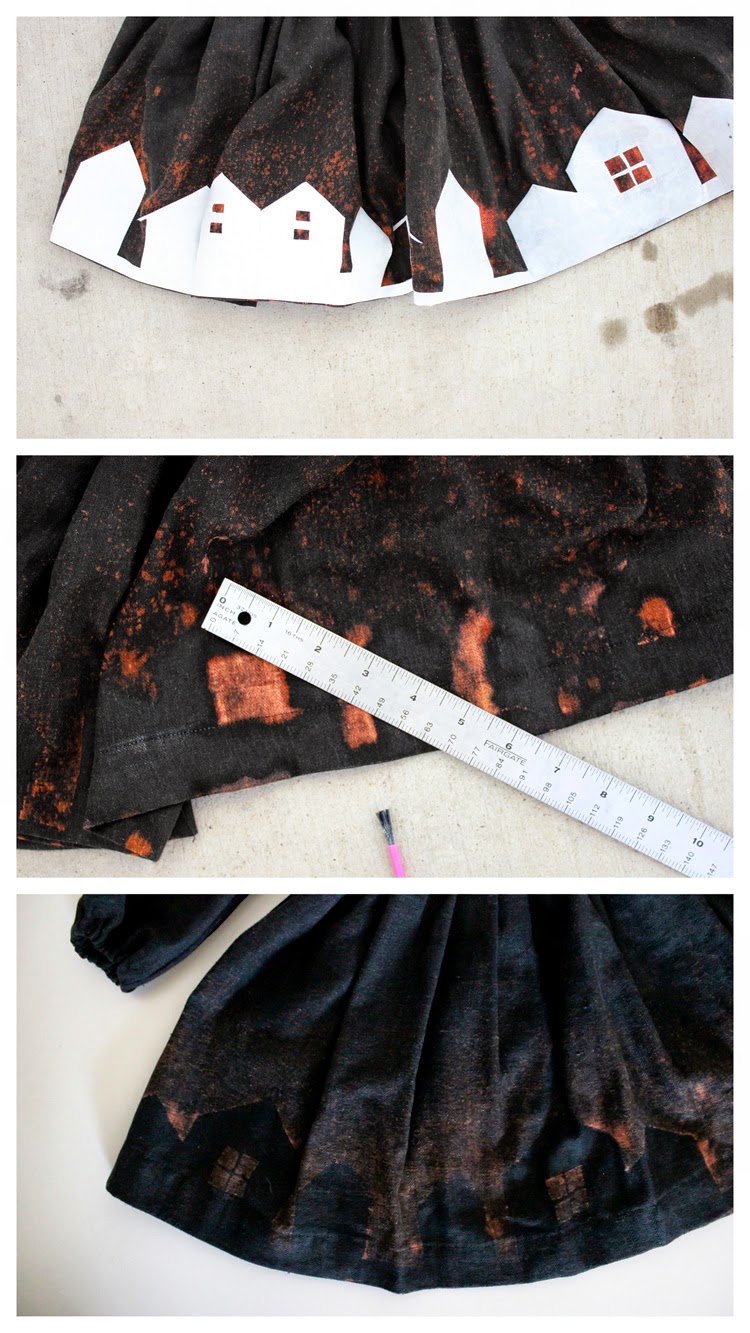
Pretty cool right?
I wish I could say it worked perfectly. And…it mostly did, but just on the back. On the front I tried spritzing it with some bleach that had expired. I didn’t know bleach could expire actually, but apparently it can lose potency over time. I didn’t realize what the problem was, until I had already pretty much soaked the front hem. It made the front a bit blotchy which I tried to fix with a paint brush and some bleach. meh…
.jpg)
It’s kind of cool and raw which plays into the witch theme nicely, but it also drives me nuts. 🙂
I really want to try this method again, but maybe around the hem of a boy’s shirt. Maybe on a blue shirt it could look like a starry night sky? Fun stuff.

Alright…I’ve got one more witch post coming up. (cackle) 😉
I’ll be sharing a tutorial on how to make a witch’s hat in any size on Monday. See you then my pretties!
Ha ha, Thank you Delia!
She is a beautiful witch.
Cute dress. =) It's too bad the bleaching didn't all turn out like the back of the dress… where it worked it looks really cool. =)
That is a totally cool trick! Great costume, and thanks for the tutorial on puff sleeves! Needed that!
This comment has been removed by the author.
Wonderful… It's a great idea! And my daughters ask me to do it…. Thank you Delia!!!
Seriously the cutest witch dress ever!!
too cute ! thanks for sharing ! i posted the link here : http://www.pinterest.com/lemondedis/halloween-diy/
Love love love, making the witch cape right now, and now I want to make this!! Thank you for great tutorials!
Thanks Gretchen! 🙂