• Skip to primary navigation
  • Skip to main content
  • Skip to primary sidebar
  • Skip to footer
  • Home
  • BLOG
  • TUTORIALS
    • Free Patterns
    • Free Printables
    • SEWING
      • Technique
    • CRAFTS
      • Printables
    • CROCHET
    • Baby
    • KIDS
      • Boys
      • Girls
      • KIDS CREATE
      • Lego
      • Parenting
    • Women
    • Men
    • Holiday Projects
      • Birthday
      • Valentine’s Day
      • Easter
      • Spring
      • Mother’s Day
      • Father’s Day
      • Summer
        • Color Your Summer 1
        • Color Your Summer 2
        • Color Your Summer 3
      • Halloween
      • Autumn
      • Thanksgiving
      • Christmas
      • Winter
    • Accessories
    • Home Projects
    • No Sew
    • Gift Ideas
      • Teacher Appreciation
    • Party Ideas
    • Photography
    • RECIPES
      • Allergy Friendly
      • Baking
      • Sweet
      • Savory
      • Beverage
      • Breakfast
      • Holiday
      • Soups
      • Vegan
  • SHOP
    • SHOP
    • Cart
    • ACCOUNT
  • ABOUT
    • CONTACT
    • Featured
  • SPONSOR
    • PRESS
  • Privacy Policy
  • TERMS OF USE

delia creates

sewing, tutorial, women · November 23, 2011

cardigan conversion

This is a re-post of my guest post at I Am Momma Hear Me Roar, for Cheri’s Refashionista series.I hope you’re enjoying your Thanksgiving holiday.
_____________________________________________________Hi I Am Momma readers! I am thrilled to be here today.
Cheri’s blog is full of wonderful creative inspiration for crafting, for motherhood, and for life. So I’m pretty honored to be her guest today!

I love re-purposing projects, because you get to take something useless to you and make it useful again…or maybe even something you love. 🙂
Such is the case with some too tight, too short sweaters I had, that I converted to cardigans.
I know, I know…this has been done before – a lot,
but this is my version of a:


With most cardigans you have buttons that line the length of it so you could technically wear it as a blouse if needed.


With these cardigans, because they are starting out as too tight and too short sweaters, there are only two to three buttons that clasp the cardigan partially closed. This is how I wear most of my cardigans anyway…so it works!


This idea is really simple, but I provide some tips and detailed methods to help you achieve a durable, beautiful outcome.
Materials:
You just need two strips of matching or complimentary fabric, about 2 inches wide and at least 2 inches longer than the length of your sweater down the middle. A cute fat quarter will work for many sweater lengths and gives you plenty of fabric. If you want your cardigan to clasp close you will also need some buttons, or toggles and some elastic.Matching thread looks best…but as you’ll see I didn’t for two of my cardigans. You use so little thread with this project…and I’m cheap. :)Let’s begin.


1. MAKE SURE you pre-wash your fabric. This is an absolutely must. If you skip this step, the fabric will shrink, and pucker and pull on the sweater in unattractive ways when you wash it.
2. Measure and cut your fabric strips. Two inches wide and at least two inches longer than the length of your sweater down the middle.
3. Cut your sweater down the middle. I made some faint marks with a ruler and pencil to make sure I cut it nice and straight. *Be careful not to stretch your sweater as you measure and cut.
4. Iron one long side of your fabric strips under about 1/4 of an inch.


5. Pin and sew the fabric strips to the cut portion of your sweater. You want right sides together. The side with the fabric ironed over is the wrong side. Don’t skip the pinning. Sweaters often stretch and pull. Pinning will help you keep everything even and where it should be.
Also, I highly recommend you increase your stitch length a bit since you are working with sweater knit. It will pull on the fabric less, create more even stitches with no skipping…just a good idea. You probably should also use a ball point needle made for knits…but I didn’t. I just used a universal needle with an increased stitch length.


6. Flip the fabric strip over and fold under each side of the sweater/cardigan. Fold the top and bottom portions under as well. Pin {don’t skip this} and sew. You can sew near the inside seam, or not. I didn’t for this one, but did for others.

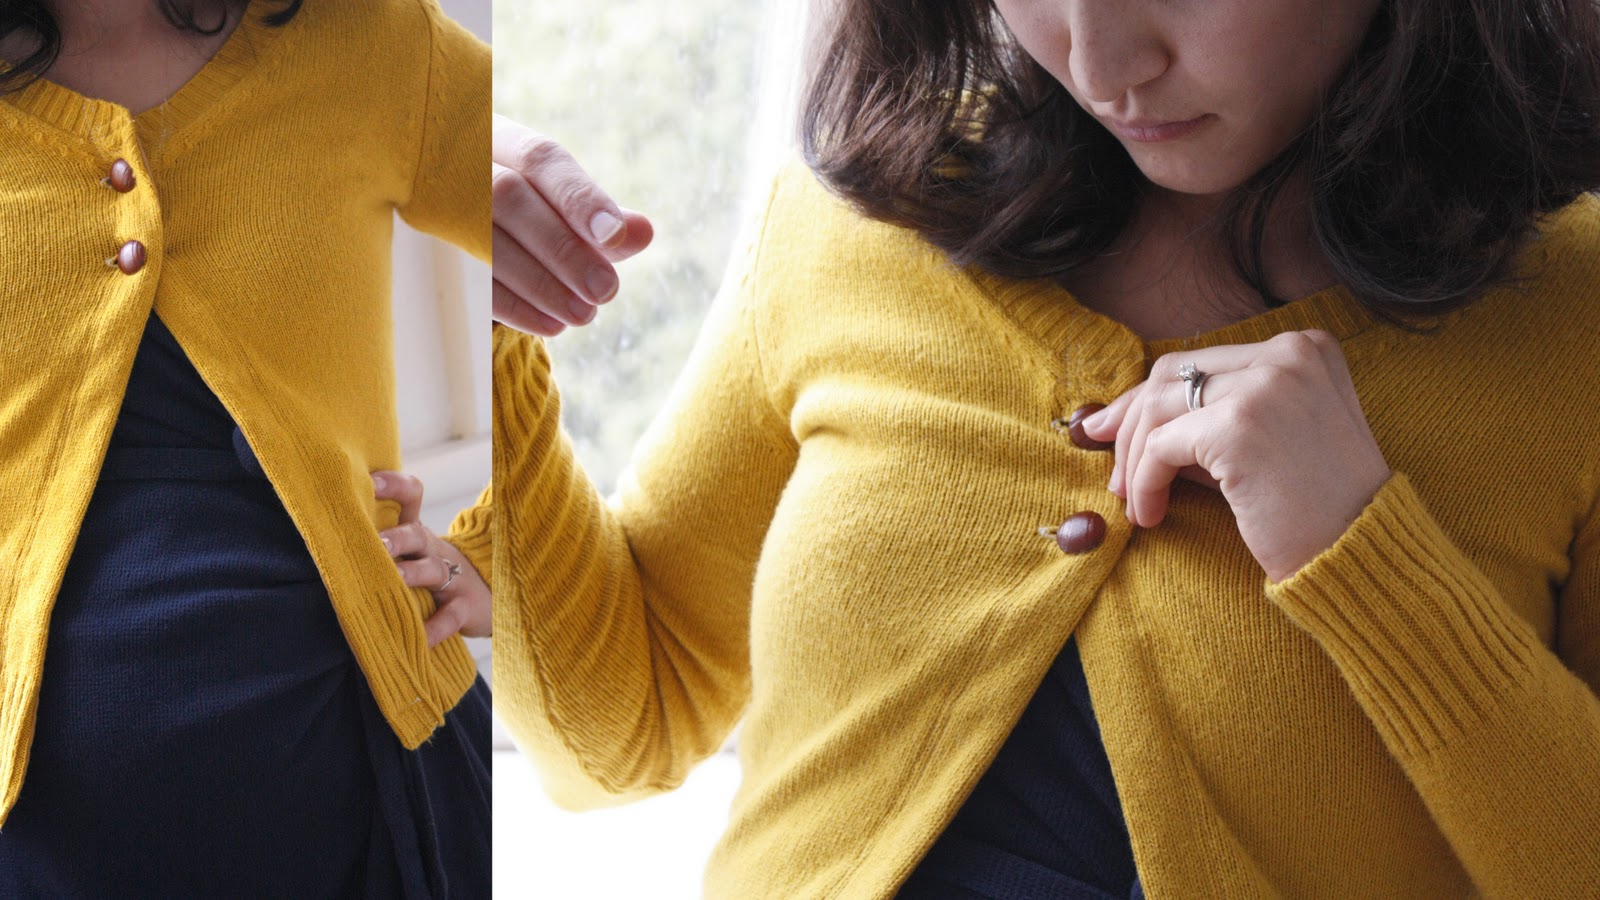
7. Last step! 🙂 You can just leave it as is, or add buttons. Remember what I said about increasing your stitch length? Well…I should have done it with my button holer too. I didn’t with this yellow cardigan and the button holer kept breaking my thread, stretching my fabric and ended up giving me less than desirable results.

I increased my stitch length as much as I could with this purple cardigan and achieved MUCH better results. This is also a thick knit shirt, instead of a sweater knit, so that might have helped too.

Don’t know how to use a button holer? This tutorial from MADE or this one from Grosgrain can help you. I learned from the Grosgrain one because I have a Brother sewing machine like Kathleen.


For this tan cardigan I put in toggles. I just picked up some toggles in the buttons/notions aisle at Jo-Ann and snagged some tan ponytail holders from Walmart. For my sweater I only needed two ponytail elastics, half of one elastic for each loop.

At step 5, just sandwich the elastic in between the fabric strip and sweater and sew it in. Make sure to go back and forth over it a few times to strengthen the seam where the toggles are.  It can be fussy to get the elastic sewn in initially, but with a little patience it turns out quite nicely.

I also top stitched over the inside seam when I was done, to strengthen the seam and toggles even more.


And now, I have three cardigans I love…

…instead of of three sweaters/shirts I was going to give away.

Bonus…I don’t have to worry about them fitting over my ever growing belly either. 🙂


P.S. If you’re wondering how these wash. I just washed mine and they did great. Just remember to follow original washing instructions for the sweater you re-fashioned. Depending on what fabric you choose to line the inside with, you might need to re-press it after each wash. If you use a cotton fabric like I did you shouldn’t have to worry about that.

Thanks for having me over Cheri!

Happy Re-fashioning!


Previous Post: « Deck the halls with Moss
Next Post: more pie please… »

Reader Interactions

Comments

  1. KillerB says

    November 23, 2011 at 6:08 PM

    What a great tutorial — thank you so much for sharing. This may have to be a project for me this weekend!

    Reply
  2. Meg says

    November 23, 2011 at 6:32 PM

    You are so creative! Thanks for posting this cool tutorial.

    Reply
  3. Lover of Vintage says

    November 23, 2011 at 7:02 PM

    what a fantastic idea, love it! Can't wait to try it!

    Reply
  4. Rach H @ FamilyEverAfter says

    November 23, 2011 at 7:48 PM

    you look fantastic! these are amazing. i just cleaned out my closet, and saved a few sweaters just to do this. thanks so much for the inspiration!!!

    Reply
  5. Christie says

    November 23, 2011 at 10:08 PM

    Love these so much! You look great in them!

    Reply
  6. Danielle Renee says

    November 24, 2011 at 12:47 AM

    Each one is great with in its self! I especially like the white one with toggled buttons.

    Reply
  7. Caitlin Weaver says

    November 26, 2011 at 7:38 AM

    These are really cute. I loved wearing my cardigans like that when I was pregnant too 🙂

    Reply
  8. Sew Much Ado says

    November 26, 2011 at 4:06 PM

    Great idea! I love all the versions, and have some perfect sweaters in my closet to make my own – yay!

    Reply
  9. [email protected] says

    November 28, 2011 at 9:31 PM

    I love this!! Thanks for helping me give new life to old sweaters…and an outfit to wear to thanksgiving!! http://buzzmills.typepad.com/blog/2011/11/giving-thanks-to-clothing-redos.html

    Reply
  10. Tiffany says

    December 1, 2011 at 4:56 AM

    I’m so doing this!

    I just wish I found this before making a stuffed animal out of a too small cashmere sweater:(

    Reply
  11. dana says

    December 6, 2011 at 3:11 AM

    can you tell i'm super behind on blogs? :). I love this post. I remember being wowed when I saw it on I am Momma. Very creative and you look totally adorable.

    Reply
  12. Jill says

    December 25, 2012 at 6:32 PM

    Thanks for this tutorial! I needed a cardigan, and now I have one fewer sweater I never wear. (And I like the new cardigan better than any I've found in the store so far!) Thanks again!

    Reply
  13. MrsJusty says

    April 22, 2013 at 10:29 AM

    Hi Delia,

    I have just been inspired by this blog post and have done a similar thing with one of my v-neck jumpers…such an incredible change! It was destined for the charity shop, now has a new lease of life!

    I was in a motorcycle accident last week and have been trawling the internet for cheap ways to keep myself occupied in my sewing room whilst I'm off work. This was

    Reply
  14. Tammy says

    February 12, 2014 at 11:04 PM

    Hi Delia,
    Thank you so much for your tutorial. I have thought about doing this with my sweaters but didnt know how to go about doing it. Thank you so much for the help!

    Reply
  15. We Should Practice says

    September 5, 2015 at 1:45 AM

    We love the cardigans and also would like to know how to make the navy blue dress that you wear with the yellow cardigan please?

    Thank you
    WSP

    Reply
    • Delia says

      September 9, 2015 at 6:03 PM

      hi! Sorry, I made that a long time ago and just sort of winged it. Wish I made a tutorial, but unfortunately did not.

      Reply

Trackbacks

  1. Tutorial: Transforming a polo-neck jumper to a maternity* cardigan | ...by Catriona says:
    September 15, 2014 at 12:07 PM

    […] you could add a top button if you fancied, like Delia does here. She also uses fabric to finish off her raw edges, giving a (probably better!) finish to the front […]

    Reply
  2. Turbózd fel a kismama ruháid: otthon! | pecsma.hu says:
    October 16, 2014 at 2:33 AM

    […] ráadásul nem kell eldobnunk várandósság után sem, ugyanúgy használhatjuk kardigánként. EZEN az oldalon megnézhetjük, hogyan készül egy ilyen […]

    Reply

Leave a Reply Cancel reply

Your email address will not be published. Required fields are marked *

Recipe Rating


This site uses Akismet to reduce spam. Learn how your comment data is processed.

Primary Sidebar

Search this site:

Reader Perks

Reader Perks

Footer

  • Facebook
  • Instagram
  • Pinterest
  • YouTube

All Images On This Site Are Protected By Copyright

You may not use any images from this site unless you meet one or more of these requirements: 1) You receive permission in writing from Delia Randall for each specific image you would like to use. 2) You use ONE image in a round up or feature post with a link back to the appropriate post or the main site for credit and for full posts/tutorials. Thank you!

Archives

Search This Site:

© 2023 delia creates · Design By Bloom