

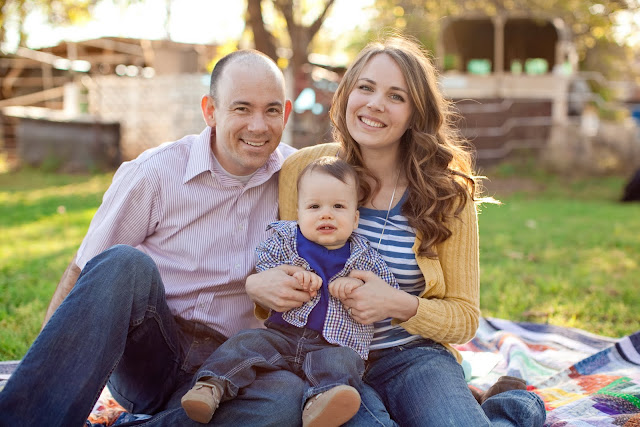
Aren’t they such a beautiful family?


Hello All!
I think we can all agree that Delia has some amazing craft/sewing talents! I’m so excited to get to share a little bit of what I know with all of you. I’m going to show you how to take pictures like this….

and this:

It’s really nothing fancy – but it always helps to have fun hats and an adorable subject!
So here’s what you need:
-A window that gets lots of sunlight
-A white sheet
-Tape or tacks to hang white sheet to wall
– Photo editing software ie Photoshop
– Digital SLR camera
Before we start I just want to say that I’m just showing you what I do, but don’t hesitate to try something new or experiment a bit.
First, you want to look for a window (preferably large) that gets great light exposure. We’re talking fills up the whole room with light or the one that you have to hang an extra sheet over to keep the room dark.
Second, find a wall/table/couch/etc close to the window that you can use for your back drop or to hang a sheet from. I’ve used the back of my couch and hung a sheet over it – I’ve even used my bed spread and just pulled it over the side of my bed. Experiment – explore – move things around – tape and tack things – and find what works best for you.
Third, it’s helpful to have a basic knowledge of how to work your camera.
There are 3 things to be mindful of:
ISO: Because you are shooting in doors you will want to have your ISO higher (this allows your camera to let in more light when it is too dark), it could be anywhere between 600 – 1600 depending on your light source. I recommend shooting at the lowest ISO possible to keep image quality high, but it’s okay to go up to 1000 or more.
Aperture or F/stop: It is nice to have a portrait lens. Most cameras come with a basic 18-55mm 3.5f stop. This if fine but it will limit you in some aspects. Typically a 50 mm 1.4f is a good lens to start with. Having a 1.4 or 1.8f stop will allow you to let in more light and will give you better depth of feild (that nice in focus look while everything in the back ground is out of focus).
In a nut shell shoot at your lowest f-stop possible with your lens, especially if you have a 3.5f stop.
Shutter Speed: You want to try to keep your shutter speed above 1/60th although I would recommend keeping it above 1/80th or 1/100th. I’ll be sure to mention what I was shooting at for the sample image in the tutorial, to give you an idea of where you should be at.
If you are still confused I would highly recommend the book, Understanding Exposure. You can probably find it at your library.
Here is a look at my set up (ps sorry this is bad quality – it’s a screen shot from a video I attempted to make for this but it didn’t work out)

Don’t be scared to move things around – I moved an end table and a trunk to make room for my little studio set up. I’ve also moved couches to get go window light and there are many times I’ve considered moving my bed! Once you have it all set up start playing around – This set up is ideal for head shots/half body shots.
TIP 1 – Try to get your sheet to lie flat against the wall as it helps in the post processing section. Place your subject at least 2 feet away from the wall (optional) as to help give you more depth of field which will help in the post processing section as well.
TIP 2– Shoot at your lowest f-stop ie 1.4 or 3.5 to make more light available. If the image is too dark try bumping up your ISO.
______________________________________________________________________________
Once you have your image, upload it to your photo editing software and pick out your favorites – here is where it all comes together. See the video below…After it loads (give it a minute 🙂 Just press play!
NOTICE: This was my first time using this program and the arrow is delayed in some instances so I’m sorry for that – If you have questions feel free to email me.
Well that’s it – I hope it was easy enough and I didn’t confuse you too much! The most important thing is to keep experimenting and trying!
________________________________________________________________________________
Have a wonderful day!
Great tips and super user friendly!
Great tips! I need a new camera. One that will let me change the aperture. What an adorable family.
Great post! Thank you for the tips. I have a few photography books but this is so much easier.
Thanks for a nice share you have given to us with such an large collection of information. Great work you have done by sharing them to all. simply superb. Photo Recovery