

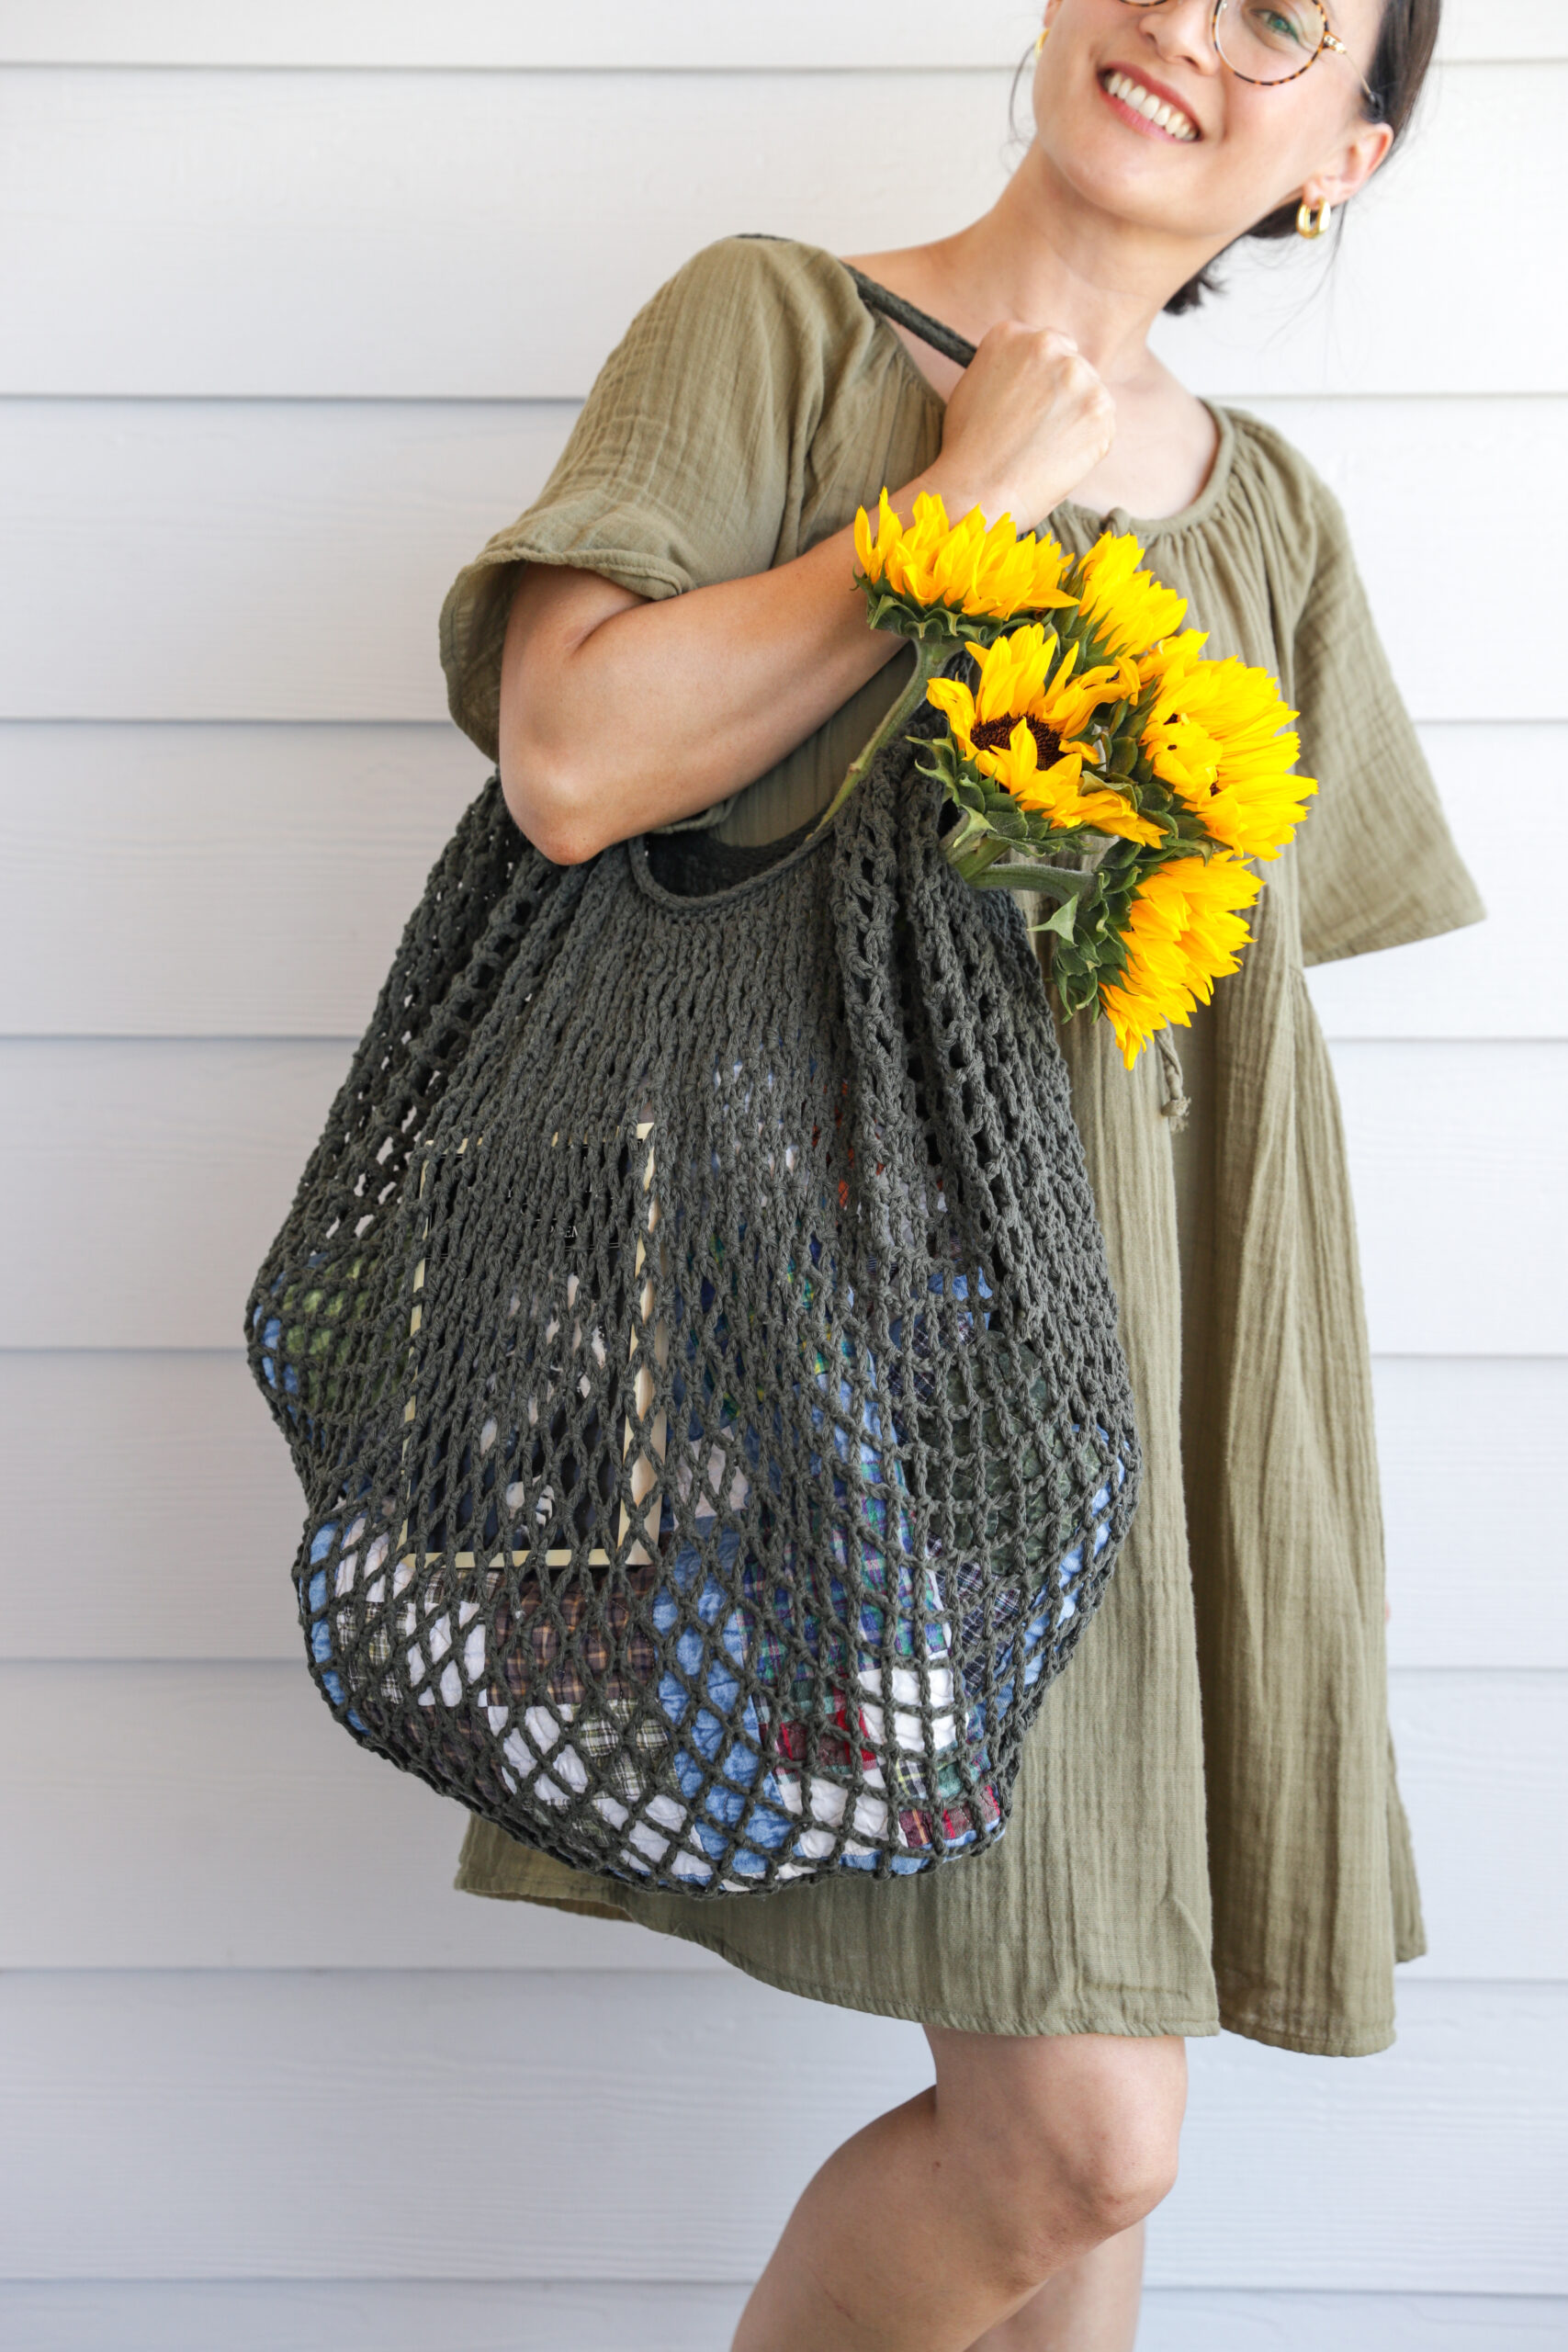
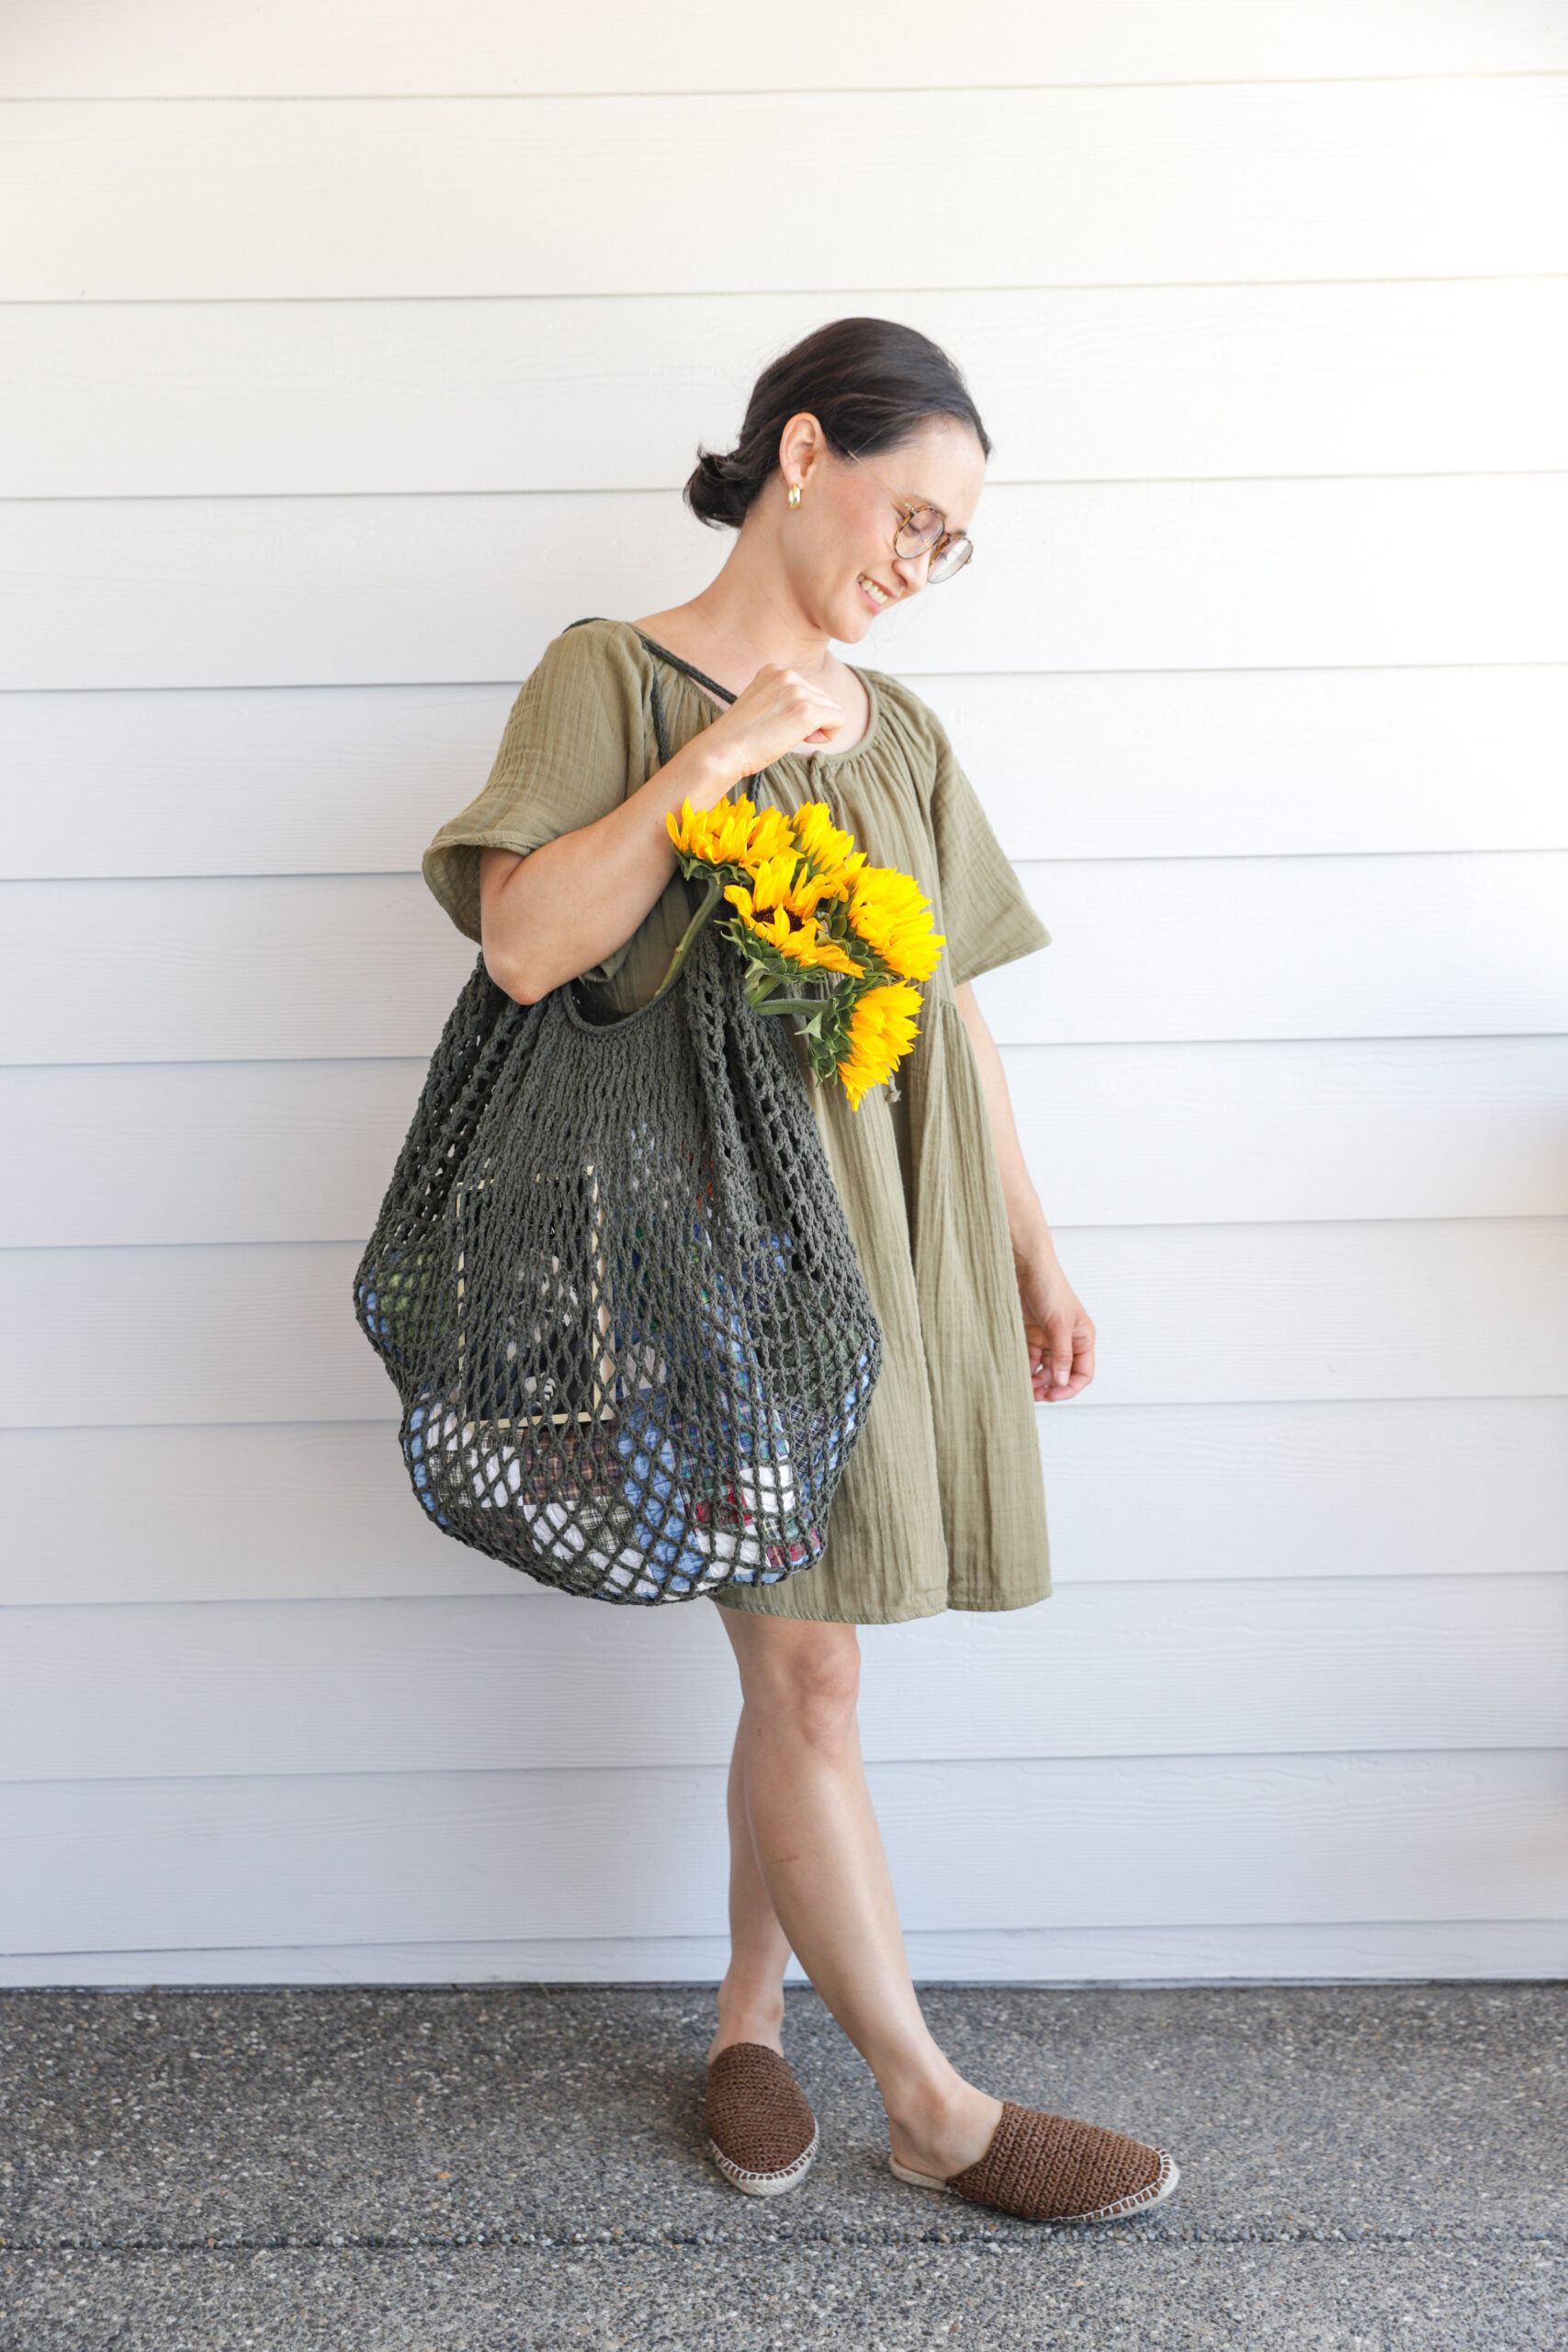
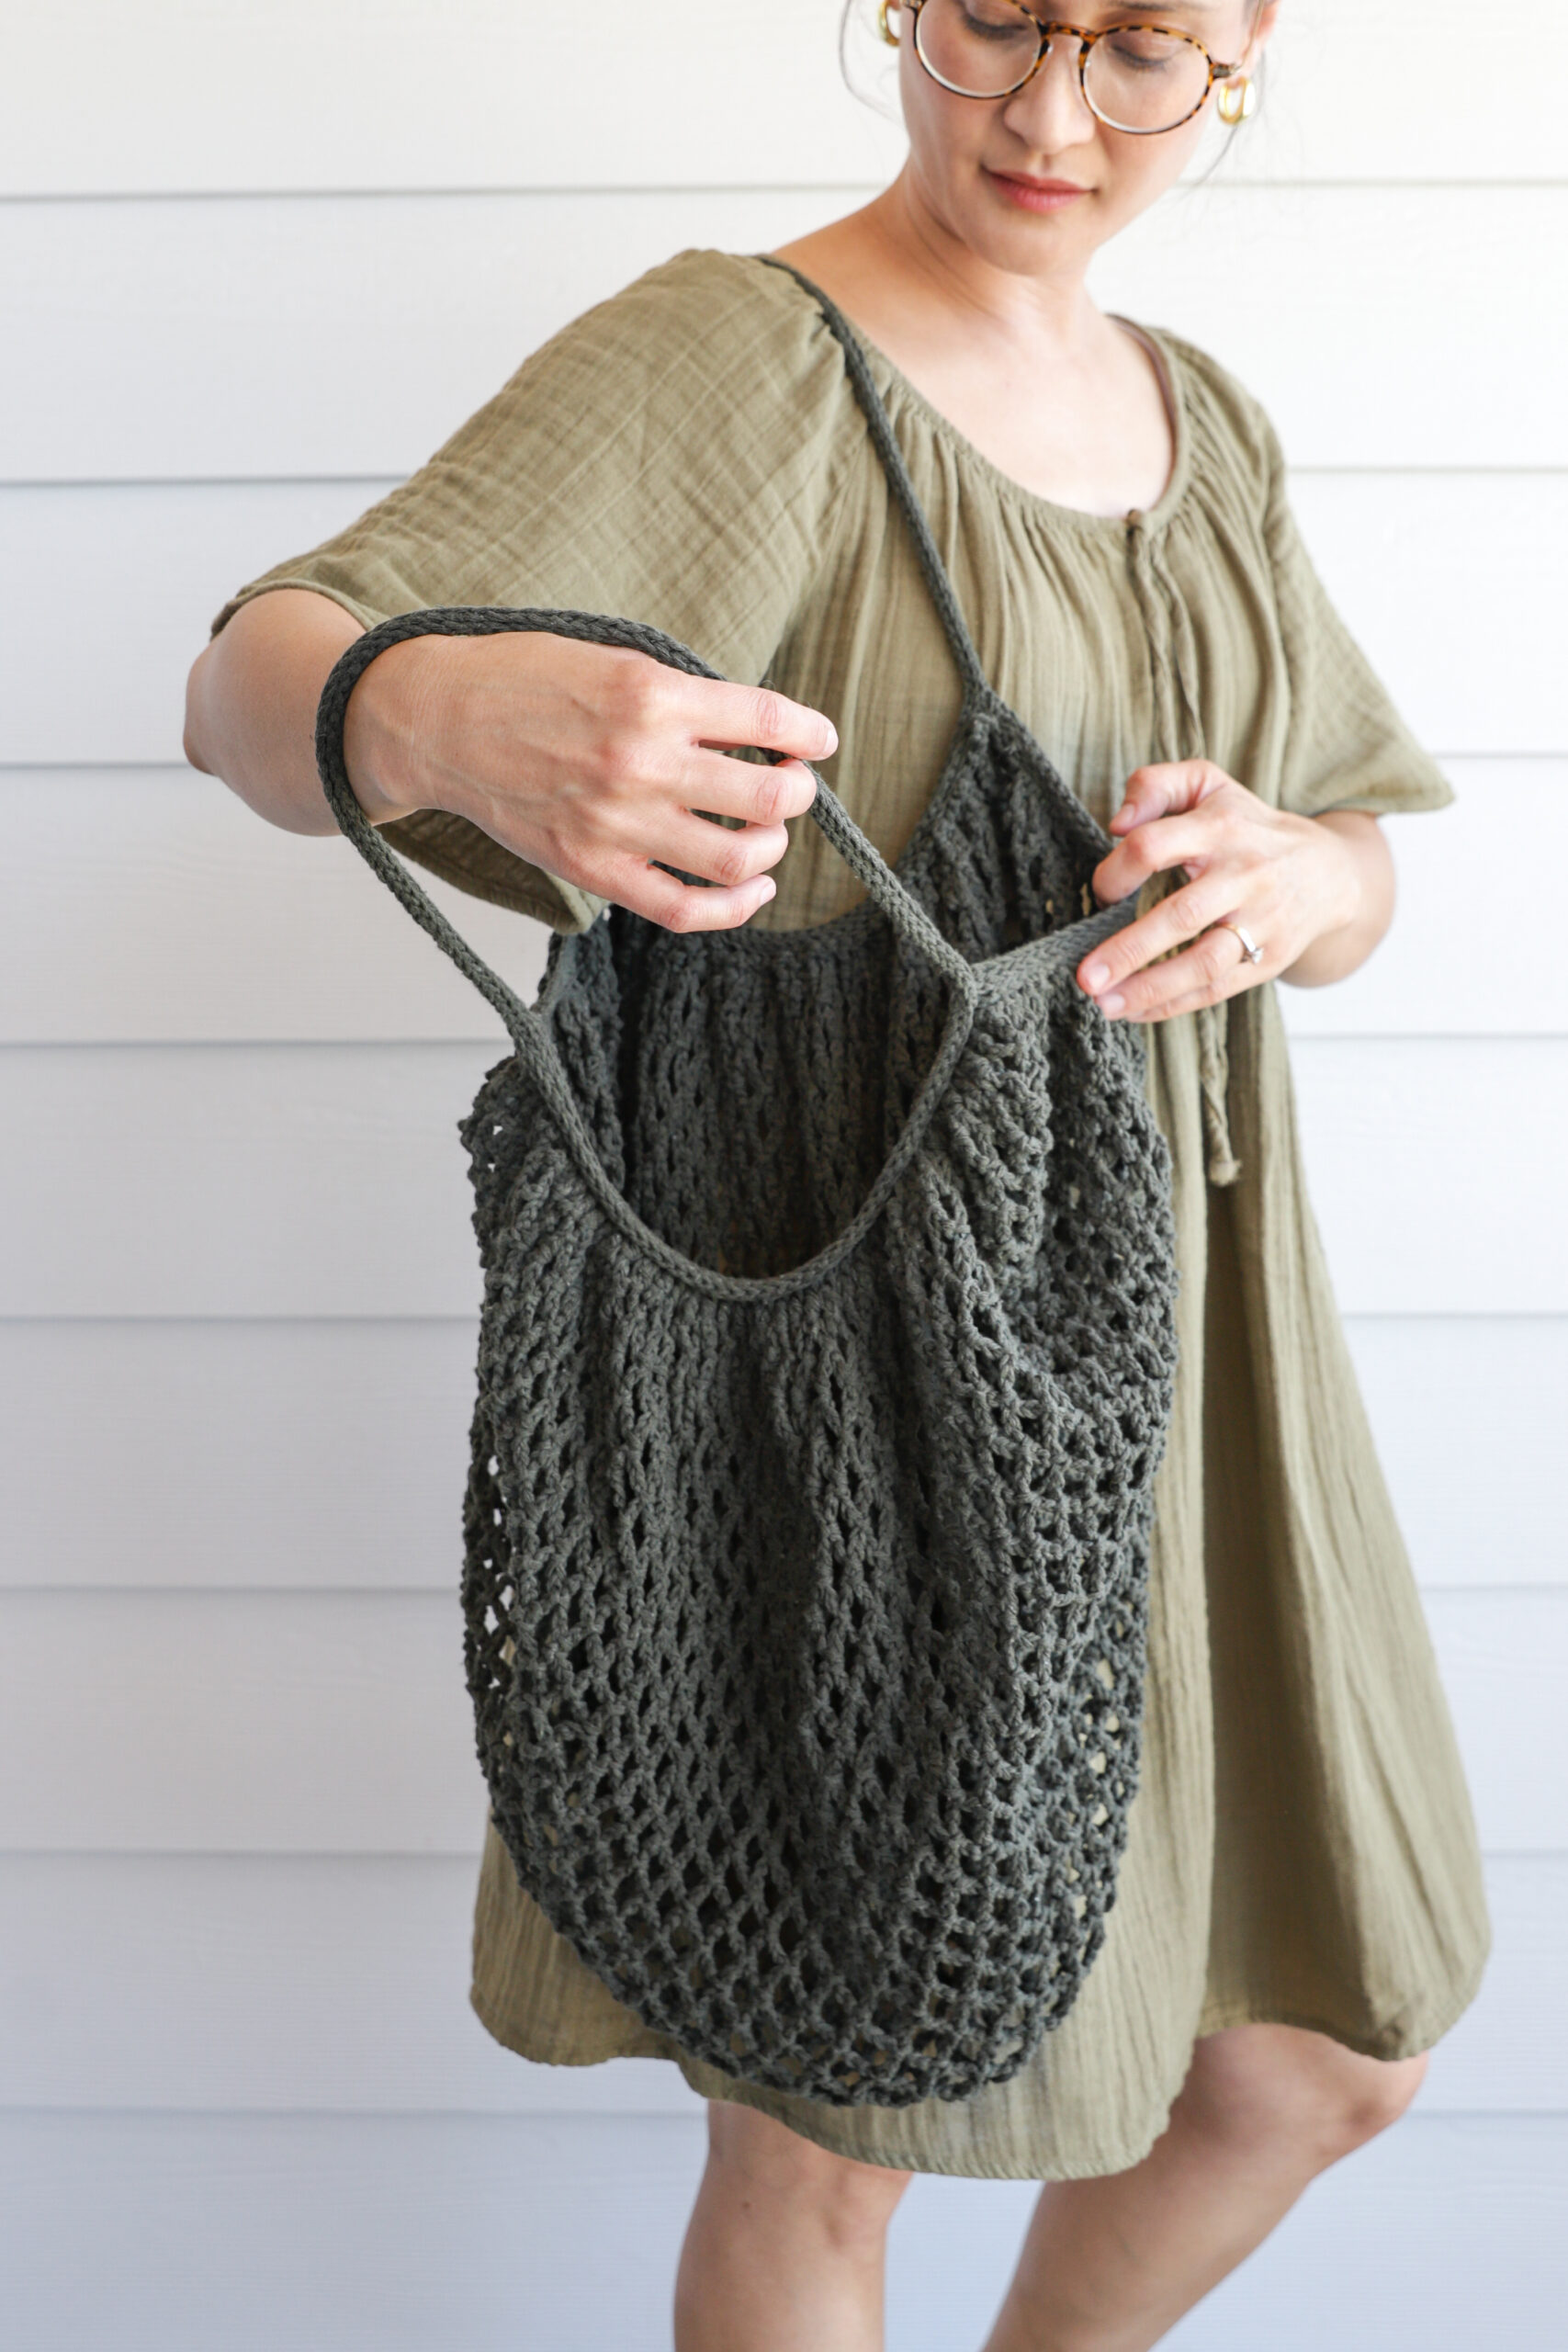
You know those iconic French market bags that you dream of taking to a farmer’s market and stuffing with fresh bread, local fruit, and curated aesthetic vibes? This mesh market crochet bag is that, but I would argue serves a better purpose carrying other things…more on that at the end of this post. 😉
The best thing about this bag though is that it is literally made up of just chains and single crochet. Say what? Yes, the most basic of basic crochet stitches.
Now here’s where I would normally say that the basic stitches makes it great for a beginner!…. but I’m not going to say that this time. Because it also takes patience and a little bit of experience to deal with the slip stitch tension and the split prone cotton yarn. When you’re learning a new skill, you’re already probably hitting your patience limit, so I recommend checking out my Crochet Basics Series first. Do at least the first two lessons/projects which teach you how to chain and how to work a single crochet in rows. Single crochet is not slip stitching but it’s similar and working a small rectangle of rows is how this bag starts.
Let’s get into it.
MATERIALS
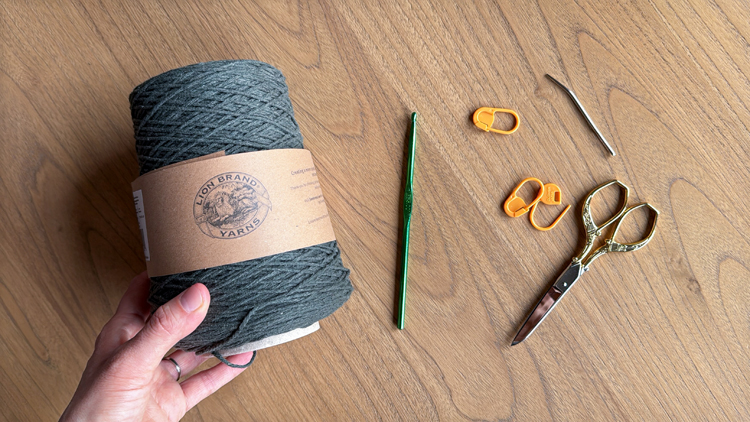
- 525 yards or 320 grams of worsted weight cotton yarn*
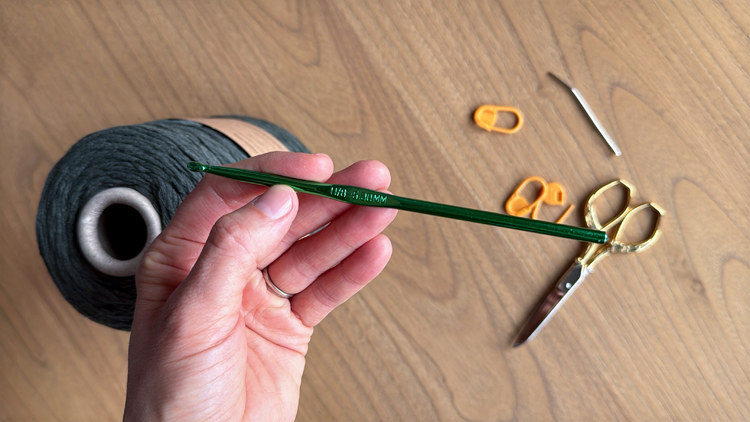
- 5.00 mm crochet hook
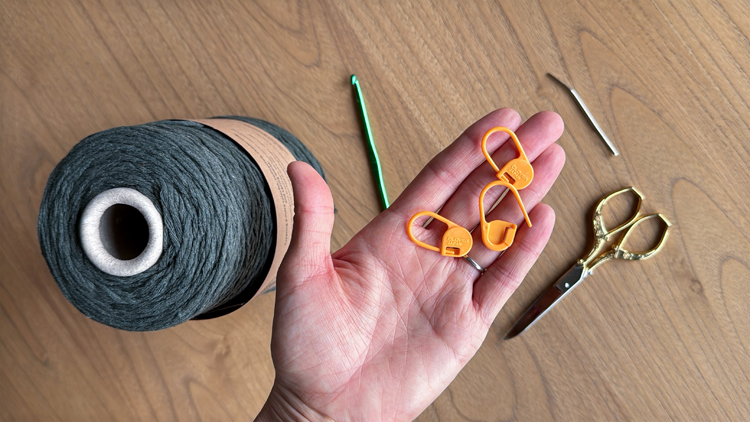
- Stitch Markers (optional)**
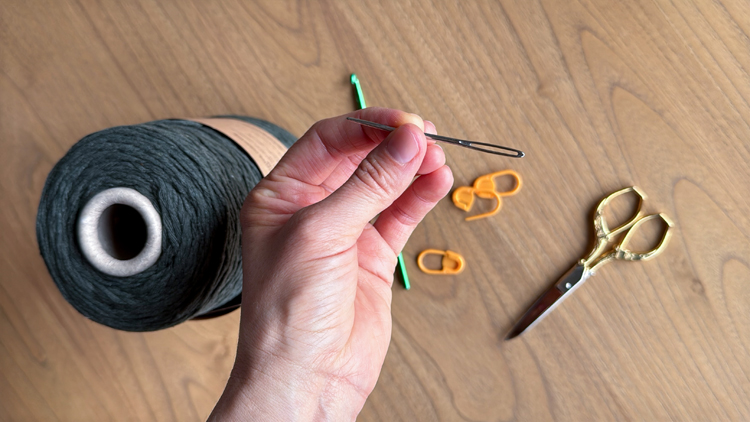
- Yarn needle (with a large eye) and scissors
Material Notes
*I used RE-UP recycled cotton/polyester yarn from Lion Brand (link is an affiliate link but doesn’t alter your price). Any kind will do but I do recommend using a non-shiny or mercerized, stiffer cotton. It creates a sturdier more substantial bag. Warning: It also tends to split which can be frustrating but gets easier to manage and avoid with experience.
**Stitch markers are optional because they only help with row counting. This can be harder to keep track of with the mesh rows, so I recommend using something to keep you from having to count and recount a bunch of times. You can also use small pieces of ribbon or yarn in contrasting colors.
GAUGE
For mesh portion:
4 x 4 inches = 9 rows (slip stitched points) x 8 slip stitch points (chains are not counted)
Honestly, creating a test swatch for this would be annoying. What I would do, is use my starting slip stitch rectangle size as a guide for when you start the pattern.
Starting slip stitch rectangle which consists of 27 stitches and 5 rows =
.75 inches tall x about 8 inches long
If your rectangle is larger then go down a hook size. I mean noticeably larger, slightly larger or smaller should be fine. If it’s too tight, you’ll know because it will be hard to get your hook to go into any of the stitches, then you may need to relax your tension and go up a hook size.
As you work your mesh stitches, you may use the gauge as a guide after a few rows. If it doesn’t match, you can pull out your stitches and adjust your hook size just for the mesh portion before you get too far.
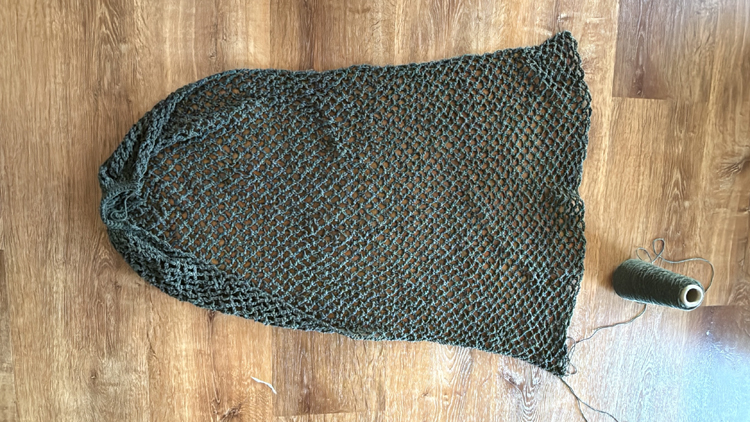
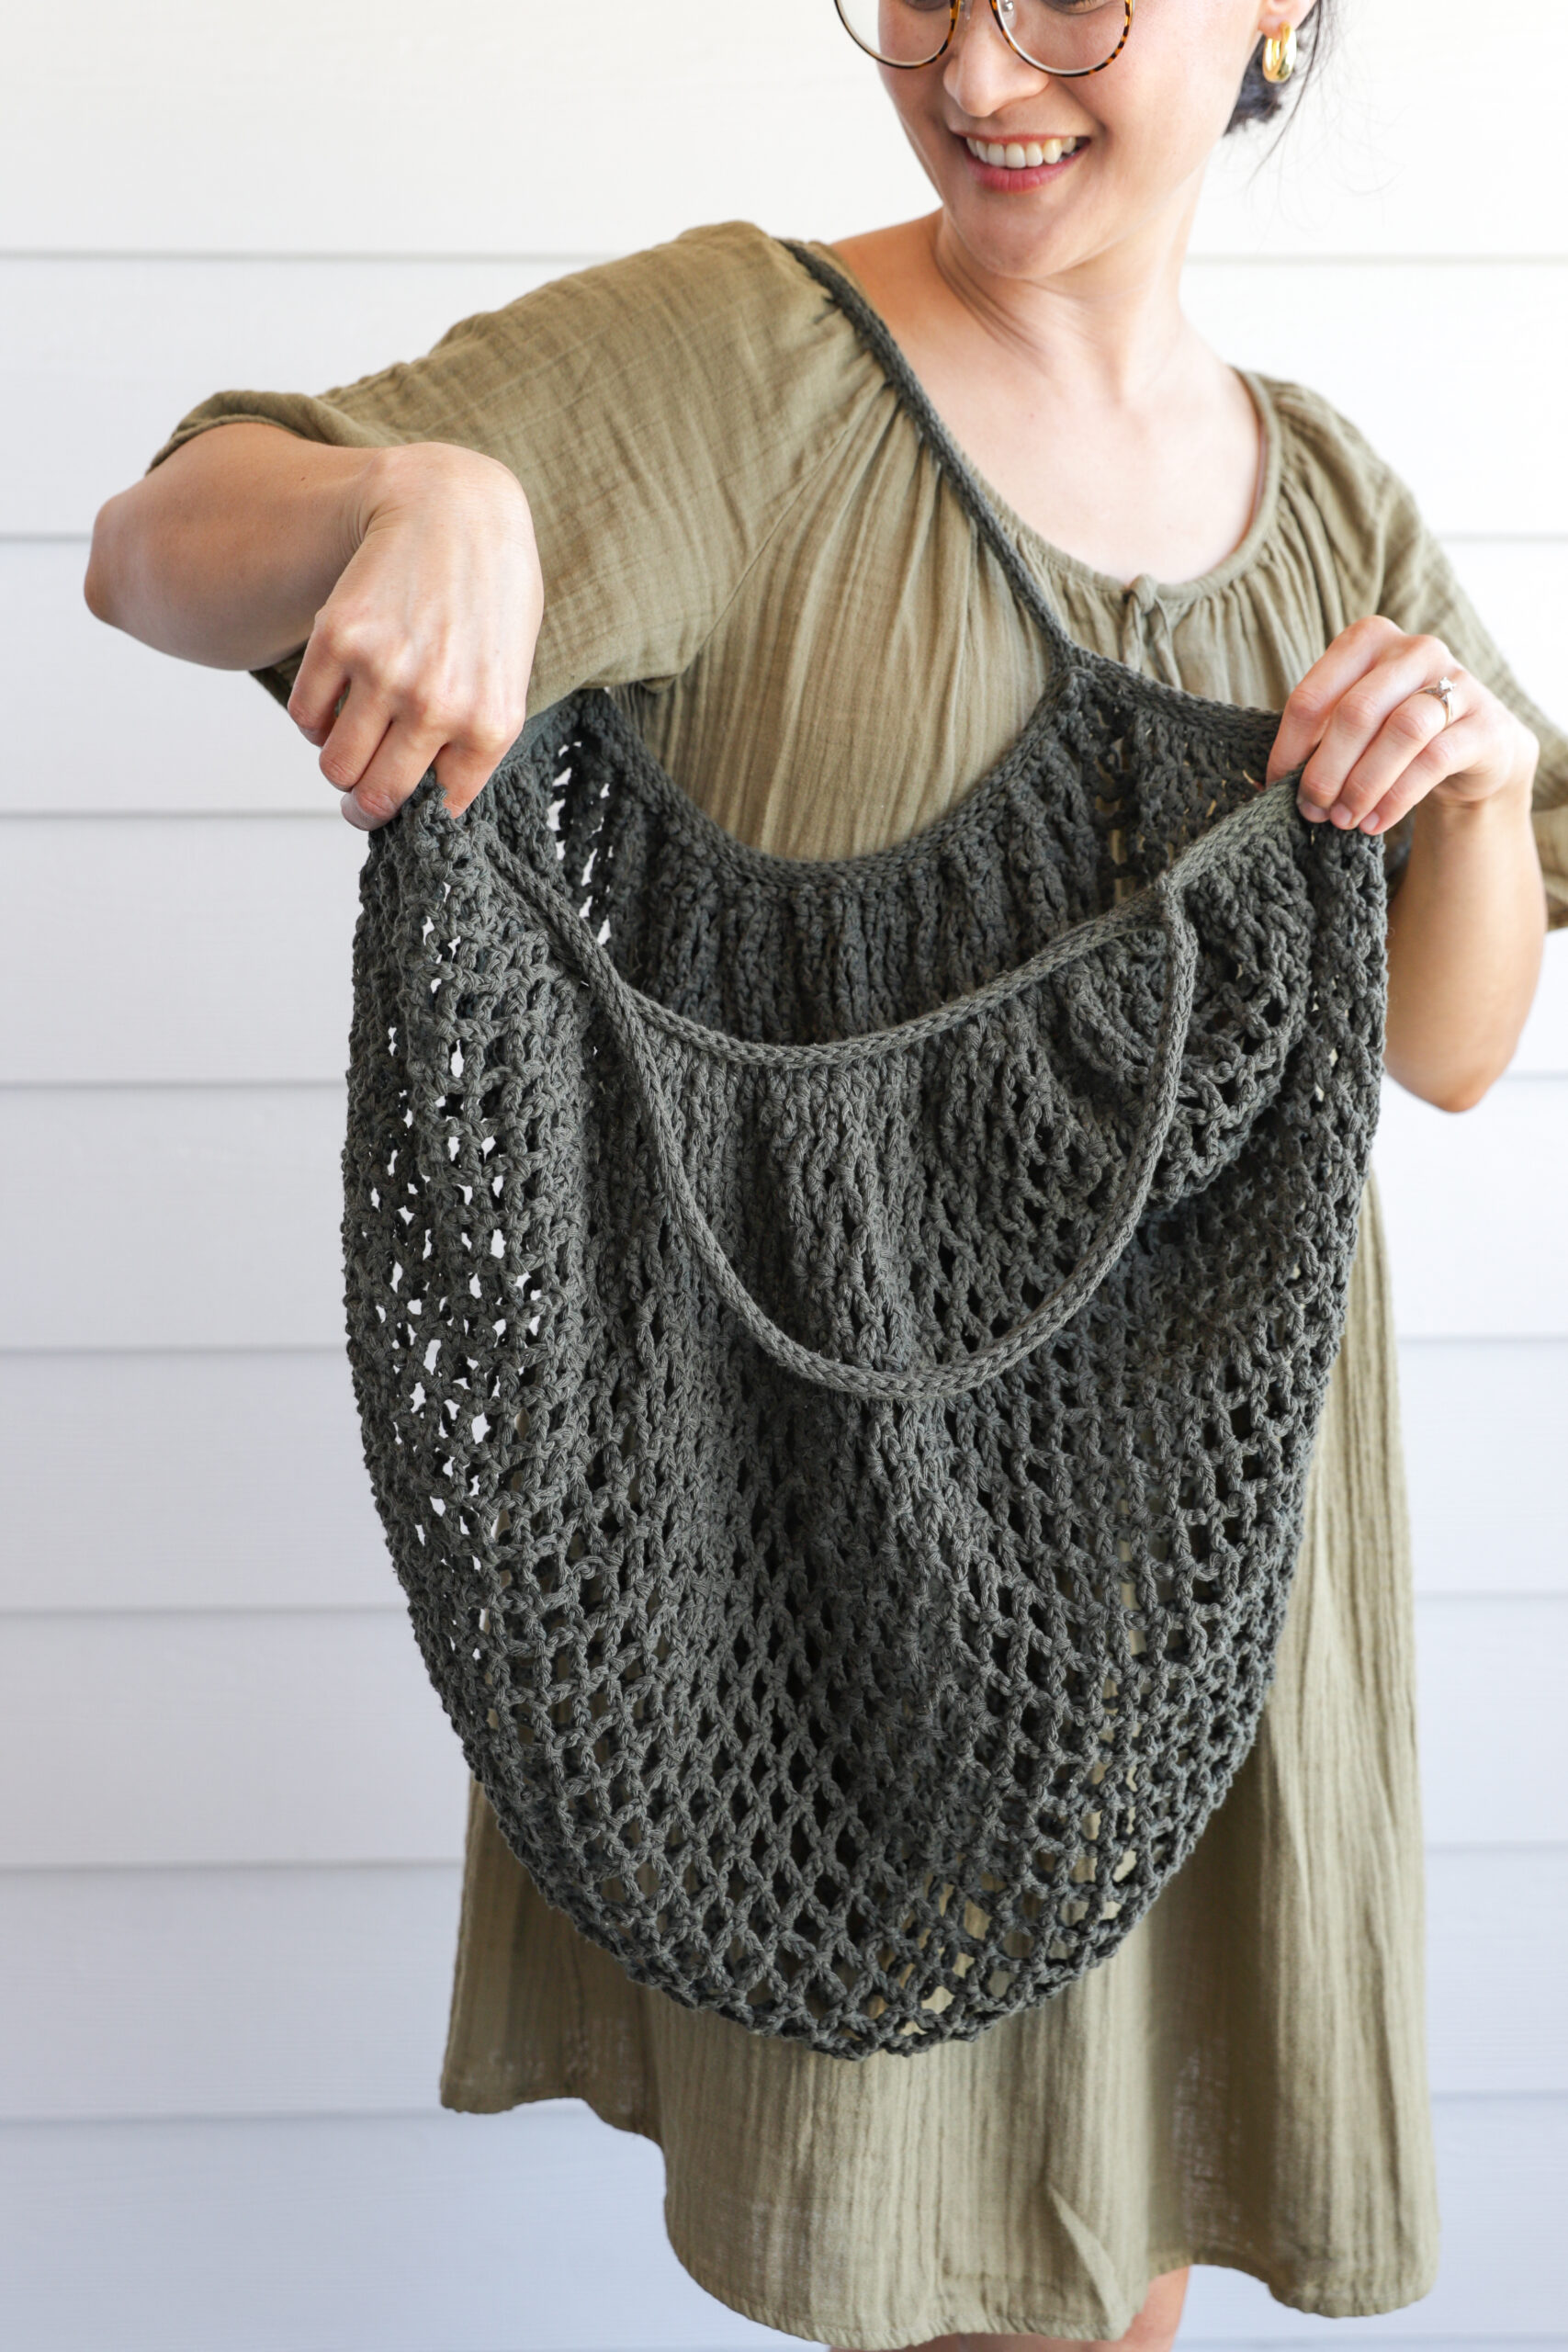
FINISHED SIZE
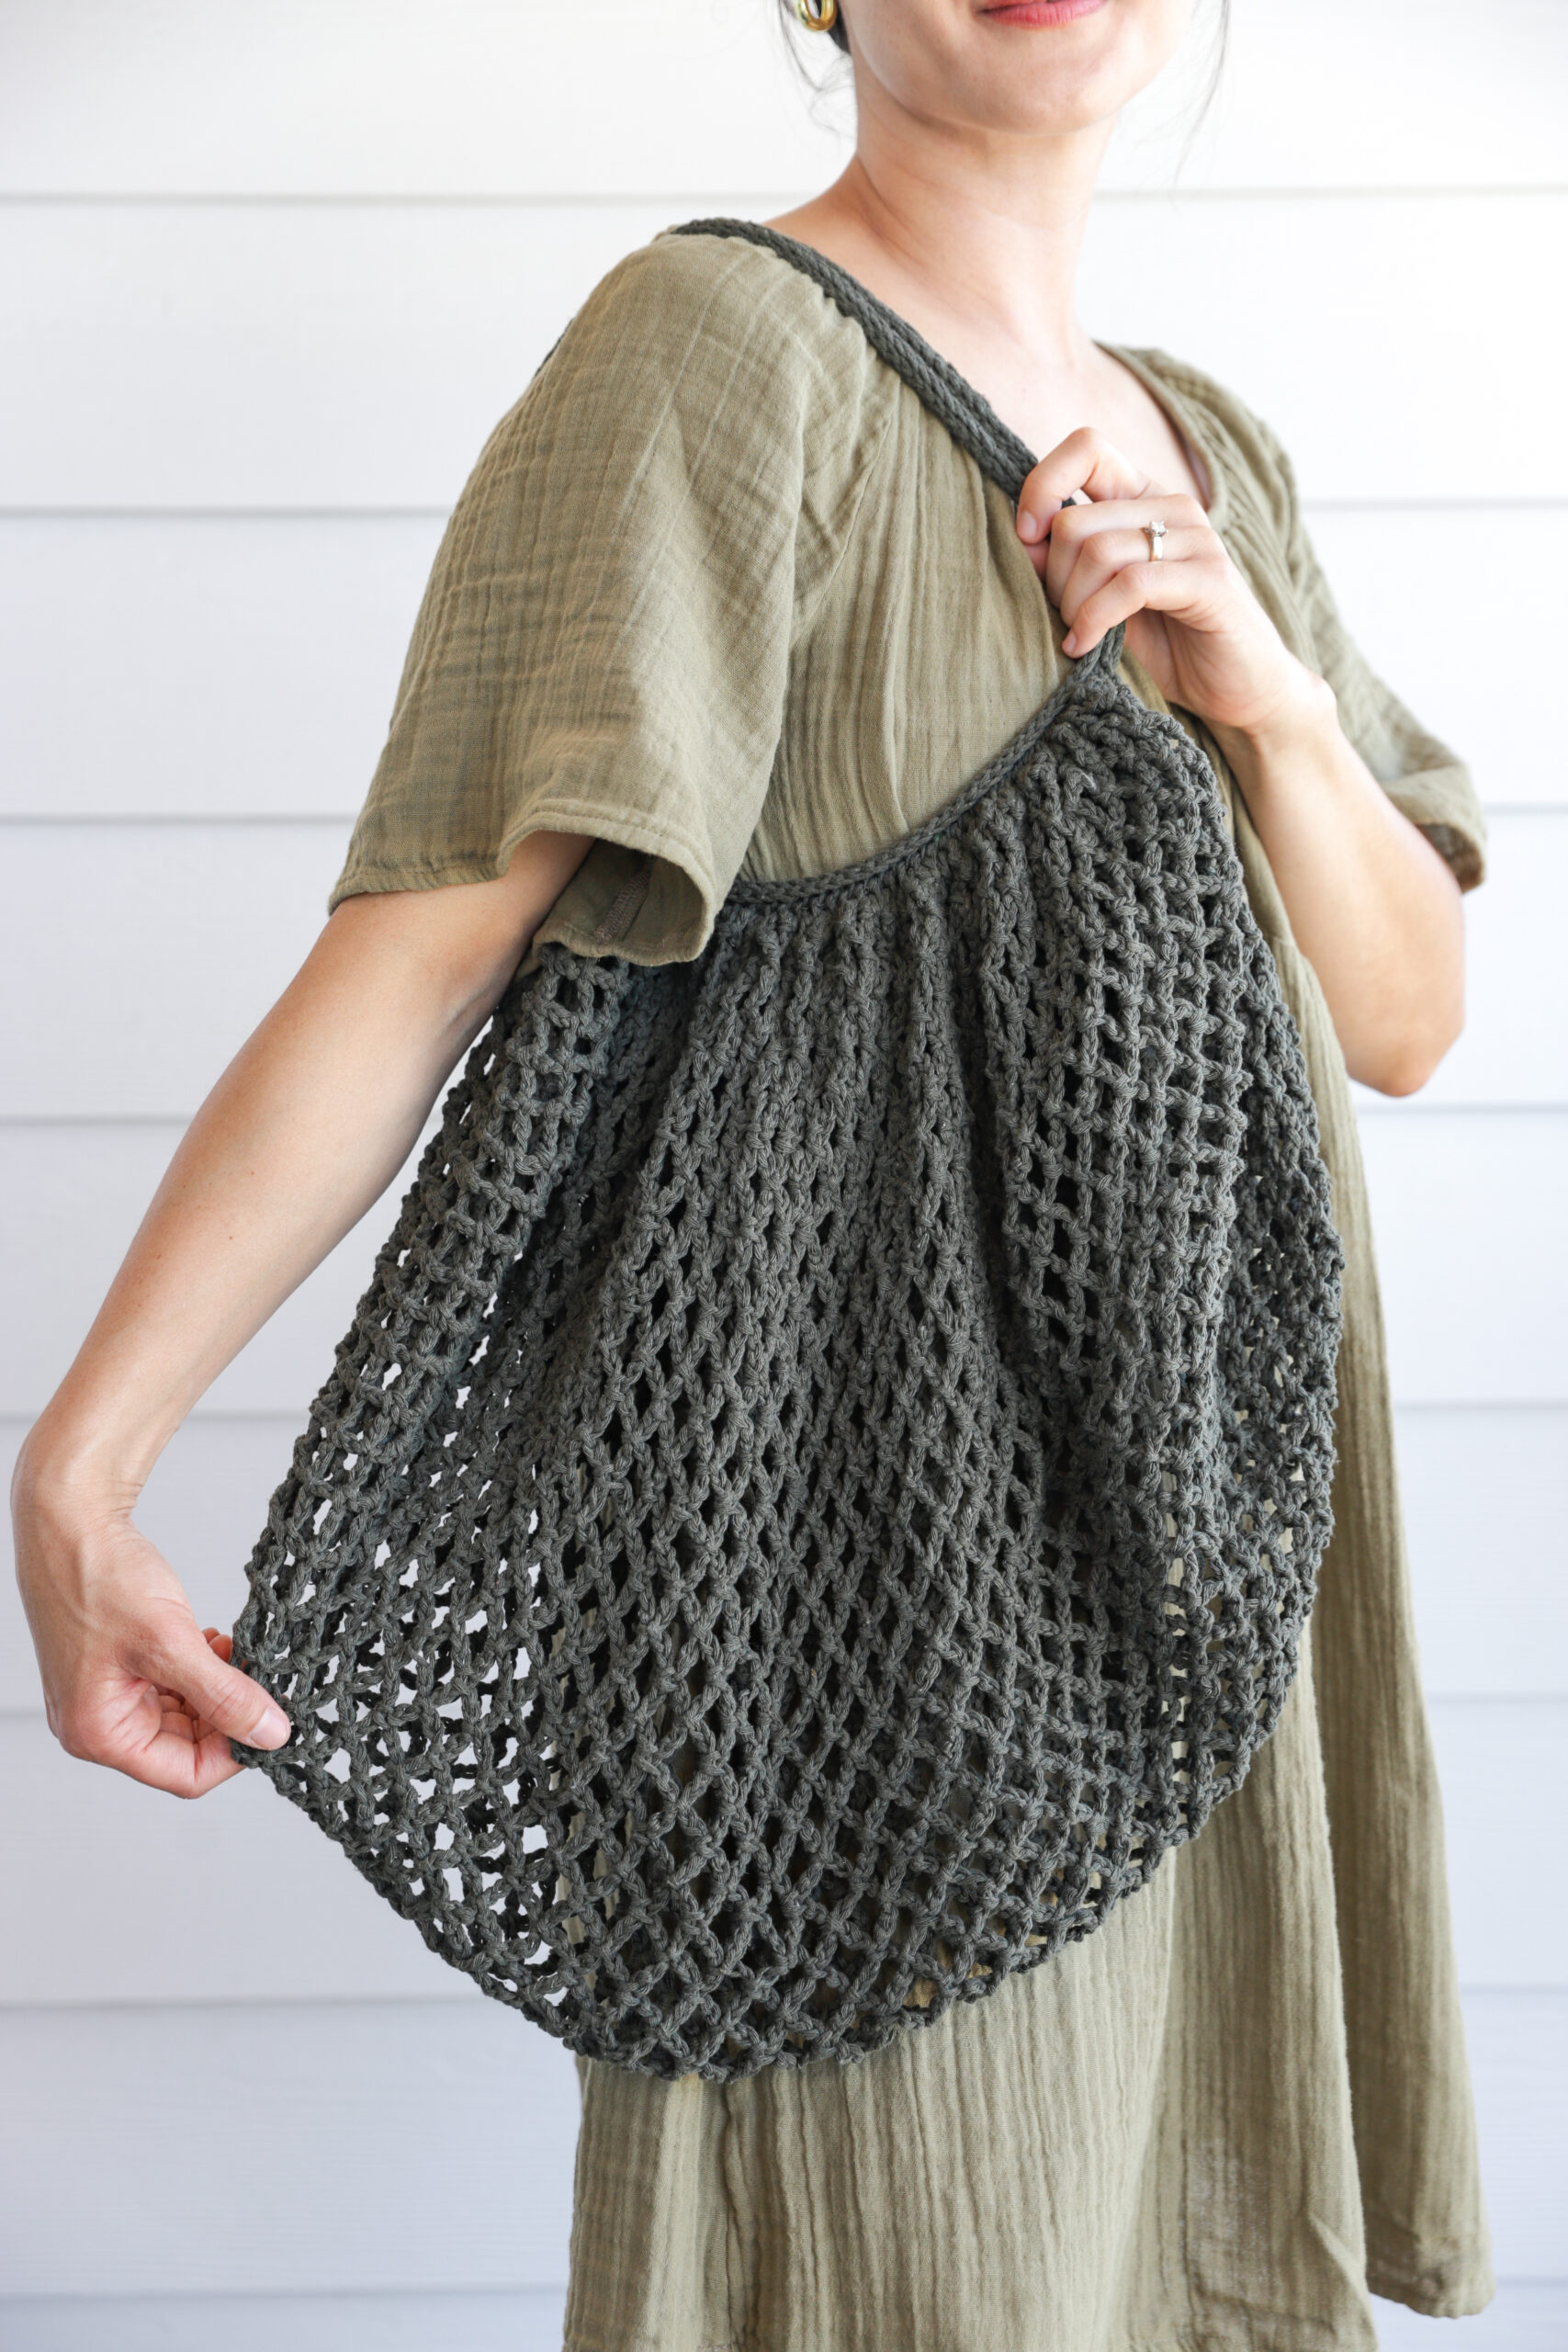
The main bag is roughly 29 inches tall, including the handles, and 18 inches wide. This is an approximate measure of the bag, unfilled, laying flat and gathered at the handles. Be mindful that it expands and stretches when in use so the width measurement is kind of hard to nail down.
ABBREVIATIONS
- ch = chain
- sl st = slip stitch
- flo = front loops only
VIDEO TUTORIAL
The video tutorial will play below after the initial ads, if it hasn’t already started playing to the top or side of your screen. (The ads run for a few minutes…sorry for the delay, it’s how I can provide this content for free. I promise the tutorial is forthcoming). Please refer to the written pattern below for stitch counts and further instructions.
Trouble playing the video? Make sure you are not using an ad blocker. The video will not play with an ad blocker. If you x out of the pop up video, you need to refresh the page to get it back.
WRITTEN PATTERN & TUTORIAL
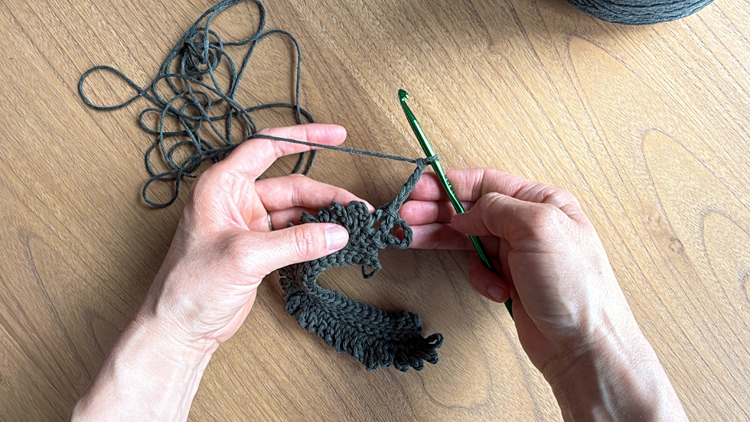
Main Bag\
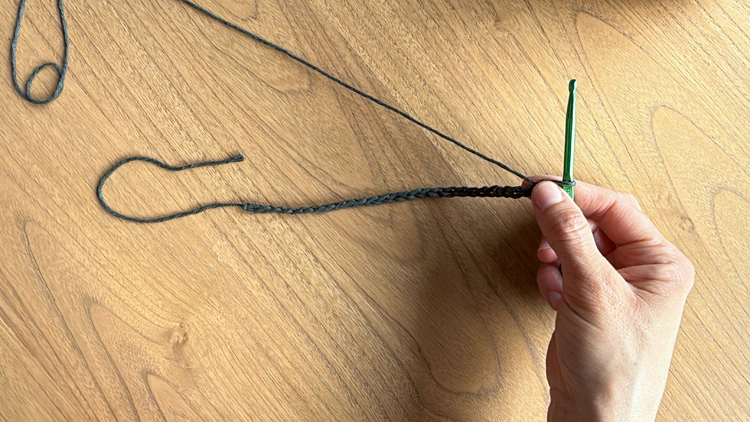
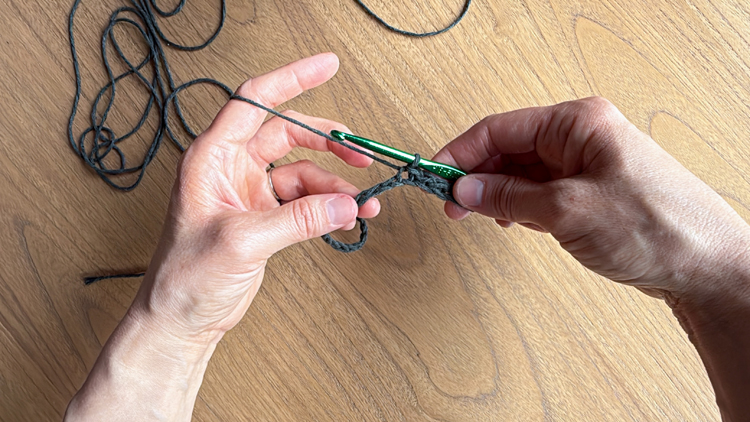
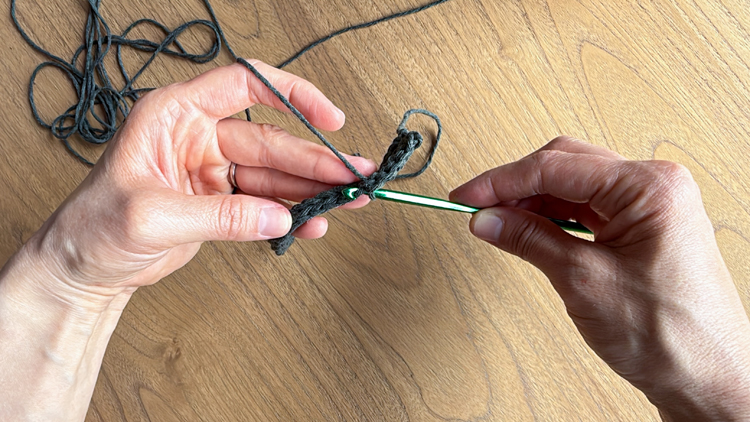
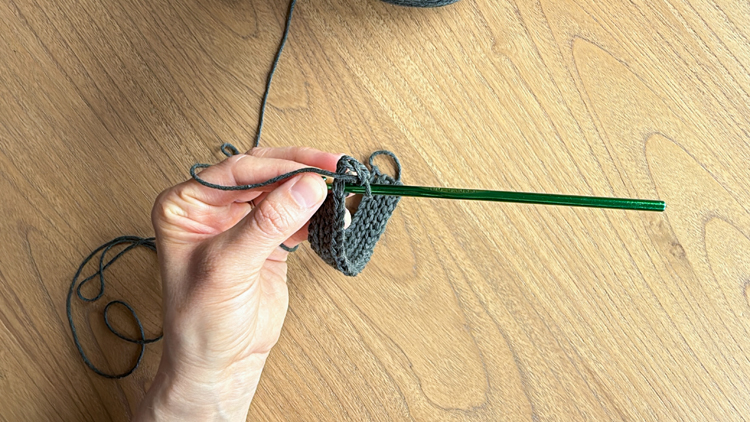
Ch 28.
Row 1: Turn, sl sti into the second ch from the hook. Sl st into each. (Total stitch count = 27)
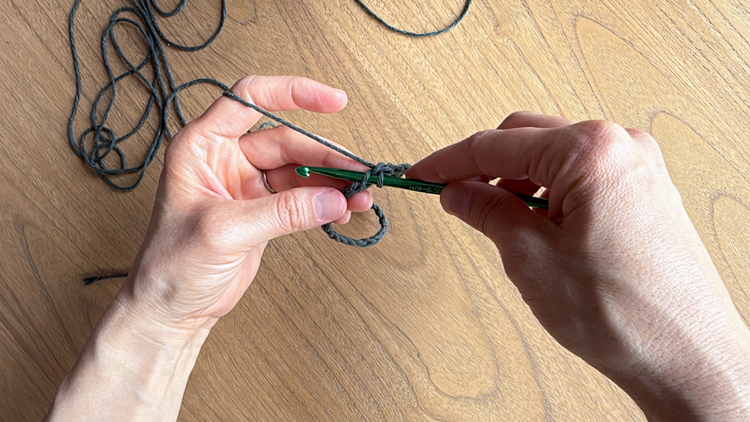
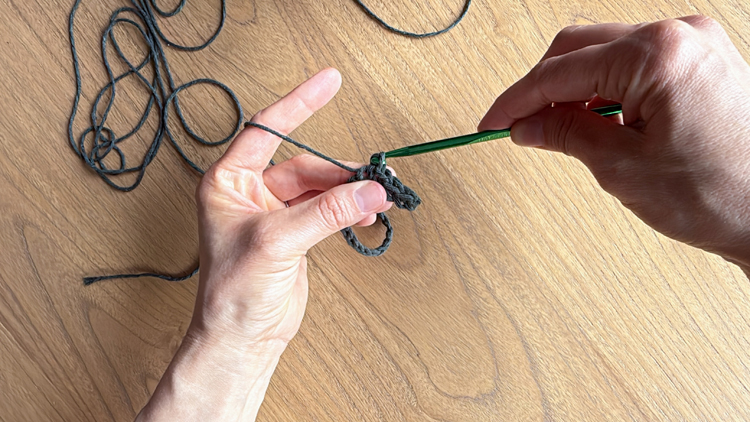
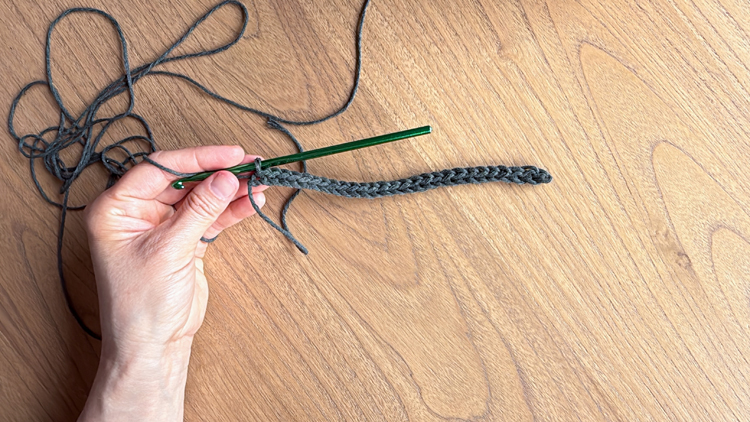
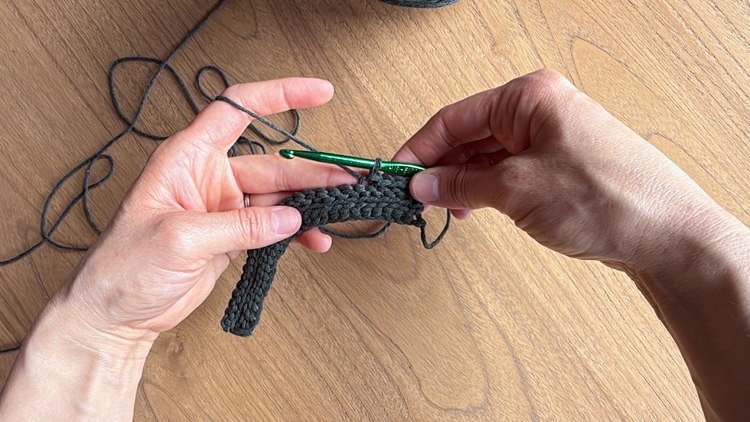
Row 2: Turn, ch 1. sl st into front loops only (flo) each stitch across. (27)
Rows 3 – 5: Repeat Row 2.
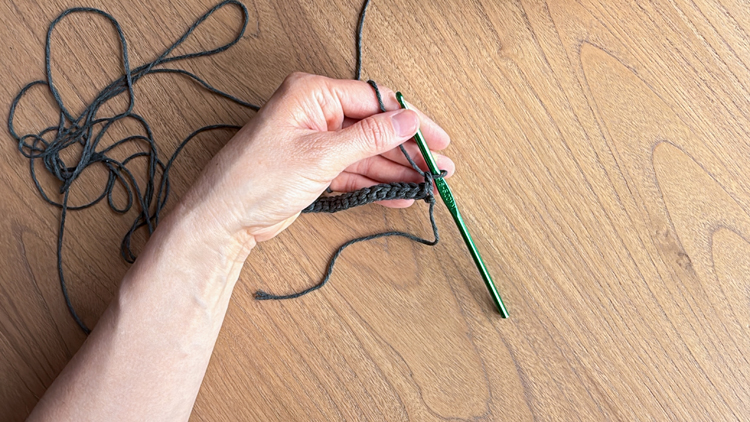
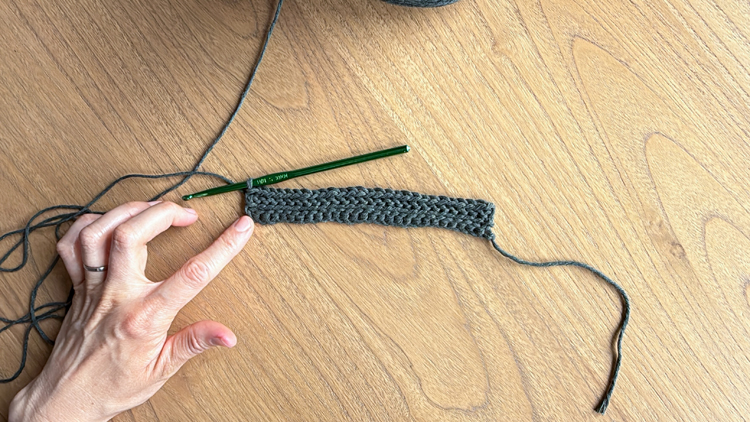
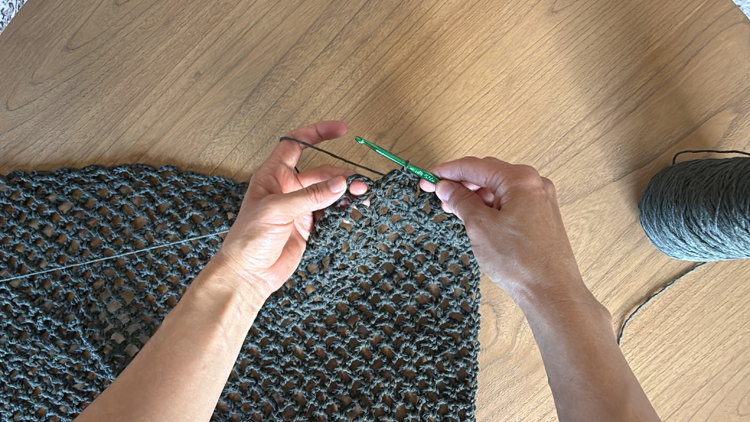
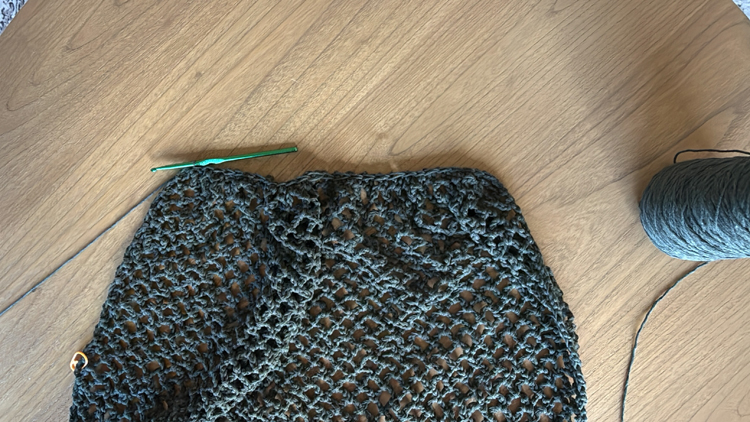
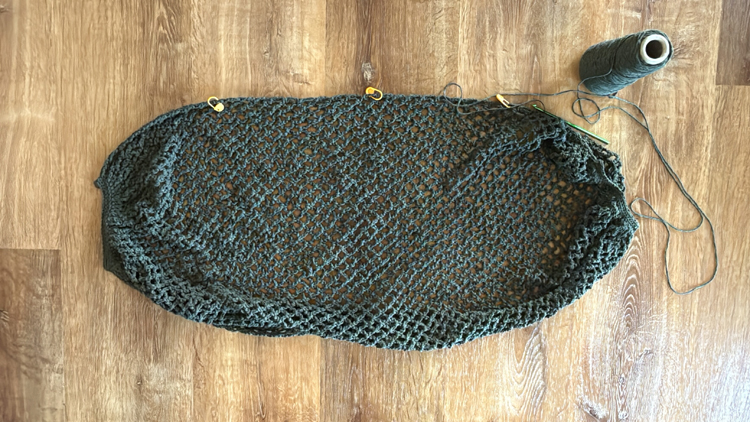
<<<Begin mesh portion.>>>
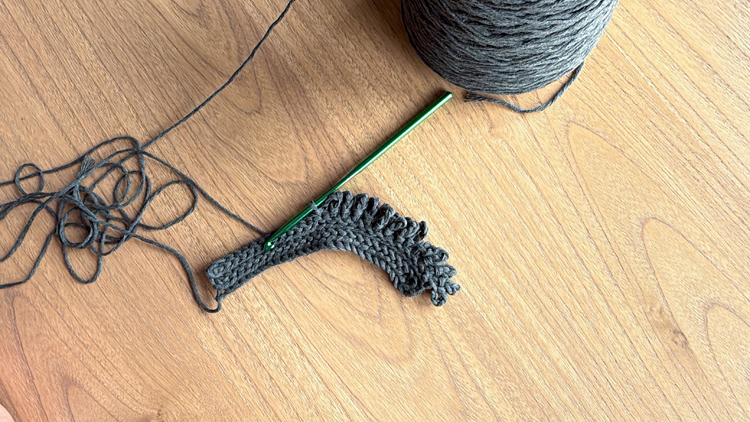
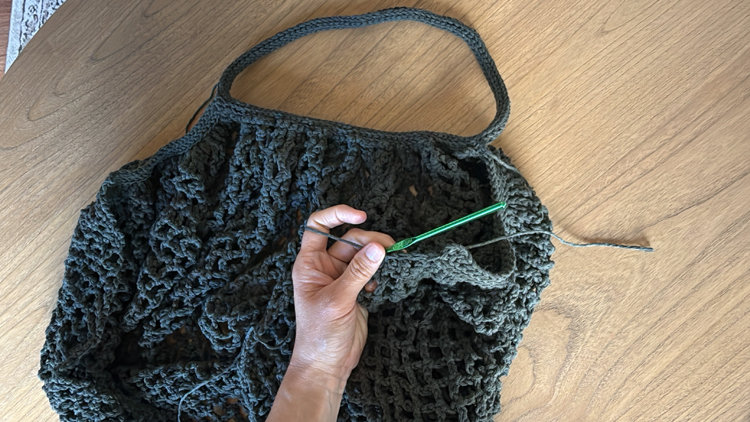
Row 6: Turn, ch 5. Sl st into first stitch. *Ch 5, sl st into next.* Repeat from * to * 25 more times.
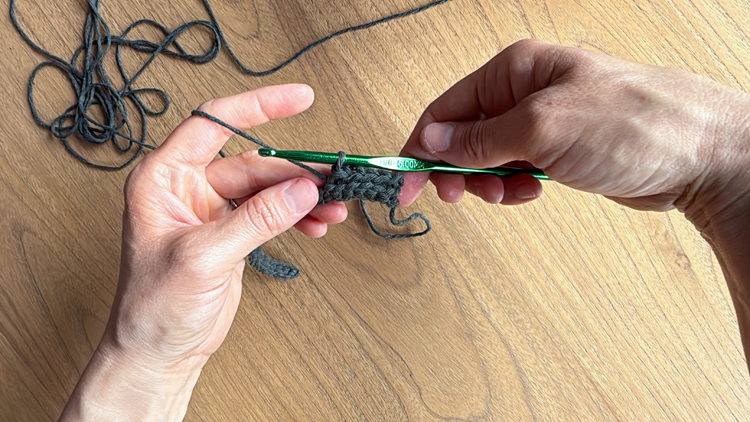
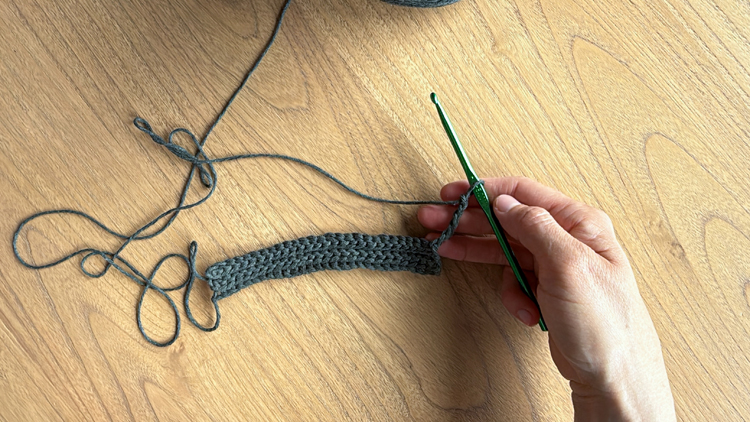
Row 7: Turn, ch 5 and sl st into first ch space. *Ch 5, sl st into next ch space.* Repeat from * to * 25 times.
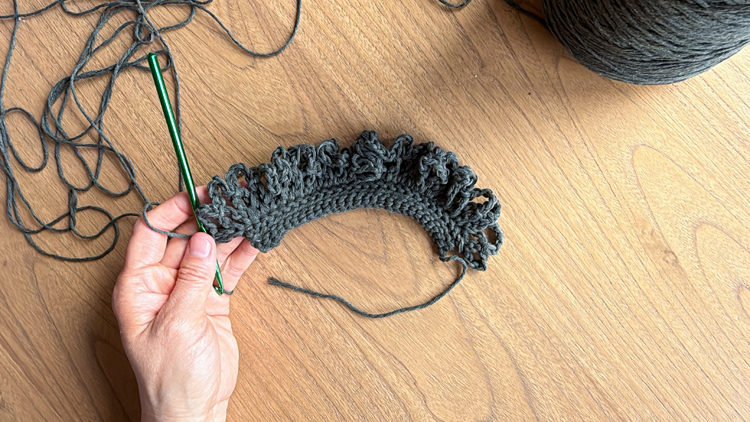
Rows 8 – 87: Repeat Row 7.
To count your rows, start on the side with the starting tail. Count each chain space on the side as two rows. You may use stitch markers as you go or to help you keep count as you near to what feels like the end.

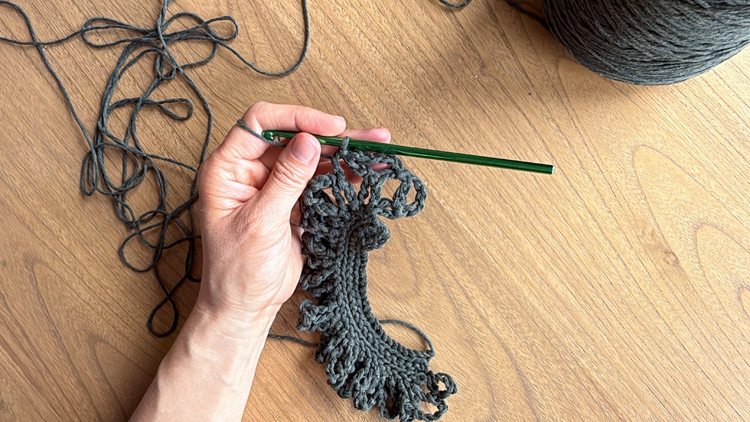
<<<End mesh portion>>>
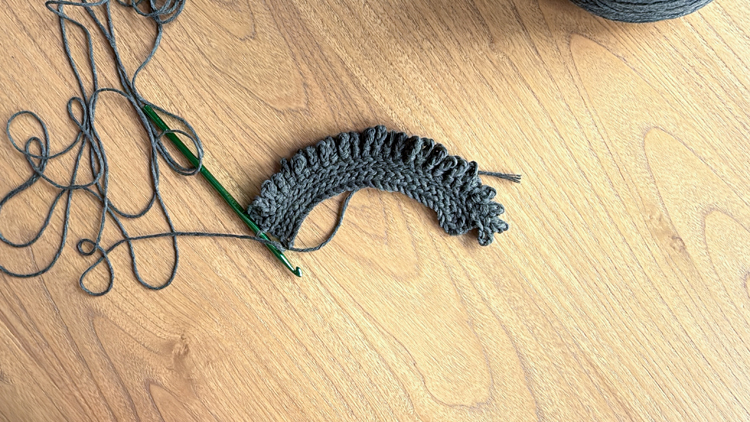
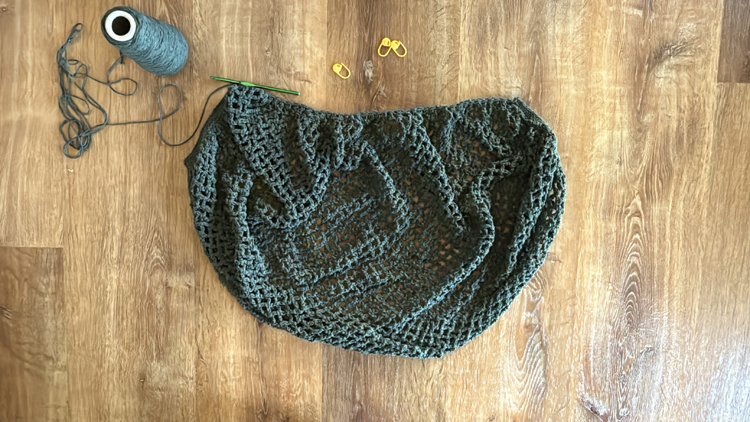
Now, we are going to “cinch” this end with slip stitches, just like the starting end.
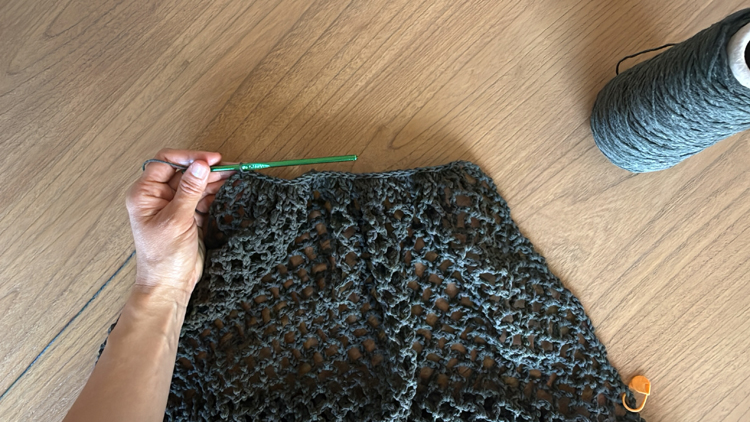

Row 88: Turn, ch 1. Sl st into each ch space. (27)
Row 89: Turn, ch 1, sl st in flo into each stitch. (27)
Rows 90 – 92: Repeat Row 89.
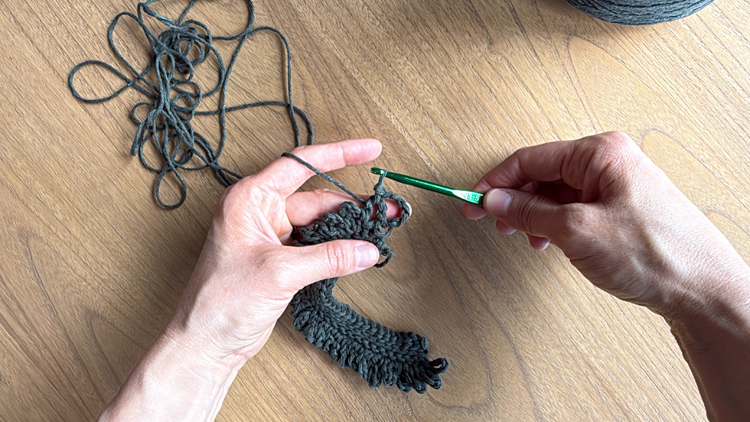
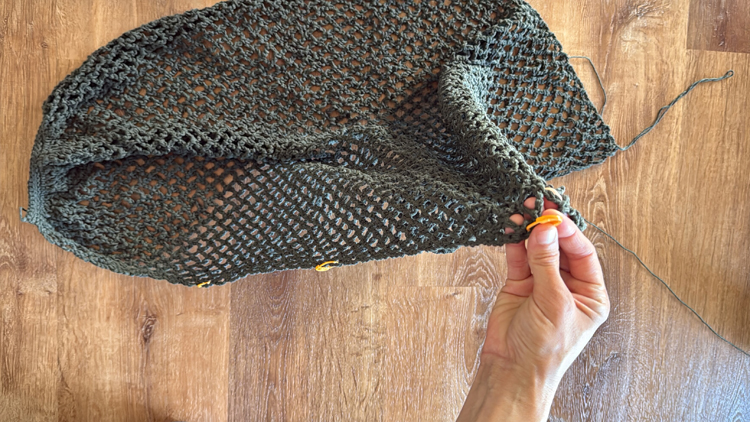
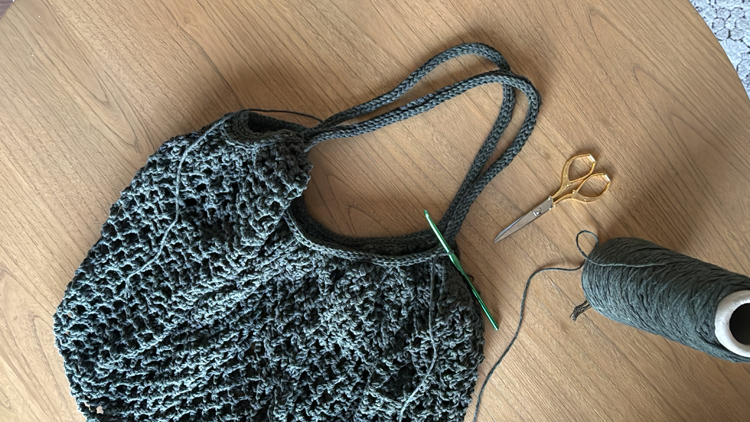
<<<Begin first handle.>>>
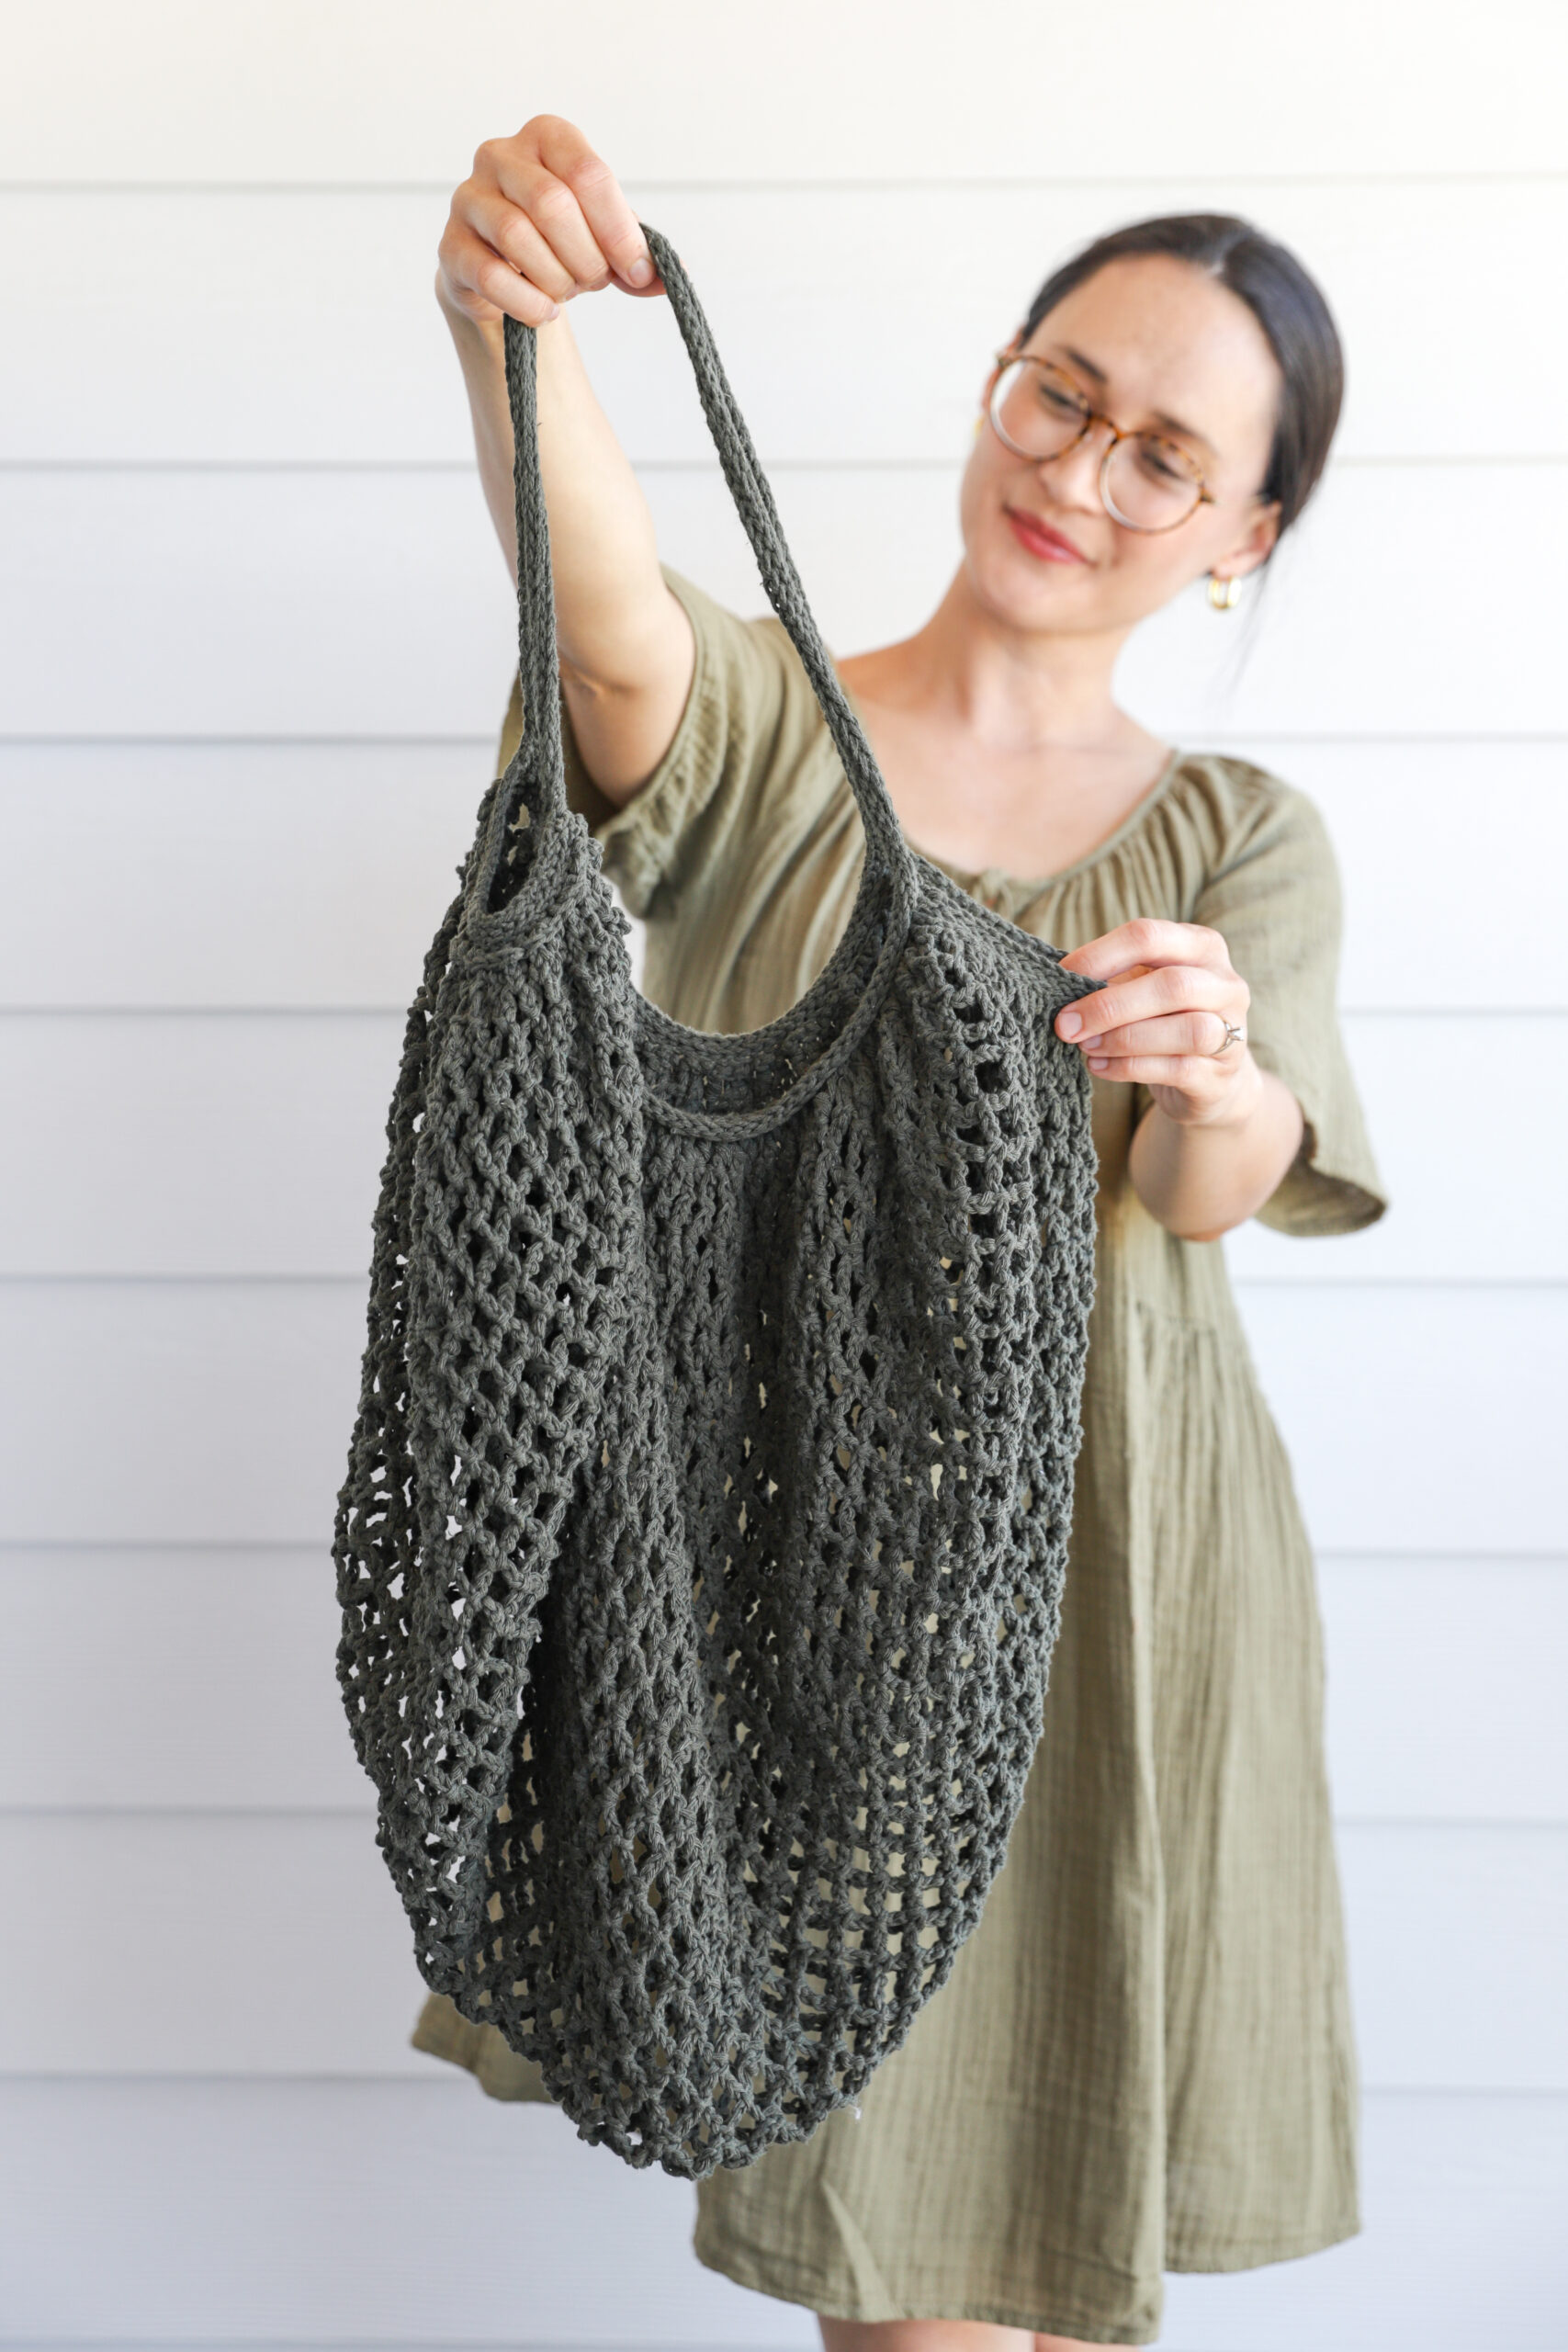
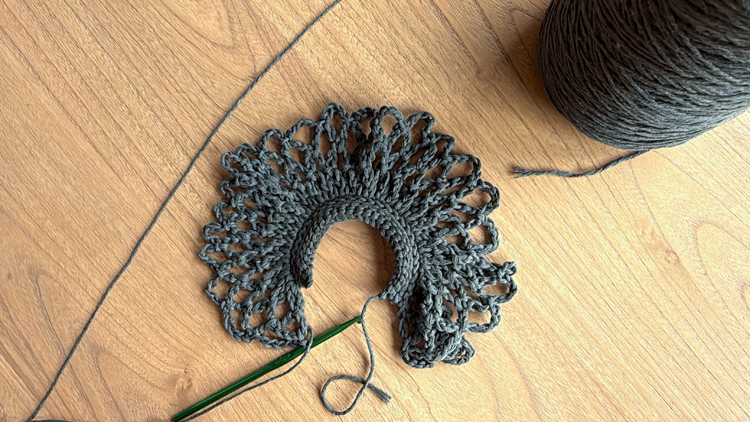
Handles
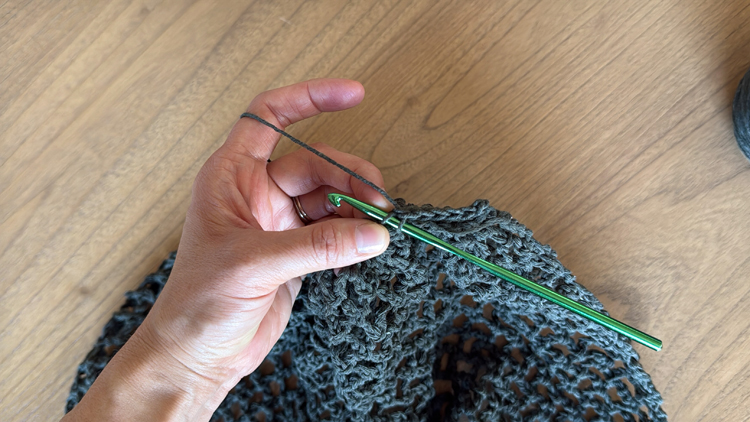
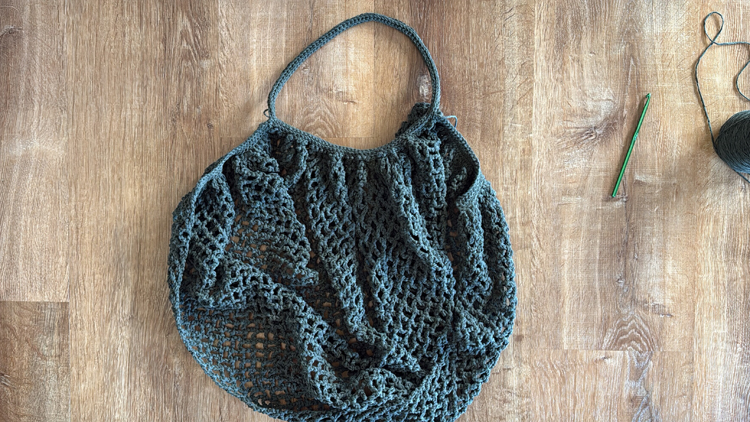
You should now have a rectangle of mesh that is gathered together at each short end with five rows of slip stitches. Turn your last row, so that you are positioned to worked into the sides of the mesh rows. You will gather the side with slip stitches, then work chains to form a handle, and then attach those chains to where you started gathering the side and work in the round.
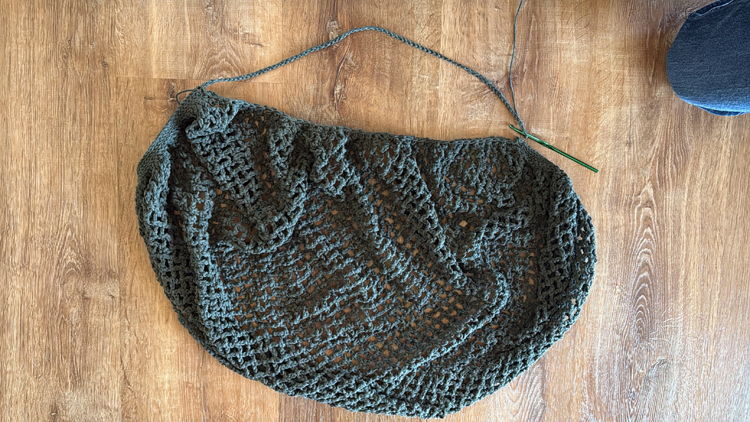
Handle 1
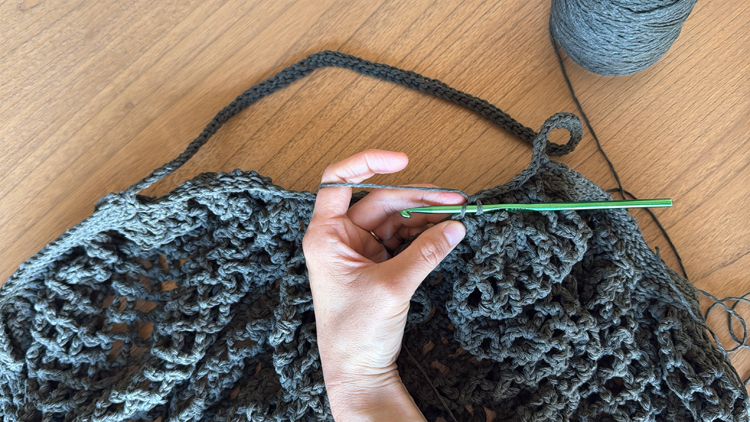
Round 1: Ch 1. Work 2 sl st into the side of the slip stitched rectangle. Keep your stitches neat but a little loose so that you can work subsequent rows into them. Now sl st into each ch space. Don’t work into any of the slip stitches. When you get to the side of the slip stitched rectangle on the other side, work 2 sl st into the side.
Then ch 75. (You may add stitches for a larger handle. Just be sure you have enough yarn planned for the longer handle. I do not recommend taking away stitches for a smaller handle).
Swing the long chain to the first slip stitches rectangle and sl st into the ch 1 from the beginning of the round.
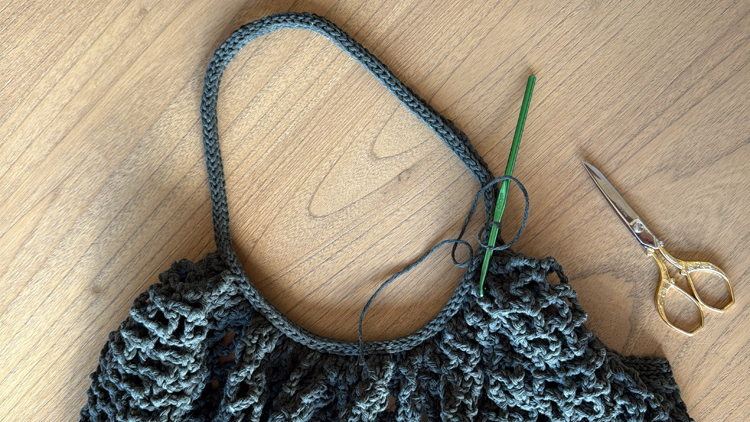
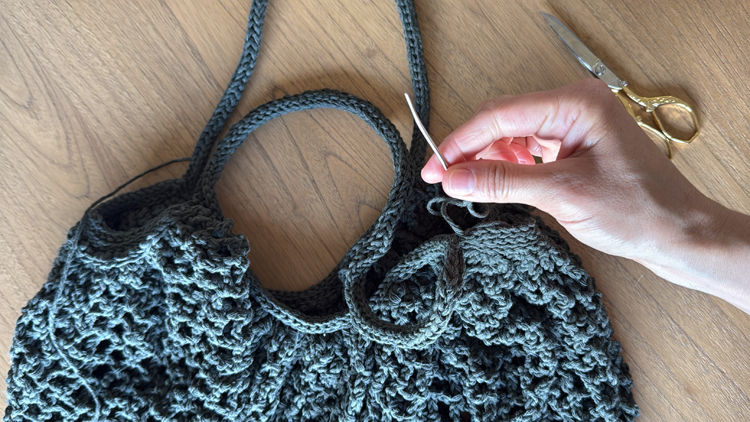
Round 2: Sl st in flo into each sl st in the round. No need to ch 1 anymore. Mark the beginning of the round with a stitch marker if desired.
Rounds 3- 5: Repeat Round 2.
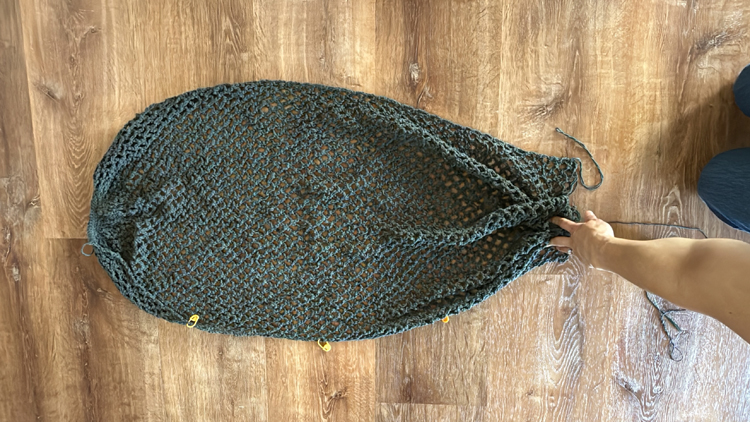
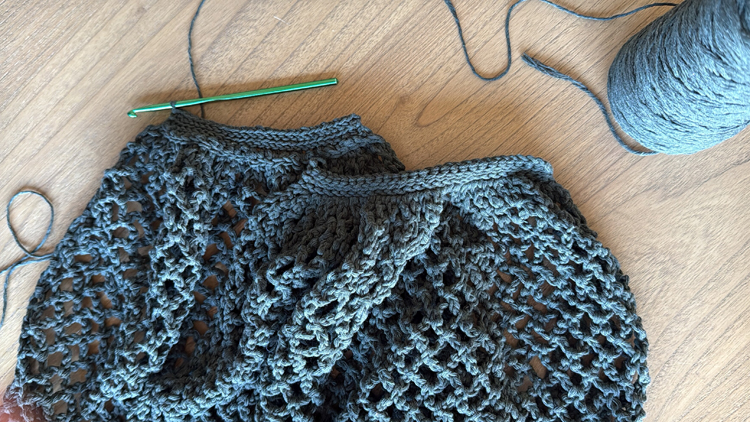
When you complete Round 5, tie off the end and leave a 6 inch tail. As you work in the round in flo, you’ll see the stitches curl inward and form what looks close to an I-cord. Let it curl. It cleans up the look of the bag and it creates a thin but sturdy handle.
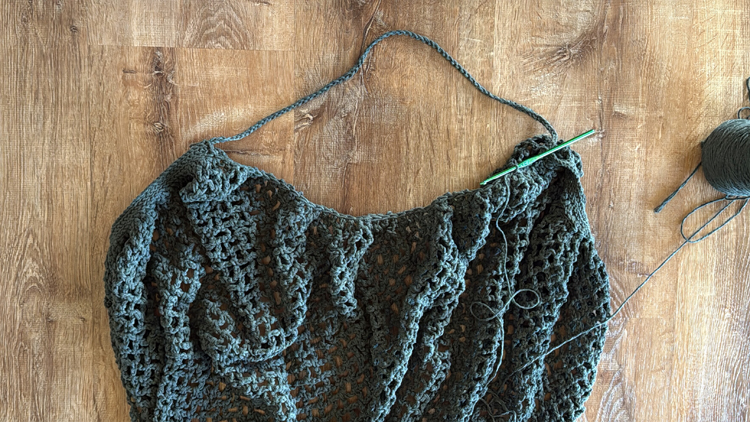
Handle 2
Slip stitch into one of the slip stitched rectangles from the other side of the bag and create a second handle the same way as the first. Be sure you haven’t flipped the bag over so that the curled handles both curl outward and mirror each other.
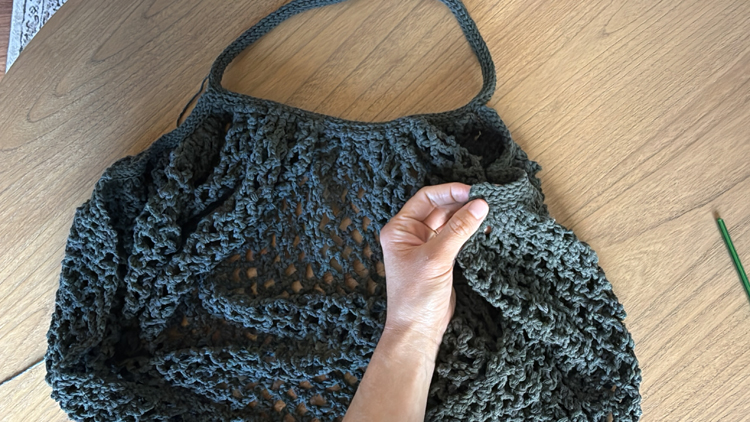
Weave in all the tails.
You’re done!
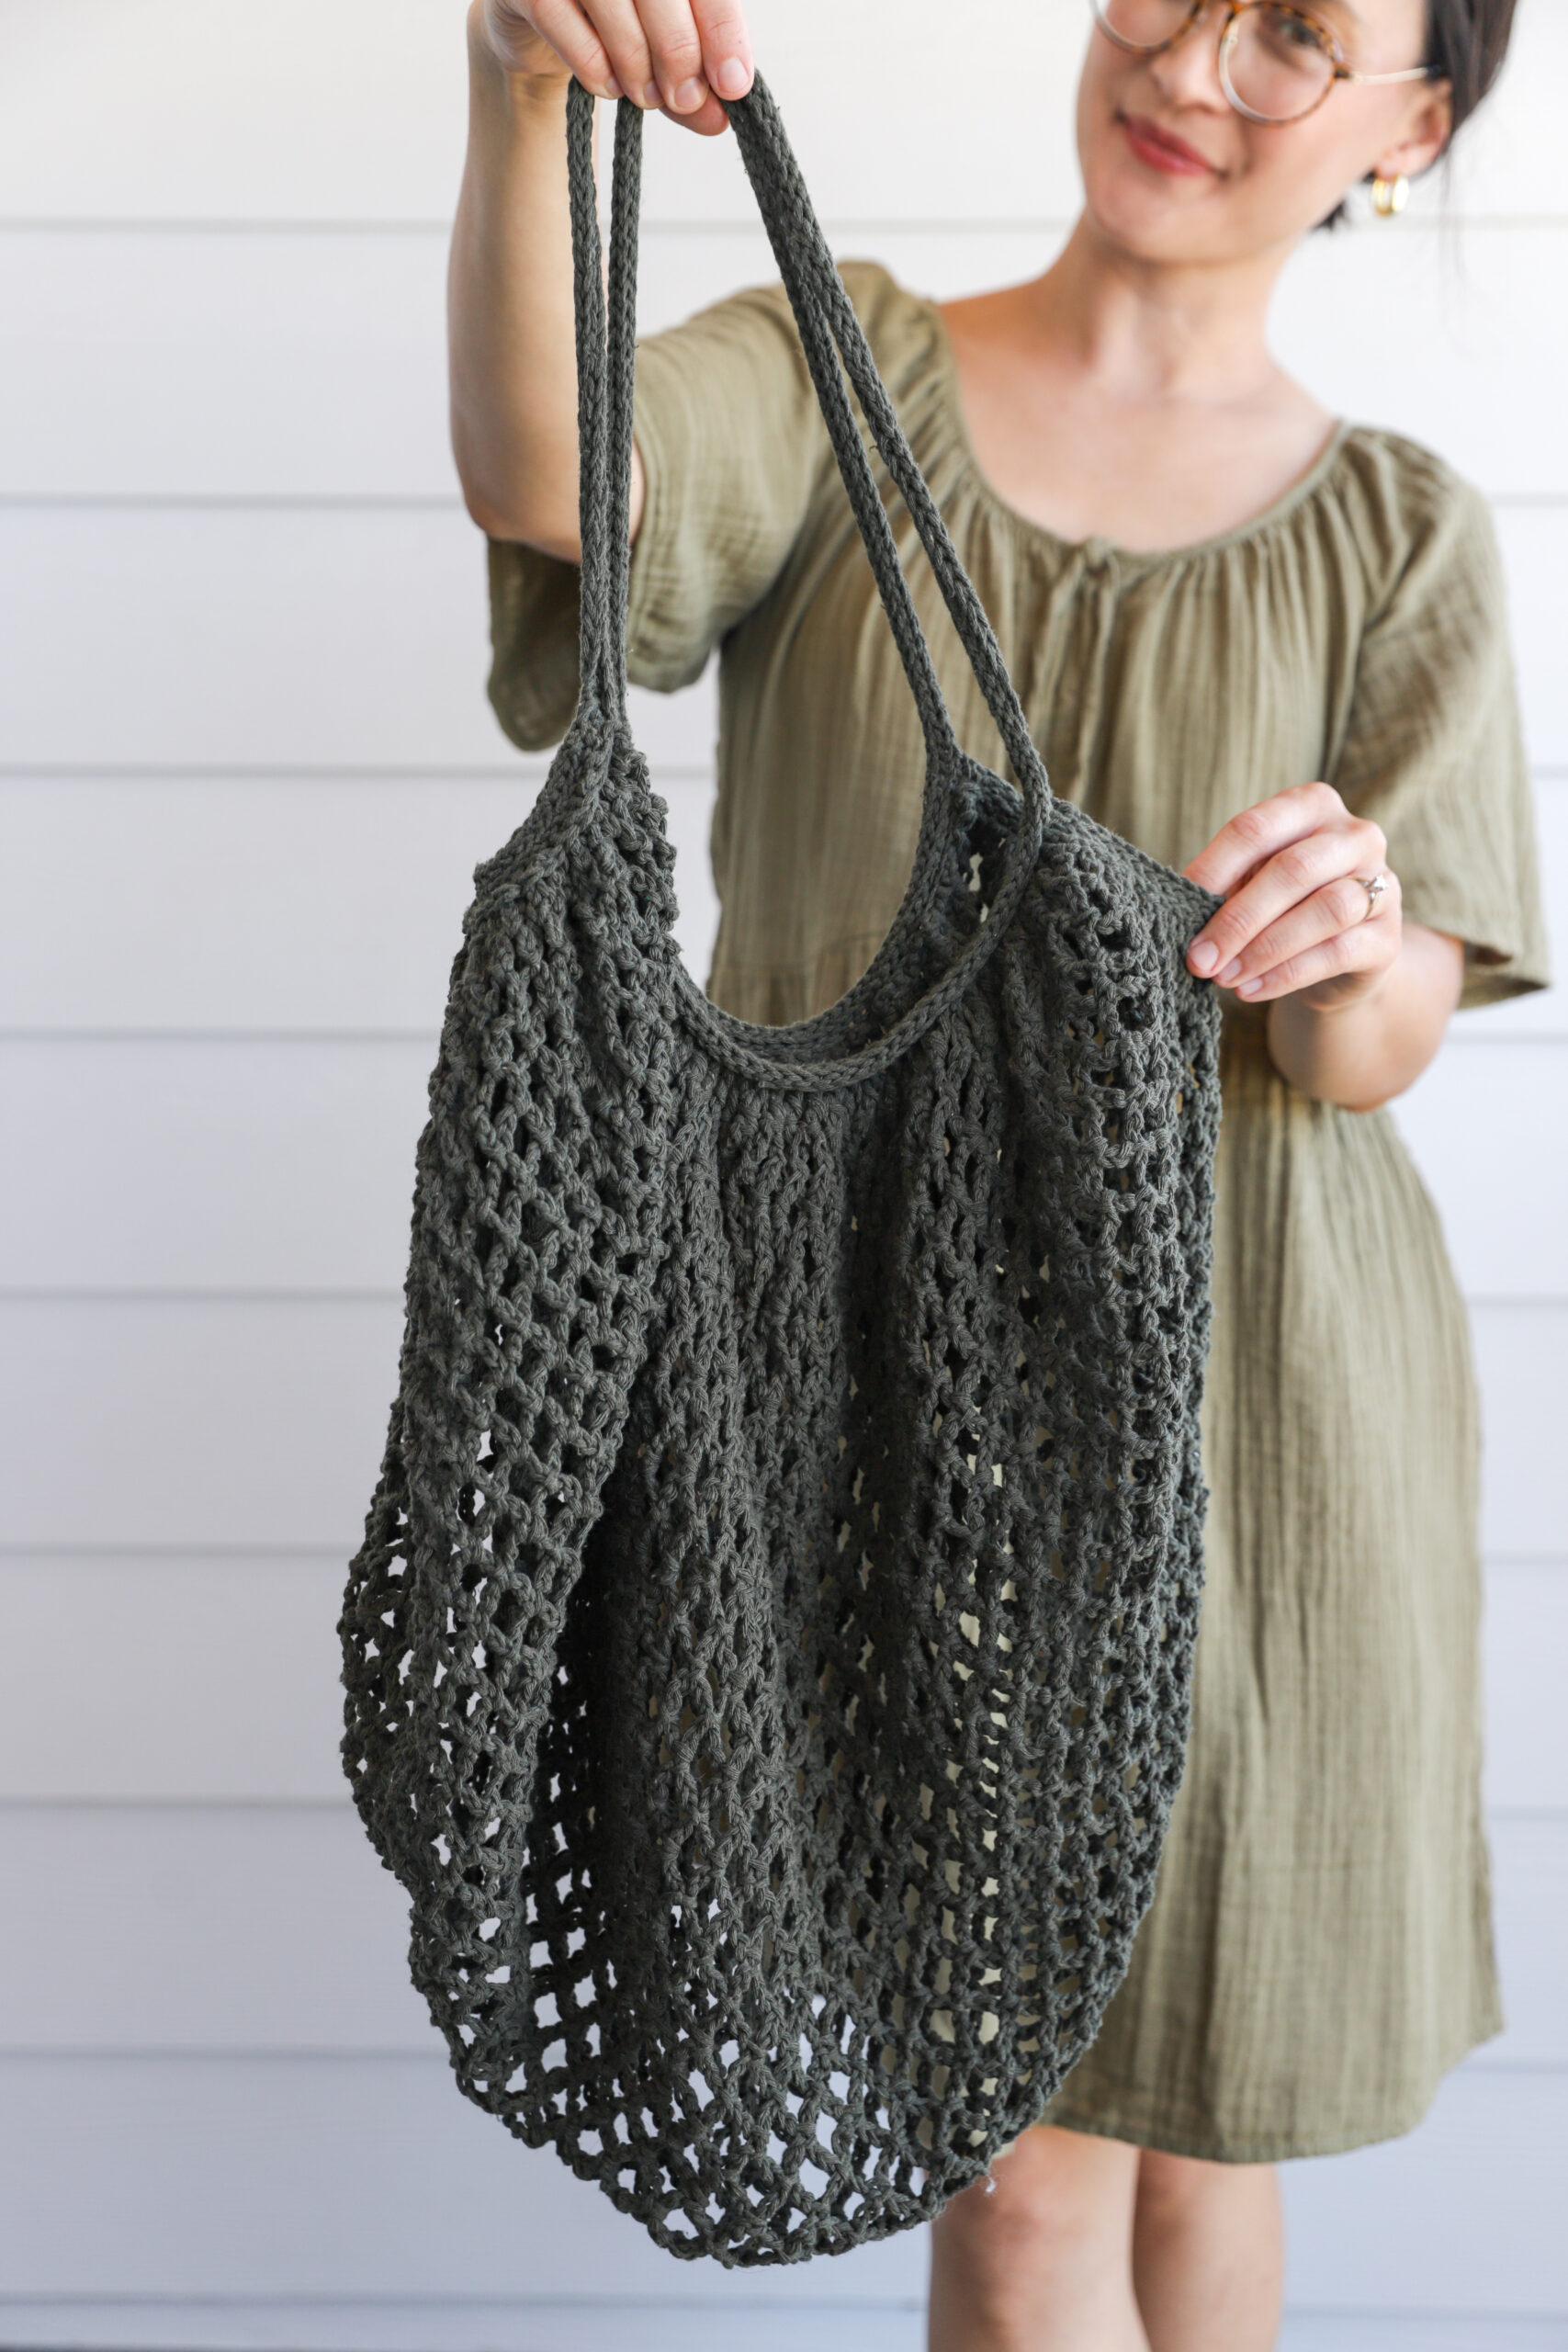
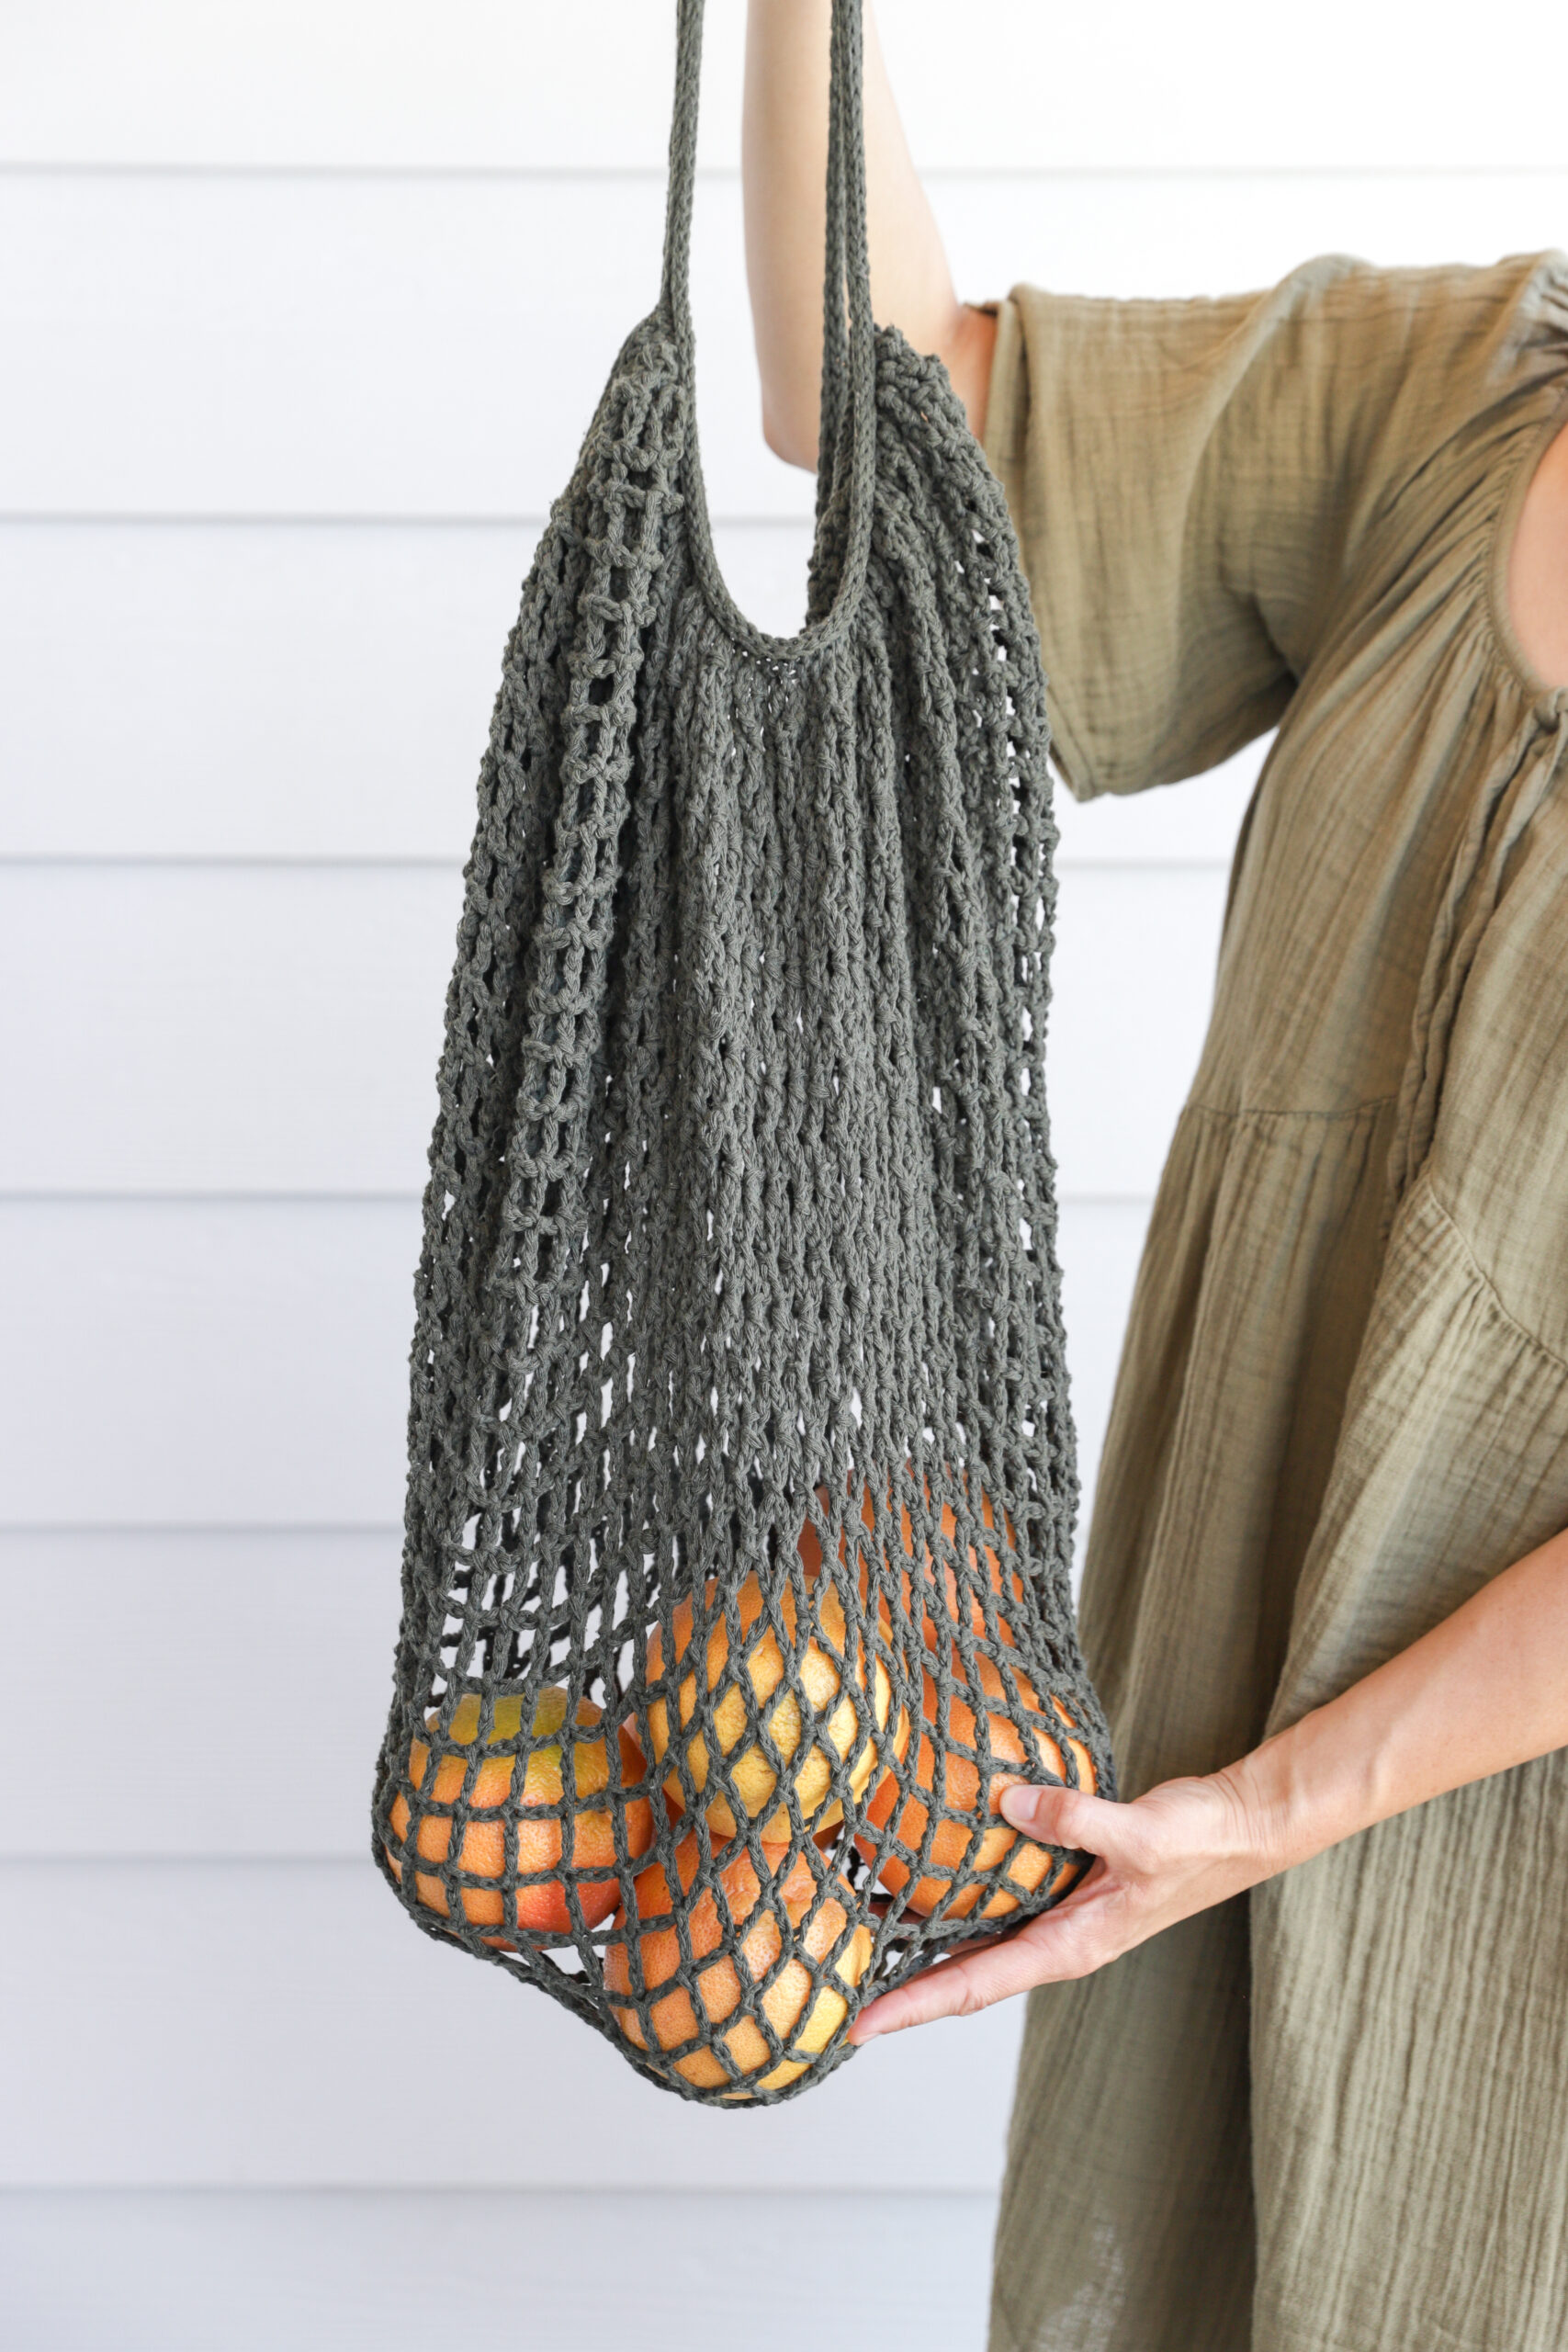
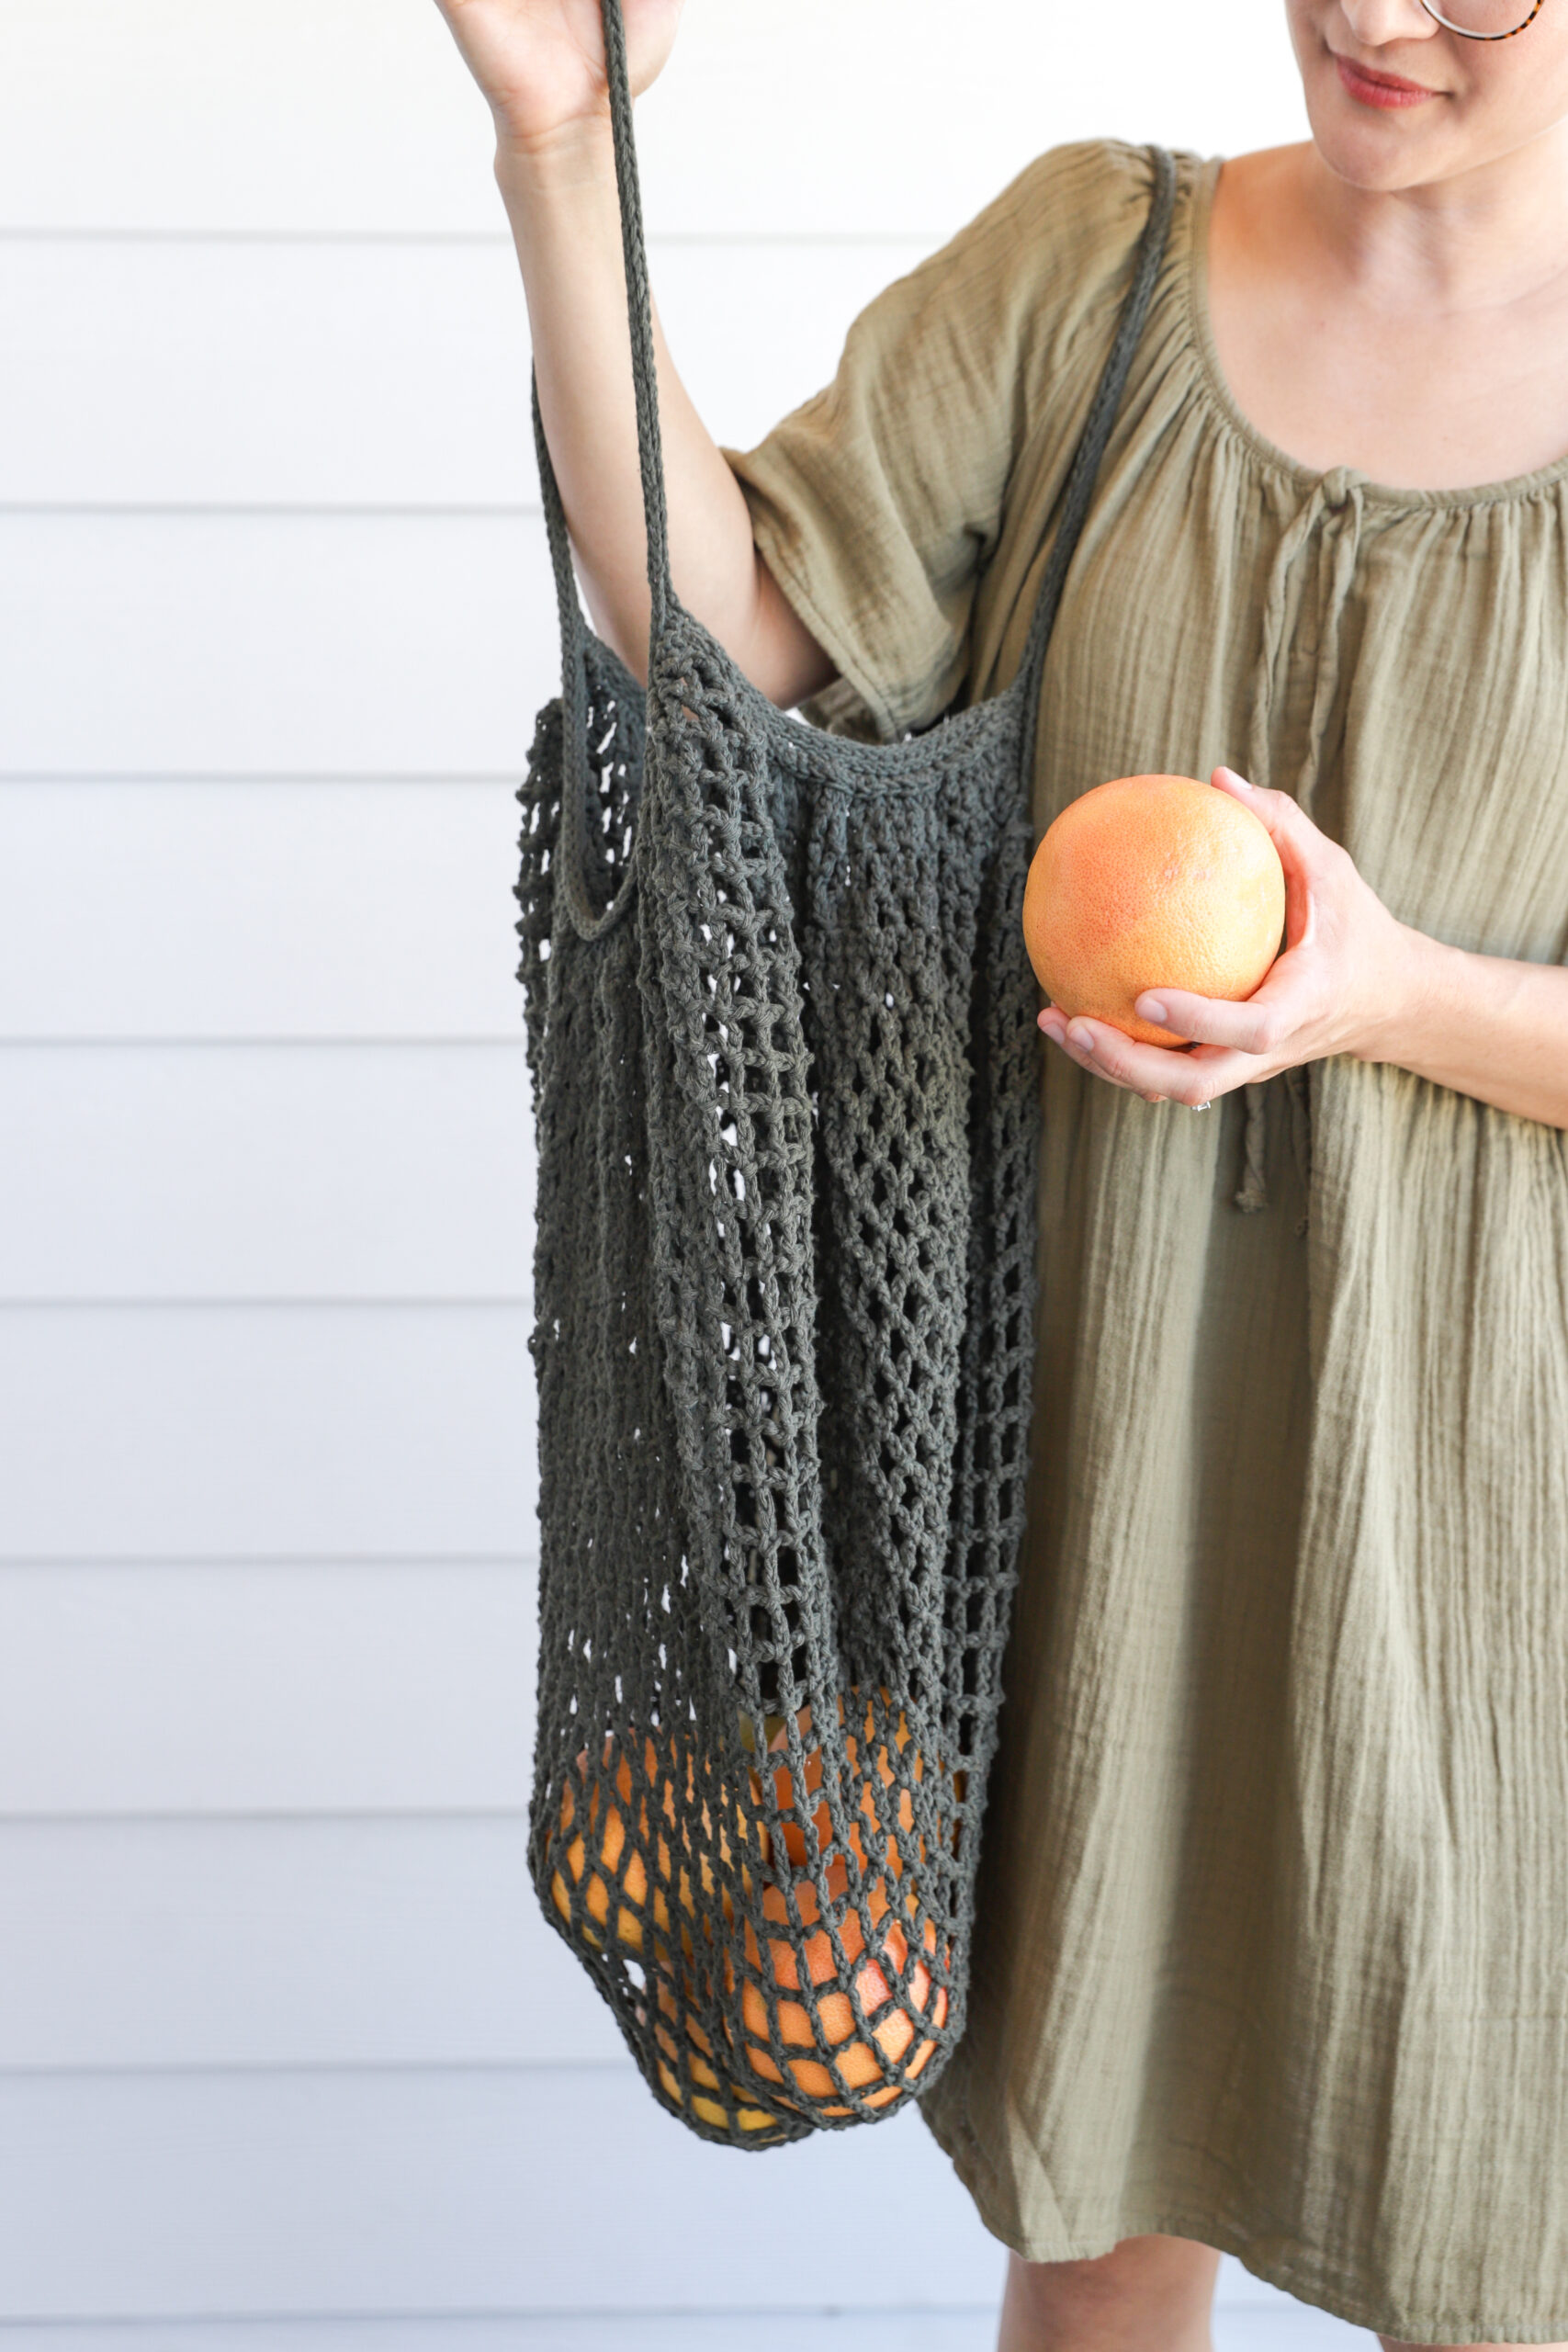
Fill it with some pretty, heavy produce. Right?
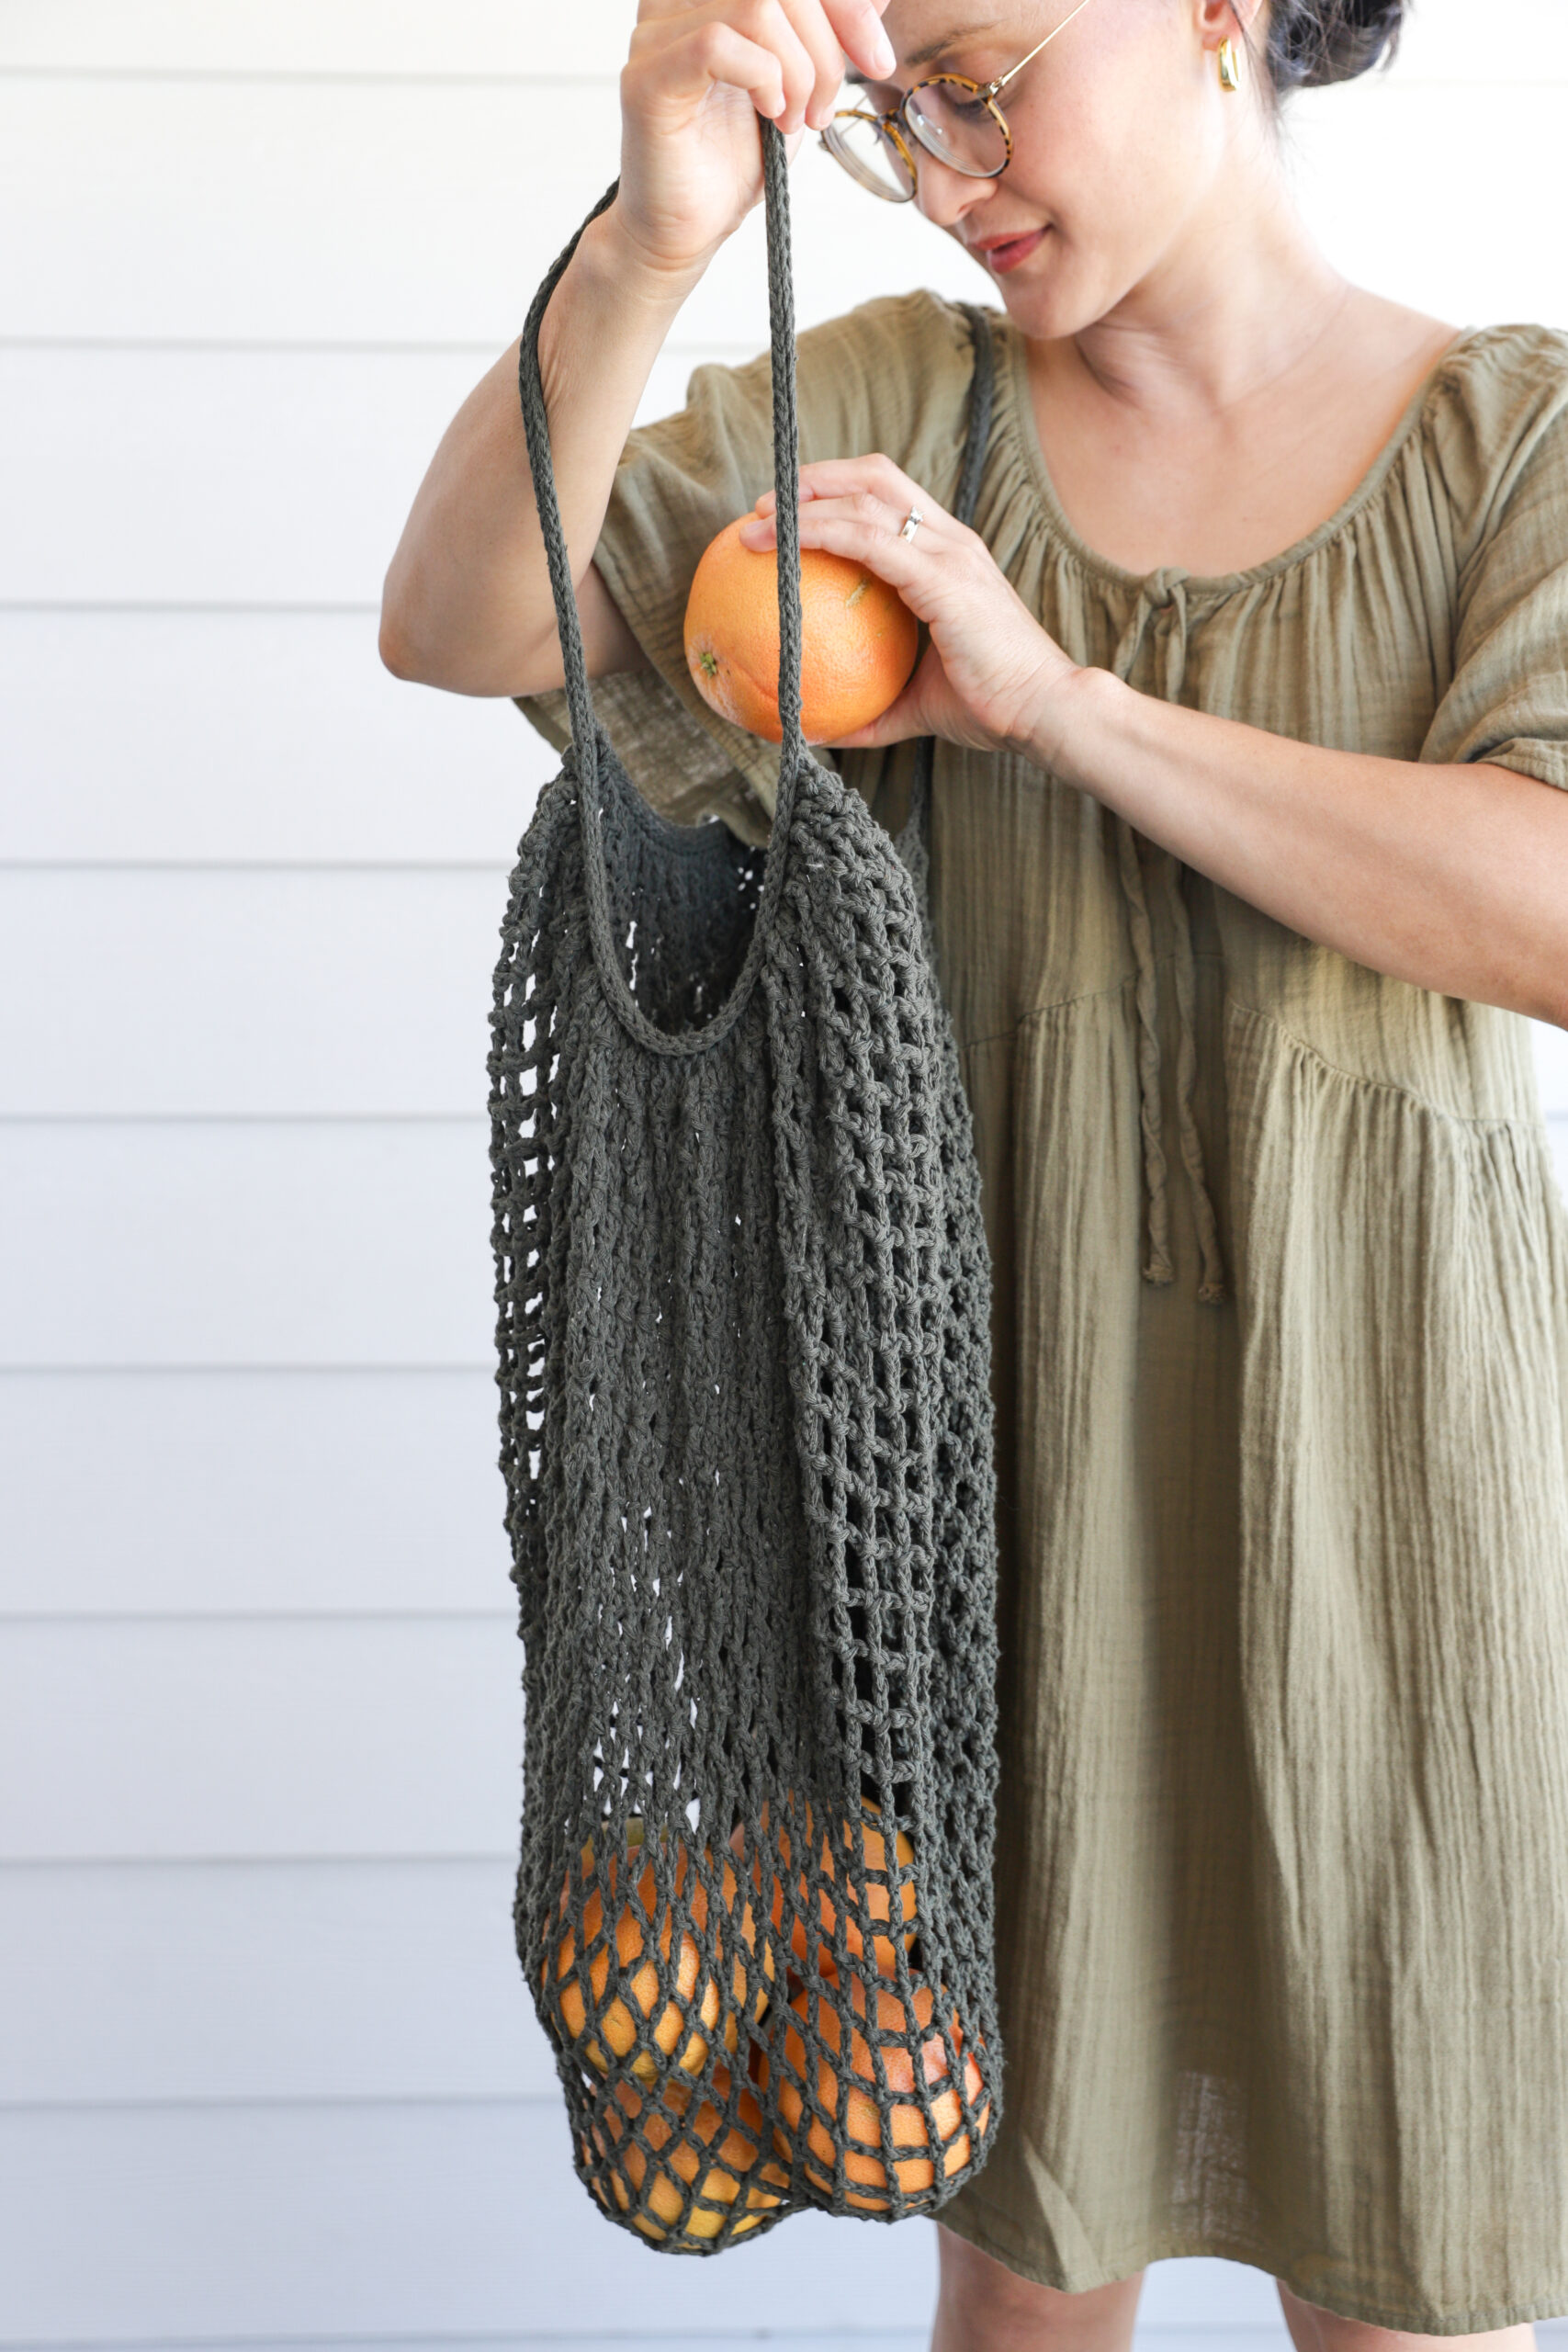
Well, yes. This bag does handle 5 pounds of grapefruit like a champ. It’s sturdy, but it also str-e-t-c-h-es.
If you want to make a bag specifically for heavy produce, I recommend shortening it.
SIZE ADJUSTMENT
You will need to create a smaller bag that will stretch less. You can do this by reducing the number of rows. However many rows you decide to remove, I recommend working an even number of mesh rows.
When you do this you also need to make the handles longer. Remember the body of the bag is part of the handle. So whatever number of rows you remove, you need to add some of it back to the handle. Divide the number of rows you removed by half and add that many chains to each handle.
For example: If you take away 16 mesh rows for a total of 64 mesh rows (not including the 5 rows of slip stitches on each side), then you would need to add 8 chains to the handle or chain a total of 83.
HEADS UP: The bag will look disproportionate if you shorten it. Remember, that it will stretch when in use.
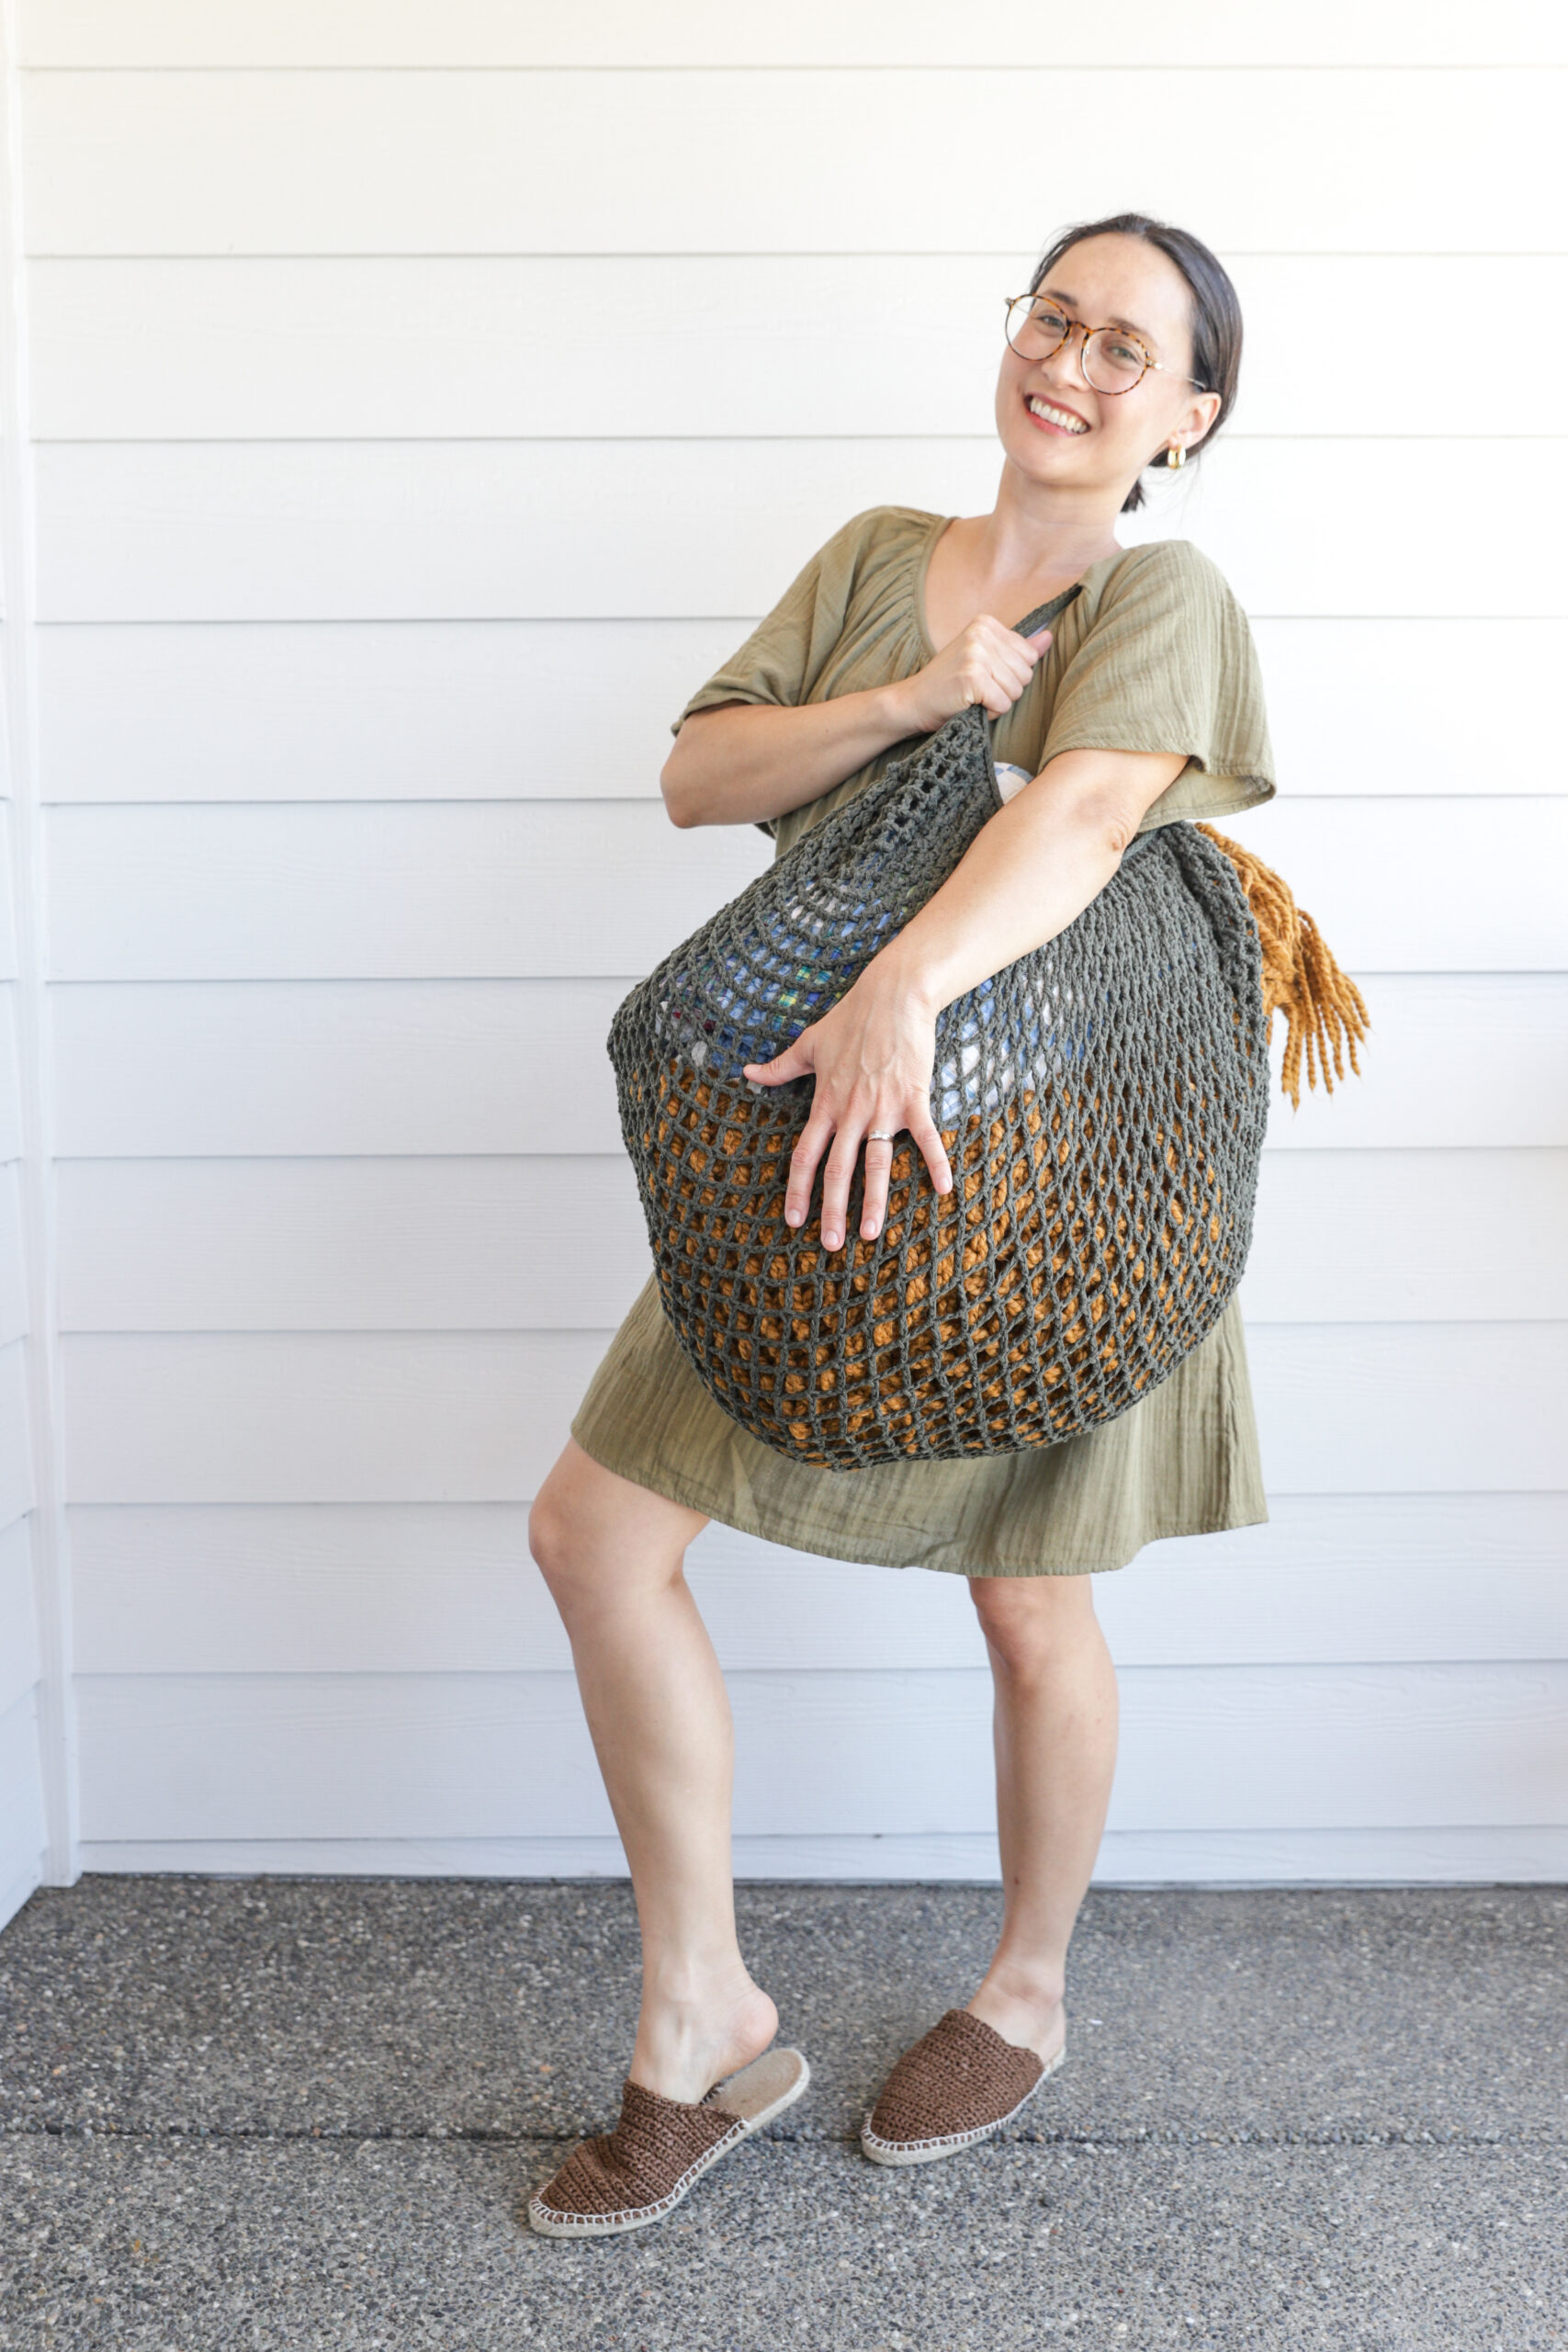
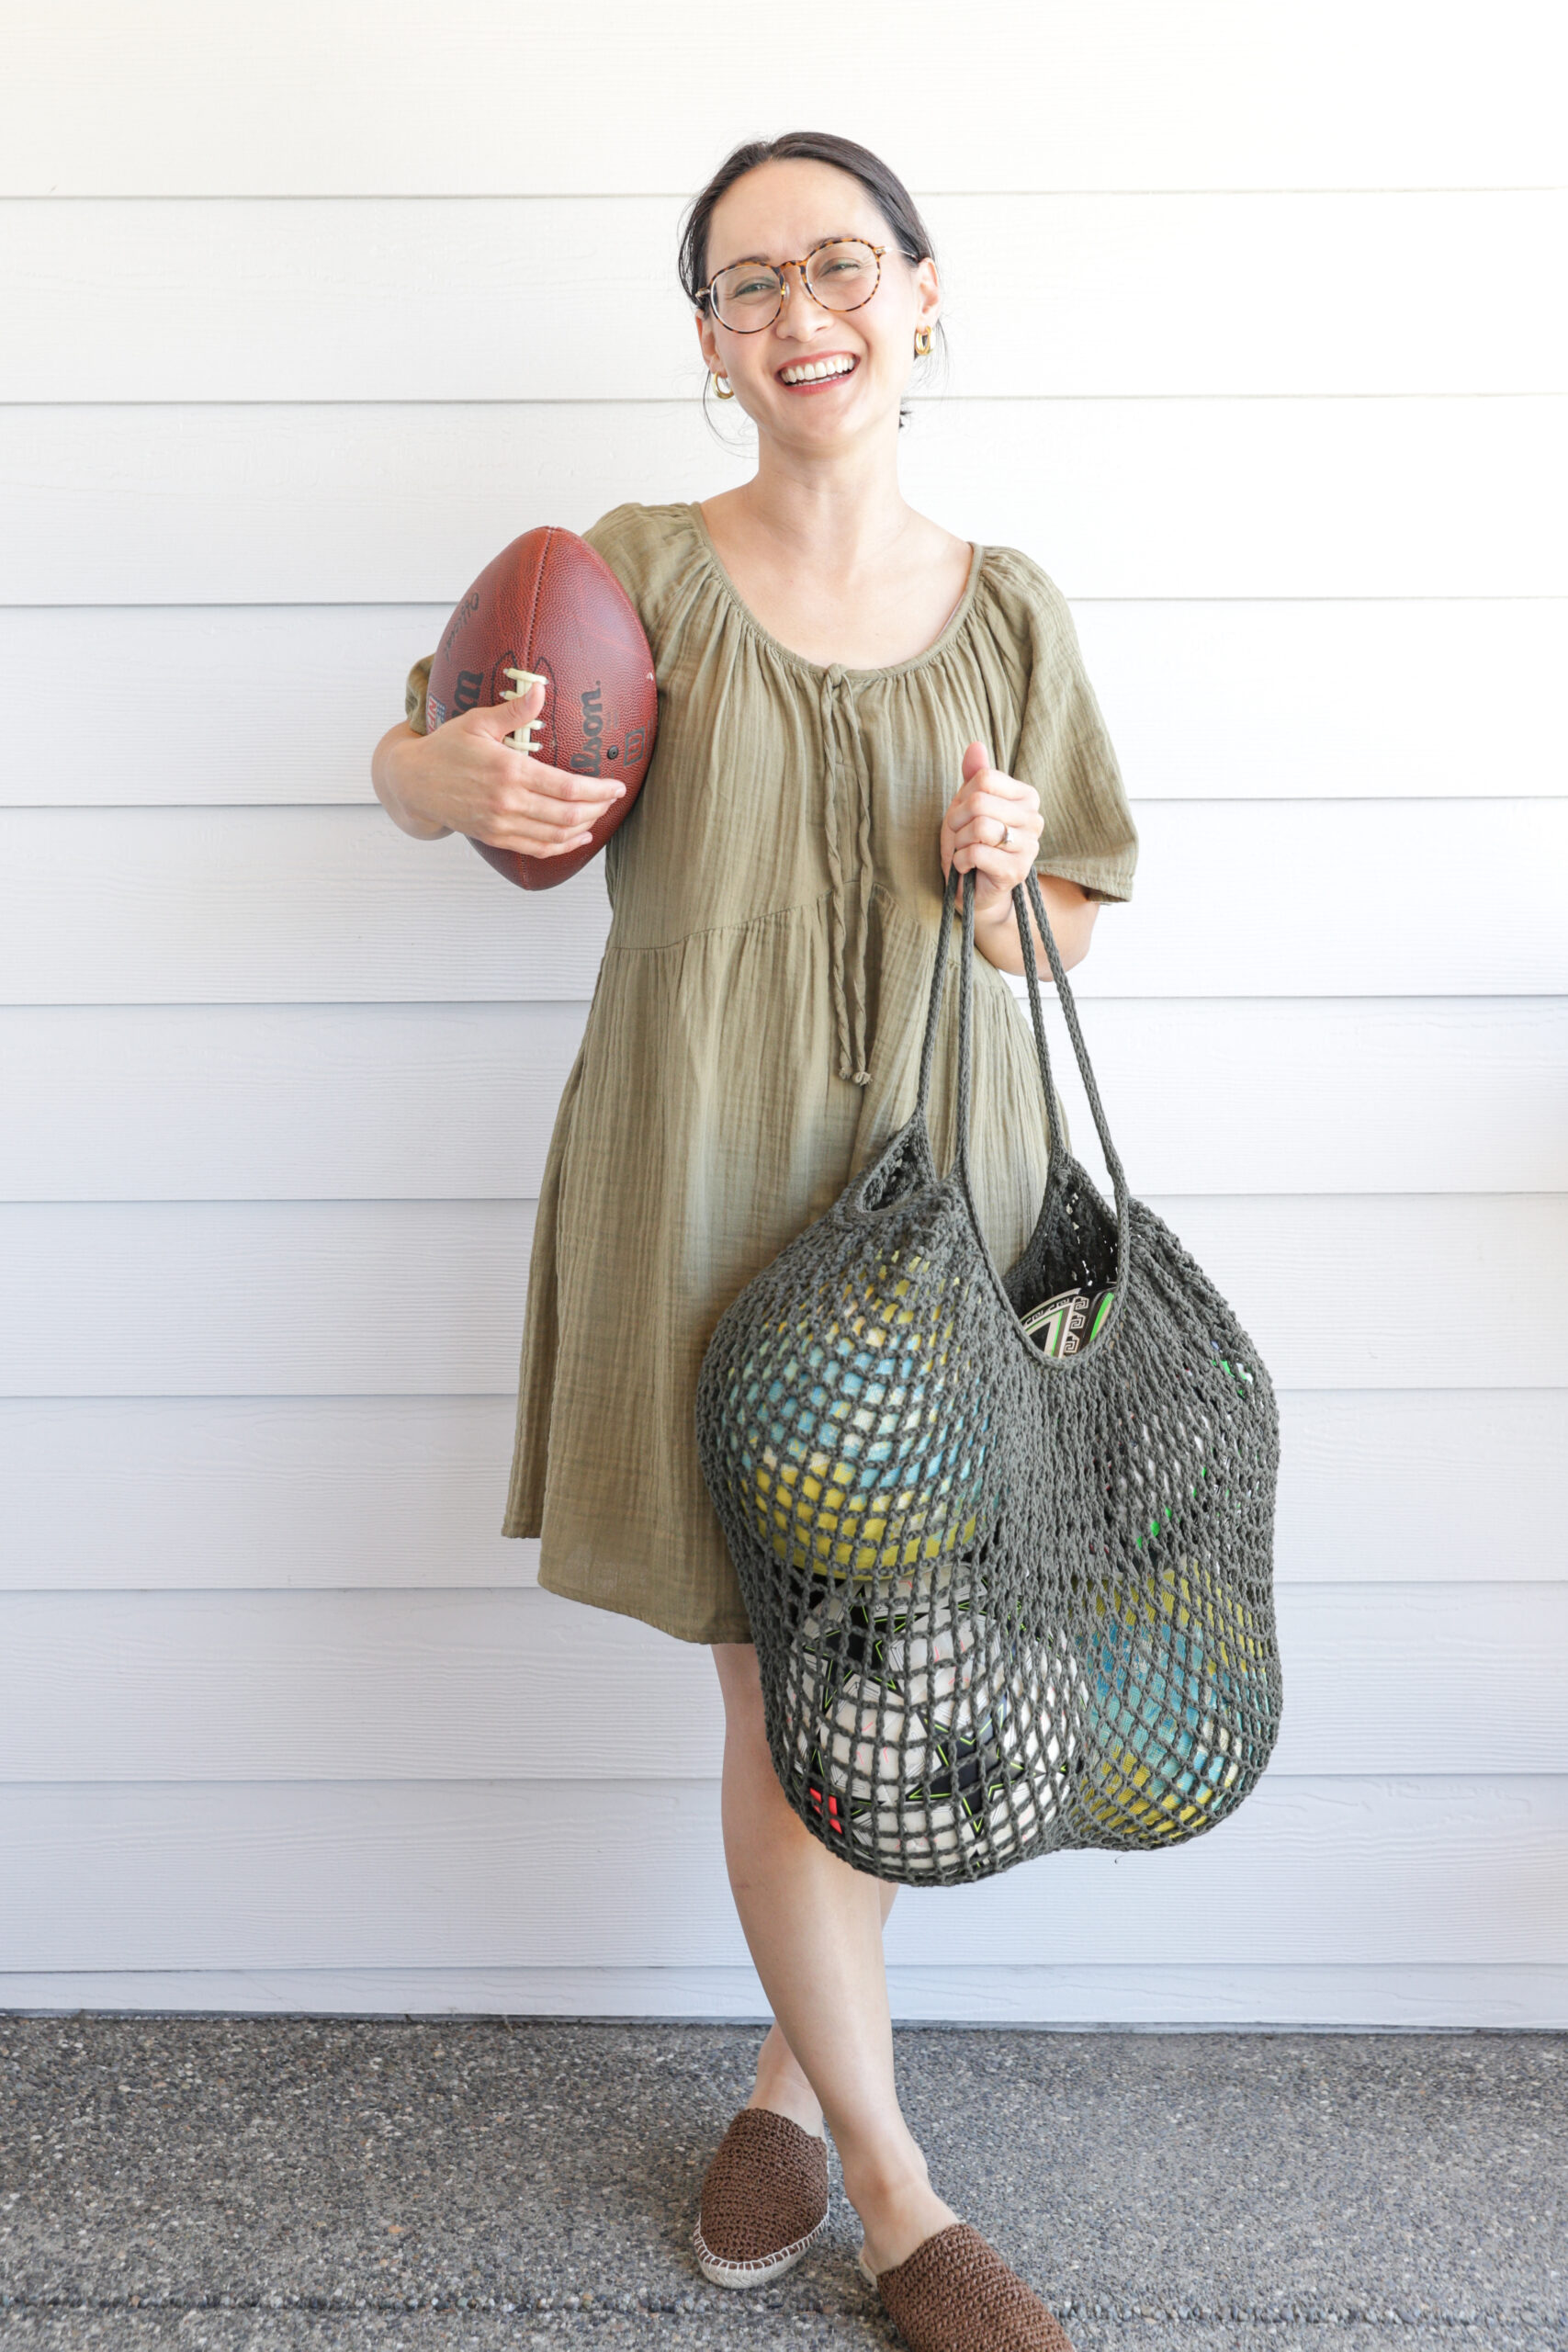
WHAT TO PUT IN YOUR MESH MARKET BAG
Finally, let’s talk about what I think this bag is ideally meant to hold. It really shines with light-ish but big and bulky items. Think blankets for a picnic:
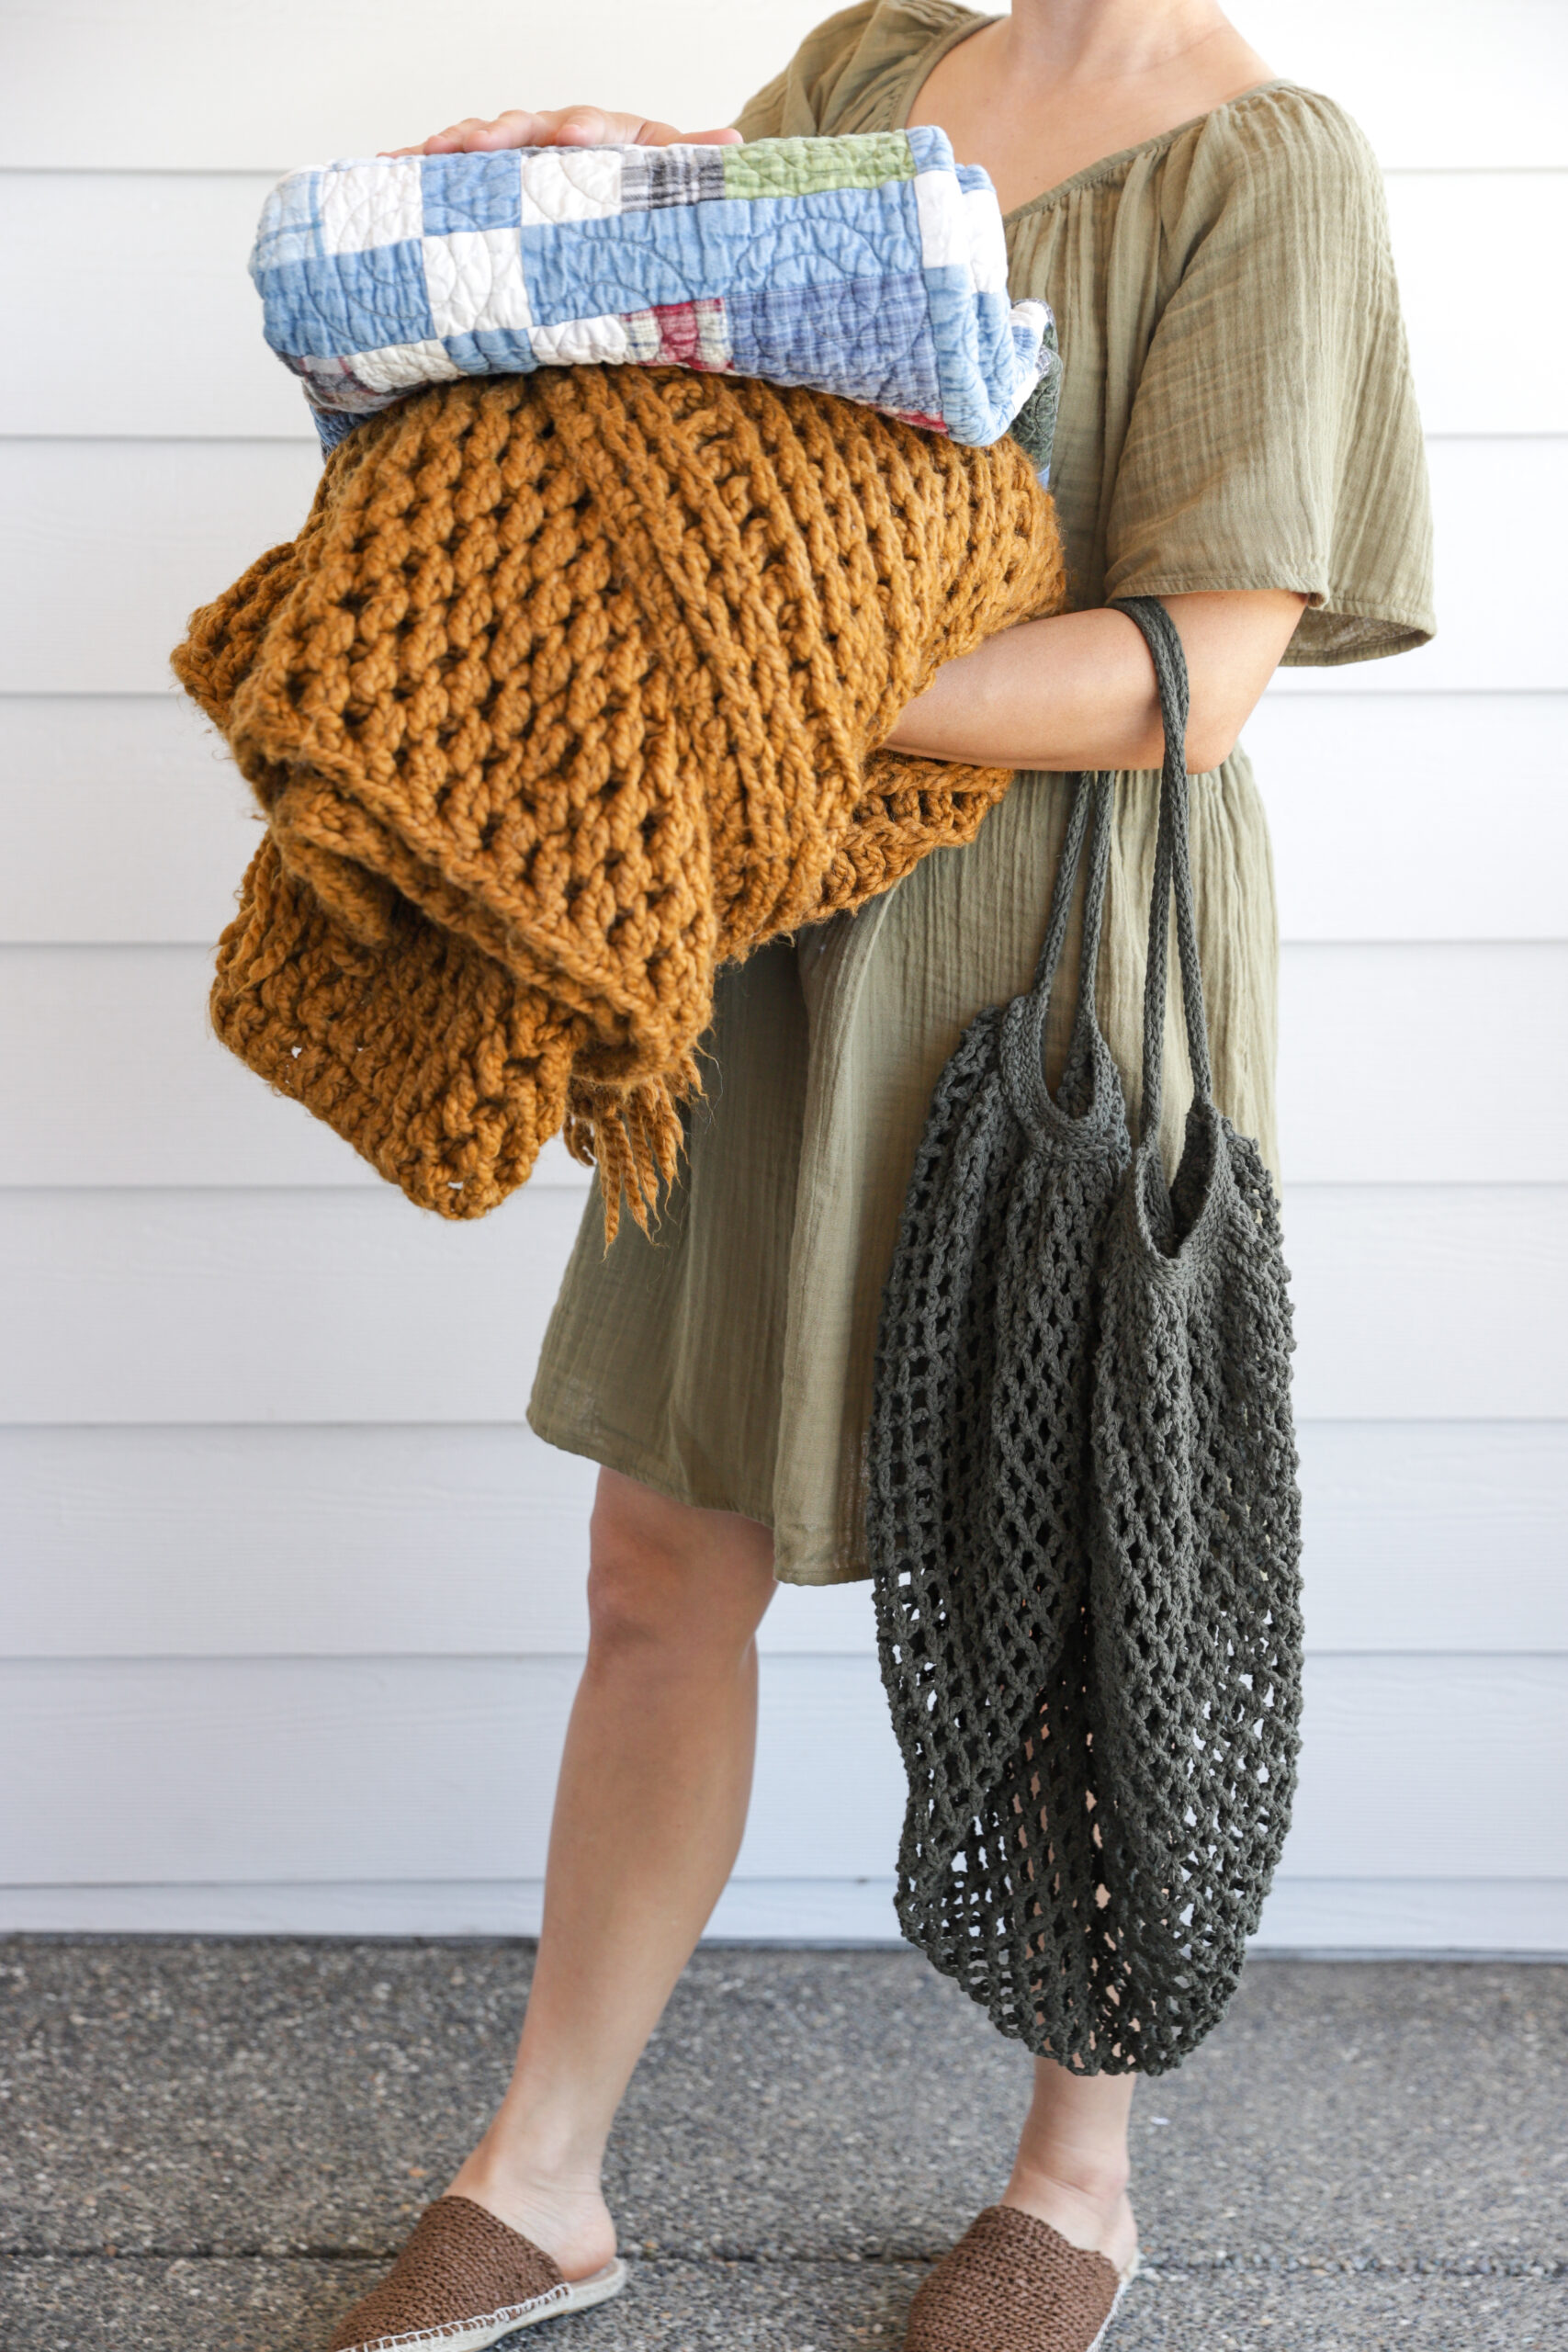

This is a quilt my mom made and this blanket is a free crochet pattern on my site HERE. Both are about lap size, but the crocheted blanket is voluminous and hard to fold. This bag is perfect for containing it.
How about sports balls but make it *aesthetic* ;):
The airy mesh makes this bag perfect for corralling damp towels and beach toys as well:

It’s not the bag you want for library books, but it’s the bag you want for a blanket and book at the park. Plus…it’s cuuuute!
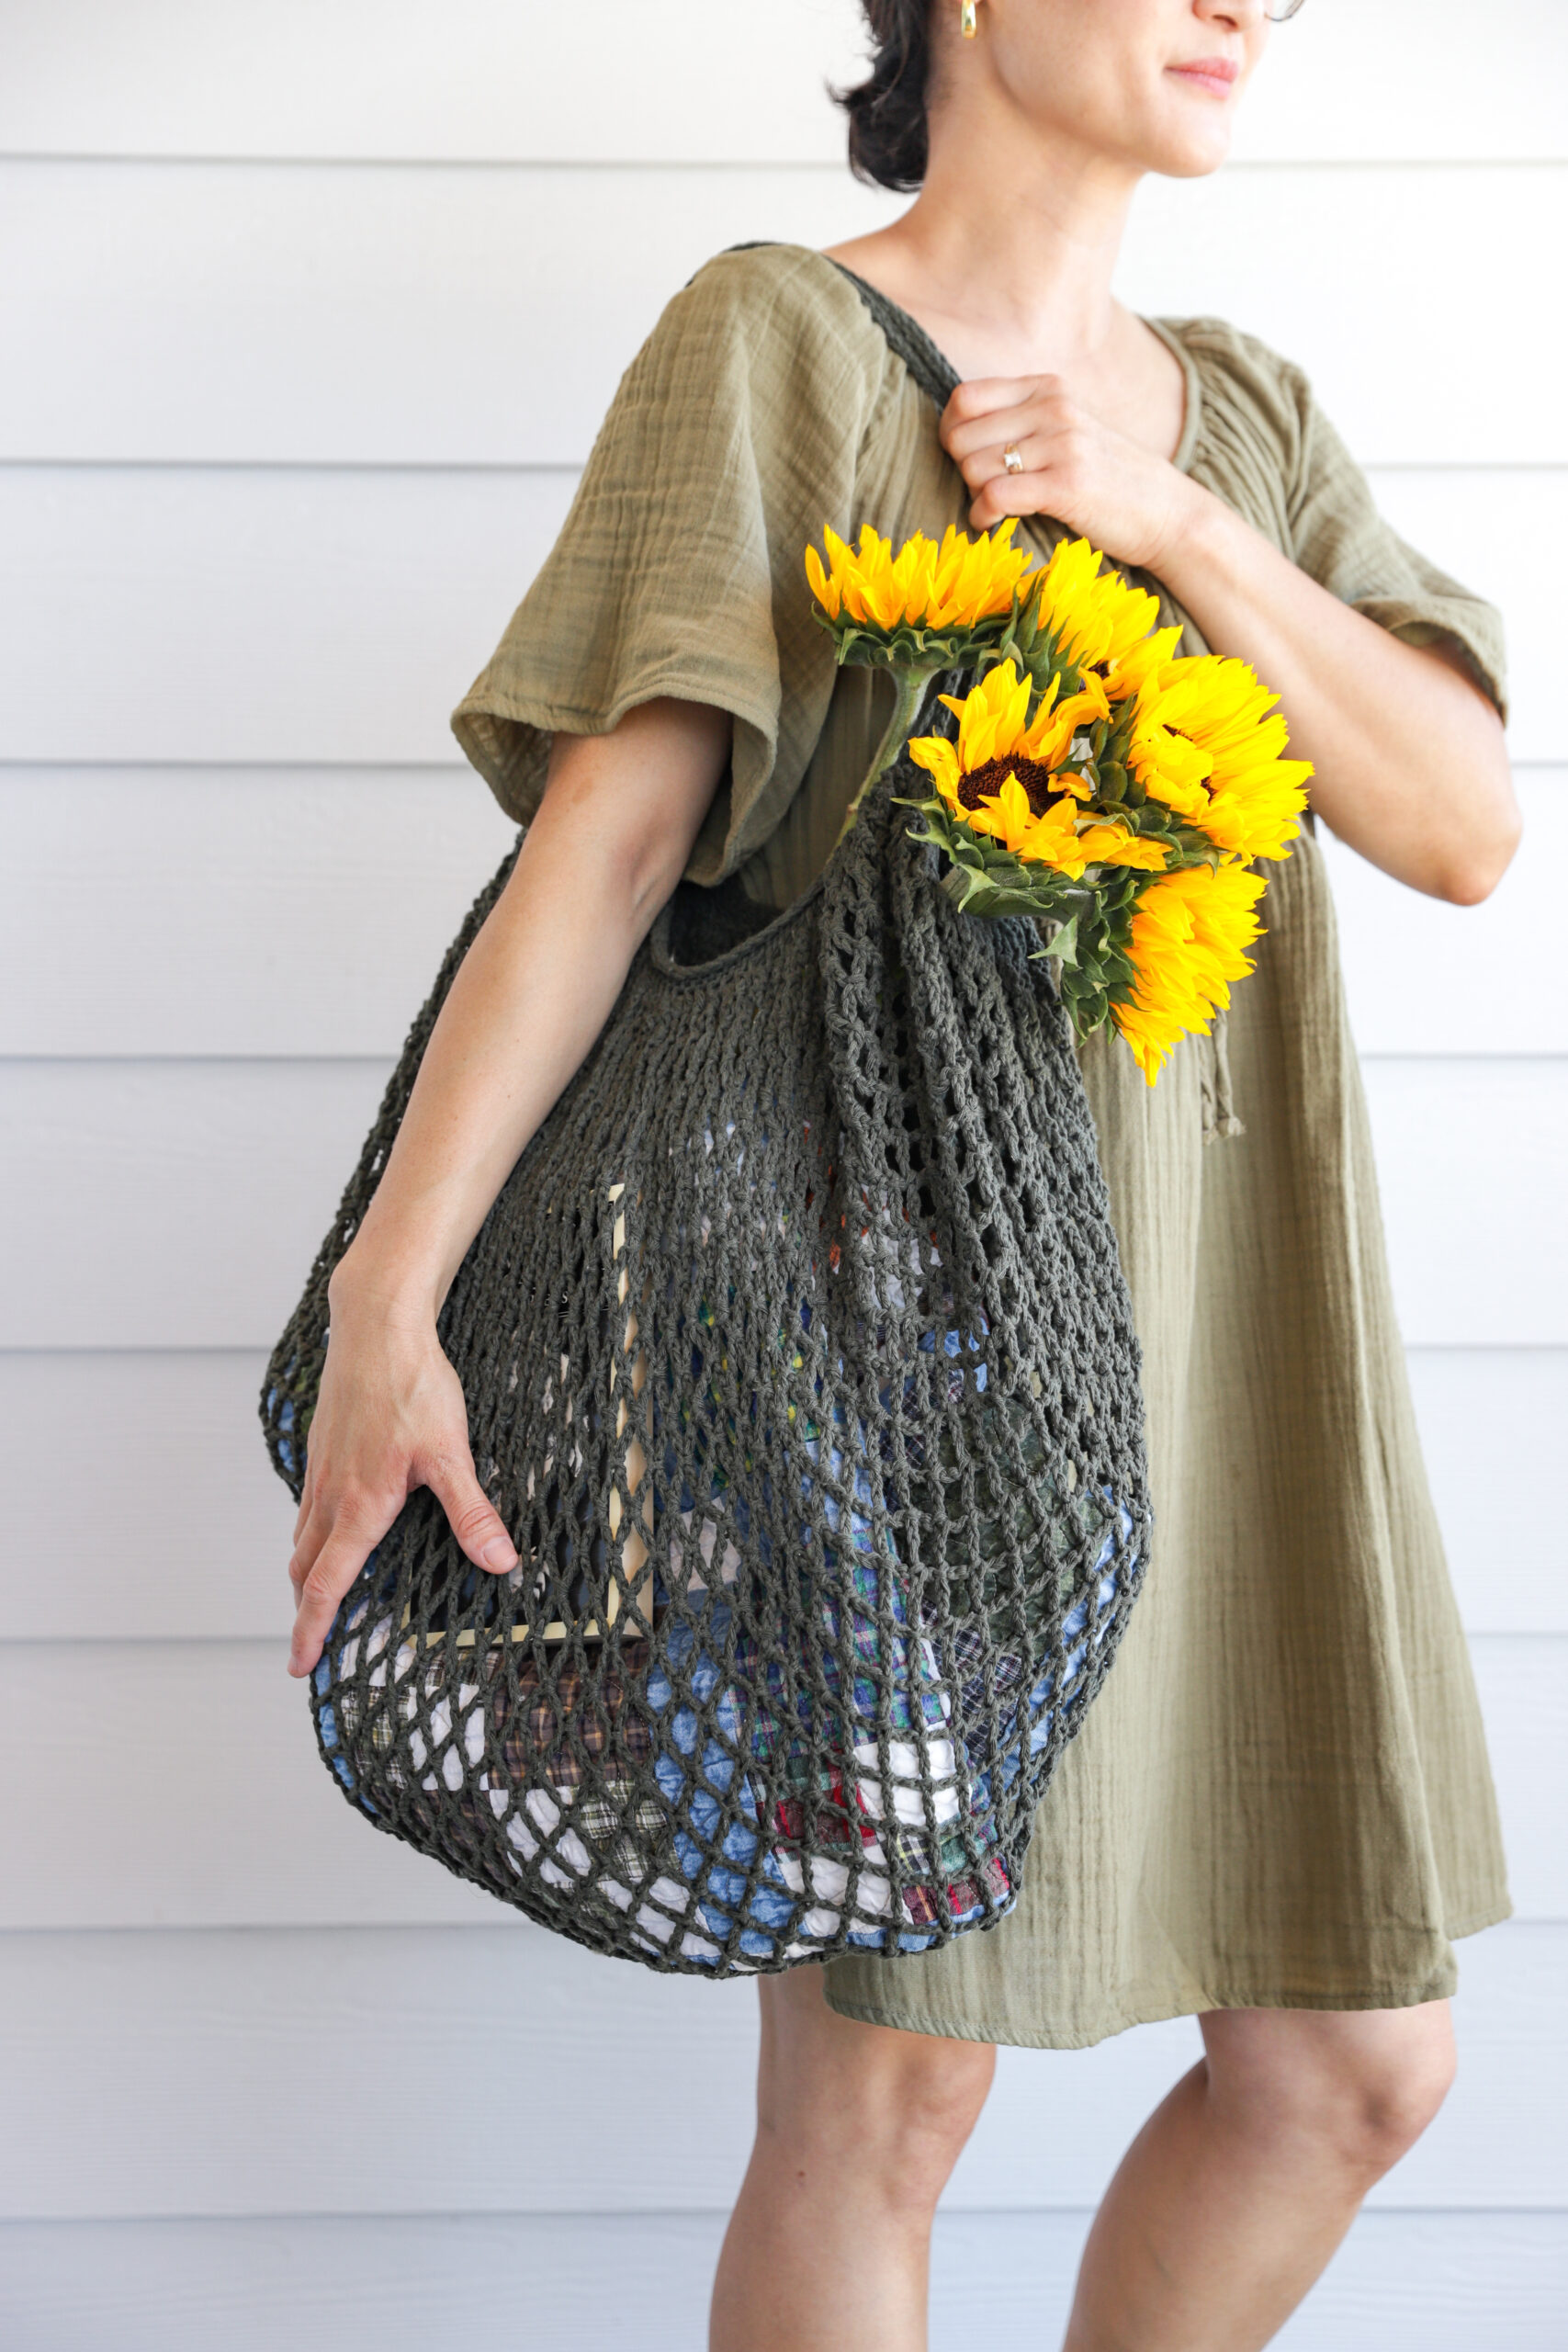
And it folds up compactly.
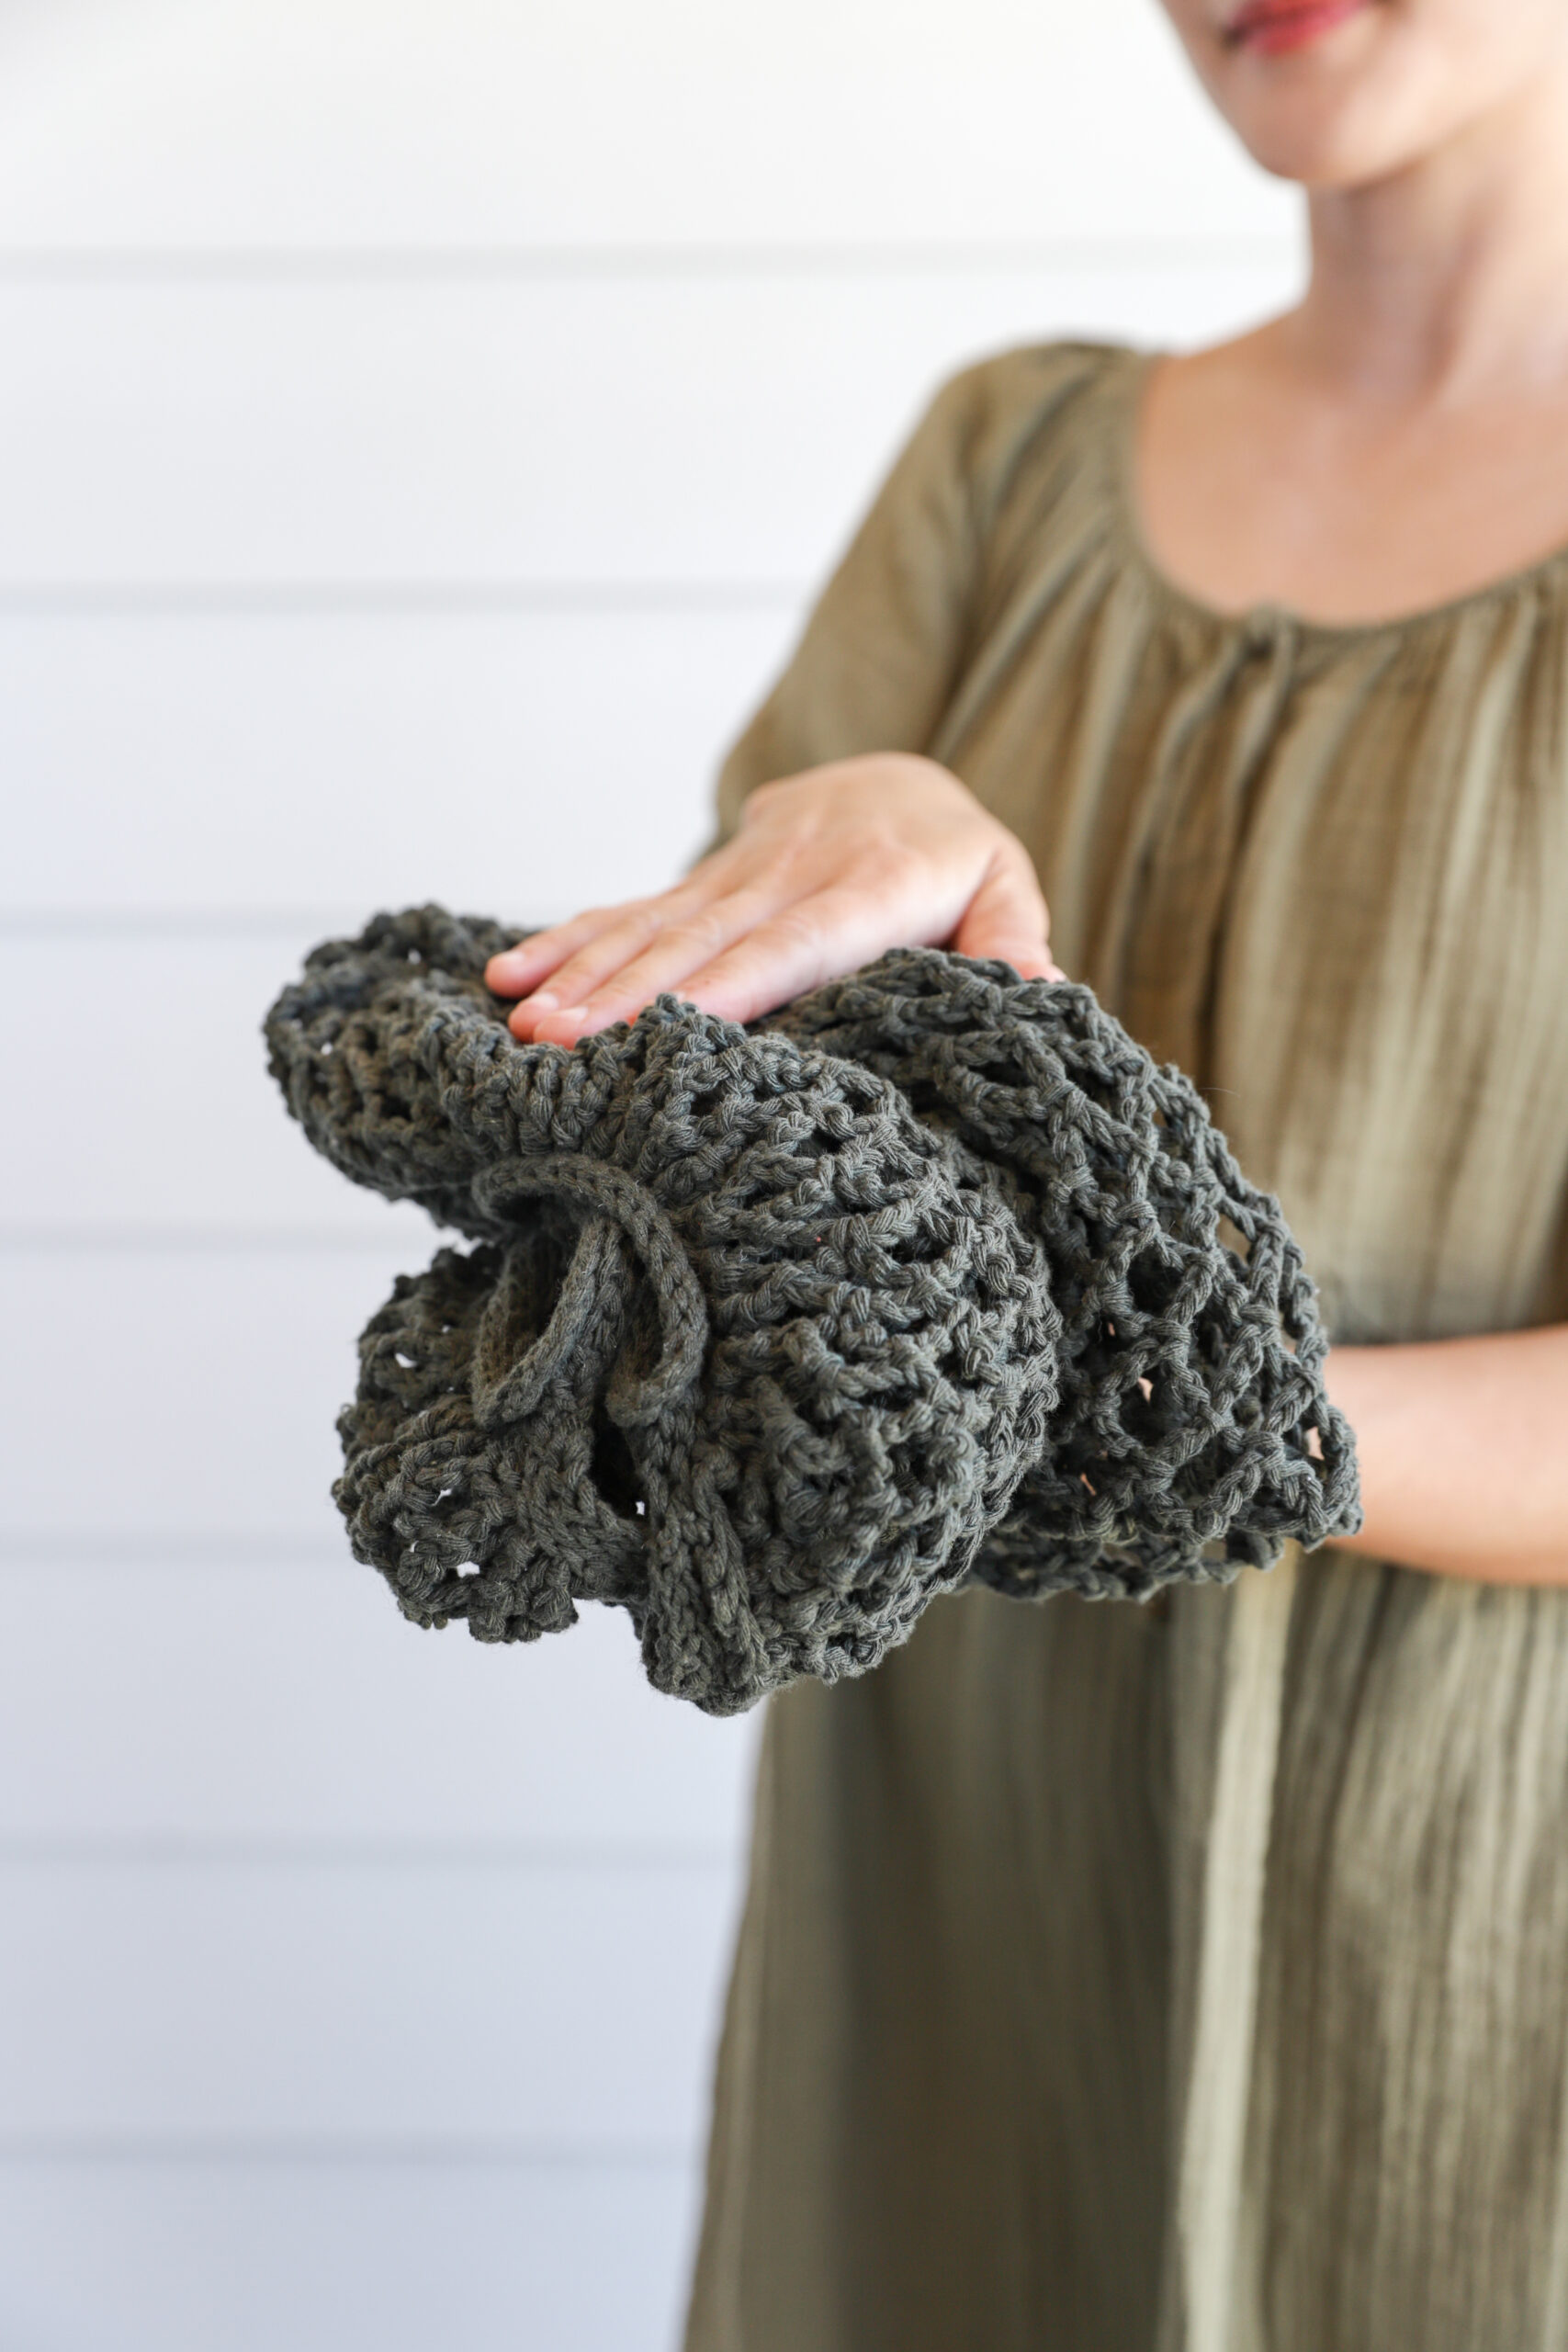
And did I say it’s cute? 😉
Leave a Reply