

This is a re-post of my guest post for Pleat Weeks at See Kate Sew.
Hope you had a nice weekend.
________________________________________________________________________Hello See Kate Sew readers! I am so happy to be here for pleat weeks. I have loved seeing all the beautiful projects that have been shared and feel honored to be apart of the guest posting panel.
Hope you had a nice weekend.
________________________________________________________________________Hello See Kate Sew readers! I am so happy to be here for pleat weeks. I have loved seeing all the beautiful projects that have been shared and feel honored to be apart of the guest posting panel.
When I was thinking of a pleated project for my post, I wanted to do try something different, so what I came up with is more of a pleating technique rather than a specific project. I call this technique:

It’s basically just a quilted pleat. Contrasting strips of fabric pieced together…

…and then pleated; and the contrasting strips just peek through.
I tried the technique with zipper pouches…


…and with a throw pillow. First with pressed pleats that bloomed a bit when I inserted the pillow form.

Then, with sewn pleats that look cleaner but have a look similar to piping.

The technique can sometimes be a bit fussy but it’s fun and adds some interest to an age old technique.
Here’s a quick run down of how I made each project using this technique.
First the zippered pouch.

To make the zipper pouch decide how big you want your finished pouch to be. The zipper will obviously determine how wide it is, you’ll just need to decide on how tall. Add a 1/4 to all sides for seam allowance. This measurement will be what you use for your liner pieces.

Okay…this next part may get tricky so pay attention.
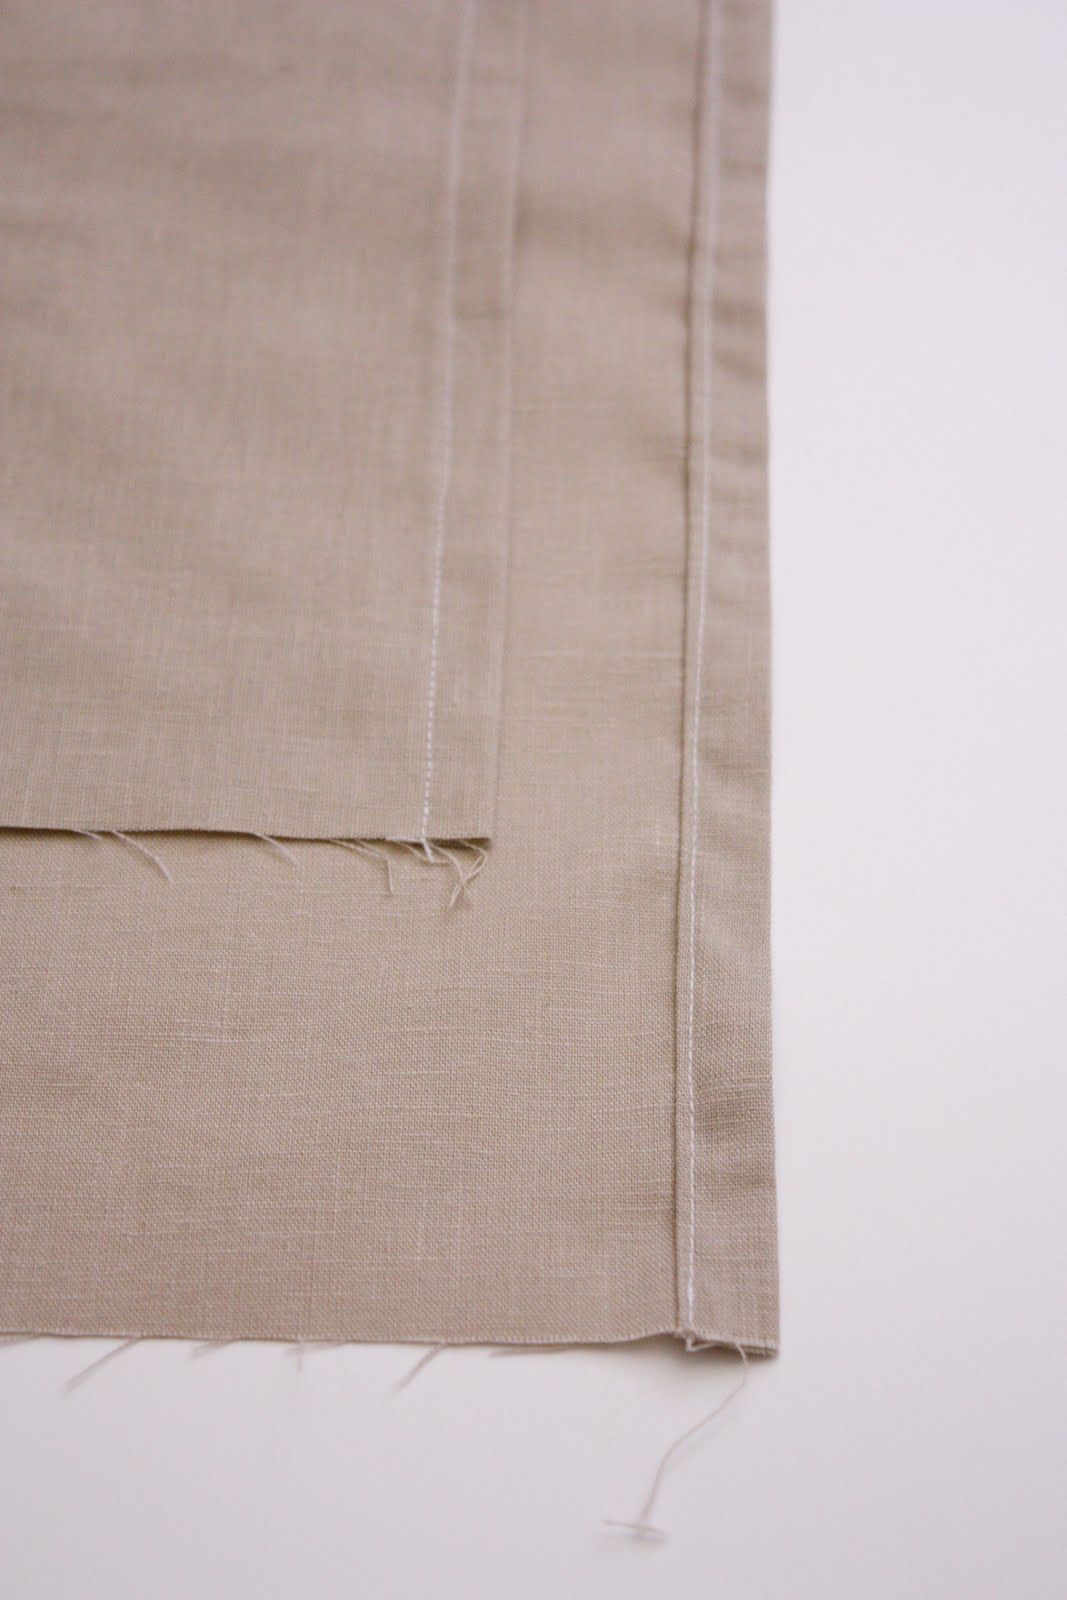
Take the liner measurement and decide how many pleats you want to have. Divide the width of your bag using that number and add 1/2 inch seam allowance {1/4 on each side} to each “pleat” strip…but there’s a bit of a catch. You need to make sure the end strips are slightly wider than the middle strips.
See how I had to tack that end pleat down on that orange and white zipper pouch. That’s why you need wider end strips. 🙂

Take a minute to do the math, then add 1 1/2- 2 inch contrasting fabric strips to go in between. These won’t really affect the finished length of your bag because they will get pleated under.
At first I thought it would matter how wide the contrasting strips were, but I found that it didn’t really matter since they are mostly hidden. A finished 1 inch contrasting strip {1/2 inch gives way to seam allowance on both sides} was just right for the zippered pouches.
Hopefully this picture makes it a little less confusing:

Once you get that down, cut your strips and piece them together.


Piece the stripes together for both outer bag pieces. Press the seams to one side. {I varied which pouch I used for these pictures…but it’s all the same thing}

Then press into pleats. You can use knife pleats or inverted pleats. Either works fine, although the inverted pleats are fussier than the knife pleats.
Pleat carefully making sure that the finished width of your bag is as close to the liner width as possible.


Trim any excess fabric off to make it flush with the liner pieces.

Pin the pleats in place so that they don’t shift during sewing.

Now you’re ready to assemble your bag. I simply used MADE’s Candy Bags tutorial. Go here.

And that’s it. When you fill the pouches the contrasting undersides of the pleats pop out even more. Kind of fun.
Now for the pillow.
The idea is the same as it was for the bags, I just used fewer pleats. The outside strips are a bit wider than the inner ones and the contrasting in between strips are about 1 1/2.

You only need pleats on one side, so for the back of the pillow, cut two pieces to make an envelope slip cover. My pillow form is 13.5×13, so I cut two pieces 14×10 inches {1/4 inch seam allowance and hemmed edges figured in}.

Piece the strips together and pleat like so…


Here’s a view from the back.
While you have the iron out double fold down a hem for the back pieces.

Sew the hems down.
Sew the pleats if you desire. If not, pin the pleats in place so they do not shift.

Sew the pillow pieces together, overlapping the back pieces like so. As you can see, I pinned it carefully first, keeping the pins that are holding the pleats in place as well.

Snip the corners and turn right side out.


Here is the pressed pleat finish:

And the sewn pleat finish:

And the view from the back.

Thanks for having me over to play Kate. Have a beautiful day everyone!

Wow Delia! I am speechless. Those pouches are to die for. Have you considered selling them? Great work.
I love the pressed pleat finish on the pillows! SO pretty! Wonderful tutorial!
cute cute cute!
Delia, you never cease to make beauty. Beauty everywhere all the time. It's a gift. Thank you for sharing it!
I just started following your blog about a week ago. I love the pleat idea for making the zipper pouch. It looks like it would be a cute stocking stuffer for my sisters-in-law at Christmas! Thanks for coming up with the idea and sharing it in an easy-to-follow tutorial.
I absolutely love the pillow! Great fabric choices. I will have to try this. Thanks!
loved it at pleat week! love it still! 🙂 totally making one!
This is a really beautiful and usefull post.
I’ll try to do it 🙂
Olá menina adorei essa ideia das pregas realmente fica um trabalho maravilhoso. Adoro novidades.
Bjim