

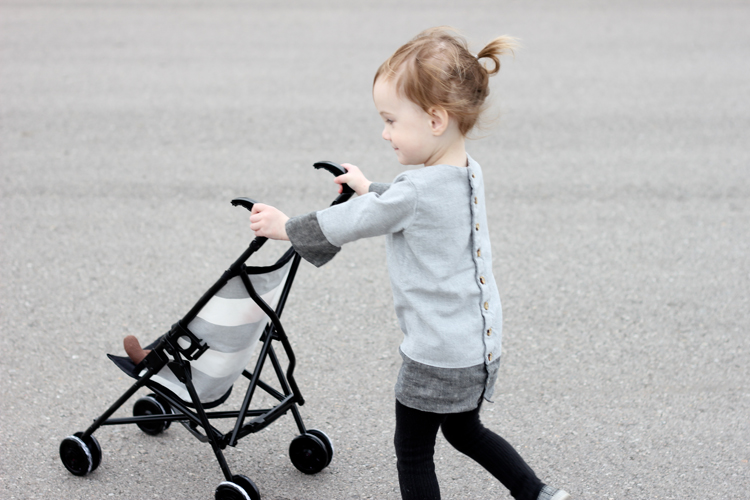
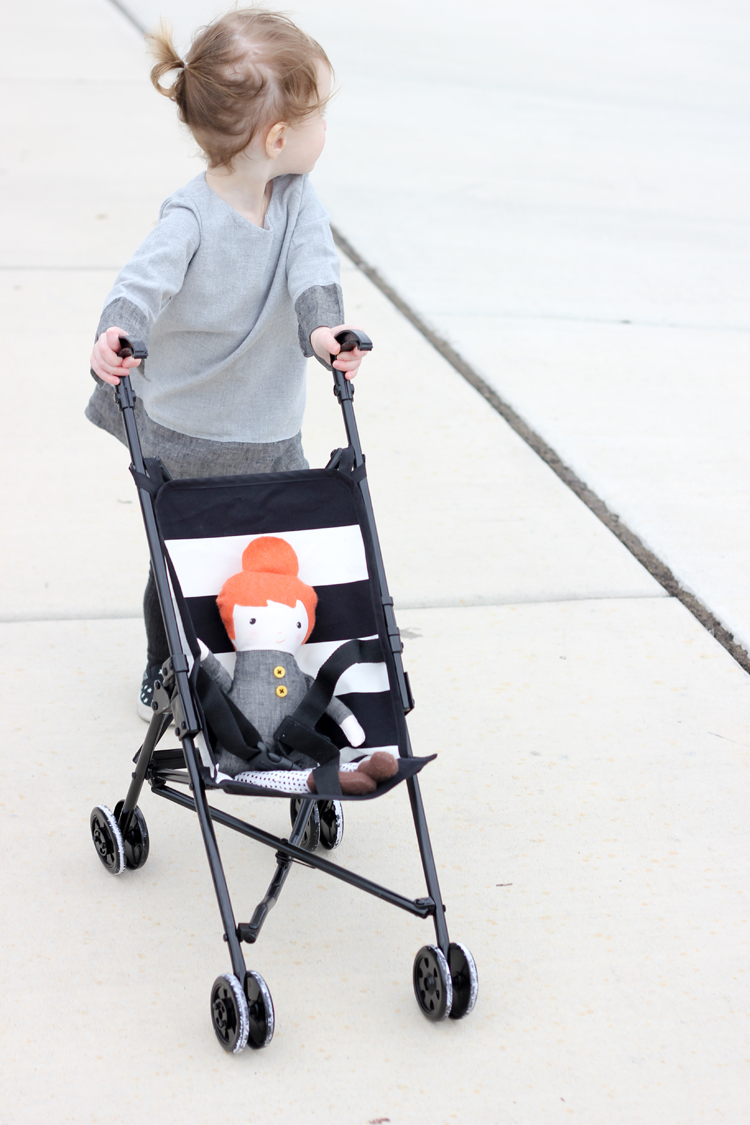
Natalie got a baby doll stroller for Christmas and by Valentine’s Day it was trashed.
 Does that story sound familiar?
I am convinced that unless you drop real money on those things, doll stroller seats seem to always be made so cheaply! So, it wasn’t really a surprise that it met it’s demise so quickly.
 It doesn’t help that most kids, including mine, like to use the strollers themselves, which makes them break faster. 😉
Secretly (or not really so secretly) I was kind of excited that it broke…so that I could make it over!
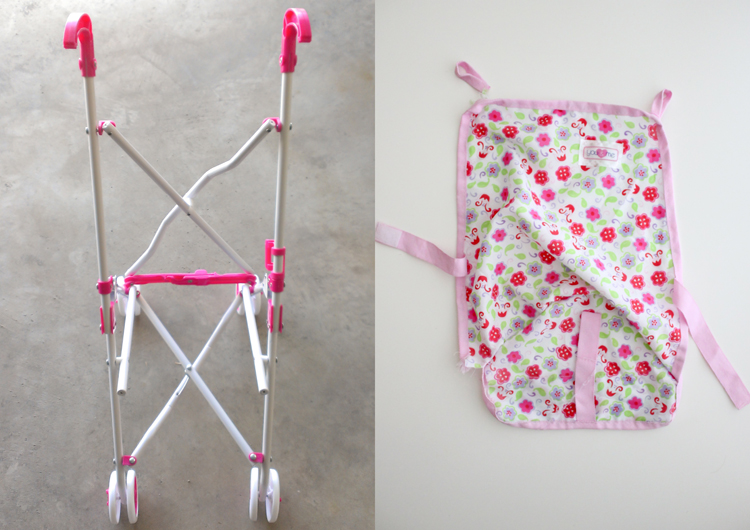
 I almost forgot to take the before picture, but remembered soon enough to snap a quick pic with my camera phone. The seat was already on my desk ready to be deconstructed, but you get the idea…
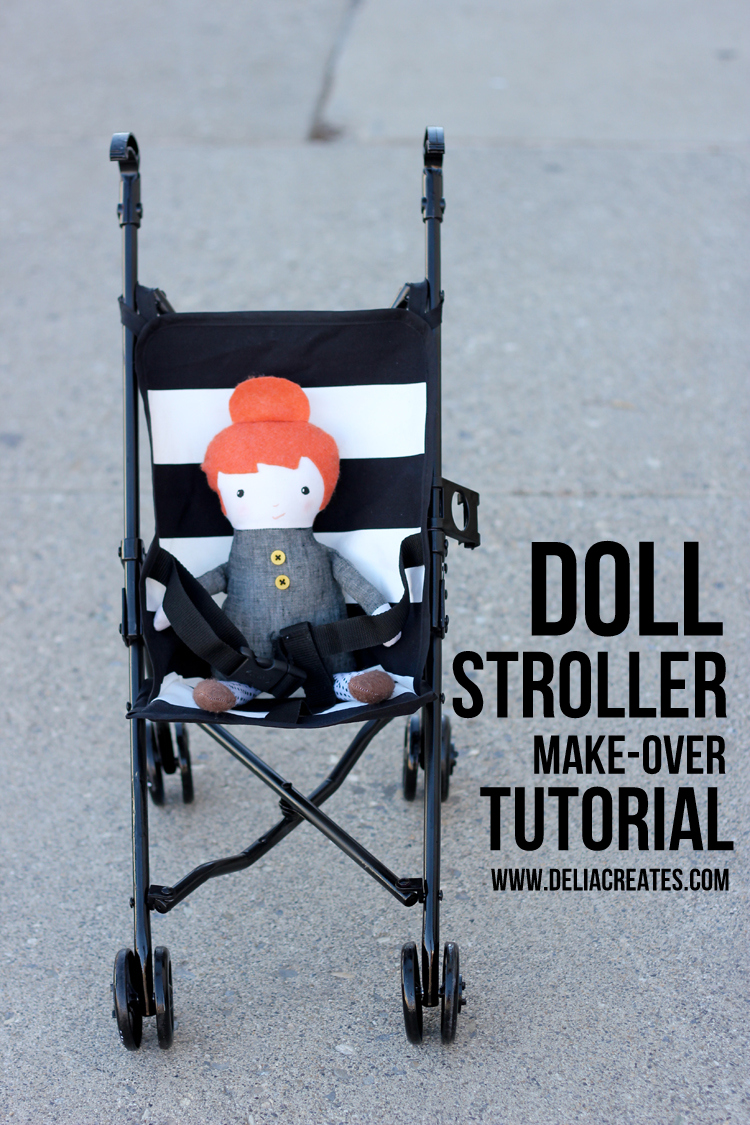
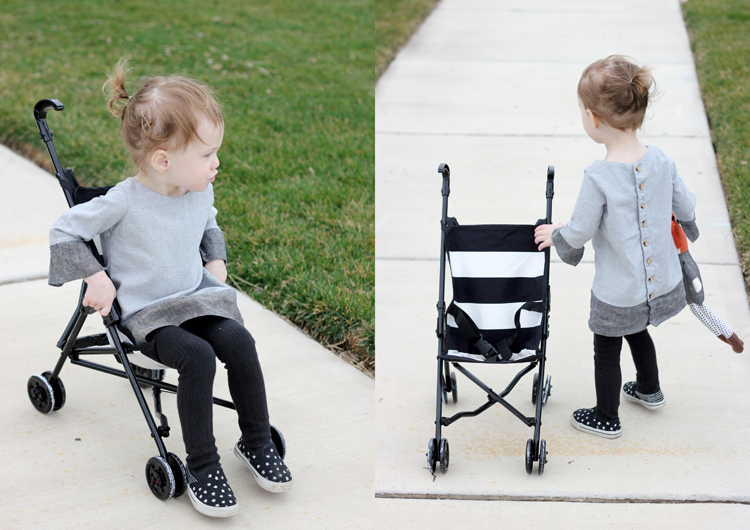
 The old to the new:
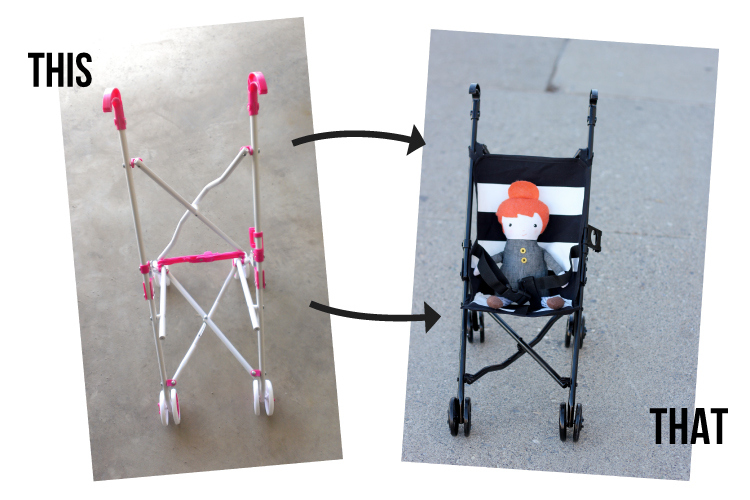 Ta da!
Want to know how I did it?
Let’s get to it…
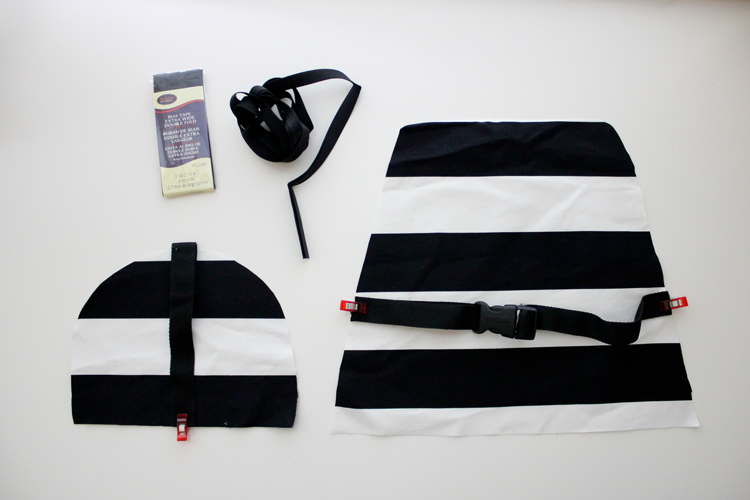
Materials:
Old baby stroller Spray paint (optional) 1 package of wide double fold bias tape (3 yards – you will use just over half) Belting and belt buckles – 1 yard should be plenty (you may decide to use velcro instead of buckles) 1/2 yard pre-washed, heavy weight fabric, like duck cloth, home decor fabric, or canvas material (I used this IKEA fabric) Matching thread (all purpose polyester) Pins and/or clover quilting clips Fabric marking pen Seam ripperPAINT THE STROLLER FRAME
First things first. If you decide you want to spray paint the stroller frame, do that first. You will have to apply several coats because there are a lot of nooks and crannies that are easy to miss on the first few passes. Let it dry about 20-30 minutes in between coats (just so it’s dry enough to handle) and then let it cure for a full 24+ hours before using it. I highly recommend using a nice quality spray paint like Rust-Oleum. Krylon paints are okay, but Rust-Oleum always gives significantly better coverage and even application…in my experience.
While that is curing, sew up the seat.
CUT OUT THE SEAT PIECES
Don’t throw that trashed seat out just yet. You need it to help you create a pattern for the new seat. If all doll strollers were made the same, I would just share a free pattern download. Since, they are not, I am going to show you how to use your old seat as a guide or pattern.
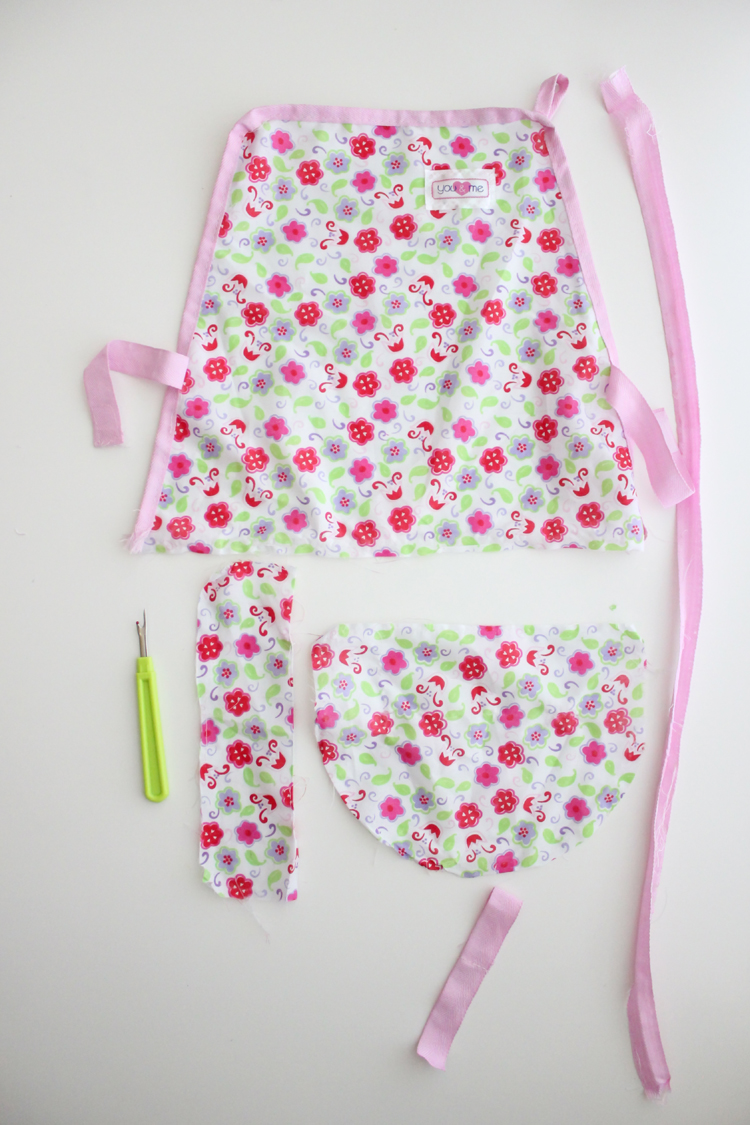 Using your seam ripper, carefully disassemble the seat into all its original pieces. You can leave the bias tape on.
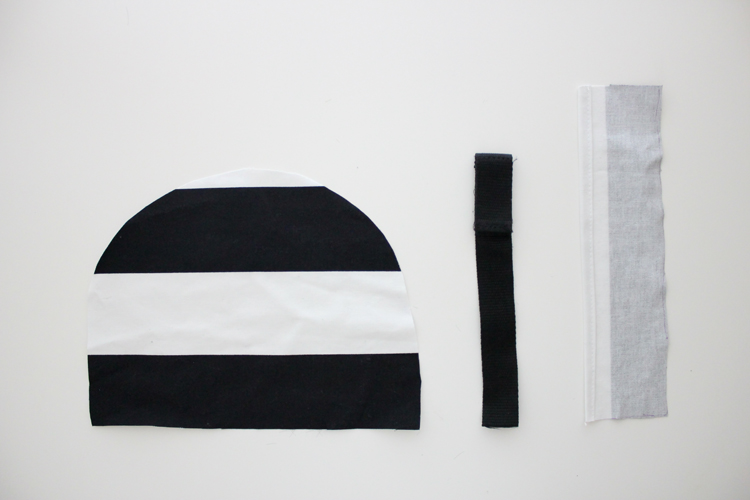
 Now trace the pieces exactly onto your new fabric. Don’t worry about adding seam allowances or anything like that. Just trace it as is, then cut your pieces out.
 Be sure to mark where the belt pieces need to go onto your new fabric. (I used my disappearing ink sewing marker.)
Get your strap pieces ready as well. I used old belt buckle straps from an old bag. You can buy belting by the yard at the store, and sew velcro on the straps as well. Use the old seat belts as a guide for how long you need to cut them. Sew the velcro onto the straps or sew on buckles in similar fashion to the old seat. For the strap that comes up from the bottom of the seat, fold over the end and sew a little loop for the side straps to thread through.
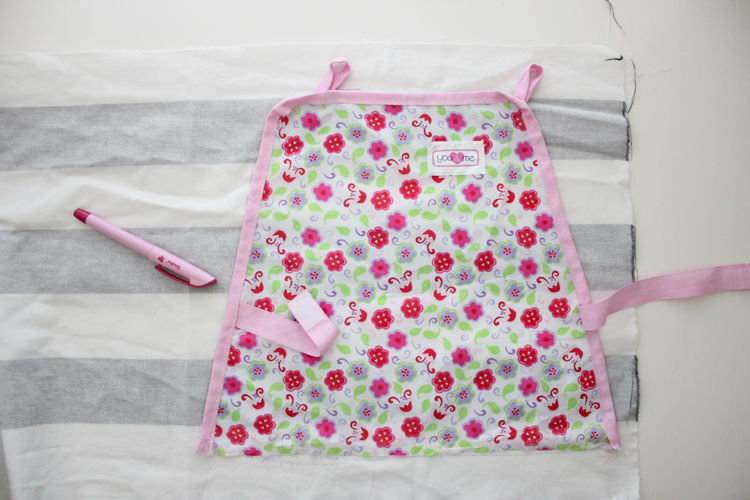
ASSEMBLE THE SEAT
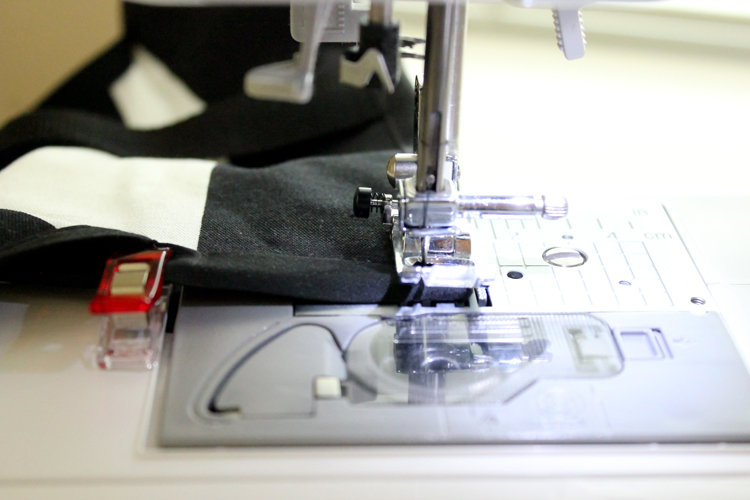
On the under belly of the seat, there is a likely a pocket that slides onto the seat frame to keep it in place. Prepare that pocket piece by folding and ironing over one of the long edges 1/4 inch, twice (so you are enclosing the raw seam). Top stitch in place.
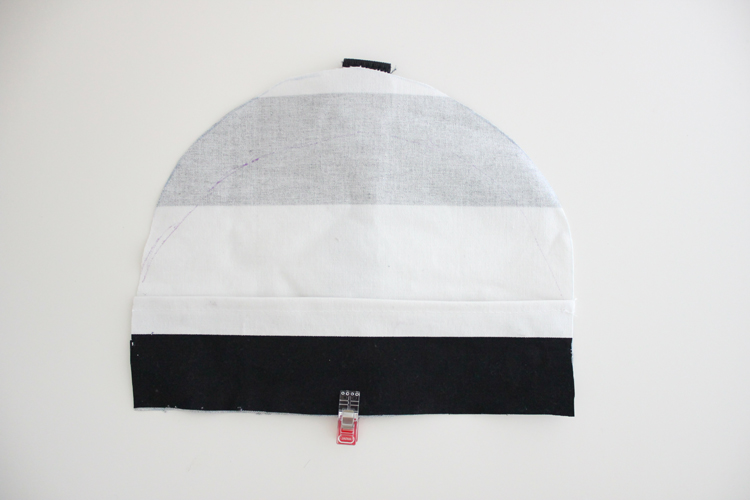 Next, place the strap in the middle of the straight edge of the semi-circle seat piece and clip or pin it in place. Baste (sew) the strap to the seat piece with a 1/8-1/4 inch seam allowance.
Baste the side strap pieces onto the back seat piece as well, at the points that you marked earlier.
Now, you’re ready for bias tape…
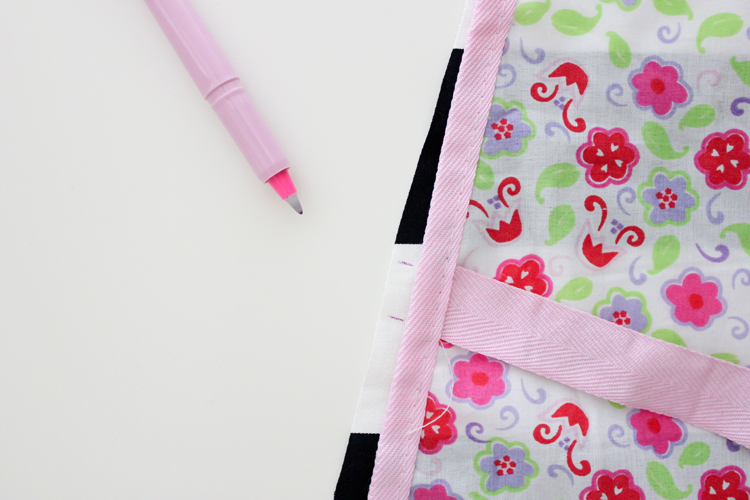
 There are a couple of ways to sew on double fold bias tape. We are going to go for the quick and easy method of just sandwiching the bias tape over the sides. Double fold bias tape comes folded with one side longer than the other. Make sure that the longer side is on the back , so that when you sew it from the front, it will be easier to catch all the layers.
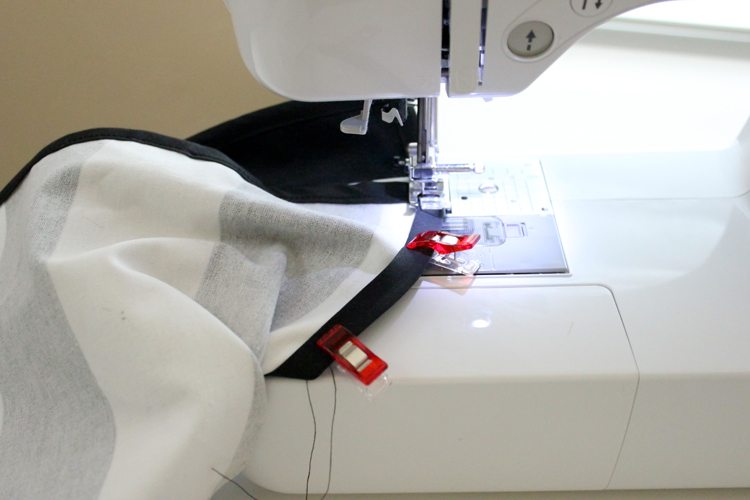
Once you get bias tape pinned or clipped around the back seat piece (do not add it to the bottom yet), flip it over so you can see the back side.
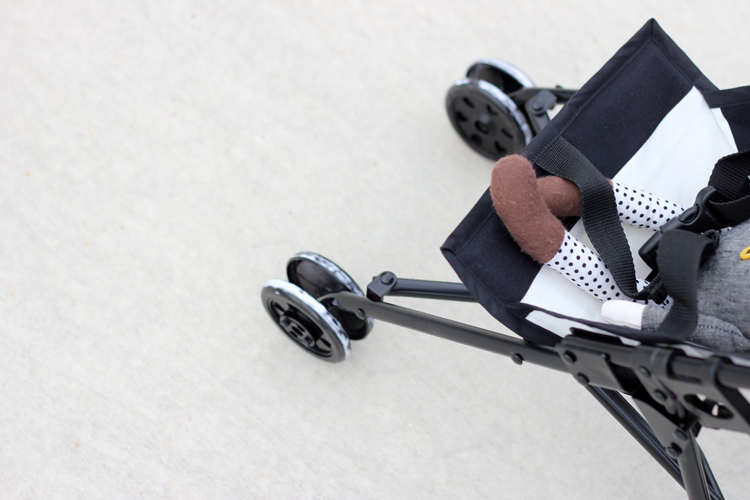
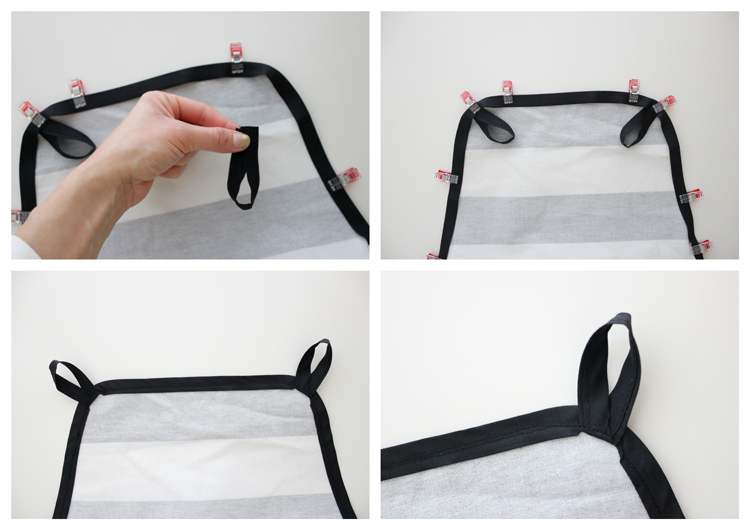 Cut two small strips of bias tape following the length of the original seat loops (they will likely be around 7 inches each). Sew the length of the strips closed and then fold them in half. (To help them lay flat, fold them so that the same sides of the bias tape strips are facing up — see pictures above. )
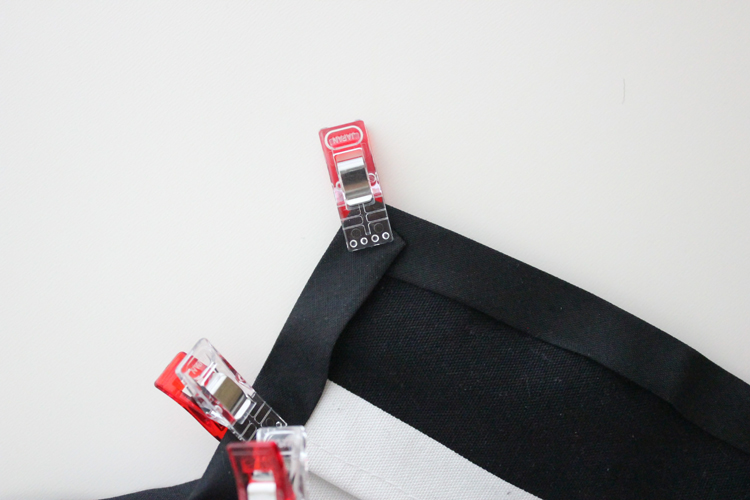
Pin or clip them into the back corners of the stroller seat. Sew around once, securing the bias tape to the back seat piece.
Then…sew all the way around a second time for durability. On the second pass around, push the loops upward and sew over them so they stick upward. When you get to the corner loops and the strap sections, back stitch and forward stitch several times, before continuing on to make sure it’s nice and strong. You want this seat to last! 🙂
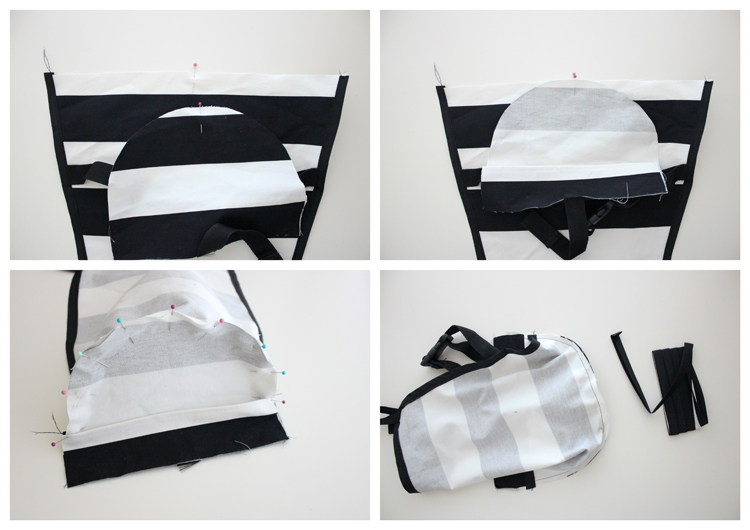 Now, you can sew the bottom seat to the back seat piece. Mark the middle of the back seat piece and the bottom seat piece (curved side) with pins. Match those pins up, with pieces right sides facing, and then finish pinning the pieces together. (The back seat should not completely meet up with the entire curved edge.) Sew all the way around with a 3/8 inch seam allowance.
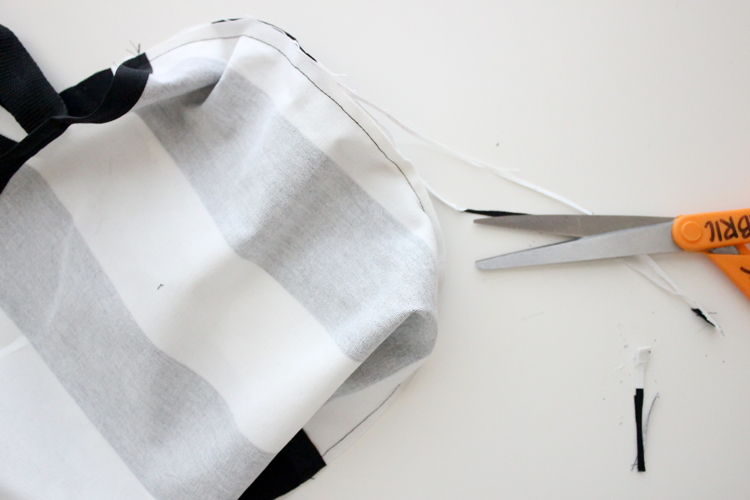
Trim back the seam allowance down to about 1/8-1/4 inch.
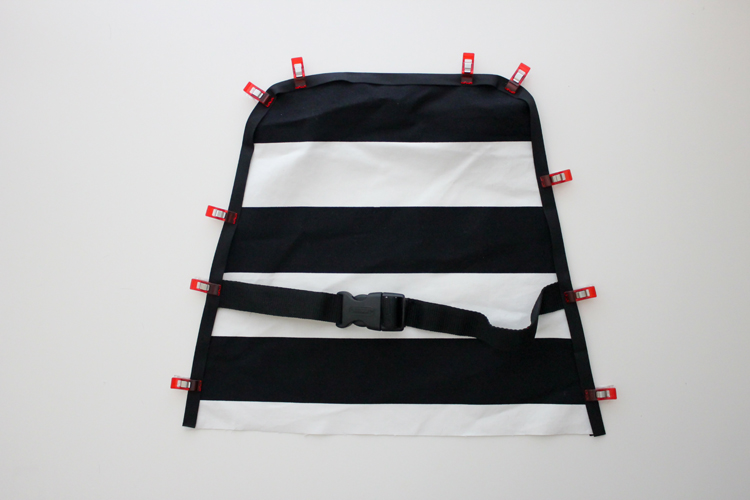
 Now pin or clip on bias tape around the seat bottom.
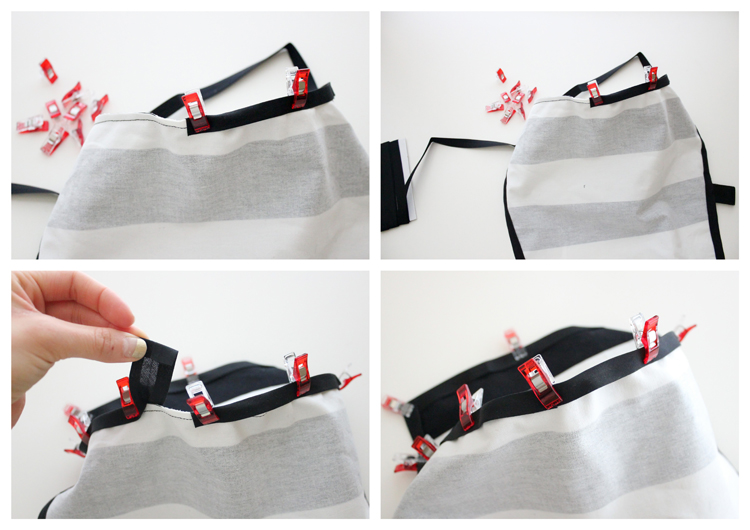
Start at the back of the curved portion. Pin or clip around. When you get to the corner, just fold it over for now (see picture below). I will show you how to make this a clean mitered corner in just a minute.
When you make it full circle, fold the raw edge of the bias tape under, and sandwich it over the other side, overlapping it by about an inch.
Okay…now let’s address the mitered corner situation.
First, start to sew the bias tape on, starting at the back. Lift up the folded piece and start at the back the same way you started pinning/clipping (the bias tape length may shift a bit, so you don’t want to sew over the folded piece just yet).
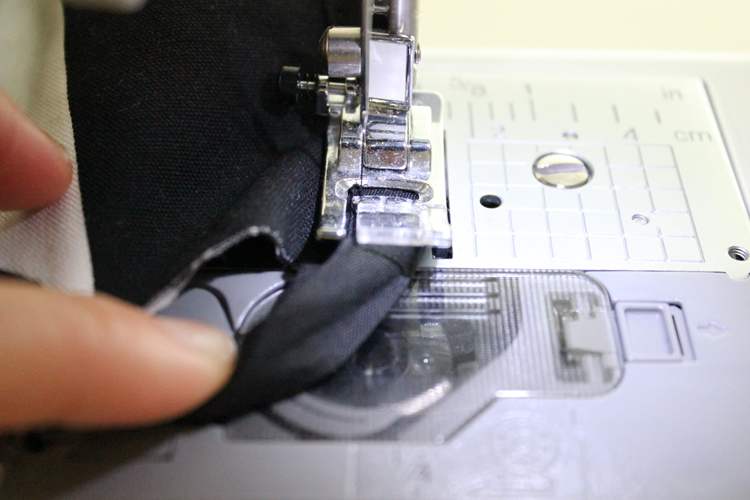
When you get to your first corner, sew until you get 1/2 inch away from the corner.
Pull the seat piece off your machine and clip threads. Take out the clips or pins around the corner.
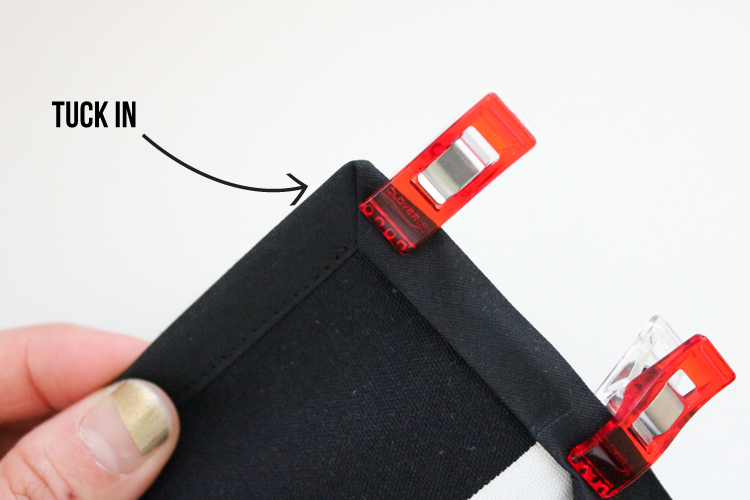
Now tuck the bias tape inward (almost like origami) into the fold of the bias tape until it hugs the corner just right and the fold looks mitered or completely diagonal to the corner. Make sure it looks good on both sides. Pin or clip it in place, and put it back up on your sewing machine. Starting just before where you left off, sew to the corner, put your needle down, lift your presser foot, and pivot the seat around.
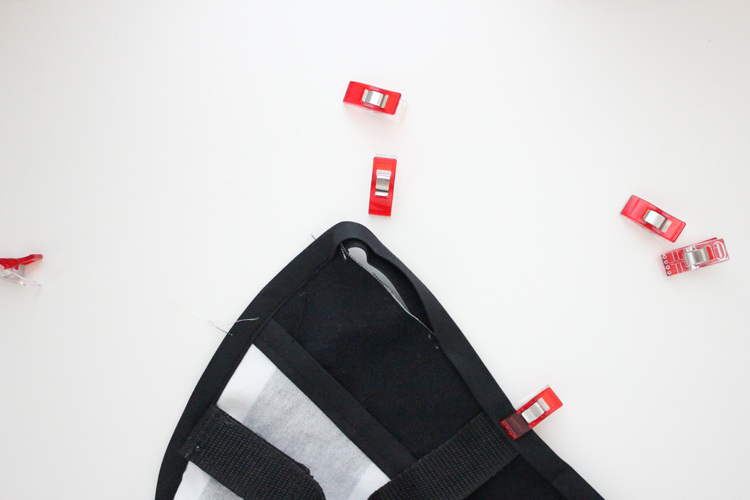
Continue sewing the bias tape in place, repeating the same steps with the second corner. This is how your corners should look when you’re done.
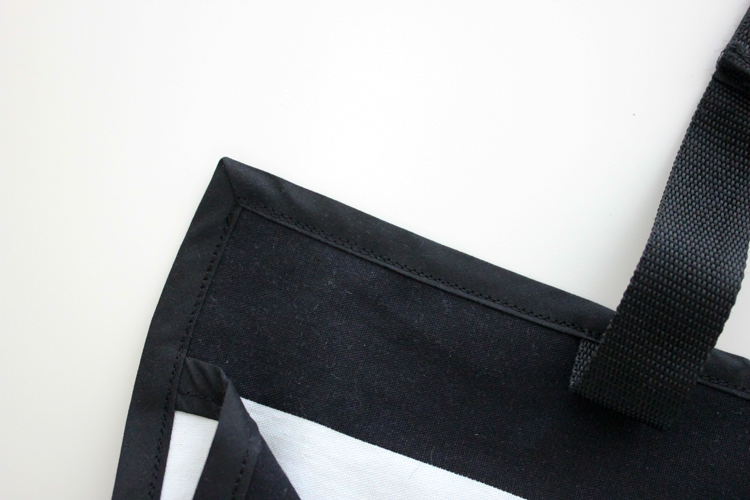
When you get to the back or the end, make sure your bias tape is folded over, tucked neatly under and overlapping the other end of the bias tape.
Don’t stop there…Keep sewing around, for a second time, for durability. Make sure to sew back and forth over the strap portion several times.
 Always double check your work and make sure you don’t have any gaps or spots where you didn’t catch all layers of fabric and bias tape. Fix any issues if needed by unpicking and re-sewing.
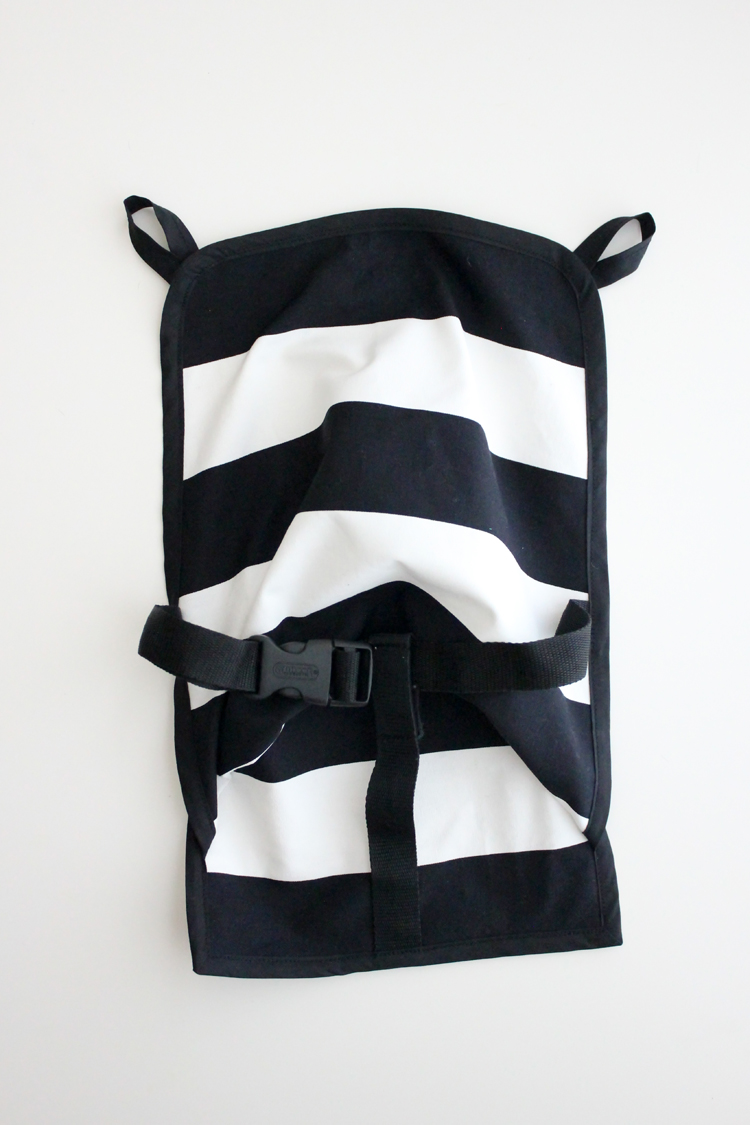 That’s it! Your seat is ready to go strollin’.
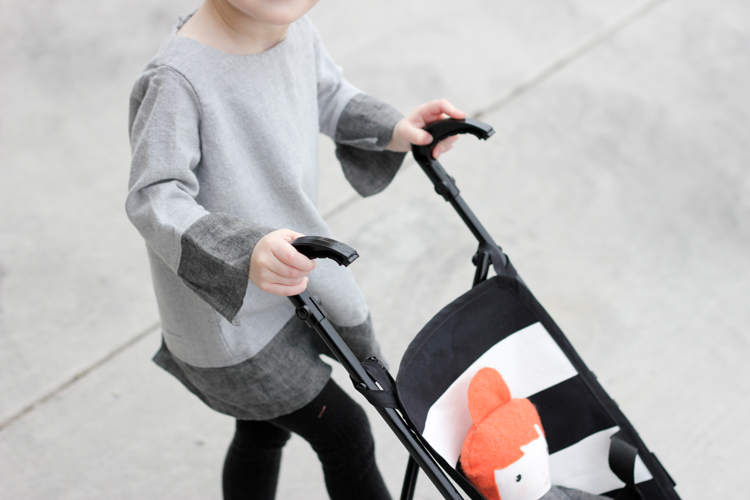
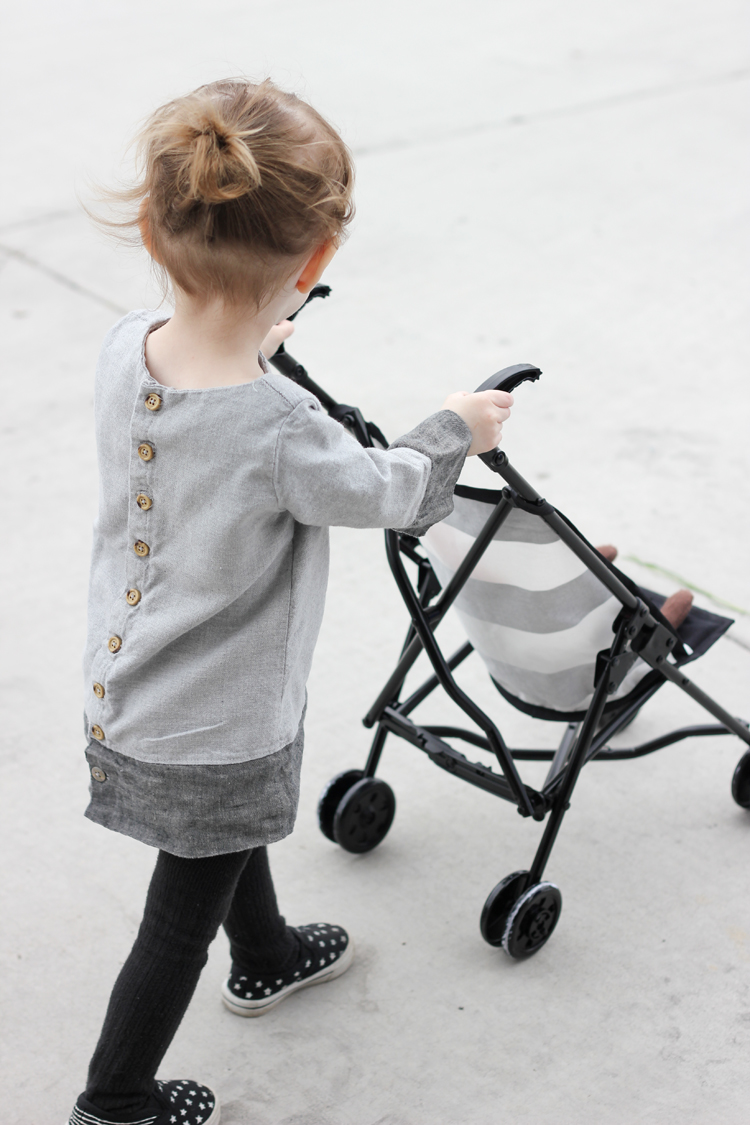
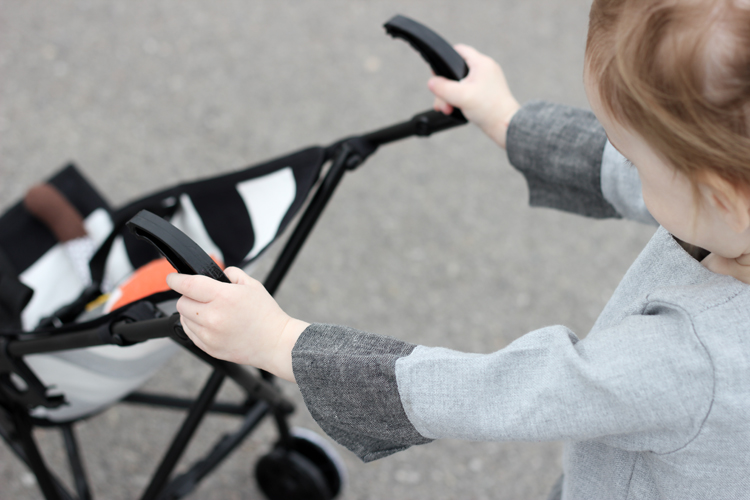
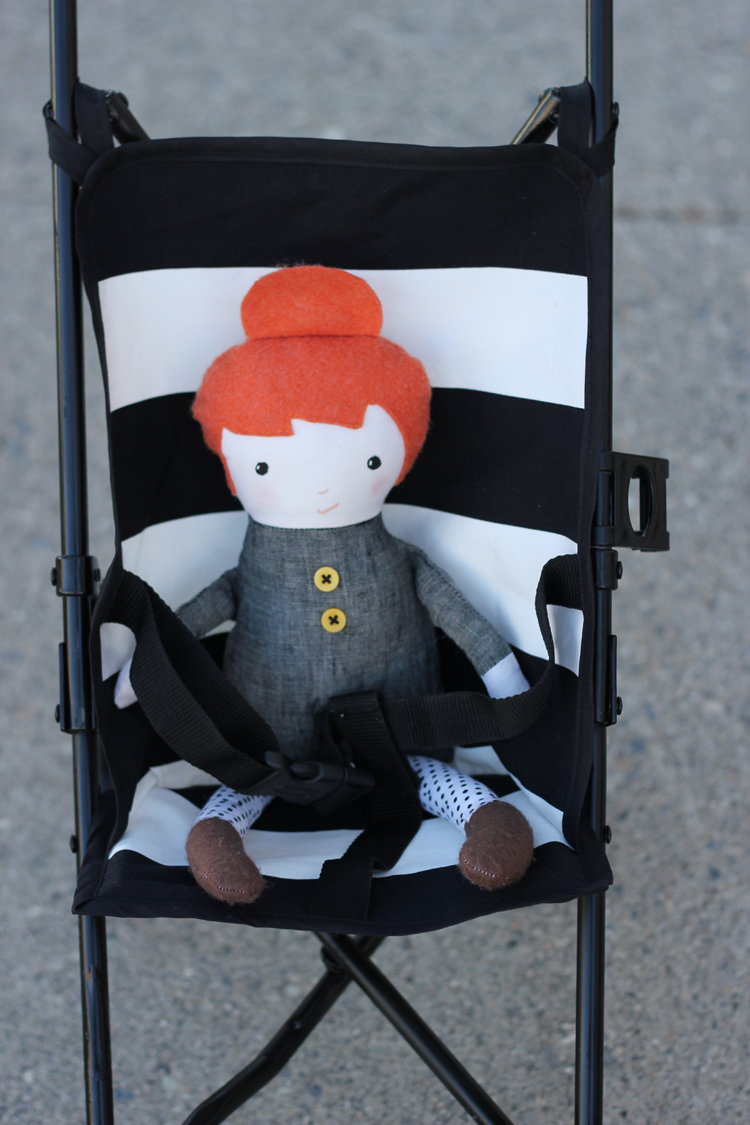
Once the frame is ready and the paint is cured, slide the seat on and off you go!
You may notice that the spray paint doesn’t hold up that great on the wheels.
Even after curing it will wear off there. If you are extra cool, you could disassemble the wheel before spray painting it so that you only spray the wheel hardware, not the wheel itself.
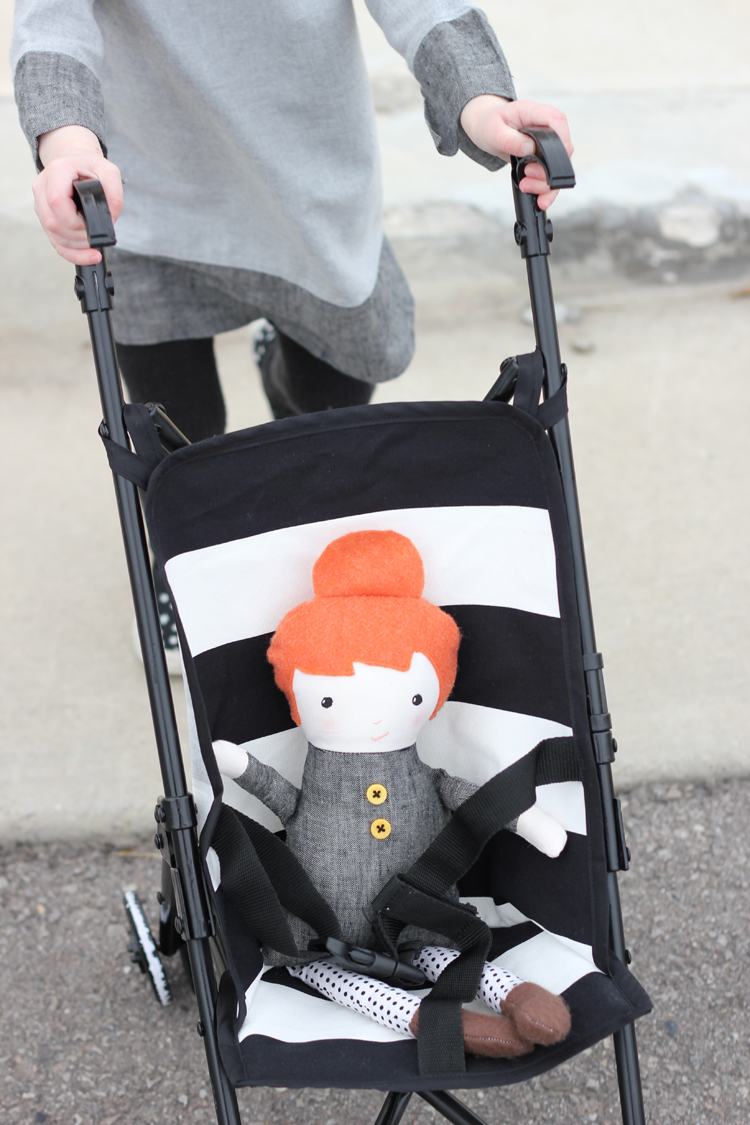

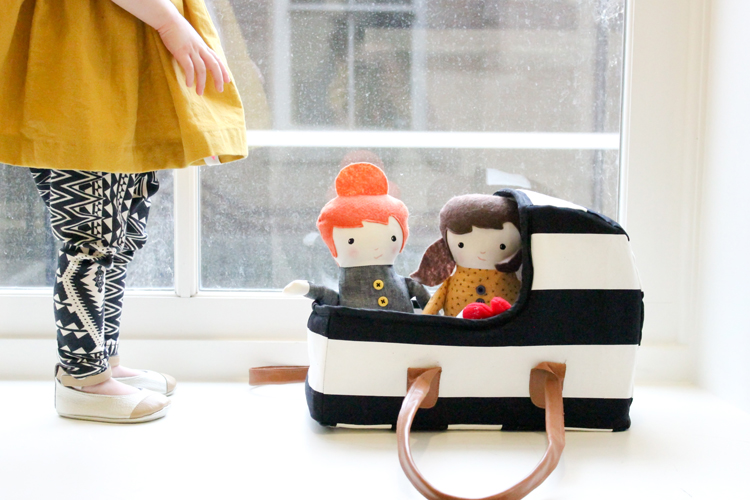
This doll was made using the free Black Apple Doll pattern. See THIS post for more details.
Natalie’s shift dress is from THIS post. I just posted a tutorial on how to make one like it using an existing dress bodice pattern HERE.
Her shoes are also a fun, DIY. I posted about them HERE.
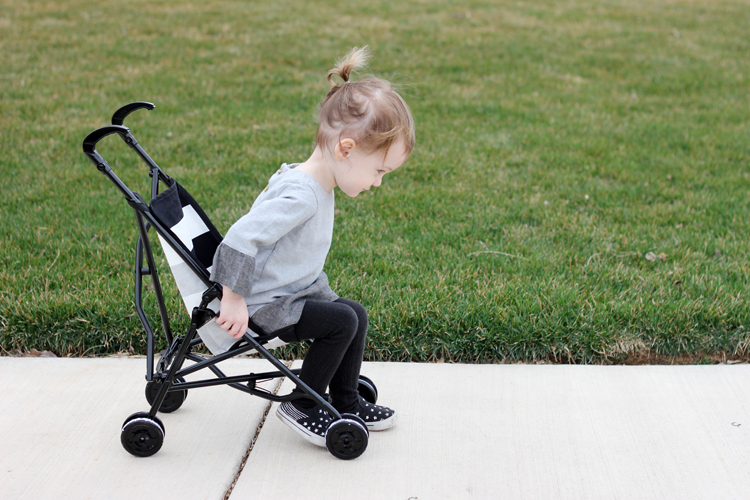
It has been a few weeks since making over the stroller and it has held up beautifully. It even has held up great to toddler passengers. 😉
Natalie is so happy to have her stroller back, and I am glad to not have to jimmy rig the broken seat into the frame every five minutes because she was upset that it was falling apart.
Plus, she now has a cute, one of kind stroller that is sewn to last. Wins all around.

It also makes me happy that it matches her baby doll basket, see below. THIS post has all the pattern details.
It’s the little things… 🙂
Good morning, I love everything that you do. I was wondering where did you purchase those clips from? You can never have enough clips around your home.lol Thank you for your time and have a blessed day.
Morning! 🙂 Thank you! I purchased these Clover clips from Jo-Ann in the quilting area. You can get them on amazon too. Have a good day as well.
Fantastic! My daughter got a baby stroller for Christmas that I bought at a consignment sale (I think I paid $3 for it) and I have been wanting to replace the fabric chair portion of it as well. I just haven’t gotten around to it yet and your tutorial will definitely help in figuring out how to do it just right. Thanks, Delia!
Nice score! Have fun!
Thank you for this tutorial ! And you’re just a perfect mom ! 🙂
You are too nice. Not perfect at all, but thank you! 🙂
I have a house full of boys and it makes me happy to see that there are options for those that don’t think its necessary to fill your house to the brim with pink and purple princess stuff. Keep on keeping on! Love it all!
Word. Thanks Katie. 🙂
That is SOOO cute!! I’ve got a Craft Gossip post scheduled for later today that links to your tutorial:
http://sewing.craftgossip.com/tutorial-doll-stroller-make-over/2014/03/19/
–Anne
Thanks a million Anne! 🙂
I’ve had to re-create our doll stroller seat twice now- I totally agree with you about them being el cheapo!! Never thought to spray paint the actually frame- brilliant! 🙂
Seriously! You CAN buy a $60 baby doll stroller that looks like it would last but…you might as well buy a real stroller then. 🙂 ha!
I love how this turned out! So much cuter than the original too! 🙂 I love that it matches the doll bed too! I am (and always have been) super matchy-matchy.
Thank you Lynette!
I love this! I’ve always hated our doll stroller (same stroller but different seat fabric in a dark pink floral that I don’t like) but I think my daughter will flip if I do this to hers. I may have to wait until it breaks, too…
oh true…I guess I have the advantage of Nat not being in the opinionated stage yet. Didn’t think of that! ha. 😉
This is the neatest project! I love how you went with black. I get so tired of all the pink that is on girls stuff.
Thanks Ashley!
I love how it looks like it belongs to you now.
I did this last year (with the rainbow Ikea fabric) and added two snapped straps to the under side so the seat was anchored onto the frame better. It made a huge difference. … until I tripped and stepped on the darn thing and bent the frame.
Ooh..snaps are a smart idea! Sorry you tripped on it. Ouch!
Hey Delia! Love your blog. I have also redone this same stroller twice now. Anyway, the second time I redid her stroller I ran out of fabric to to make the fold that slides the seat part onto the base and happened to have a piece of leather the exact size I needed to make that pocket. I am so happy I used the leather because my daughter still sits in it and the leather provides just enough give that it doesn’t put a lot of stress on the seams. Anyway, this one has lasted over two years. Just thought I’d share in case anyone else has a child who still sits in her doll stroller at age 4. Thanks for the great tutorial.
That is SO smart! I’ll have to see how long this holds up, but when/if? it breaks I will definitely have to remember this tip! Thank you!
My girls are way past this stage, but oh goodness do I remember those cheapy seats in the baby doll strollers! Gah. I wish I saw this years ago!
Beautifully done, as always.
Thank you Michelle!
My daughters have a stroller just like this! Amazingly, they haven’t broken it yet, but it’s still in the giveaway pile right now… maybe I’ll haul it out and make it nice. =)
That is amazing that they haven’t broken it yet! Way to go them!
That is the cutest stroller remake I’ve ever seen. Bringing back memories of when I remade our stroller seat. Now my little girl is 13! Great job!
Thank you so much Sarah!
I love this so much Delia! I laughed a little when I was reading through your tutorial b/c we got Hannah a plastic baby stroller last year and by the summer I had already re-attached the bias trim twice, and the second time ended up sewing all around the whole thing twice, which has made it last for the past 9 months or so.
Mine has a gray frame and black wheels already so I’m halfway there, just need a much better cover. 🙂
Yours came in black and gray!? So lucky! Everything girl here is so heavily doused in pink it’s not funny. I like pink, but it’s pink overload! 🙂
Seriously remaking Evie’s stroller a few years (or pimping her stroller as I called it on the blog ha!) saved me soooo many headaches. Why don’t they just put sharp points on the end of those stroller pieces ha! They might as well the way they slice through the fabric. Plus it is just so much cuter to push around and heaven knows we are all about the cute right ha! I just can’t get over Nats pig tails lately so gosh darn cute!
Oh girl…I had no idea you already did an almost identical tutorial. I thought about googling it before posting about it, but I know a lot of people have done stroller tutorials in general, so I just went with it. I was just going to share my version. Thanks for being so gracious about it! I checked out your post. Love how you used elastic for the top supports. So smart!
I’ve never seen a baby doll stroller that looked so chic! Way to go! Only a boy in this house but I have a doll stroller in my preschool classroom that seriously needs some TLC! Thanks for the awesome tutorial!!
That’s a very clever idea! Cute too. 🙂
I LOVE THIS so much! One of my complaints about baby strollers is that they’re always so pink and, dare I say it, ugly. The black and white make this one classic and way cooler — and I love that it’s sturdier, too.
I did something very similar with a thrifted doll stroller before giving it to my daughter. Except i made the seat reversible by adding seam allowance. One side is white minky and the other is a watercolor twill fabric i had on hand (had just a little of the pink from the handles/wheels mixed in so it coordinated and helped the pink not be so glaring -hadn’t thought of painting).
Delia I recently remade my daughters stroller seat and after attaching the seat on the wrong way I went looking for some tips and found your tutorial. I linked back to your tutorial in my blog since in the end I used your instructions for attaching the seat and checking over some of my other work. You can follow the link below to see my creation. This is a great tutorial and was really helpful as I was about halfway through and was ready to scrap the whole thing. Thanks for making such easy to follow tutorials.
http://jumpingbeansoup.blogspot.com/2014/08/stroller-remake.html
Awesome! I am so glad I could help. I clicked over and your seat looks great!
Hi!
I have a random question for you…I love the little doll! I found the tutorial but I was wondering how you added the little bun to the top of the hair? Did you sew it on to the top of the head before flipping it inside out and stuff the doll from the top of the bun?
Thanks!
Whitney,
Yep, that’s what I did. I just cut out a bun shape out of felt and then sandwiched it in between the head pieces before sewing the doll together. Hope that helps! 🙂
Great tutorial & pictures, thank you.
Bought exactly the same brand stroller for my 18 month old for Christmas, was going to revamp it before giving it to her, but seeing that it is purple, will wait until it breaks and then do it.
Thanks Carina!
Oh my gosh, this is amazing! I wish I could buy one from you (I’m not great with a sewing machine). Let’s face it, the pink pink pink ones you buy in the store are quite unsightly. I just ordered one for my daughter for Christmas and could not find a non-ugly one anywhere. Sigh. I guess it’s about her and not me… this time ;0)
Julia Kristina
http://juliakristina.com/blog
Thanks Julia! I know what you mean. The barrage of pink and purple in the stores is nuts! I have found some really cute ones, but they go for $60! I can’t bring myself to buy a play stroller that is as expensive as a real one. sigh… 🙂
Oh my word, by far the cutest thing I’ve ever seen. I want so much to recreate this, but my sewing level limits me. Are you interested in selling any? I would love a stroller and matching doll bed?
Thank you America! I often wish I had time to run a shop and a blog. I don’t do custom orders for that reason, but do you have a friend that sews perhaps?