

I’ve often heard that it is better to have a nice lens than the nicest camera.
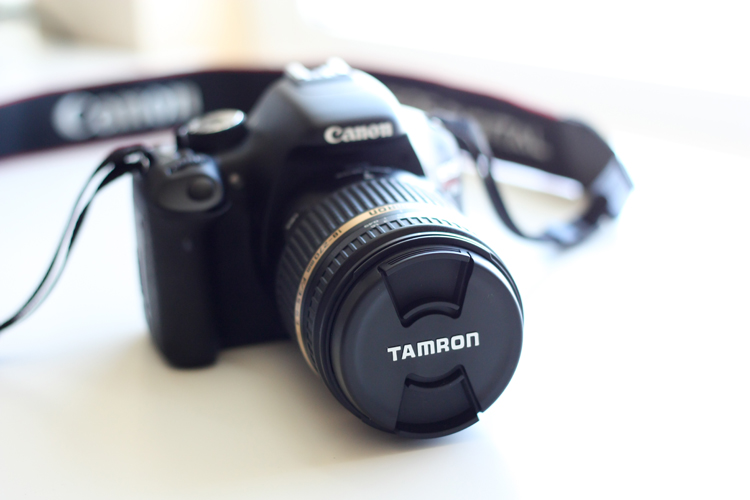
So, when I had the itch to upgrade, I decided to look for a new lens. Up to this point I had only been using kit lenses and the Canon EF 50 mm/ f1.8 fixed lens. After asking some friends, what lenses they like best, the Tamron 18-270 mm lens was cited a few times. I had already heard great things about it and so I decided to go for it.

Well…I can see why people say it almost never leaves their camera. This is really such a great, versatile lens. (P.S. Indoor Photography tips are at the end :)).
Let’s break down the pros and cons.
Pros
– It’s legit. You can immediately feel and see that this lens is the real deal, as it is heavier than kit lenses and just all around more substantial. Of course, I am just comparing it to kit lenses and not other lenses of its kind, but I think it’s definitely worth the upgrade.
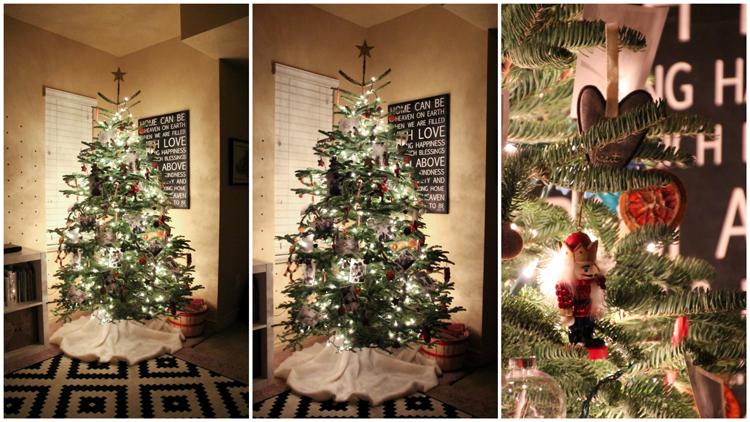
– The zoom range is awesome. I took these three shots of my Christmas tree from one spot. I didn’t move at. all.
Same with this mountain range. I took a shot of the whole range (not even zoomed out all the way) and then zoomed in on this peak:


It makes photographing my kids a little easier as well. I don’t have to move around so much or switch lenses to get different shots.
Here’s another comparison.
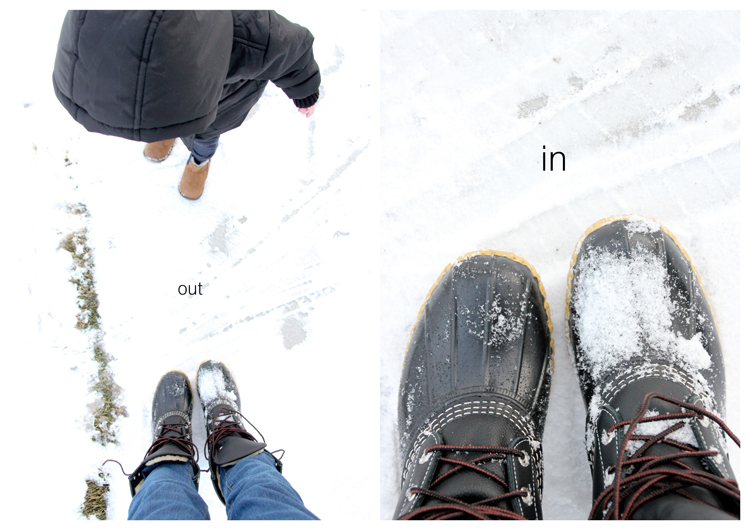

I can take full shots like this and then detail shots, of the boots she proudly put on the wrong feet ;), right after with just the twist of my lens.

And I don’t have to run far away or come up close to make that happen!
Oh and it makes blog tutorial pics easier for the same reason.
– It’s affordable. If you have ever priced name brand lenses, they are a preeeeety penny. At around $400, the Tamron lens is still quite an investment but much more affordable.
– Better print quality. You can’t really tell so much when the pictures are in digital format, but when you get your pictures printed, you can see that the Tamron lens or any non-kit lens yields a slightly crisper, cleaner shot.

– The aperture range is super versatile. You can dial down your f-stop number to as low as 3.5 which is great for indoor photography and portraits.
– Tamron lenses can fit both Canon AND Nikon cameras.

Cons
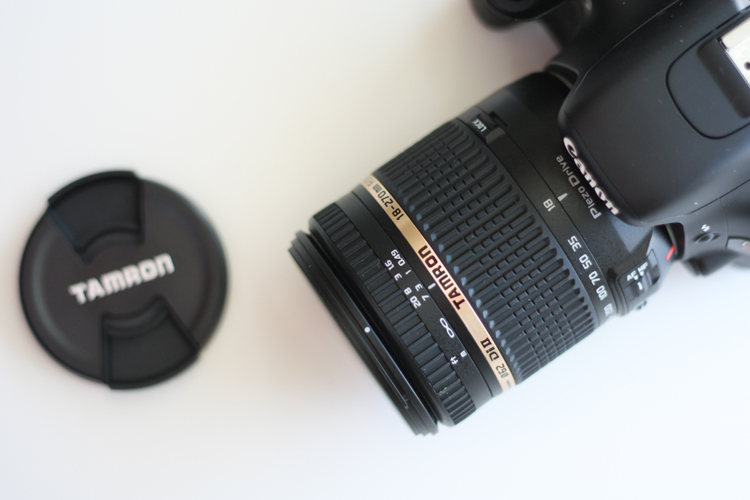
– This lens is heavy. Some may or may not consider that a con, but I thought it was worth mentioning. I personally take it as a sign that it’s good equipment, but you do have to get used to the weight.
– The lens zooms the opposite way from my kit lenses. I am sure this is something that typically varies from from lens to lens, but there is a little bit of a learning curve in teaching myself to zoom the other way.
– The rapid shutter response time slows a bit. It’s not a big problem, but noticeable.
To learn more about the Tamron 18-270MM F/3.5-6.3 Di II VC PZD, check out the specs HERE.
Or you can visit: www.tamron-usa.com. They often have rebates that get you up to $100 of select lenses as well. Check out THIS site out for current rebate offers.
Now for some indoor photography tips for dSLR cameras.
With winter upon us over here, I find that we have to take more and more pictures inside. Even our family pictures!

Taken with the Tamron lens ^^^ 🙂
Here are FOUR tips to get beautiful pictures indoors:
1. Use natural light as much as possible. I know this isn’t always convenient, but whenever you can, make sure to take pictures near bright windows. If the light is too harsh or streaming in directly at your subject creating overblown highlights, try angling your blinds upward so the light bounces to the ceiling and fills the room with ambient light. You may also try positioning your subject so the light streams in from the side. Move your subject away from the window just a bit so there isn’t any direct light right on them.
You may need to adjust your settings and make your ISO higher or your shutter speed slower, to compensate for the reduced amount of light.
In most cases, you want to avoid putting them with their back to the window. This causes the background to over expose and the subject to be underexposed. Of course unless this is what you’re going for. You can either expose the background but not your subject for a silhouette shot, or extremely over expose the background and properly expose your subject to get a cool ethereal glow around your subject.

2. Avoid using flash. Unless you are proficient at using off the camera flash, I highly recommend avoiding it. It can create harsh shadows and all sorts of common photography problems like red eye, glare, etc.
3. Try stepping out of AUTO.
When taking pictures at night. Turn on as many lights as you can so there is a lot of ambient light. And if you can, don’t use AUTO. AUTO will almost always turn the flash on.
Instead, crank your ISO up all the way (unless it is amazingly bright) and dial down your f-stop number as low as it will go. Quick aperture lesson: smaller f-stop number = wider aperture = more light allowed into the camera =more background blur.
Now, looking at your exposure meter, determine how fast you need your shutter speed to be to get a well exposed picture (the little arrow should be at zero or into the positive range). You may need to slow it down significantly to get a properly exposed shot. Sometimes, I slightly underexpose the shots (not too much!), knowing I can fix the pictures later in editing. Or I switch lenses to one with a wider aperture range.
Think manual is too much work? For the most part, once you get your settings just right they will not change that much unless you move closer to or farther from your light sources.
Need more explanation on the terms and techniques I just mentioned? Go here and here for basic tutorials on exposure and how to read your camera.
Note: These are tips for not using flash, but there are techniques you can use with off the camera flash which I don’t feel ready to authoritatively cover yet. 😉
I must also add: If you don’t have photo editing software, then cranking up your ISO might not be a good idea, because high ISO creates graininess. If you can only use free editing software, try not to let your ISO go above 800 and try your best to slow your shutter speed down as slow as you can manage. You may have more picture blur, which is where the next step comes in handy…

4. Hold your Breath! Unless you want to add flash, then you will likely have to bring your shutter speed way down if shooting indoors at night with only ambient light. When your shutter speed dips below 1/200, your breathing can cause blurring. If you hold your breath when you press down the shutter button, it helps reduce camera shaking and blurring. And of course, hold really, really still! 😉


5. Expect some editing. I almost always edit my indoor pictures. I like to remove or reduce color casts, especially with the “warm” or yellow lamps providing much or all of the ambient light. I don’t remove all of it however, because I still want it to have an indoor glow, but that’s a personal preference.
It’s helpful to use editing programs like Lightroom to smooth out any graininess as well. When you shoot indoors, you often have to increase or max out your ISO. As I mentioned before, higher ISO numbers means more graininess or fuzziness in the pictures. This is easily remedied in Lightroom with the Luminance slider. Other editing programs may allow you to “smooth” out your photos in a similar manner. Your camera may also have a high ISO noise reduction feature. It drains the battery faster, but I take about 60% of my pictures indoors so I always have it on. It doesn’t reduce noise as much as post editing can, but every little bit helps.
That’s it! Those are my tips for capturing your memories indoors.
If you have any questions, please feel free to ask in the comments section.
Happy snapping!
Disclaimers: This post is sponsored by Tamron USA. This review was written in my own words, with my own pictures and my own honest opinions.
Please keep in mind that I’m a self taught, amateur photographer. Just a regular mamarazzi, sharing what I know! 😉
great post and awesome tips delia!
thanks kate!
I have wanted that lens for a while – and have had yet to make the leap. Great review!
Thanks Jess! It’s really worth it and so much more affordable than upgrading cameras. Although that is still on my someday list. 😉
Gorgeous photos! I can’t believe the detail you can get on that beautiful mountain!!
Thank you Melissa!
Ooh!! Great tips!!! Thank you!
Thanks Andrea!
I could just look at your photos all day long. LOVE them! You are one of my favorite ‘photography’ blogger. And great great tips.
Thank you Mie! You made my day! 🙂
I needed these tips and now I want a lens so so bad! I’ve totally been putting it off but I think it’s gonna be my next big purchase 🙂
It’s awesome! Using a legit lens is definitely something every photographer should experience. 🙂 Thanks Marissa!
I like when the zoom comes from the camera and not my feet. I want that lens!
I know right? I still find myself running around sometimes. I have to remind myself to zoom! 🙂
What a great post! I have a Tamron lens and love it. I love your tips about indoor photography and that last shot of your whole family is just perfect!!
Thank you Lindsay!
Gorgeous photo Delia! Your tree is beautiful and I LOVE the black and white thing you’ve got going on. So graphic and modern and what I want my house to look like when I grow up 😉 I’m also a big fan of that subway art behind your tree.
Thanks Autumn! The how to for the canvas is here: http://www.deliacreates.com/2012/08/hymn-on-wall.html
I love, love, love my Tamron 28-75, but this post is making me think I need to look at their 18mm option for my next lens!
Just picky things. “It’s” ALWAYS means “it is.” The possessive of “it” is ALWAYS “its.” The other thing — you’re not “stopping way DOWN to f/5.6” — you’re opening UP to 5.6. Stopping down increases the f/ stop; think of it as a fraction — 1/5.6 … 1/16 … 1/64 — because that’s what it actually is.
I’ve finally managed to take a few decent photos in the past few weeks, mostly from re-reading and re-re-reading your Mamarazzi series. =) And I use most of the tips you shared above, with the exception that I really try to avoid cranking up the ISO up past 400 since mine only goes to 800 and the photos are really super-duper grainy. (I don’t own a photo-editing program… I have to use a free online one.) I’ll have to try holding my breath though! =)
You are so right. If you don’t have editing software to reduce the graininess, it is definitely not worth cranking up the ISO! Good point! Before I had Lightroom, the holding my breath trick worked wonders when I had to bring my shutter speed down dangerously slow. 😉
Hey…I just had a thought. I am not sure what camera you are shooting with but I know that pretty much all Canon dslr’s have a noise reduction setting. It doesn’t eliminate graininess but it helps a little bit. If you haven’t already, maybe check your manual to see if you have it?
i am finally shooting in manual with my 50mm 1.4 and loving it but i would also like a lens that will allow me to zoom in or out better. i had been debating over this one or a 30mm. plus lightroom…is it worth it?
Ooh that’s a nice lens! 🙂 I think Lightroom is totally worth it. I like that I can tweak ever so slightly in Lightroom to make a good picture great and I use it almost exclusively for all my photo editing. But…would it be your only photo editing program? Photoshop can do a lot and has a lot of other great tools for other blogging tasks. If you could find a suite selling them as a package deal that would be ideal. I got mine while my husband was still a student and we got a really good deal on the student version (which is the same as the full version). Stop me please if I am telling you things you already know! 🙂
Great tips and examples! ♡ the family photo!
Thank you Emily!