

Clay projects are not my usual MO, but today I’m giving clay a go!
It’s really simple to make too.
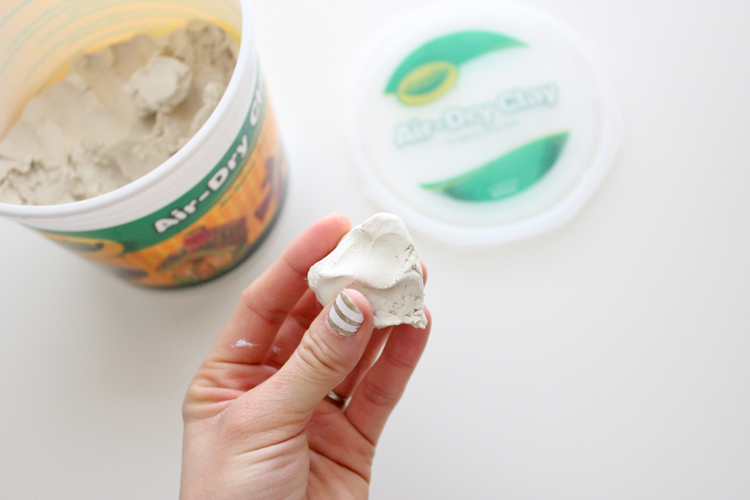
And…here’s my dirty secret… I used Crayola air dry clay… Yep! The kid stuff in the kid’s craft section. It’s highly available, it’s relatively inexpensive, it’s hard to mess up, and it totally works.
 Let’s get to it.
Materials:
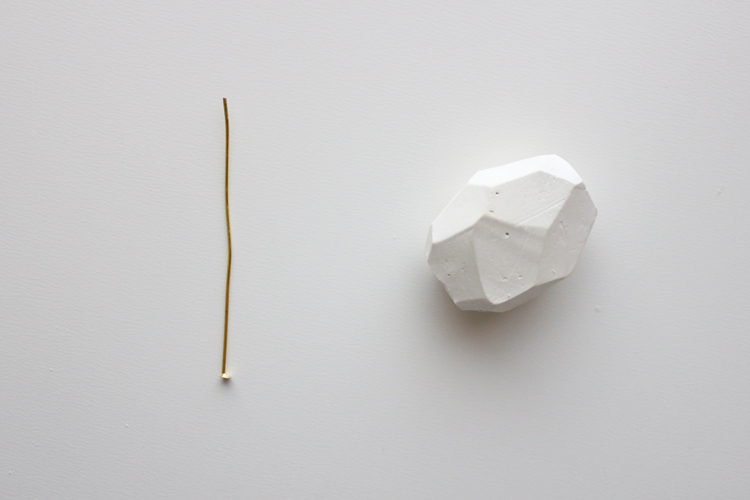
air-dry clay (I used Crayola brand which is about $10 for a large tub) exacto knife or other small sharp knife long sewing pin or unbent paper clip head pin (look in the jewelry making aisle) needle nose pliers optional: gold leafing kit *NOTE: I made two pendants. One heart shaped one and one oval shaped one. I may switch between the pendant shapes a couple times in the tutorial pictures. Don’t let that throw you. The process is what I am showing you and it is the same regardless of pendant shape.STEP ONE: Form your pendant.
 Grab a piece of clay a bit larger than you want your finished pendant to be. We will be cutting away the excess later.
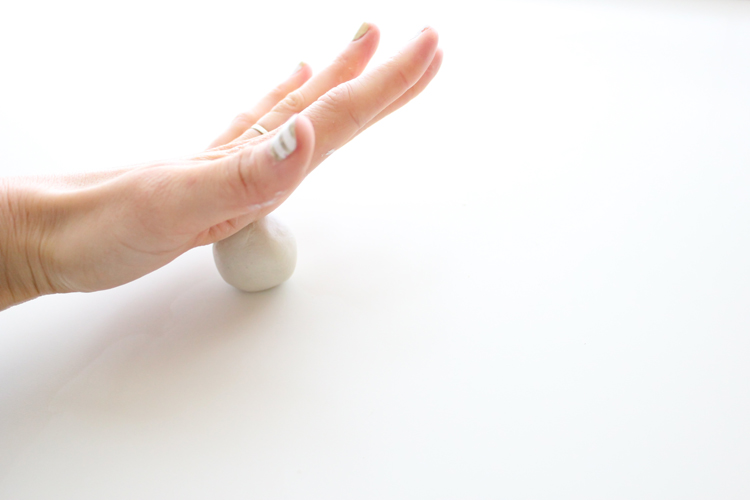 Roll the piece of clay into a ball. Using the bottom of a cup or the palm of your hand, slightly flatten the ball into a disc. If you want to shape it a bit more at this point (like into a blob like heart) do so now. Do not shape it too much. Remember we will be cutting a lot of the exterior clay away.
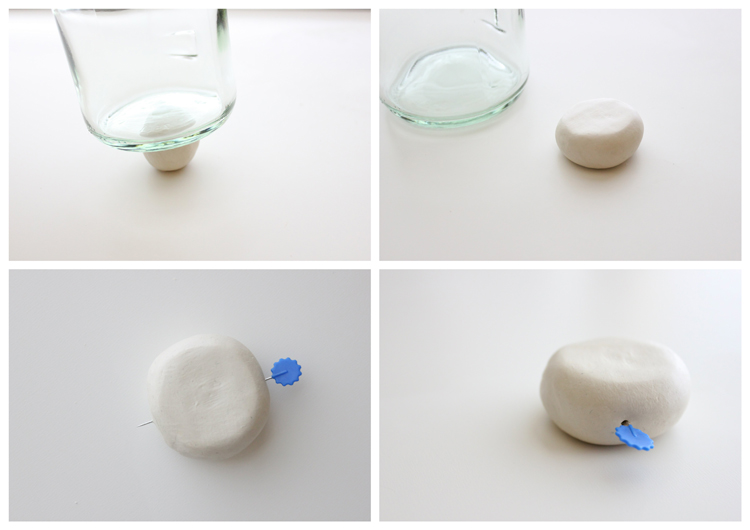 Slide the long sewing pin straight through the disc from top to bottom.
Be careful to keep the pin as straight as possible. If you mess up a few times, re-roll the disc into a ball and start over.
Once the pin is straight through, every so slightly wiggle the pin in a circular motion from EACH side. You are creating a tunnel for the head pin to go into later, so you want it large enough to fit the head pin in, but not too large that the head pin will pass right through and not support the weight of the pendant.
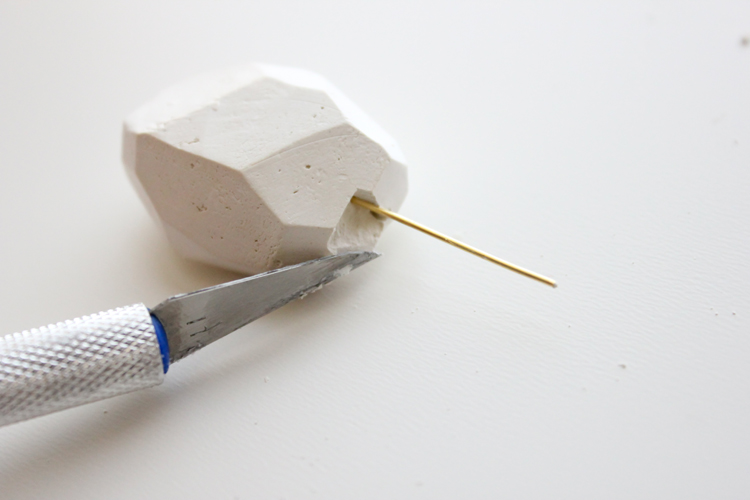
STEP TWO: Cut your pendant.
 Remove the pin and let the disc dry for about 8-10 hours. This may vary according to your climate and how big your pendant is. You want the clay to dry out and harden just enough that it isn’t easily pliable, but is soft enough to cut into.
It should be firm enough that when you go to cut it, it yields a nice clean slice and doesn’t squish at all under the pressure of your hand or the knife.
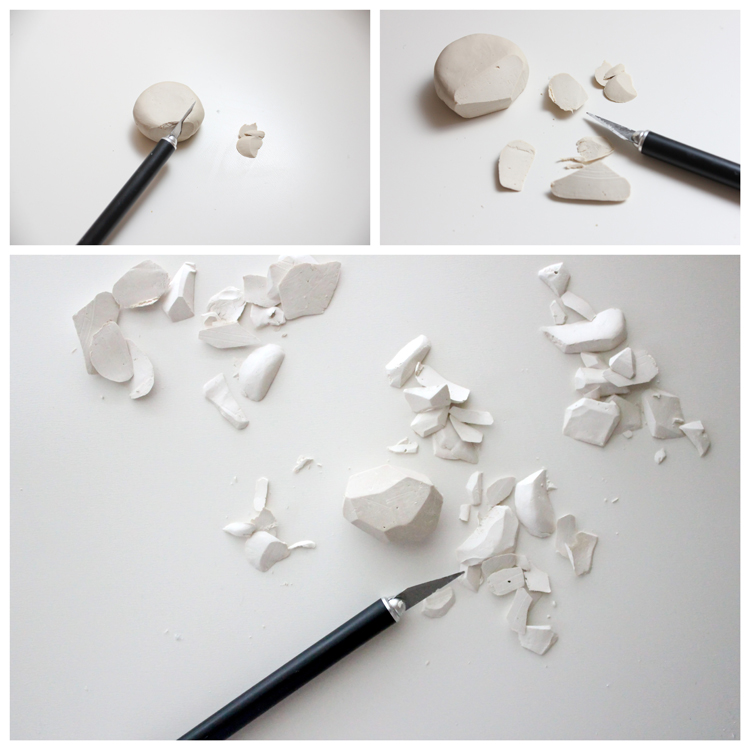
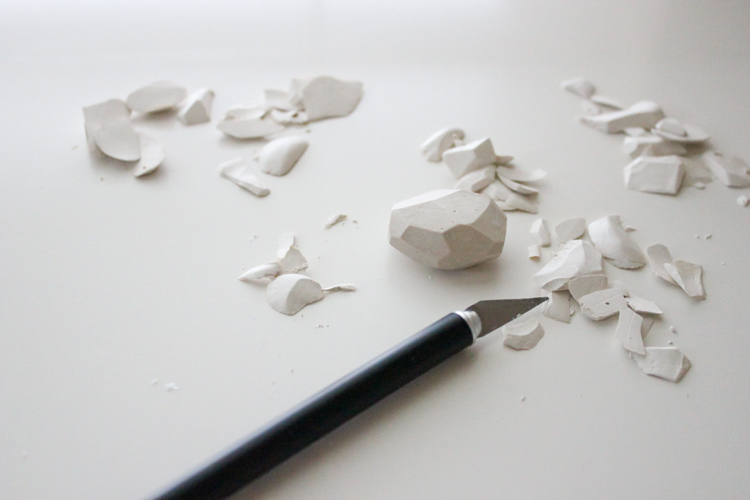 Cut off pieces of clay with your exacto knife, sculpting your pendant as you go.
Once it looks how you want it to, let it completely dry. This will take about 2 days.
This is a great project that only requires a few minutes of your time at a time so you can squeeze in some crafting moments here and there through your day. It can also test your patience, 😉 but don’t rush it. Make sure the pendant is completely dry.
STEP THREE: Finishing steps.
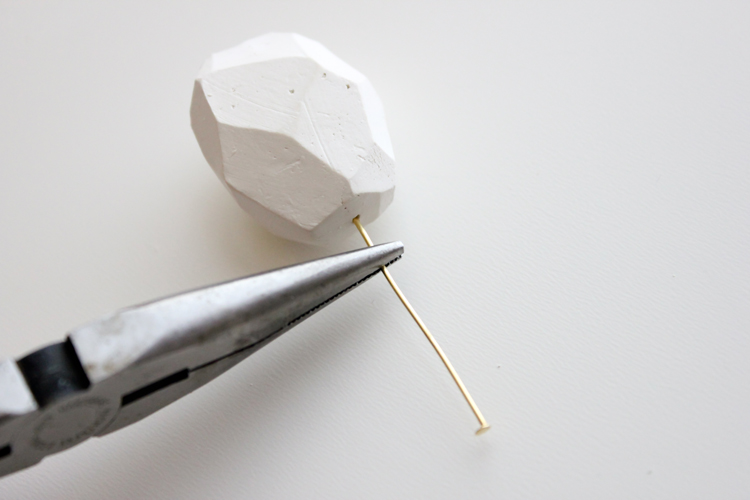
 Now insert the head pin into the hole. You may want to score the opening one more time with your sewing pin to make sure all is in order.
 It will likely be kind of a tight fit. Your pliers should be able to help feed the head pin in if that is the case.
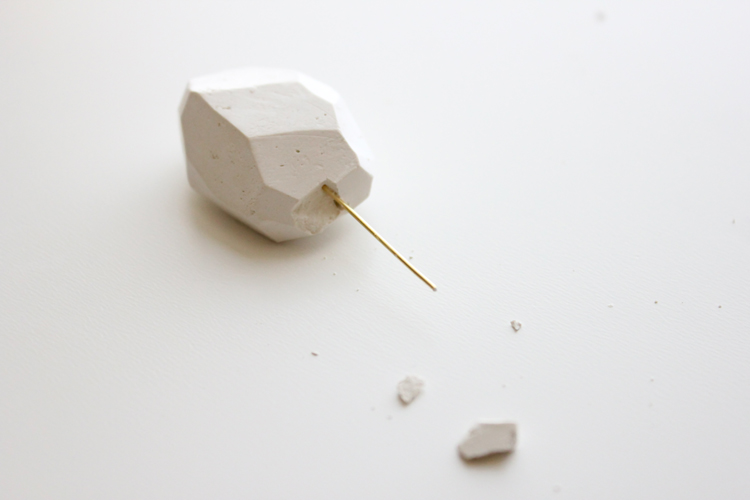
 You may end up damaging one end of the pendant as I did. Simply take your exacto knife and and “sand” down the edges with the blade.
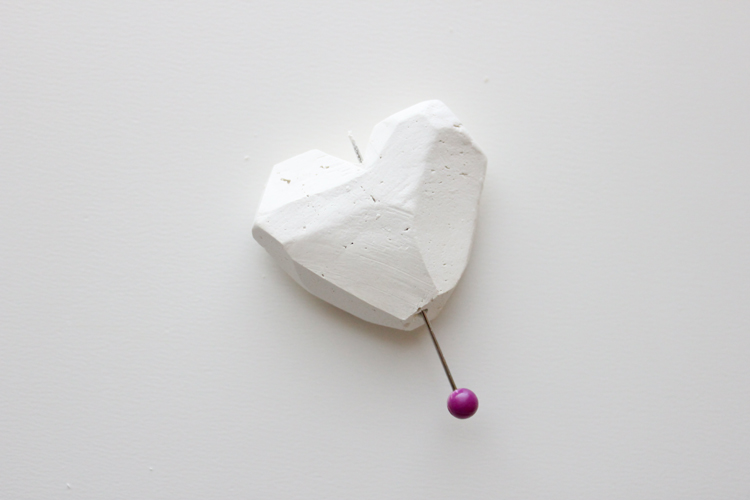
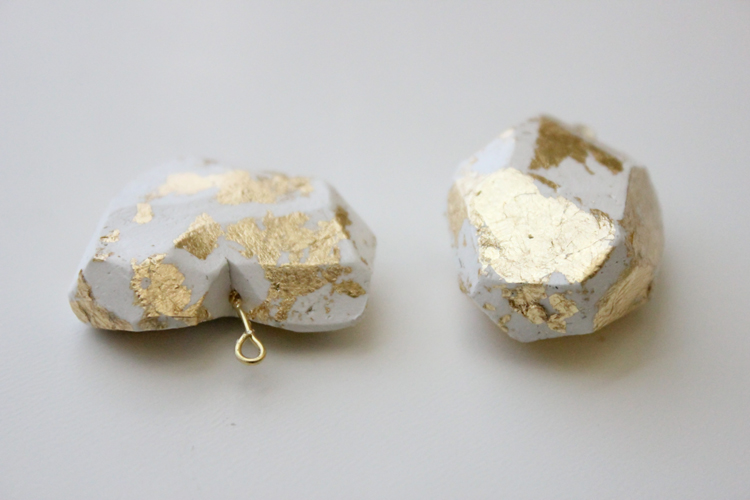
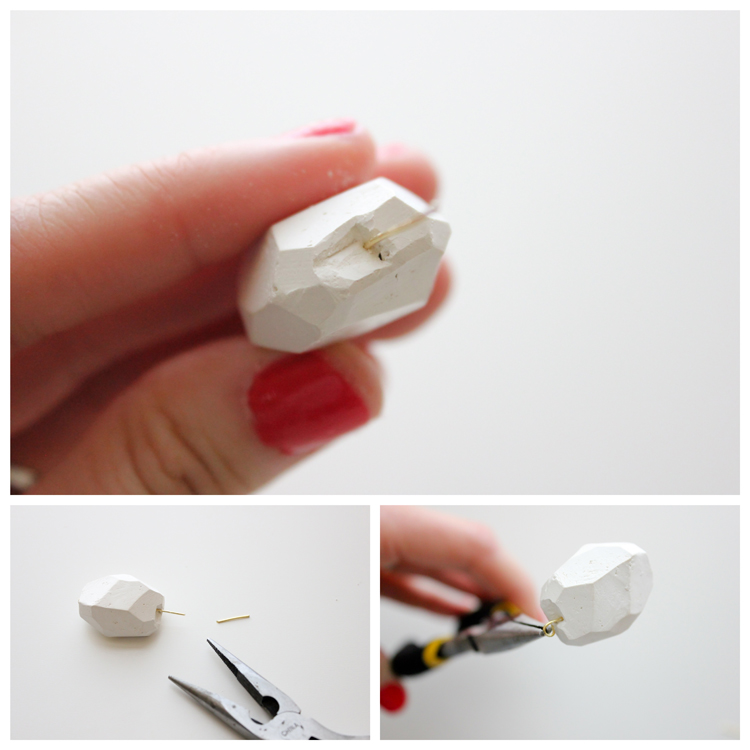 Trim back your head pin if needed and roll the end into a closed loop with your pliers.
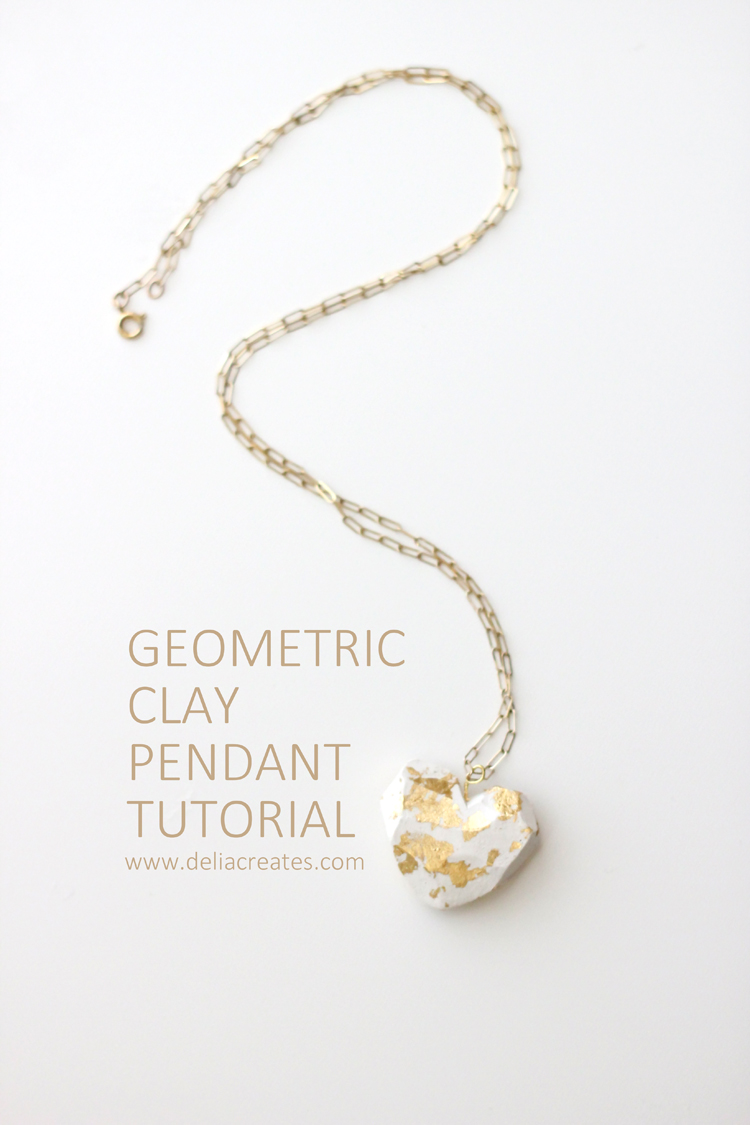
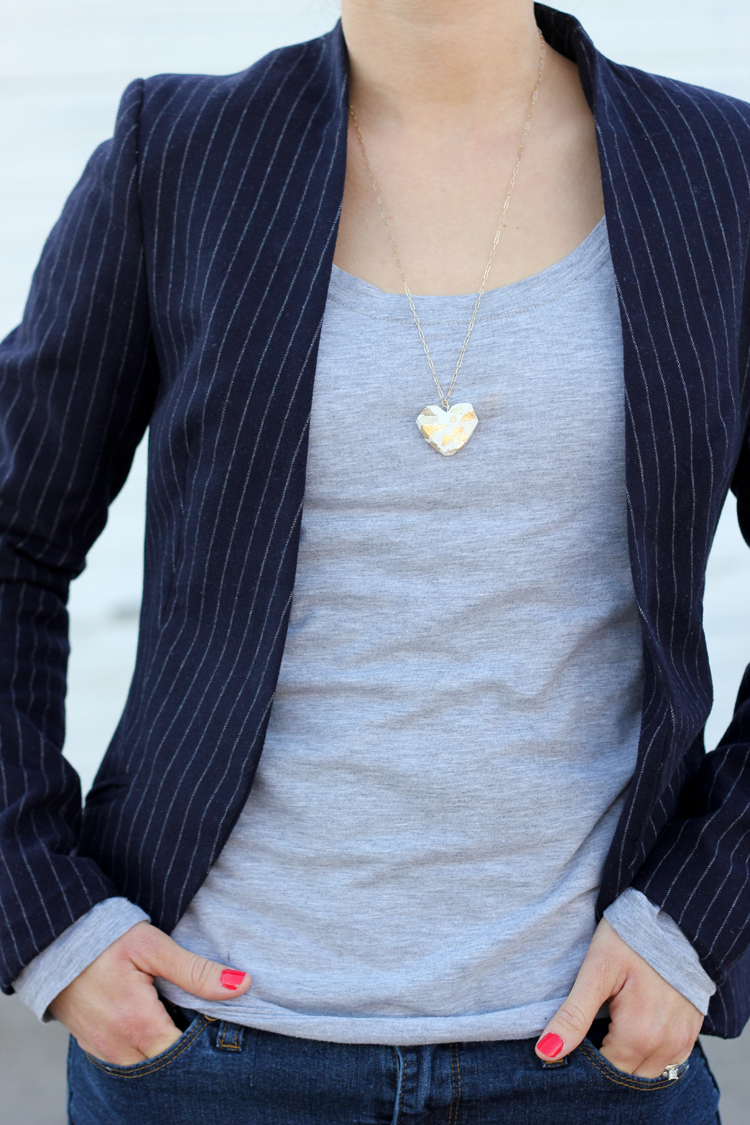
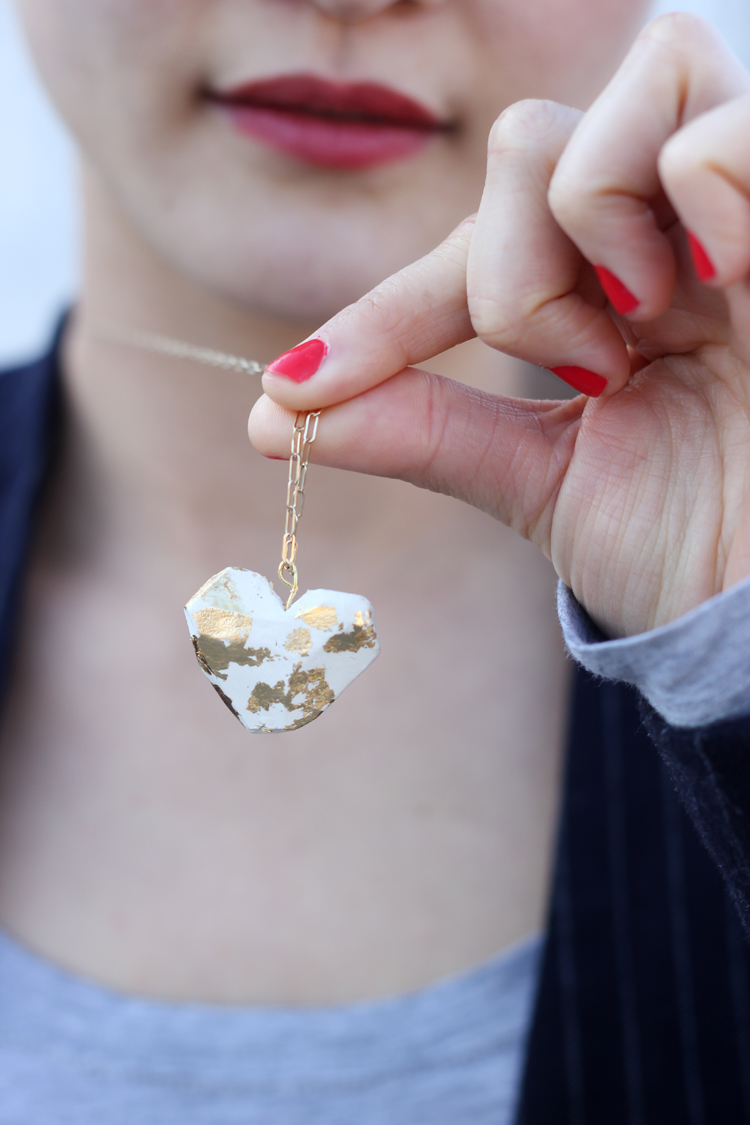
You can stop here…or you can add some embellishment or color. I decided to gild my pendants with some gold leafing.
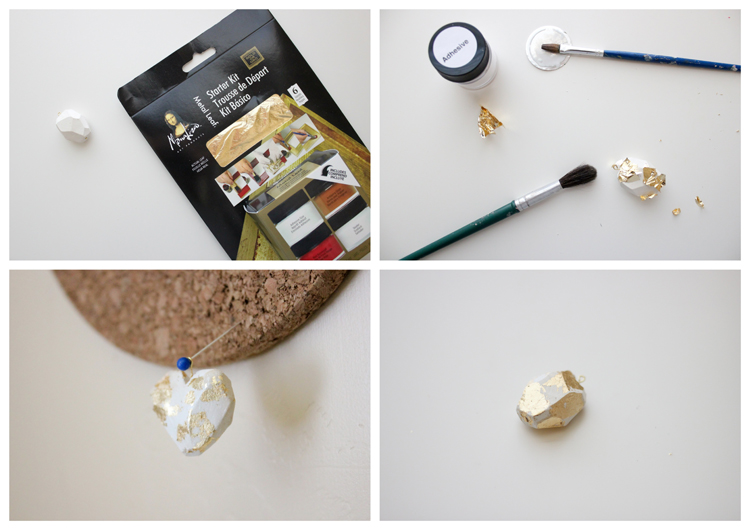 I dabbed the pendant all over randomly with some adhesive (so I would get a mottled look) and then followed the instructions found in the gold leafing kit. My kit is Speedball brand and is from Michael’s. I only used the adhesive and sealant this time.
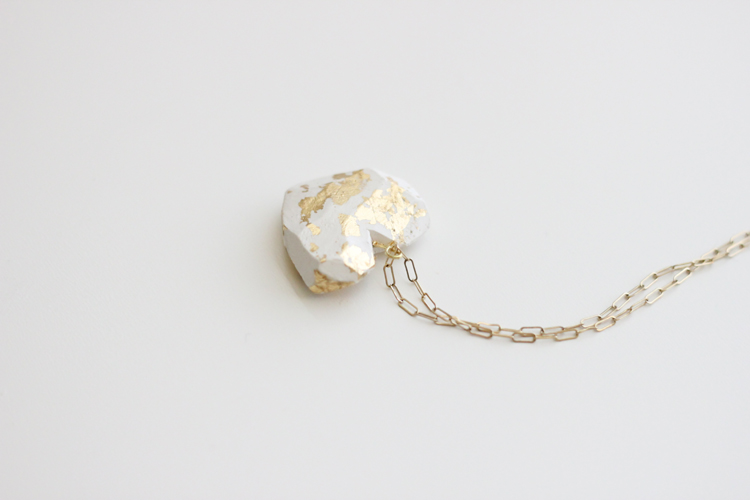
So I wouldn’t have to wait for one side to dry to finish the other, I pegged the pendants to some cork board. I angled the pin upward so the pendant would fall forward. This allowed both sides to dry simultaneously after applying the sealant.
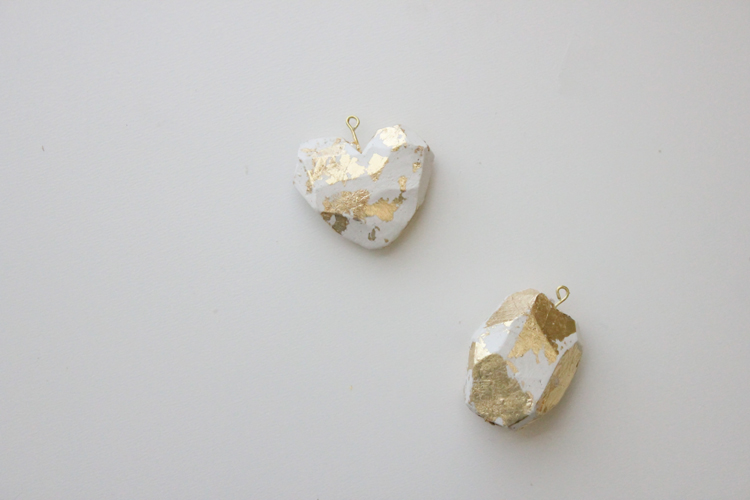
 That’s it! Slide it onto a chain of your choosing and you’re set.
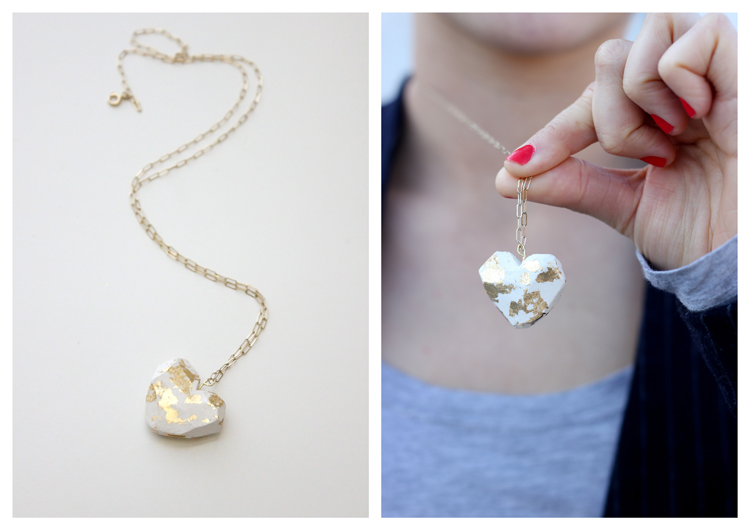 You may be wondering about the fragility of the finished pendant. If you wait for it to fully dry it should be pretty sturdy. It is not unbreakable, but I made a few test pieces to throw down on the ground and they held up fine. I have also dropped these pendants onto the bathroom floor on accident, and they are still intact. Not bad for some kid crafting clay. 🙂

These are beautiful! You did a really great job. Thanks for sharing the idea with us, your readers. I’m not much of a jewelry person because I don’t like flashy stuff, but these are simple, elegant and really easy to do. I think I’ll be doing this for Christmas gifts this year (it’s never to early to start thinking)!
Thank you so much Julie!
I love the shapes you chose. Really elegant yet simple!
Thank you Stacia!
Love it, so simple and it looks awesome! <3
Thank you Deepa!
I don’t wear jewelry, but that is really cute. Maybe I’ll make a key-chain. =)
I threw it on the ground a few times and it held up okay. I don’t know how it would do as a key chain but it’s worth a try! It’s super expensive to make right? Let me know if you do and how it goes?
Cute idea for a diy wedding favors or gifts for jr bridesmaids. Lots of applications for a wedding. Thank you for sharing.
I didn’t think of that but you’re right! Thank you Marilyn.
A really lovely idea. I’m looking forward to trying it.
Super cute Delia! Since I am gaga for anything gold ha! And I love the roughness of it!
I love it! Amazing!! Delia, you are a genious!!!
Thanks Luna!
UMMMMMM……….LOVE! I am for sure going to try this out!
This is downright adorable! I love simplicity of the gold and white 🙂
This is gorgeous! I love the gold speckles!
so cute! very clever using kids crafting supplies to make something so sophisticated looking.
I really love these, Delia! That heart one is lovely!
These look great. I’m loving the geometric style at the moment, and the touches of gold are perfect