

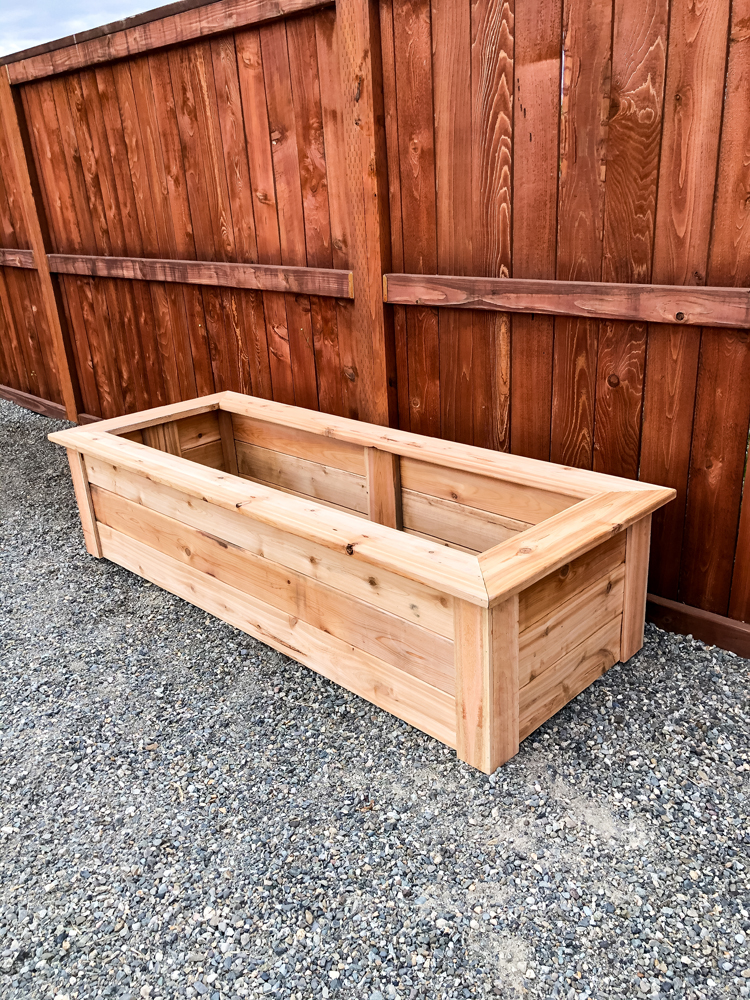
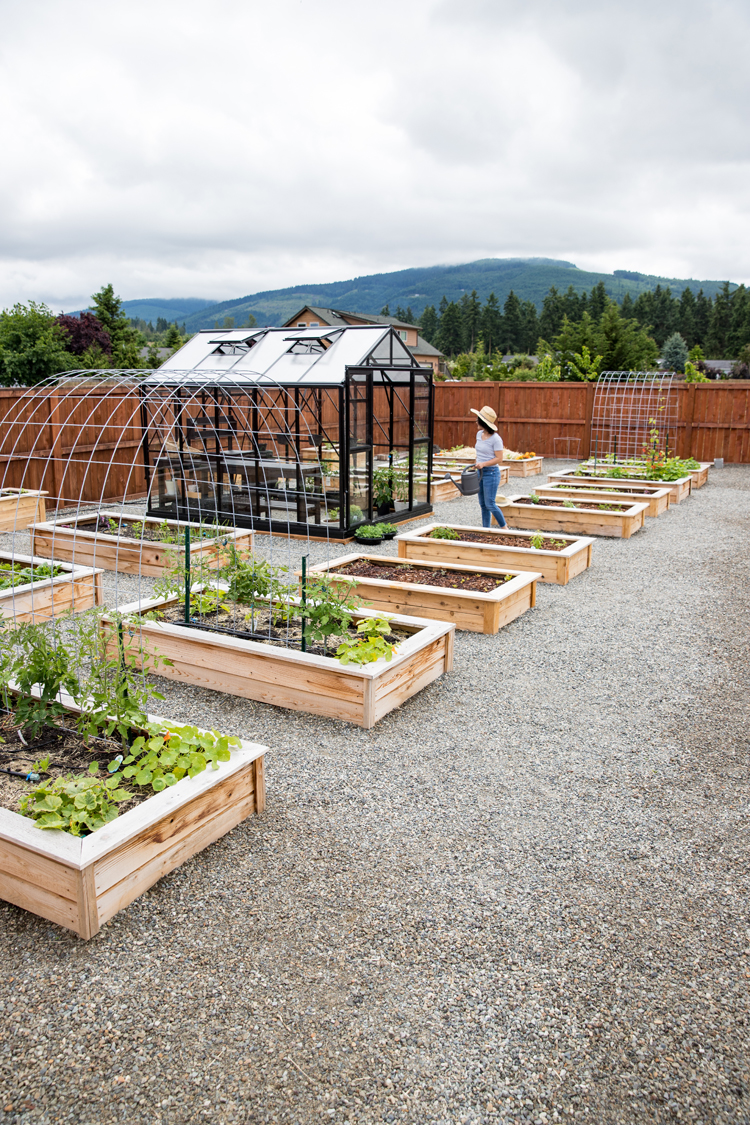
This past Spring we transformed part of our backyard into a raised bed garden with 18 cedar beds. Initially, we were just going to stick to the ten beds I found pre-made on Facebook Marketplace, but I was greedy for more bed space so I made more! Ha!
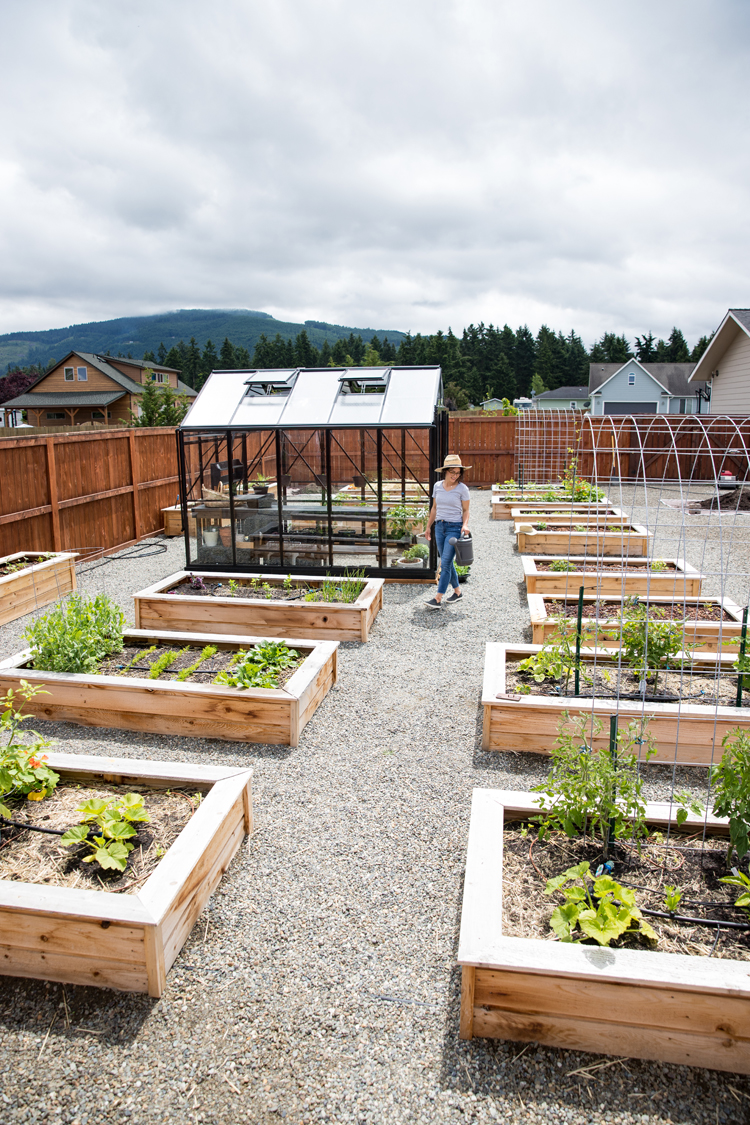
I took cues from the pre-made bed’s construction and figured out how to make more beds of various sizes.
I won’t be sharing plans per se, but I’ll include the measurements I used on to make type bed sizes. I mainly want this post to be a tutorial that will help you make a bed in any size and height.
Note: If you would rather purchase some detailed plans, so that you don’t have to do any guesswork, my friend Miranda from Live Free Creative, Co. has created some great plans based off the beds I originally bought pre-made as well. She shows you exactly what to buy from Home Depot and she’s designed them in such a way that you will have very little waste and only spend $97 per bed. They are tall, deep, and beeeautiful! Go HERE for more information.
I have a lot of information to share, so I am going to organize this post by: Lumber Details, Cuts and Measurements, Other Materials, Tutorial, and Tips For Use.
Lumber Details
I used all cedar lumber, because it can last many years without breaking down or needing any staining or treatment. We are primarily growing food in our beds so I don’t want any chemicals leaching into the soil.
Cedar lumber can be EXPENSIVE. We saved a ton of money by buying directly from a lumberyard and using their discount decking lumber. Many pieces are in perfect condition, but there are also pieces that are cracked, have holes, or don’t look as pretty. For garden beds this doesn’t bother me so much. Each 5/4 inch (true 1 inch) x 6 inch x 8 foot board was only $4 but we couldn’t cherry pick which ones we wanted. So we ordered extra to make up for any pieces that may be unusable. Even still, we were able to make 8 beds for around $350 worth of lumber, closer to $400 if you include hardware, which is an insanely good price. It’s worth googling around for a local lumberyard and checking if you can find a comparable deal in your area.
We also got 2 x 2 cedar corner supports from our local lumberyard. For the corner trim, we use 5/8″ x 3.5″x 6′ cedar fence slats from Home Depot.
Cuts and Measurements
I share the measurements I used below. If you want to make your bed a different size, these measurement notes are still helpful. They will tell you how I determined the measurements for the cap, trim, supports, etc.
Type of lumber I used:
- decking lumber 5/4″ x 6″ x 8 foot (5/4 is actually a full 1 inch in depth but 6 inches is about about 5.5 inches in width)
- 5/8″ x 3.5″x 6′ cedar fence slats
- 4×4 inch cedar for corner supports *
*TIP: I originally used 2×2 for corner supports which work fine, but I realized after building a few beds that for a more secure cap, a 4×4 would work better.
I made two bed sizes:
FIRST (short) BED SIZE:
Length: 6 ft, Width: 38 inches, Height: 12 inches
Cut decking lumber:
4 – 6 foot pieces (for length of the bed)
4 – 3 foot pieces (for the width of the bed)
4 – 11 inch long pieces (to connect boards together and offer extra support in the middle of each side)
2 – 42 inch pieces, mitered (Cap width = Side width + 2 inches when other boards get attached. It should overhang the sides by about 2 inches.)
2 – 76 inch pieces, mitered (cap length. Length of the bed plus 4 inches)
Cut Trim:
8 – 11 inch pieces (cut to the height of bed before adding cap)
Corner Supports:
4 – 11 inch pieces (same as trim)
SECOND (tall) BED SIZE:
Length: 6 ft, Width: 26 inches, Height: 17.5 inches
Cut decking lumber:
6 – 6 foot pieces (for length of the bed)
6 – 2 foot pieces (for the width of the bed)
4 – 16.5 inch long pieces (to connect boards together and offer extra support in the middle of each side)
2 – 30 inch pieces, mitered (cap width. Side width, plus 2 inches when other boards get attached, plus It should overhang the sides about 2 inches)
2 – 76 inch pieces, mitered (cap length. Length of the bed plus 4 inches)
Cut Trim:
8 – 16.5 inch pieces (cut to the height of bed before adding cap)
Corner Supports:
4 – 16.5 inch pieces (same as trim)
Other Materials
You will also need:
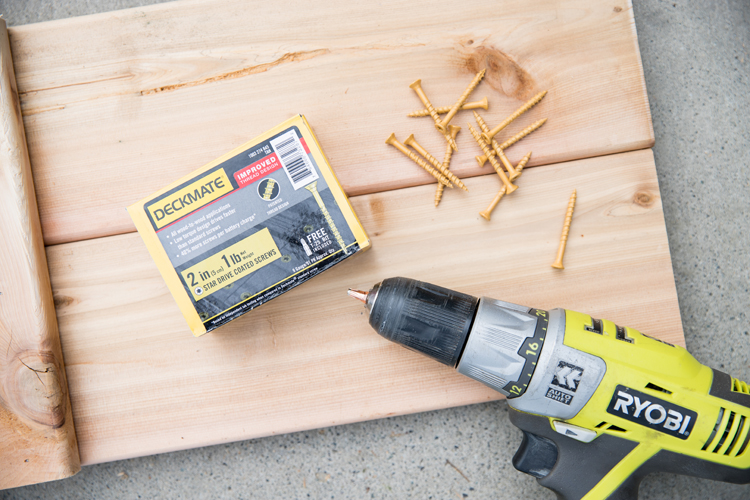
- Power Drill/Driver
- Decking Screws* – 40 to 50 screws per bed, 2 inches long
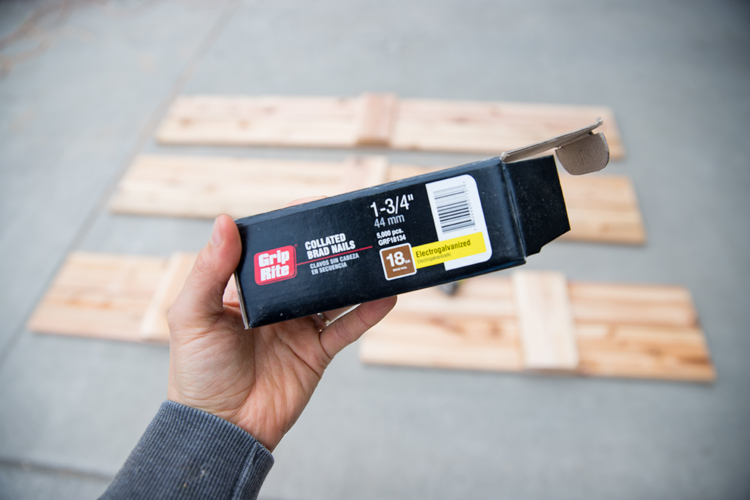
- Brad Nailer
- Exterior Galvanized Brad Nails **
- Optional: Use a hammer and stainless steel exterior nails instead
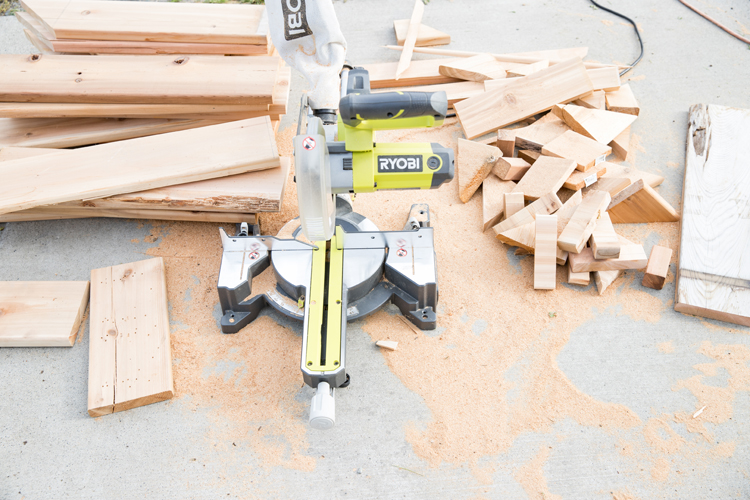
- Miter Saw
- Measuring tape
- Pencil
Materials Notes:
*I used Deck-Mate screws with a star bit. They are easier to drive and less likely to strip. My package of screws came with a star bit. Be sure to grab one if yours does not.
**I used a brad nailer to make assembly easier and faster. You can also use a hammer and stainless steel nails instead. That is what our pre-made beds were constructed with.
Tutorial
The great thing about these beds , is that it takes just one person to build them. These were all built solely by moi, if you don’t count the one I taught my kids how to build. Anyone can make these!
Moving them is another story. Get help with that step. 😉

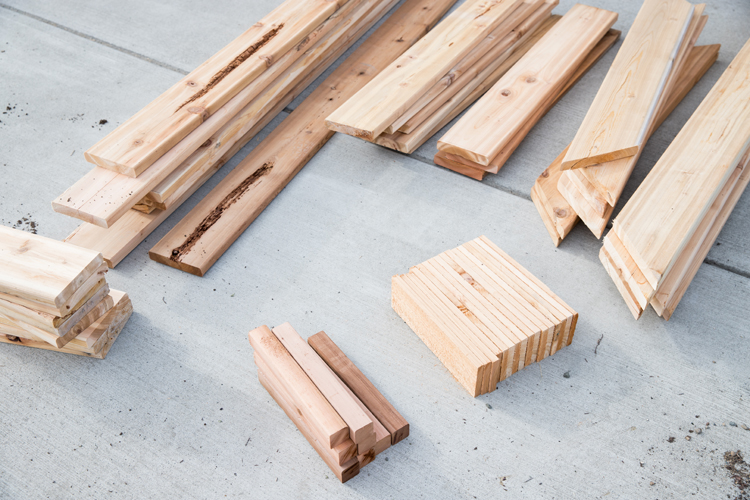
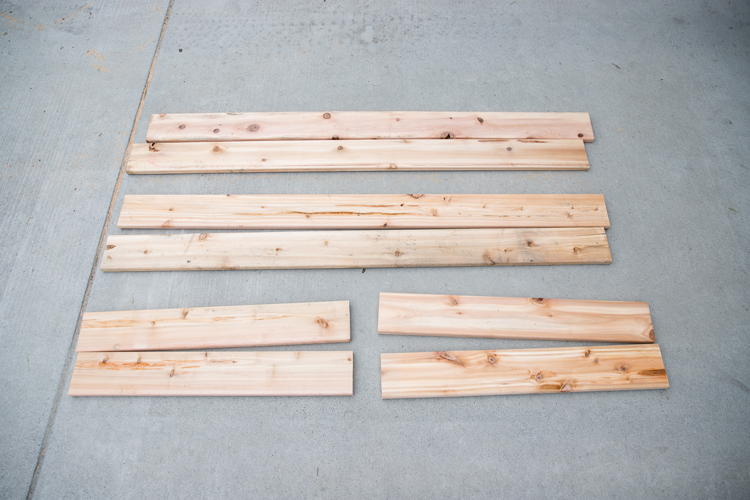
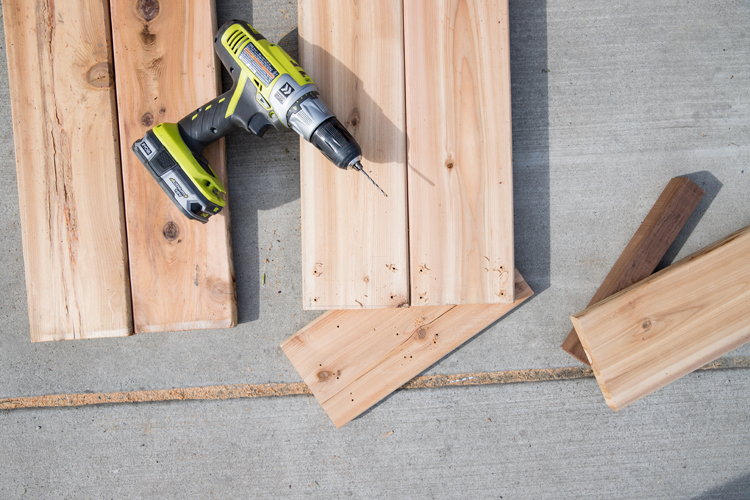
First, cut all your pieces.
I cut the pieces for my first bed, made it, and then I cut the pieces for all the beds at once. It is the most tedious step. Once it was done though, assembly for the rest of the beds just flew by.
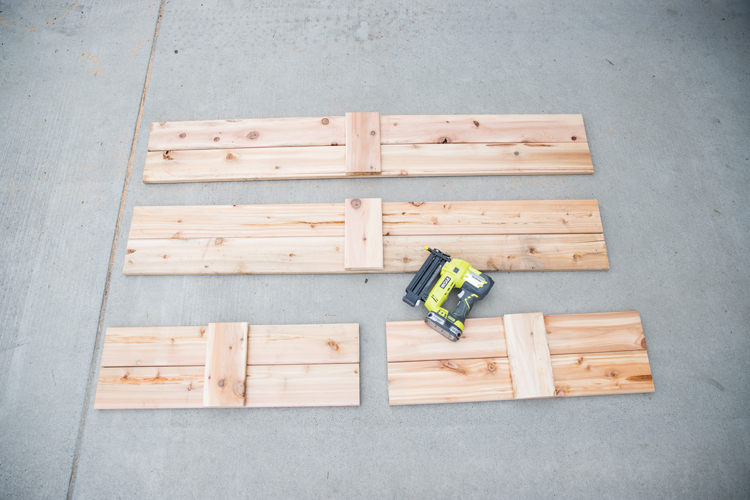
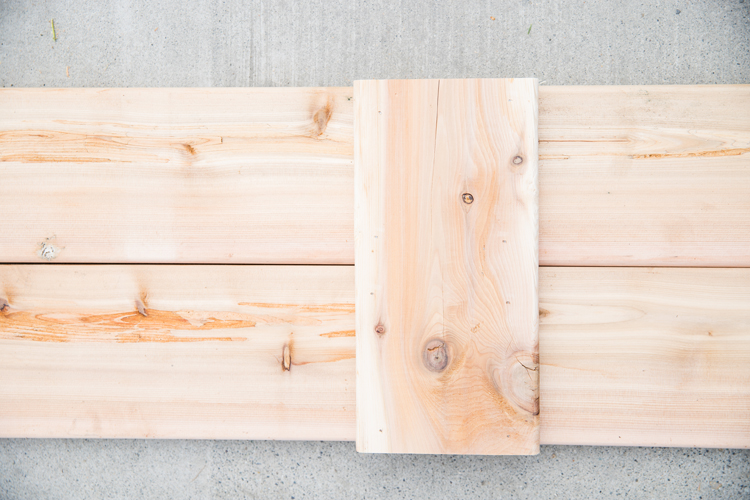
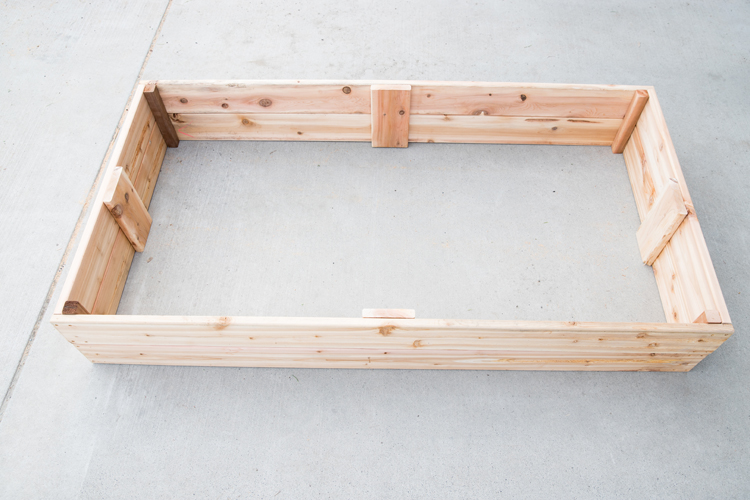
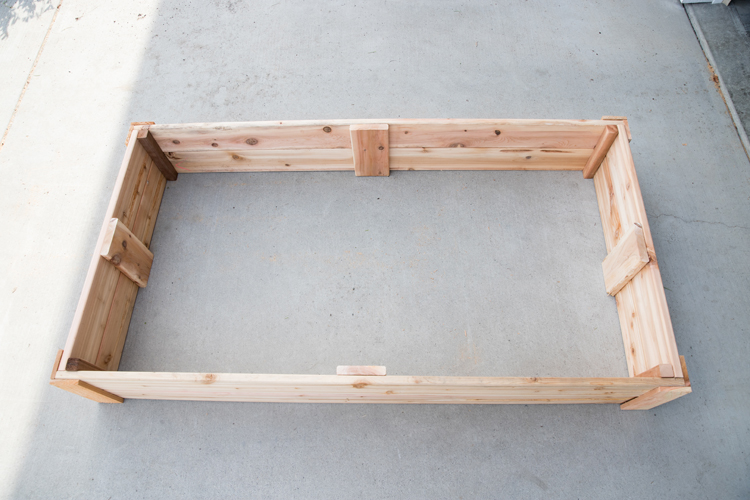
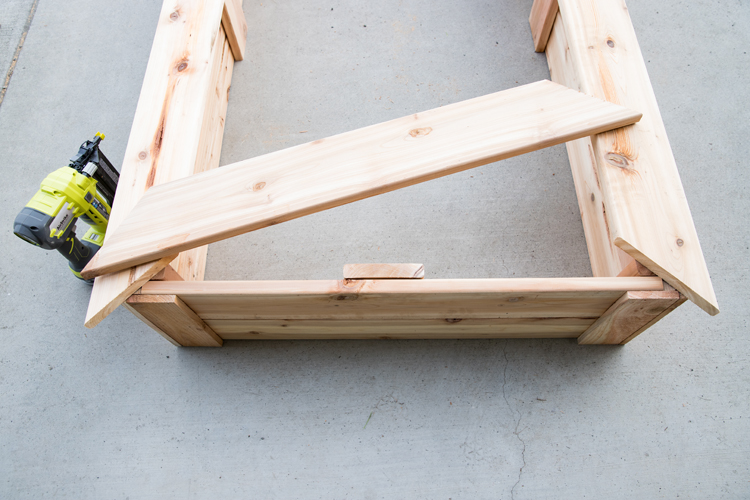
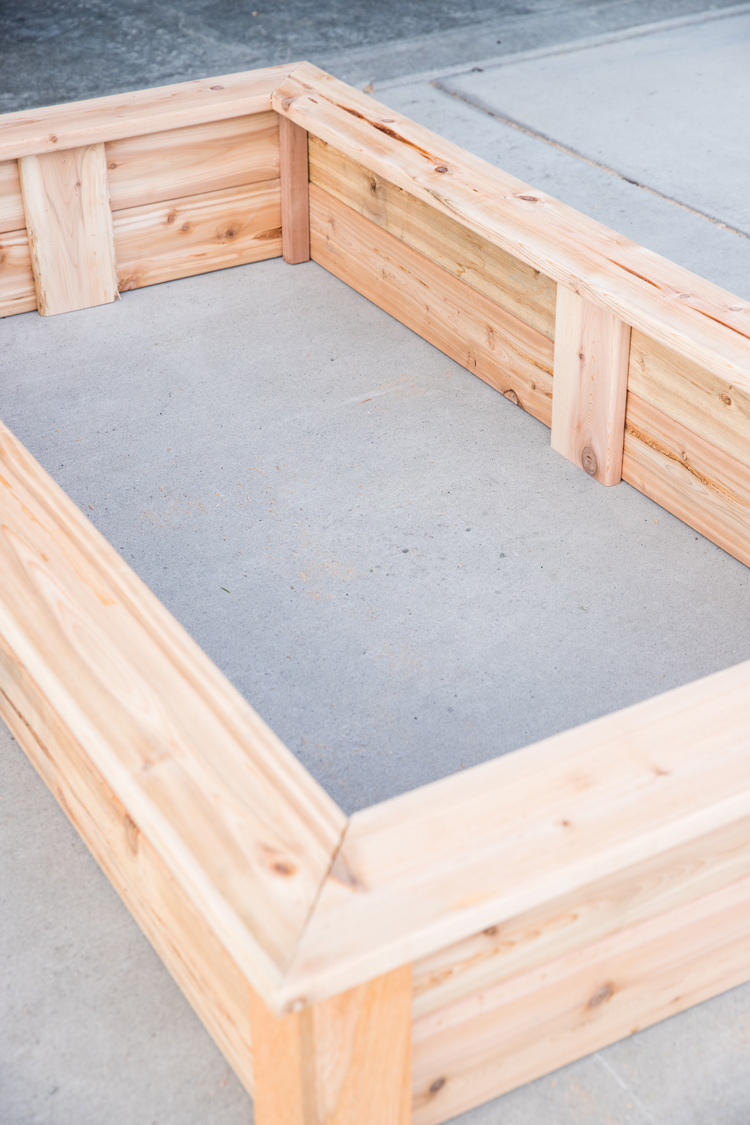
Second, connect the sides.
Line the side pieces up together. Lay a support piece in the middle of the sides, perpendicular to the slats, and nail the support in place.
Do this for all four sides.
This allows you to work with each side as if it is one piece.
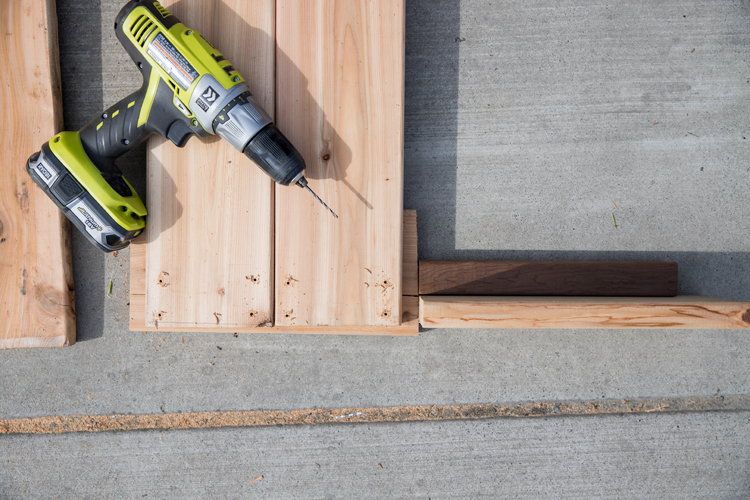
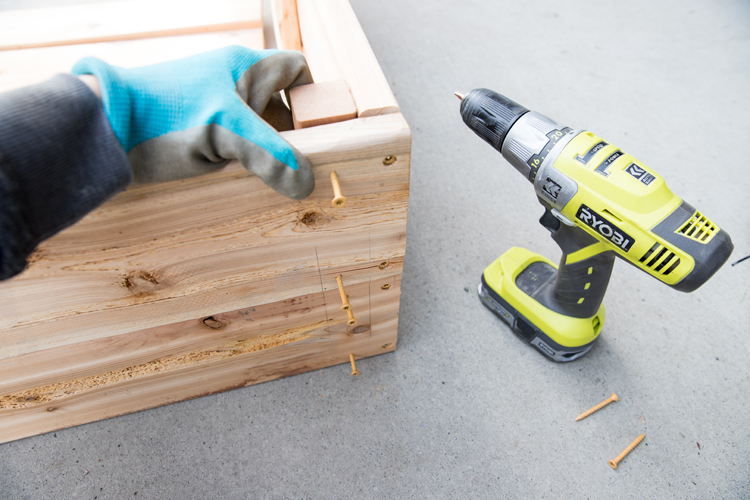
Third, pre-mark and pre-drill.
I flipped the long sides over so that mid-point supports were facing downward.
Using the corner support pieces, and the width of a scrap piece of decking I marked out where I needed to pre-drill where the screws were going to go in. I only did this for the long sides. (The screws will self drive once the corners are mostly secured from the long side.)
Then I put a piece of scrap wood underneath the markings so I could pre-drill the sides and keep it even (the sides should be balancing on top of the mid point support piece).
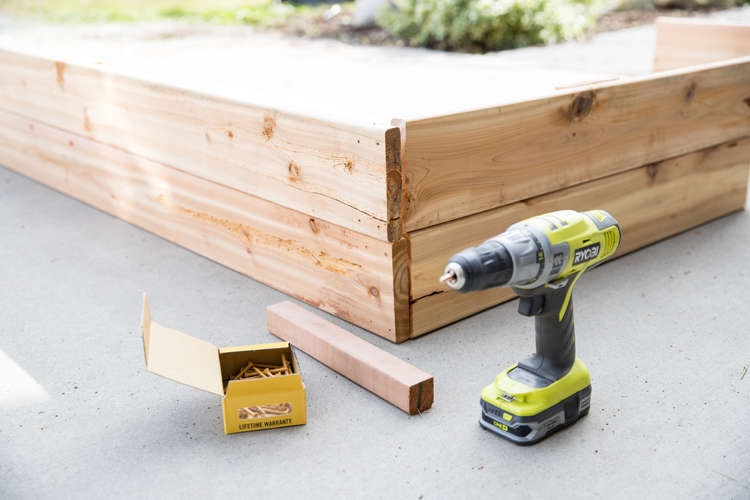
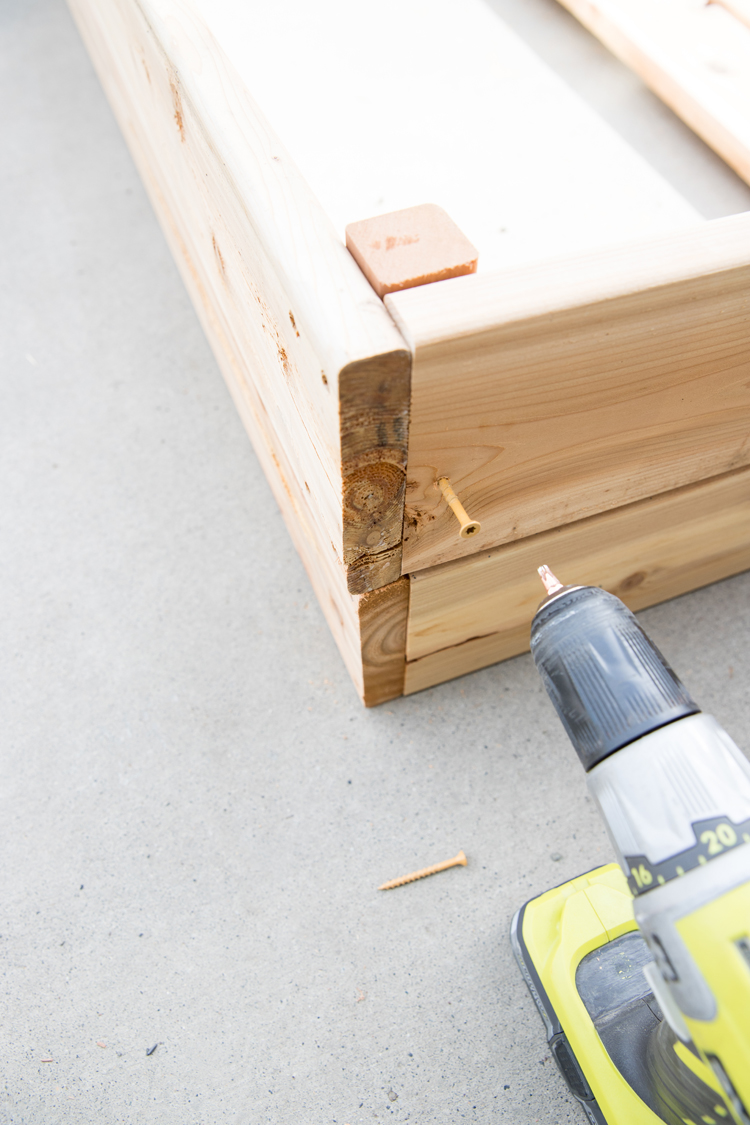
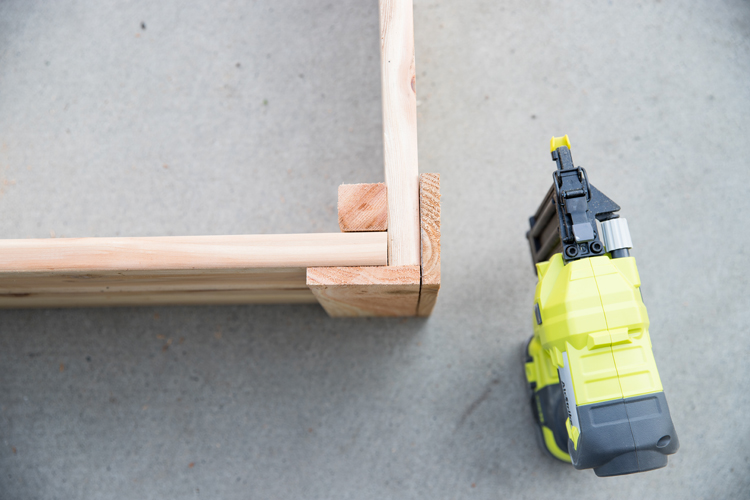
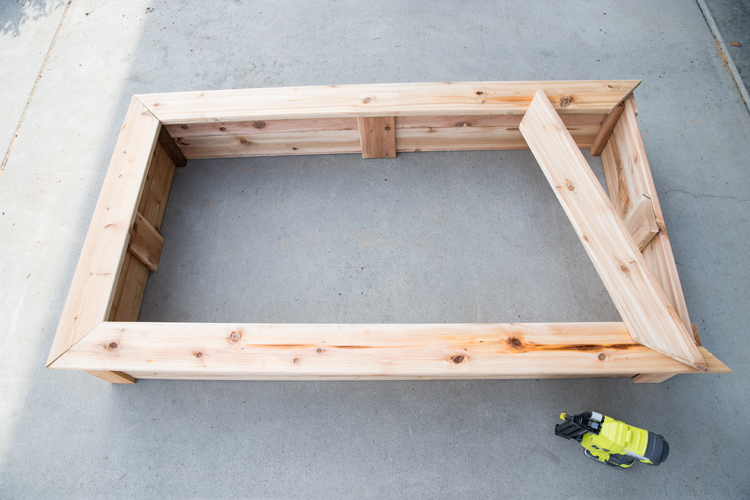
Fourth, attach sides together to form a box.
I sometimes used bricks, or boxes to help hold the sides up while I attached the first two sides together. I aligned the long side up to the end of the short side and screwed in four screws about half way.
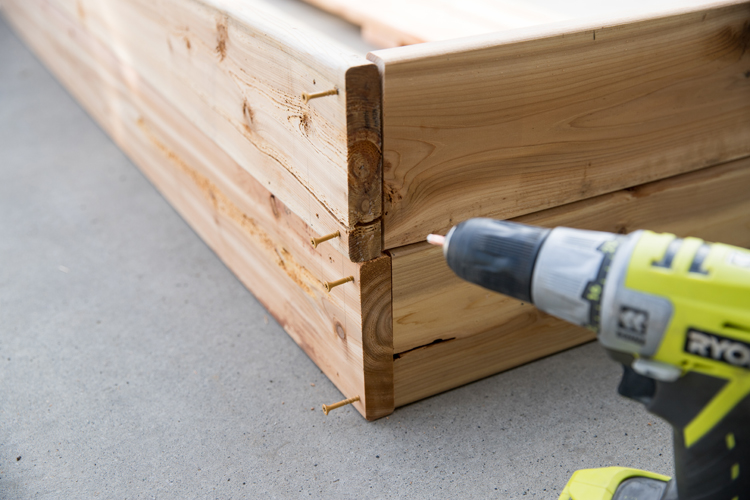
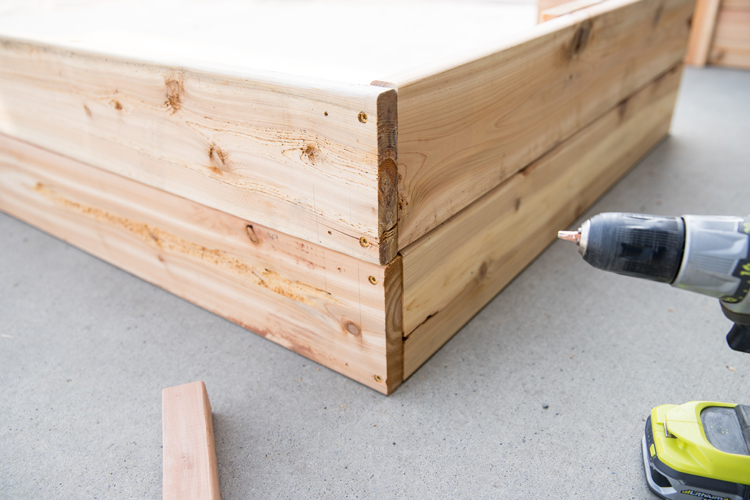
I then screwed each screw in a little bit at a time to ensure the corner joint came together evenly.
I placed the 2×2 corner support on the side of the joint and screwed 3-4 more screws in through the pre-drilled holes. I say 3-4 screws, because four is kind of gilding the lily. To say a little money I started using three screws with no noticeable difference in structural integrity.
I then screwed in three more screws from the short side of the joint where no pilot holes were drilled. Once the long side is secured, the pilot holes are pretty unnecessary. The deck screws will go right in.
I did my best to line everything up perfectly, but due to knots, imprecise cuts and some warping in the wood, some of my corners weren’t perfect. I decided to show you this, so you can see that even if it isn’t perfect, it’s okay. It will get covered up by trim and you won’t notice at all. This is also the consequence of using less than premium wood. This wouldn’t be ideal for furniture, but for a garden box, this is a-okay.
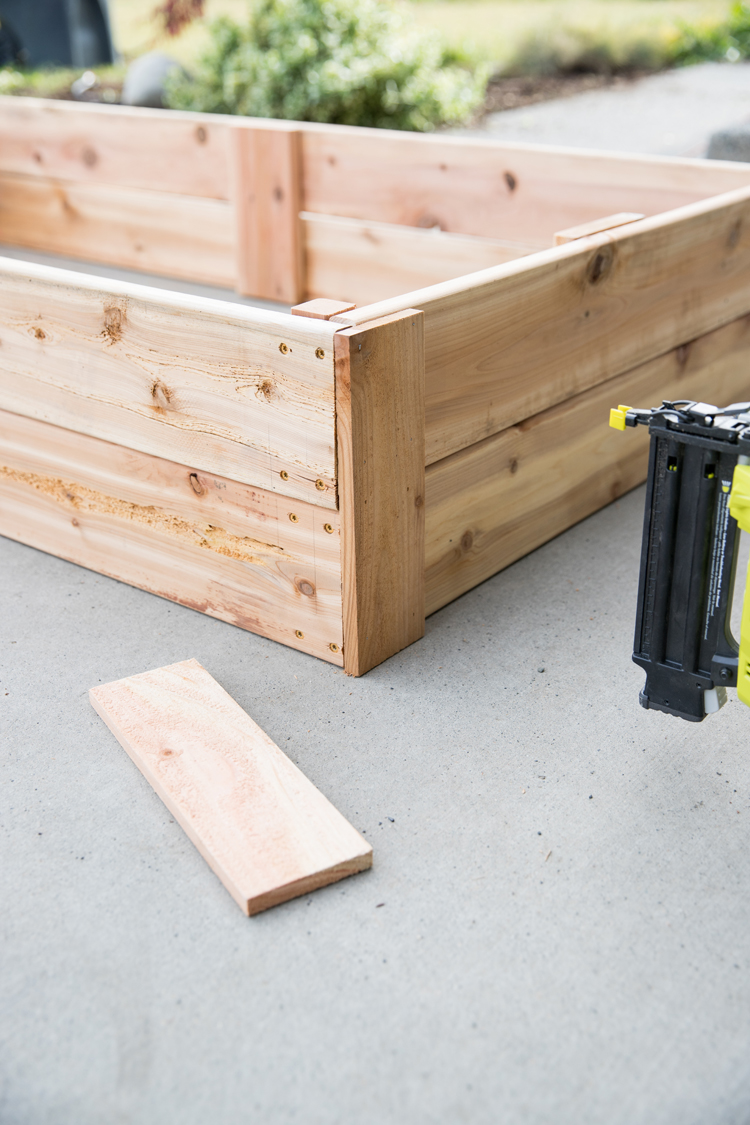
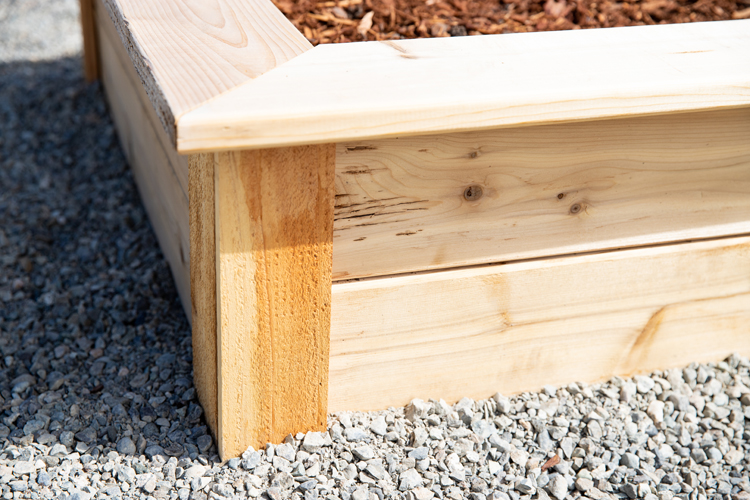
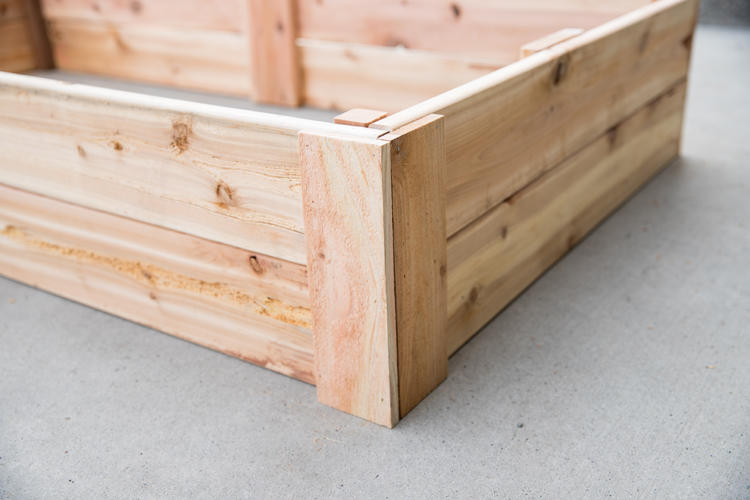
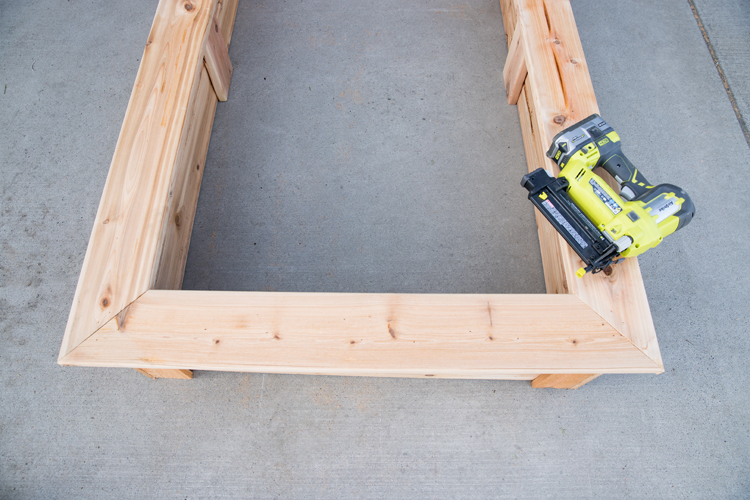
Fifth, add corner trim.
Place trim at the corners and nail in place, taking care to avoid where your screws are placed.
For an added measure of strength, I like to alternate the joints so that the first piece of trim goes on the short side, and then the second piece of trim is placed over that. The picture above can help clarify what I mean.
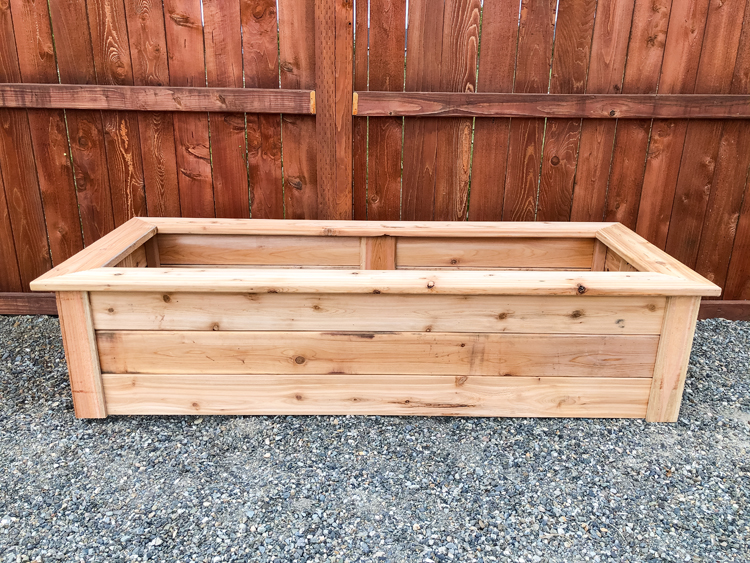
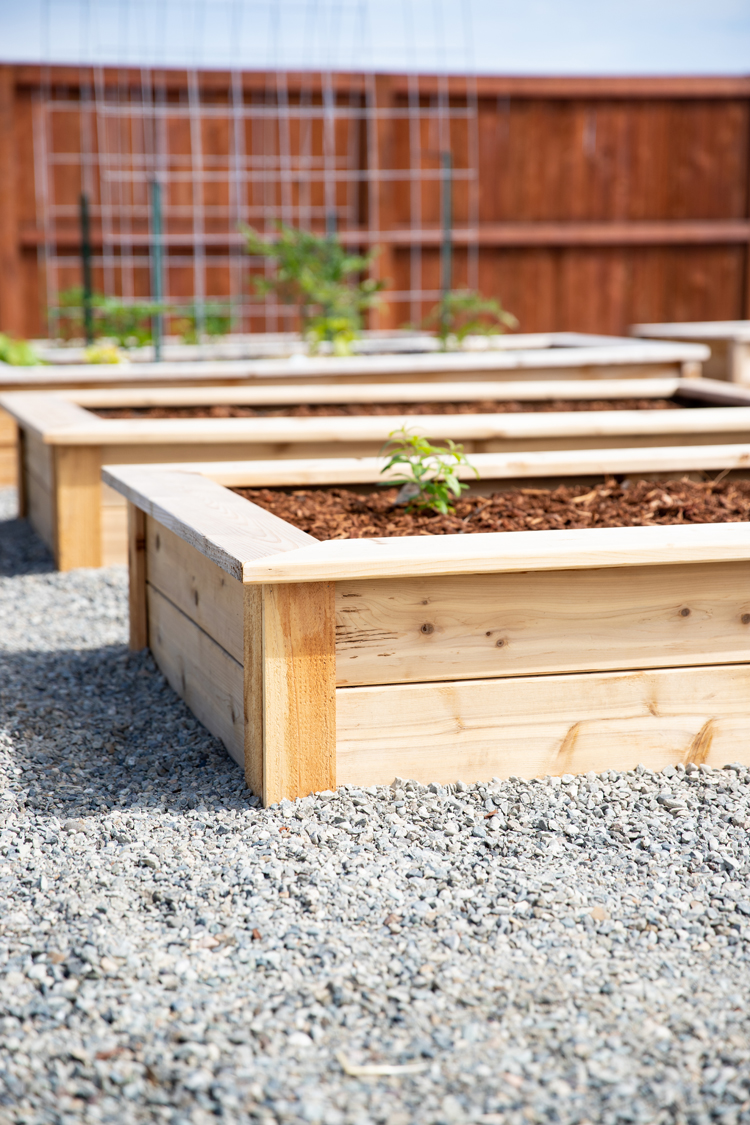
Sixth, attach cap.
You can skip this step and even the trim step as they are mainly for aesthetics. We like sitting and kneeling on the cap though, so I recommend including it.
Center the mitered cap pieces on the bed and nail in place. I nailed mine to the corner supports and the mid point supports several times. I also nailed the cap pieces together through the sides of the cap at the corners.
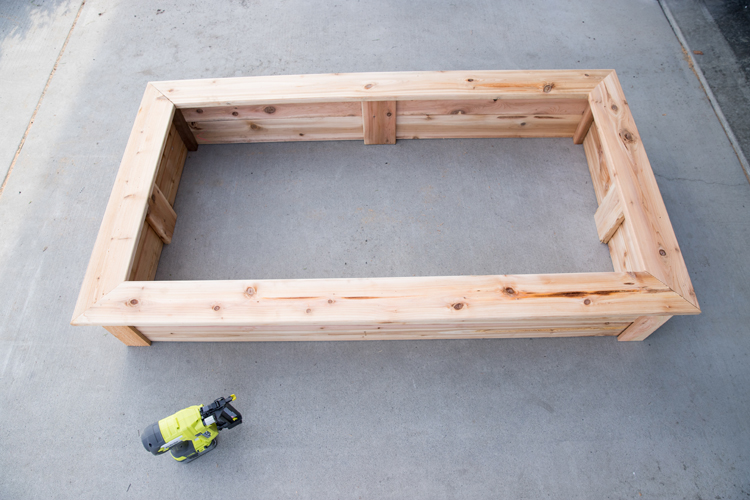
In the pieces that had perfect integrity, this worked great. It’s so sturdy, we can walk and sit on it with no problems. When I tried to use pieces that had a worn out side or damaged side (I’d flip it over so you couldn’t see it), the cap has destabilized a bit. It has been mostly fine, we just can’t have two people sitting on it at the same time like we can with the ones with the good caps.
All done!
Tips for Use
Now all that’s left is to place it and fill it up!
I am working on a post for tips on how to save on soil. I’ll link that here when it’s ready. I also have some instagram stories saved in a highlight if you can’t wait. I’m @deliacreates over there.

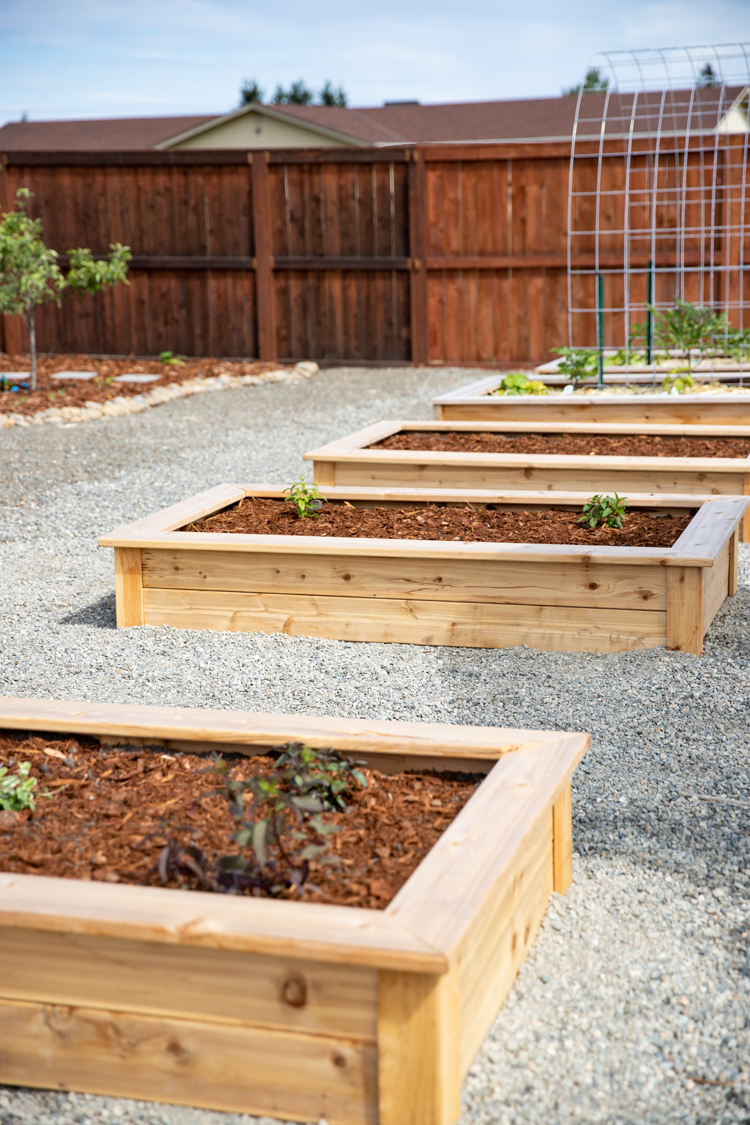
When you place your bed, it helps to ensure the ground is completely level. If it isn’t, use some locking or driveway gravel to help even out the ground. This will make your bed sturdier and it will allow you to sit, kneel, and stand on it as needed.
You can make your bed any width or height. Just be sure to make it deeper than 8 inches minimum, to make sure you have enough soil depth for some shallow rooted plants like lettuce, kale, cabbage, and annuals.
If you’re wondering how to make those wire arched trellises, I have a tutorial for them HERE.
And if you make some beds using my tutorial. I would love to see it and share it with everyone (with permission of course)! Tag me on social media. I’m @deliacreates on all my social channels.
Looks so good! Can you tell me more about your magical greenhouse? We just moved to a zone 3 (yes, 3!) and I am going to need some sort of help to get anything warm enough to grow here!
Sure! We got it from a local greenhouse maker that unfortunately does not ship outside Western WA. The Palram Glory line has a similar greenhouse but with polycarbonate instead of glass. I hope that helps! Best wishes with growing in zone 3. I love that you’re making it work!
who is the greenhouse maker?? I’m in western WA!!! <3
Unfortunately, I can’t recommend the seller’s service record. It’s been a good greenhouse but we’ve also had to repair it a few times ourselves. If you still really want their information, email me [email protected].
Can you give me some info on how you prepped the ground under the rock and raised beds? Getting ready to do a similar project and I’m conflicted on what to put under my beds.
Sure! We leveled it and then laid professional grade weed cloth. It costs more than the stuff you can get at Home Depot or Costco but it is very much worth it. You still get weeds here and there but WAY less and with shallower roots. Then we added 3 inches of gravel. We were going to compact it, but decided to let us walking on it compact it over time. Because we used granite +minus (ground up granite), you don’t sink into it and it is easier to walk on. We laid the beds right on top. The gravel is just another layer of drainage at the bottom. The professional grade weed cloth still allows water to flow through it, which is important for this. You don’t want to use sheets of plastic and have the water pool up in your beds and gravel. I hope this helps. Let me know if you have any more questions.
Perfect. Thank you! Did you need to line your beds with cardboard or anything to prevent dirt from washing out the bottom?
I did not. I started with a base of professional weed cloth and 3 inches of gravel for my raised garden bed area though. I nestled the beds into the gravel a bit so it has held the dirt in place.
How much soil did you need for each of the tall beds?
I bought our soil by the yard at a local soil/gravel place. I think it may have been 1/4-1/3 of a yard.
Hi Delia,
What is the dimension of the cap pieces? In the photo they look like 2x, not 5/4.
Thank you!
Hi Lindsay. They are decking pieces that measure 5/4 x 6 x 8. Are you asking if they are actually 2×4? I want to make sure I understand your question. If you want a faster response, direct message me on instagram (@deliacreates) or email me at [email protected].
Hello, love your garden beds! I was curious if you set up a drip irrigation system or if you just watered by hand? If so, what system did you use/How’d you set it up?
Thanks Sarah! We have been working on a drip irrigation system that has been semi-successful. I feel like we tweak it so much every year that I haven’t felt comfortable sharing a tutorial per se. We’re still learning. So far we have been using the DIG system from Home Depot. We’ve used sprayers and drip line. Neither has been 100% a winner for us but I feel like the drip lines give me more flexibility in my annual vegetable patches. On overcast days it’s usually enough. On sunny days or if a plant needs more attention or fertilizer through watering, I supplement with hand watering. For our permanent perennial plants like our berry bushes, little sprayers/bubblers have been better. I hope that helps at all.
FIRST (short) BED SIZE:
Cut decking lumber:
6 – 6 foot pieces (for length of the bed)
6 – 3 foot pieces (for the width of the bed)
Shouldn’t this be:
4 – 6 foot pieces (for length of the bed)
4 – 3 foot pieces (for the width of the bed)
?
Thanks
Oh dear. You are right! Thank you for catching that typo error. I will fix it now.
I’m having trouble finding discount cedar at local lumberyards online. Did you call around or were you able to find the discounted material on local websites? Any tips on your searches would be appreciated!
I asked local people who knew contractors or were handy to find out where they purchase their supplies. My local lumberyard with discount cedar was an hour from me. The price made up for the inconvenient drive though. I hope that helps.
Did you seal your planter boxes with anything? Did you line them with gardening fabric? My husband is making them for our vegetable garden! Can’t wait!
Good questions Victoria. I did not seal my boxes because they are cedar. They should last a decade or more without any sealing. You can find a food grade sealer that is safe for growing food and will extend the life of the wood, or you can lightly char the wood to seal it (It’s a Japanese method called Shou Sugi Ban). I didn’t line mine with gardening fabric, but the boxes sit on top of commercial grade, permeable landscaping fabric because I have the boxes surrounded with 4-6 inches of gravel. I hope that helps. Please let me know if you have any more questions. I can respond faster on instagram: @deliacreates.