

For today’s project, I’m combining sewing and crocheting into one!
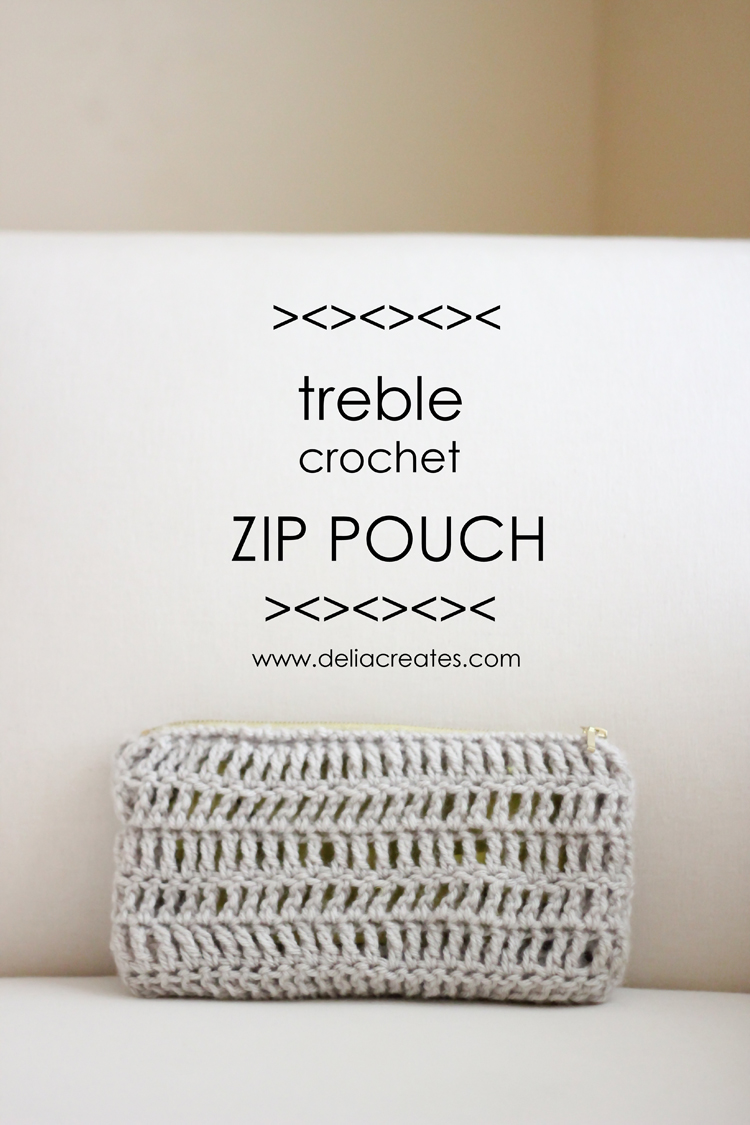
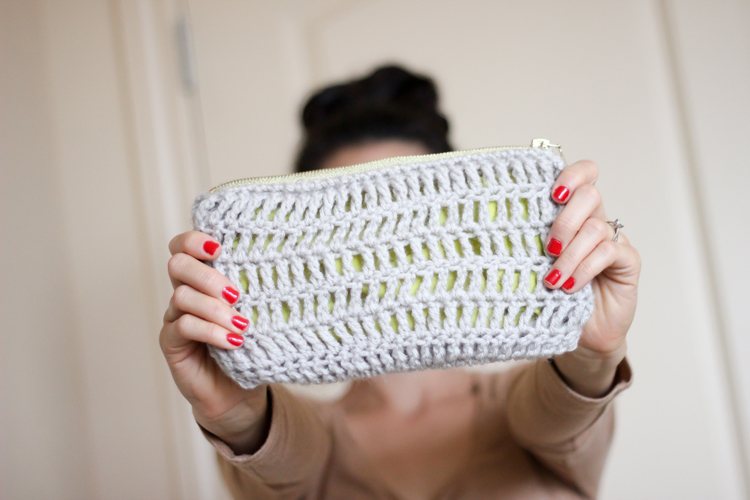
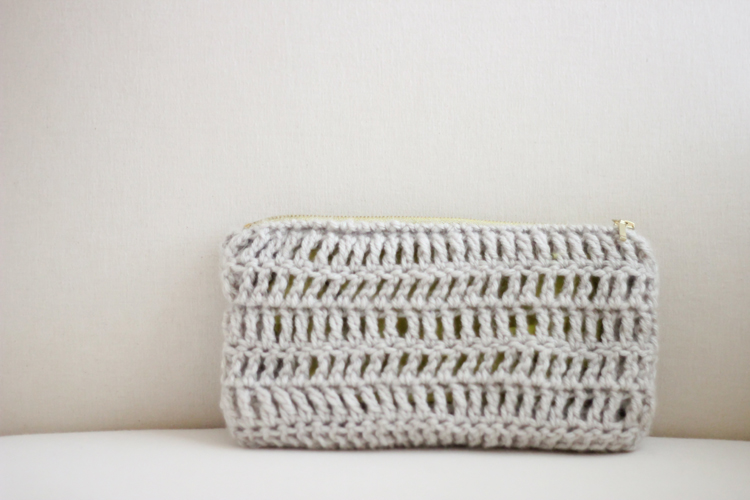
I decided to use a triple or treble crochet stitch to pump up the texture.
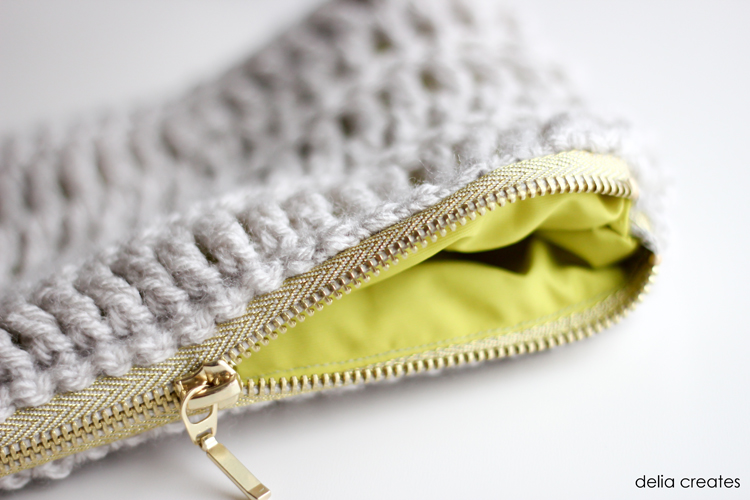
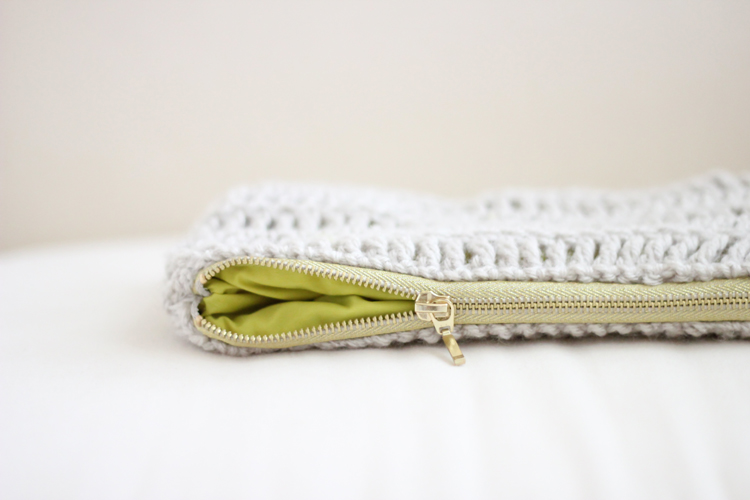
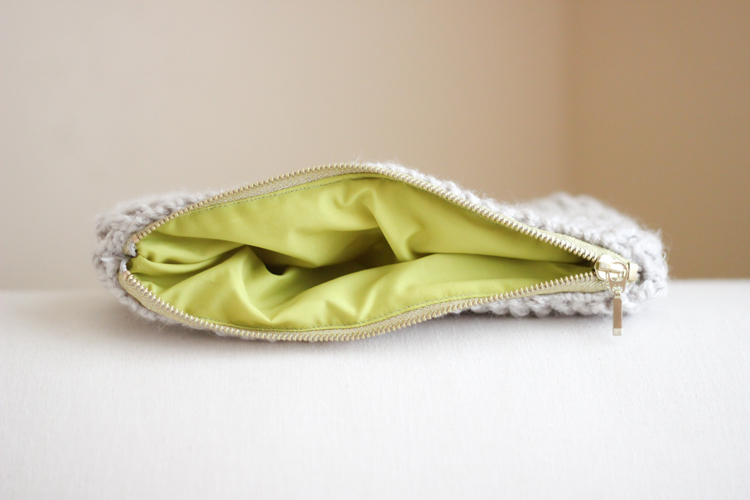
It also gives a subtle peek-a-boo effect to the chartreuse lining underneath.
 Fun right?
Let’s make one shall we?
MATERIALS
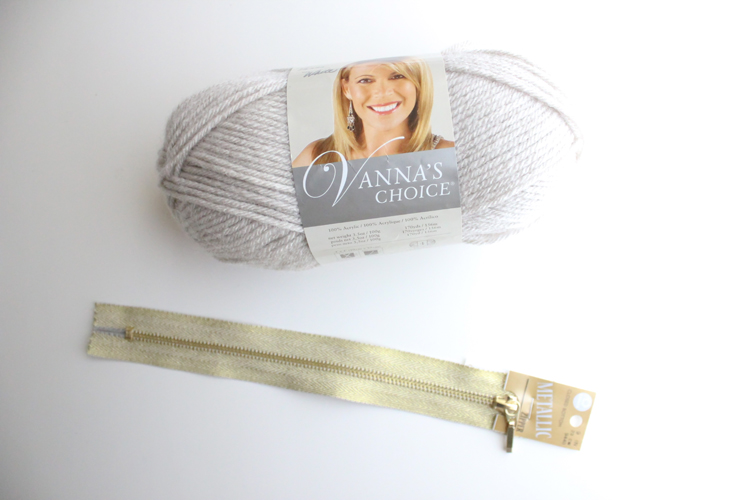
worsted weight yarn – less than one skein (I used Lion Brand Vanna’s Choice in Linen, 170 yards, 3.5 oz per skein)
size I-hook ( to get a looser weave, you may decide to use a smaller hook for a tighter weave)
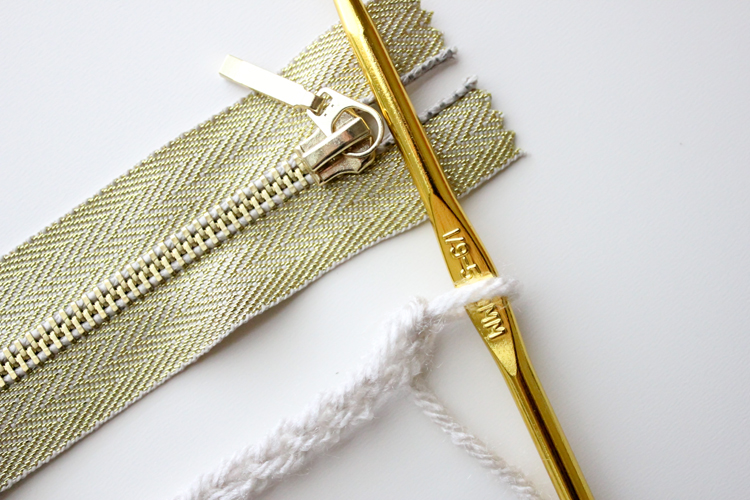
zipper (any size will do, I used a 9 inch gold zipper from Coats & Clark)
lining fabric – preferably fabric with no noticeable wrong side, yardage depends on the size you want to make your zip pouch
sewing machine and matching thread
TECHNIQUES & ABBREVIATIONS
For this tutorial you need to know these crochet techniques:
slip knot, chain, single crochet (sc), triple or treble crochet (tr)
*Note: This is a tutorial rather than a pattern, so that you can adjust everything to the size of your choice of zipper and how large you want your zip pouch.
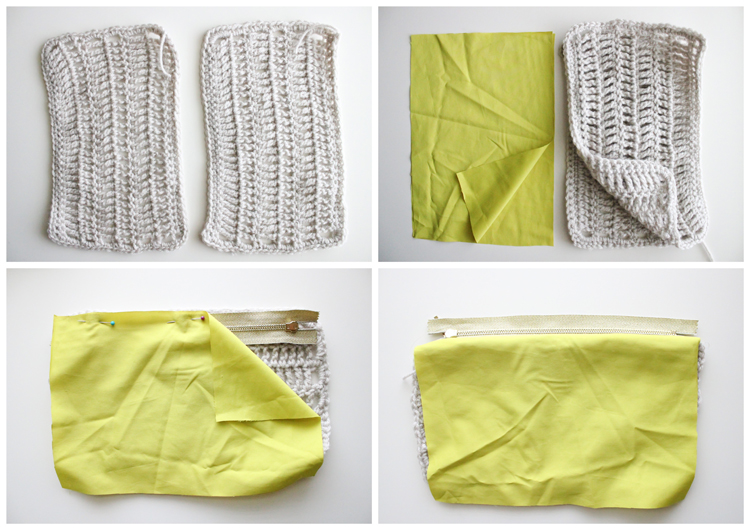
TUTORIAL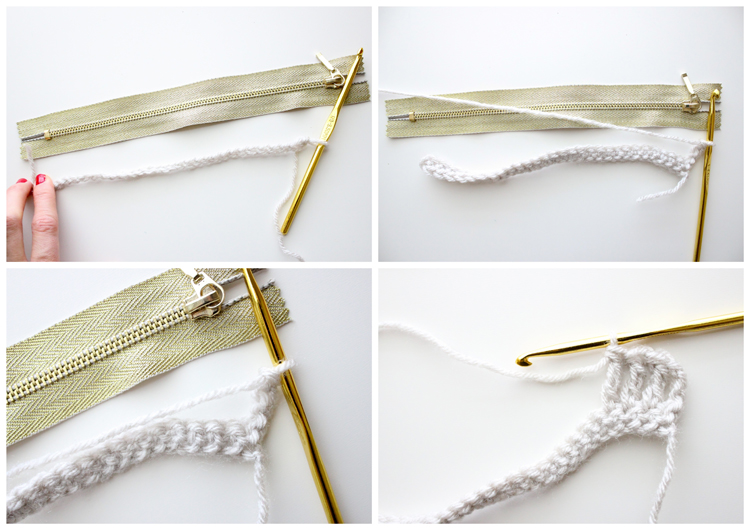 1. Chain the length of your zipper plus a couple chains.
*Make sure to stretch your chain out a bit to see how long it will be. Once you start crocheting into the chain it will stretch out into it’s actual size. When it’s just a chain it tends to spring up shorter.
2. Single crochet into the second chain from the hook and then all the way across.
3. Turn. Chain three and then treble (or triple) crochet into the the next stitch and all the way across.
*Traditionally you are supposed to chain four before proceeding with a row of triple crochets. I have found that this creates ripples and hanging loops in my work, so I have shortened the beginning chains. If you are more familiar with the traditional method, please do what works for you.
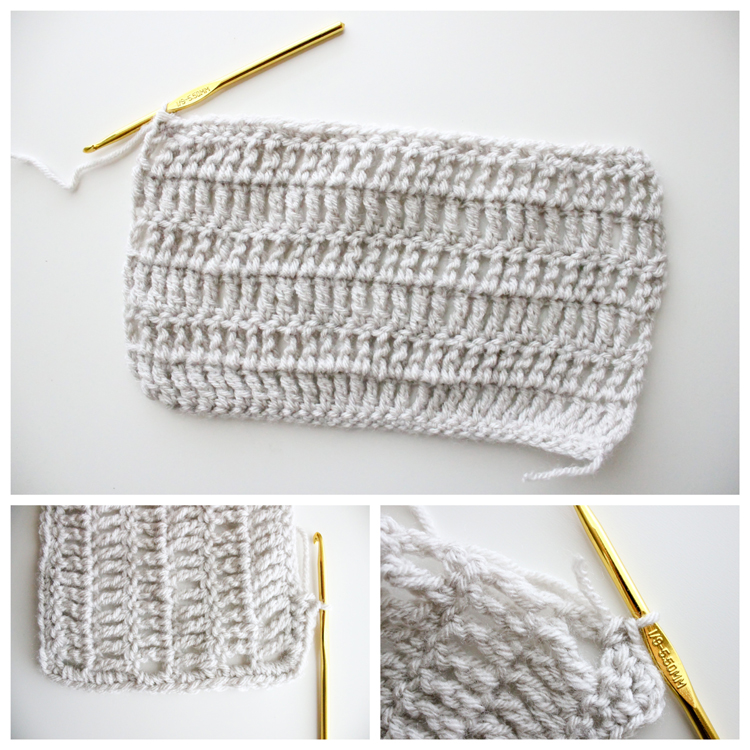 4. Once you get your piece about as tall as you want it, you can tie it off and get to sewing. Or…you can single crochet around the edges of the whole piece. I did this to help ensure the everything would be nice and stable for sewing. It really doesn’t make that huge a difference though.
*Edge crochet tips: I crocheted about three sc in the sides of each tr. At the corners, I also crocheted three stitches in one spot to make a corner. Because of the way these pieces are, that meant I crocheted 8 sc in one corner loop for each corner (3 stitches in one tr, 3 stitches for the corner and then 2 stitches after that before continuing onto the sc side). Crochet the tail into your edge stitches. It will most likely be hidden after sewing, but you might as well crochet over it while you’re at it, so that it doesn’t accidentally stick out of the pouch later.
I honestly wasn’t as exact with this as I would be for say a blanket, because I knew it was going to get sewn over. You can see a drooping edge. 😉 No big! Just crochet around for stability. It will not be visible after sewing.
 This is about what you should have.
5. Now do it again, so that you have two pieces.
 Now it’s time to sew the pouch.
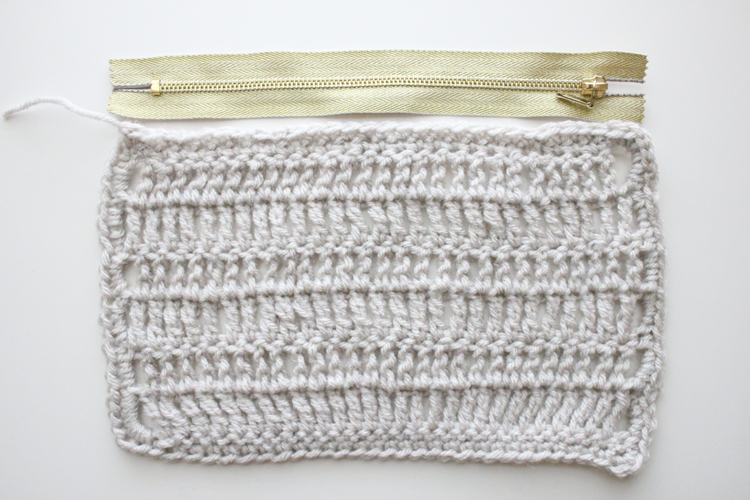
6. Cut your lining fabric the same size as your crocheted pieces. I used this really slippery polyester (hence the no ironing ;)), but almost any fabric will do . Just stay away from knits. Because the crochet pieces already are stretchy like knit fabric, you need a liner with little to no stretch. Also…It’s best to make your lining fabric two sided, since it will be visible through the crochet spaces.
7. Take one crochet piece and pin it right sides together to one edge of the zipper. Lay one lining piece onto the other side and pin in place. *Double check to make sure the zipper pull side is facing the crochet piece.
8. Sew with a 3/8 inch seam allowance. Open it up so that the right sides are facing out and the other side of the zipper is exposed.
*TIP: Sewing a crocheted piece is like sewing a very fussy piece of knit fabric. Be sure to a. sew slow, b. lengthen your stitch, c. use a walking foot if you are still having trouble.
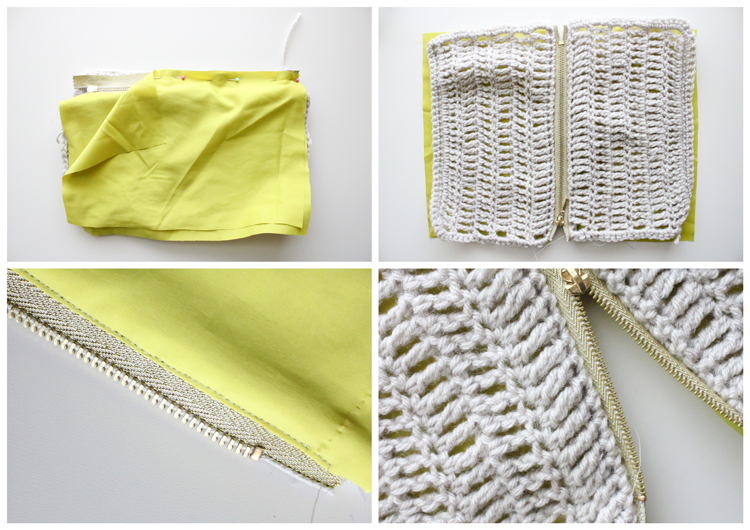 9. Repeat the process with the other side of the zipper.
10. Open everything up, right sides out. Now top stitch the liner down for a cleaner look and to help prevent any lining fabric from getting bunched up and caught in the zipper pull.
11. Open the zipper up about half way, so you can pull the bag right side out after sewing.
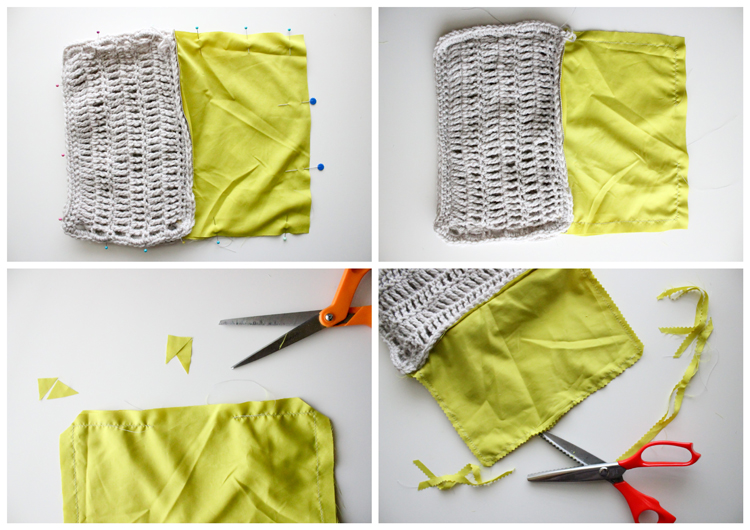 12. Lay the crocheted pieces right sides together and the lining pieces right sides together. Pin in place. Mark a 3 inch opening in the middle of the lining piece, so that you won’t sew there. This is where we will turn everything right side out.
13. Sew around, avoiding the marked middle section of the lining piece. *I sewed with a generous 5/8 seam allowance.
14. Snip the corners of the lining, being careful not to clip any threads. Then trim the lining seam allowance back with some pinking shears. This part of the liner will not be concealed perfectly by the crocheted bag, because of the texture holes. Pinking the edges will help prevent fraying.
*DO NOT, however, trim back the crocheted pieces at all. Even though they are sewn down, it is best to not clip any of the yarn so it doesn’t unravel.
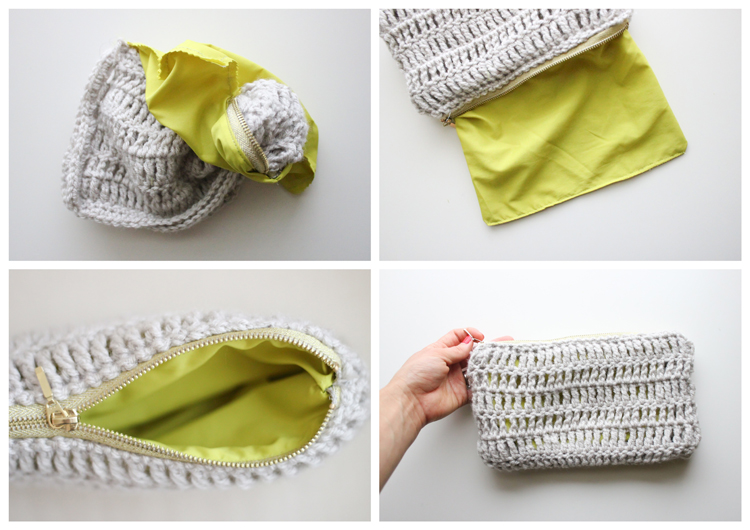 15. Turn the bag right sides out. Work the corners out with your fingers. Press the bag with your hands to get it to the right shape.
16. Pull the lining out and sew the hole closed with a line of straight stitching close to the edge, across the bottom.
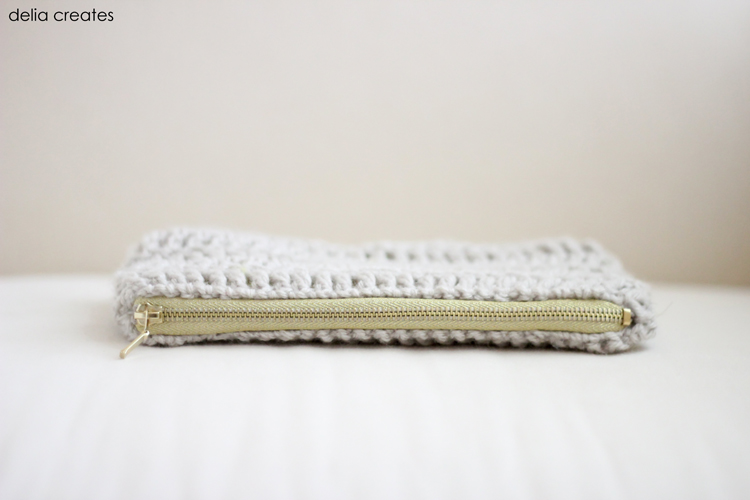
17. You are…done!
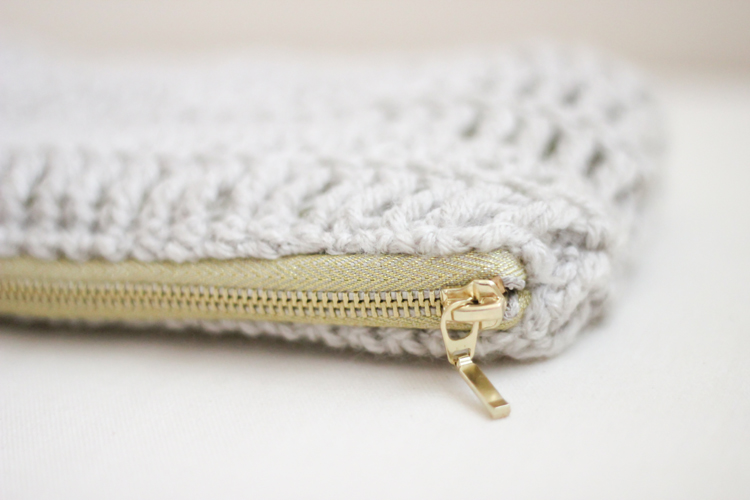
 Take that zipper for a test drive to make sure everything is in order…
 🙂
🙂
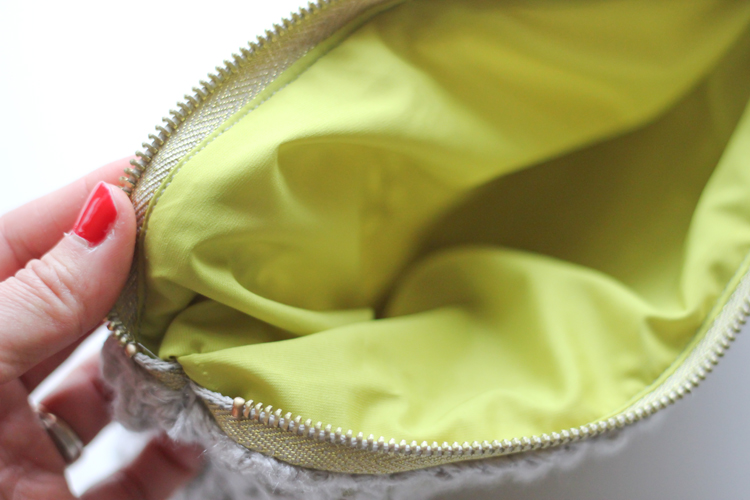 Isn’t the texture sooo purty?
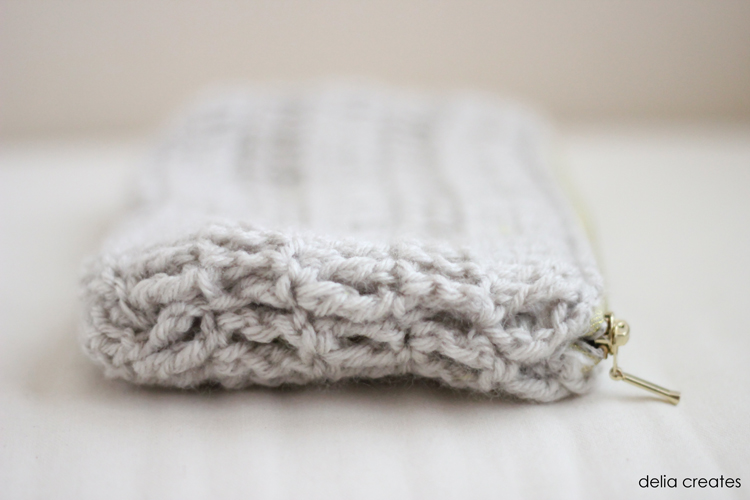 The finished bag is so soft it could almost double as a little travel pillow. 🙂
If you want a denser/sturdier crocheted outer bag, you can use all single crochet stitches instead. You also wouldn’t need a double sided lining either.
 And that’s all there is to it.
This is a great project to experiment with and make your own. Use sc, dc, or tr…or a mixture of them all!
This is super cute!
Thanks Allison!
That is so cute, Delia! Thanks for the tutorial. I am seriously going to try to make one. I learned to crochet years ago from my grandmother, but I can’t read a pattern to save my life. (My grandmother didn’t read patterns; she just looked at the picture and started crocheting and then would hand you the most beautiful finished item that looked better than the original.) Honestly, I forgot a lot of what she taught me. I mainly remember my great-grandmother (who was in her 80’s and mostly blind), feeling everything I crocheted and always telling me that my tension was too tight!
My sister crochets beautifully and I keep thinking I should get her to re-teach me, but thanks to you and Anneliese, it is starting to come back to me. Thanks!
What an awesome legacy of crocheters in your family! My grandmother recently lost her sight and is still crocheting too! All by feel. I hope I’m that amazing when I get older. 🙂 So, glad you are getting back into the swing of things.
Love this….I’ve never thought of combining crochet and sewing…two things I love! Super cute!
Thanks so much Teresa!
Oooh!! I LOVE this!! Thanks for sharing!
Thanks Erin!
Gorgeous!
Why thank you Stacie!
Love it. I love that you crocheted the outer fabric. So clever. Nice job on the bag and the tutorial.
Thank Ann!
What a perfect handbag to carry around during this winter! I adore your color combo!
Thanks Stacia! I know..isn’t the treble crochet texture yummy? 🙂
Mmm you are making me want to pick up the crochet hook again. You are doing a wonderful job of making crochet trendy! Keep up the great work.
I take that as a great compliment. Thank you so much!
Hello Delia!
I love this little pouch! So cute and clever yet simple!
That is really cute! I love the peek of color from the lining showing through the crochet. =)
You have the most amazing style, Delia! I love this so much. You make me want to learn how to crochet!
U reach me here in Africa sis, I love the simplicity in both tutorial and results. Thanks for sharing
This is a really great tutorial, I was planning on combining my crochet and hand=sewing skills and I think this will be my first project 🙂
Great tutorial! Love the colors and the use of fabric + crochet {two of my favorite things!} I recently saw a tutorial where someone was sewing fabric onto yarn and she suggested putting tissue paper under the crocheted part so the yarn doesn’t get stuck in the teeth of the sewing machine. After sewing, you can easily pull the pieces of tissue paper from the project. As I’m sure you know, once the yarn gets pulled, it’s so hard to fix.
Thanks for sharing this tutorial.
Heather
nice tutorial, i would like to try this ^^
Hello dear,
I have made a blogpost about DIY’s and linked your cool DIY. I hope it’s ok.
Here´s the link:
http://zu-grinsebacke.blogspot.de/2014/04/vier-diy-inspirationen-taschen.html
Greetings from Germany
Of course! Thank you for the feature!