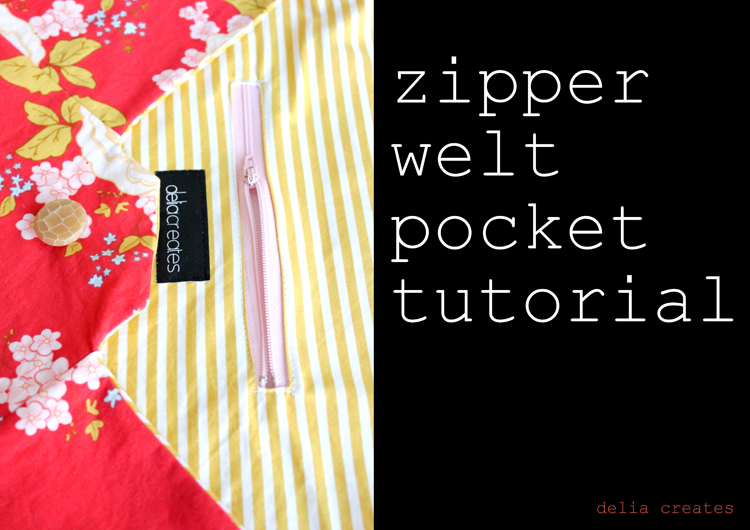
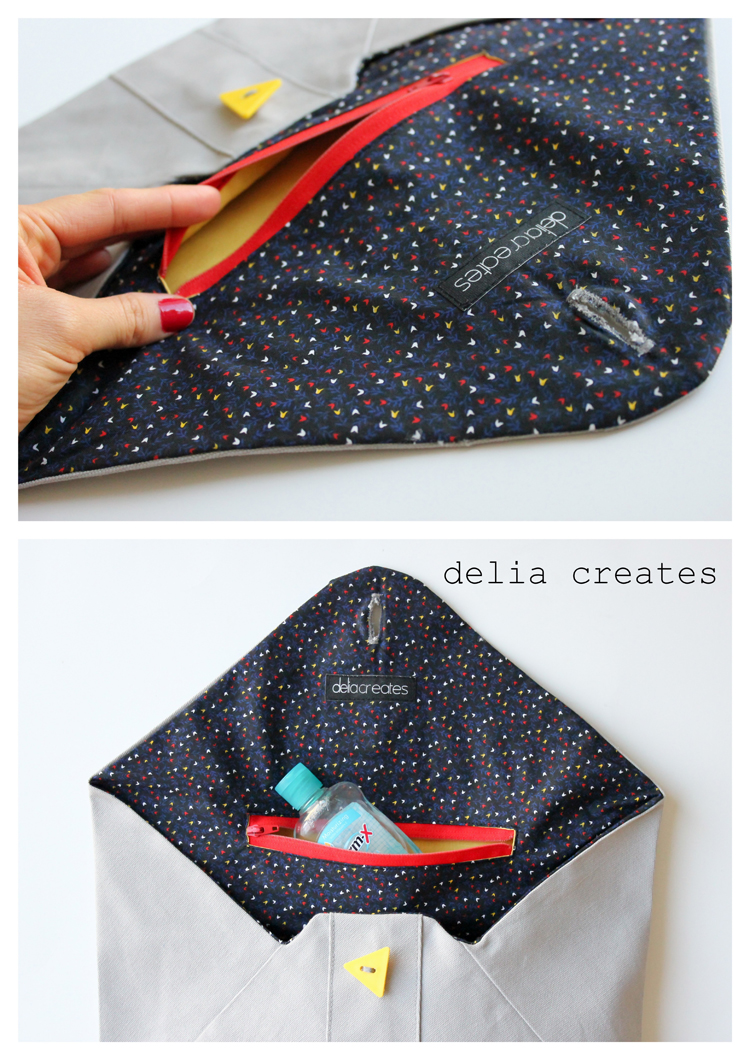
• Skip to primary navigation
  • Skip to main content
  • Skip to primary sidebar
  • Skip to footer
  • Home
  • BLOG
  • TUTORIALS
    • Free Patterns
    • Free Printables
    • SEWING
      • Technique
    • CRAFTS
      • Printables
    • CROCHET
    • Baby
    • KIDS
      • Boys
      • Girls
      • KIDS CREATE
      • Lego
      • Parenting
    • Women
    • Men
    • Holiday Projects
      • Birthday
      • Valentine’s Day
      • Easter
      • Spring
      • Mother’s Day
      • Father’s Day
      • Summer
        • Color Your Summer 1
        • Color Your Summer 2
        • Color Your Summer 3
      • Halloween
      • Autumn
      • Thanksgiving
      • Christmas
      • Winter
    • Accessories
    • Home Projects
    • No Sew
    • Gift Ideas
      • Teacher Appreciation
    • Party Ideas
    • Photography
    • RECIPES
      • Allergy Friendly
      • Baking
      • Sweet
      • Savory
      • Beverage
      • Breakfast
      • Holiday
      • Soups
      • Vegan
  • SHOP
    • SHOP
    • Cart
    • ACCOUNT
  • ABOUT
    • CONTACT
    • Featured
  • SPONSOR
    • PRESS
  • Privacy Policy
  • TERMS OF USE

delia creates

sewing, technique, tutorial · March 4, 2013

Welt Zipper Pocket Tutorial

Hey hey!

I’ve got a fun tutorial for you today.
Yes fun! It’s fairly simple too.
Once you see it and try it. You’ll say to yourself, “That was it?” Then you’ll want to put a zipper welt in everything!
Be aware that this is not a basic beginner sewing technique though. If you already have the basics down and are looking to try something new (but not too scary or complicated). This is the tutorial for you!
Now, I am a perfectionist (mostly), so I can’t help apologizing for my imperfections. I know my envelope clutch didn’t turn out perfect…even though I turned it inside out a few times to see where I went wrong. I discovered that I didn’t put my pattern together perfectly. You can read more about that HERE. The welt pocket did turn out.
So, let’s get to the pocket. ๐Ÿ™‚
What you’ll need:ย 
Other than the usual (thread, pins, sewing machine), you’ll need the fabric you want to put the welt in and two identically sized pocket pieces, a zipper, sewing scissors, craft scissors, an iron (not optional), a ruler, and a sewing marker/pencil.
STEPS:
(This looks complicated in words but if you follow the pictures, it really is not. What I wrote should just clarify things if you have questions.)

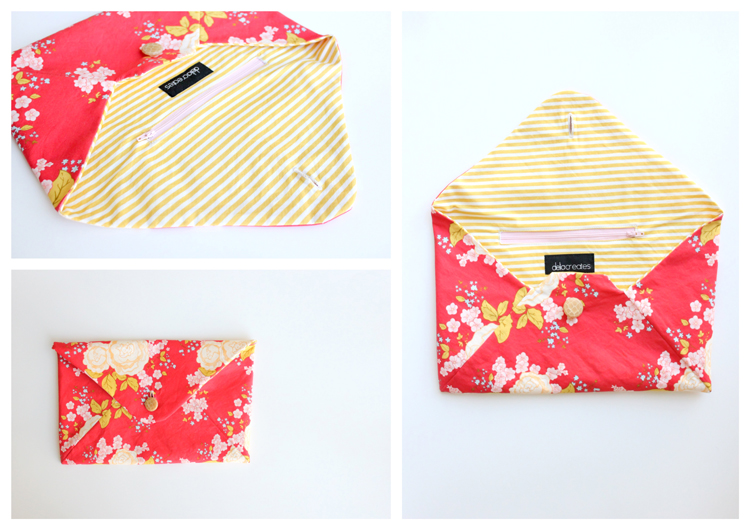
1. Decide where you want your pocket placed on your main piece of fabric. Place a pocket piece on top of where you want your pocket to go. Make sure you give yourself at least two inches of pocket fabric above where you want your finished pocket and at least an inch or more on the sides. *Make sure the pocket piece is on top of the main fabric right side up. **It is ideal if one of your pocket pieces matches your main fabric, but it’s not necessary (just looks cleaner and hides any small mistakes). If you have one that matches, use it as the first pocket piece.

2. Using your ruler and sewing marker, draw a rectangle 1/2 inch tall and as long as you want it to be. Make sure your zipper is long enough or longer than your rectangle. You also want to draw a triangle at each end with lines at about 45 degrees to the corners, a line connecting them, and a line marking the middle of the rectangle.
3. Place a pin at the middle line. Also place pins around the rectangle to keep everything from shifting.
4. Sew exactly on the rectangle you drew. Don’t sew on the lines you made inside the rectangle, just on the rectangle. With your scissors cut the lines on the inside (except for the middle marker line). Make sure you snip the lines to the corners as close to the stitches as you can without snipping through the sewn lines. The closer you get to the corners and sewn lines, the cleaner your welt will look (which I’ve learned through trial and error).
5. Push the pocket piece through the middle hole you just created.

6. ย Press generously with a hot iron to get it smooth and even. This is how it should look from the wrong side.
7. Place your zipper over the pocket opening. Flip your fabric over so that the main fabric is right side up again.

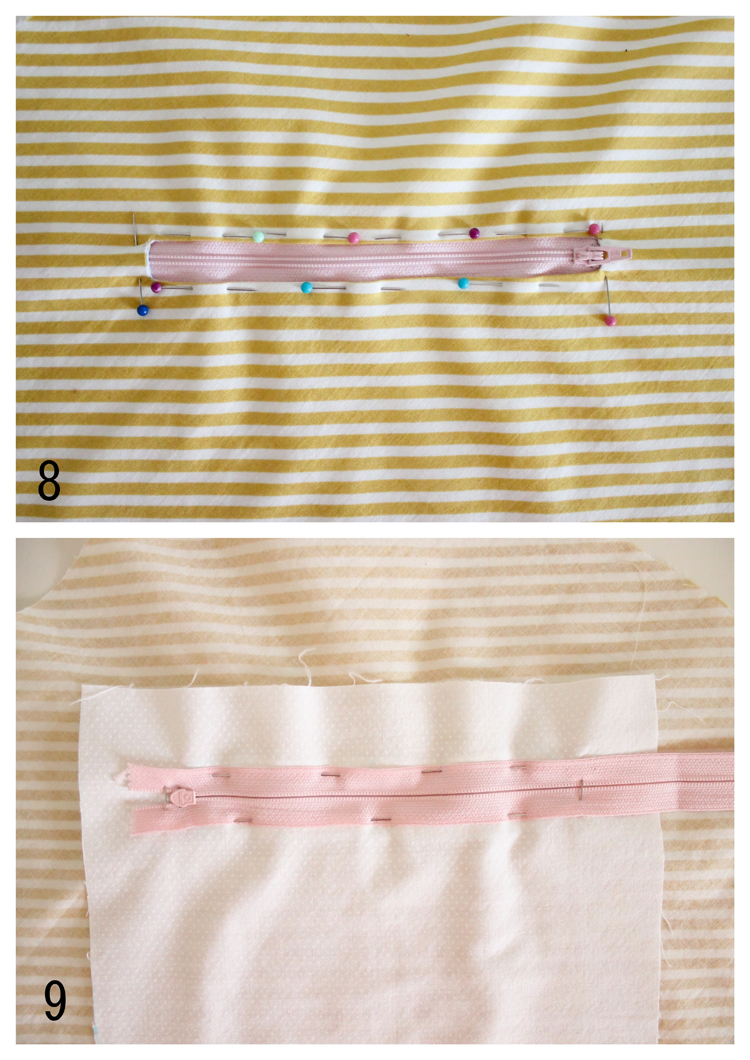
8. Pin the zipper in place. I like to pin in the direction I’m going to sew with the pin heads facing toward me, so I can pull them out as I go. I start by the zipper pull and pin all the way around.
9. Check your work on the back before sewing, to make sure everything is in place.

10. ย Top stitch around the zipper very close to the edge. Sew slow! Take your time. Start by the zipper pull and sew aroundย pulling the pins out as you go. You will need to pull the zipper pull open a little and squish the zipper teeth together as you sew that first side. Be sure to sew forward and back when you start and stop.

11. Clip your threads, flip your main piece over and do a cheer because the hardest part is done!
12. Turn the main fabric back over and trim down your zipper. I do NOT use my sewing scissors for this. I grab a pair of craft scissors so I won’t dull my sewing ones.
*This step is optional. You can add a label beneath the zipper for aesthetics and to help keep the pocket from shifting too much.
13. Now flip the main fabric piece over and add your second pocket piece to the back. Pin it to the first pocket piece all the way around.
14. Sew the pocket pieces together. Make sure you are just sewing the pocket pieces together and not any part of the main fabric.
15. Make sure you caught both layers and that the pocket pulls away from the main fabric. You’re done!!! Feel free to do a victory dance. ๐Ÿ™‚
Then, finish your project as needed.
See? Not too hard right? I would say they are just as easy as regular welt pockets.
You can vary the size of your welt so as to show more or less of your zipper. If you want to show more of your zipper, just be aware it makes top stitching more difficult.
Happy sewing!
Previous Post: « My kid designer
Next Post: Blog Update »

Reader Interactions

Comments

  1. Leigh Anne says

    March 4, 2013 at 8:30 PM

    Well, that's just snazzy! You make it look so easy. Gonna have to conquer my fears and just try it ๐Ÿ™‚ Thanks for sharing!

    Reply
  2. [email protected] is not optional says

    March 4, 2013 at 8:37 PM

    you make it look so easy! love welt pockets-especially with zippers!

    Reply
  3. Charity says

    March 4, 2013 at 8:43 PM

    That looks so simple! I love welt pockets and using the flip-through technique for finishing holes. My only difficulty would be the zipper… I always have tension problems when I sew zippers.

    Reply
  4. 2littlehooligans says

    March 4, 2013 at 8:58 PM

    wow, that does look easy…or you make it look easy:) thanks for sharing!

    Reply
  5. Niki says

    March 4, 2013 at 10:42 PM

    FINALLY! I have been searching for a good tutorial on this. There was another one I used on the rare occasion that I needed to put a zipper in, but it was all in centimeters and kind of vague and not nearly as lovely as this one. Yea! Pinning and sharing!!

    Reply
  6. Lizette Alvarez says

    March 5, 2013 at 2:31 AM

    Esta bien bonita pero no creo q me quede, i like, I'm mexican, And not speak english
    ๐Ÿ˜‰

    Reply
  7. Falafel and the Bee says

    March 5, 2013 at 3:57 AM

    Thanks so much for sharing this!
    You made it look so easy that I am going to have to give it a whirl!
    ~Michelle

    Reply
  8. kirstin @ kojodesigns says

    March 5, 2013 at 7:32 AM

    I seriously love this so much. Like SO SO much. Gorgeous… and you make it look so easy. ๐Ÿ™‚

    Reply
  9. Unknown says

    March 6, 2013 at 7:32 PM

    This comment has been removed by the author.

    Reply
  10. Unknown says

    March 6, 2013 at 7:33 PM

    This is fantastic! How do I pin this so I can come back to it again?

    Reply
  11. kitblu says

    March 7, 2013 at 3:38 AM

    I only made welt pockets once. The local fabric store provided advice and encouragement (Thanks Sarnia Fabricland!) and they turned out perfectly. I think your tutorial will do the same for zippered welt pockets. Thank you. I pinned it for the benefit of other sewists.

    Reply
  12. RyanSarahN says

    March 12, 2013 at 8:51 PM

    I just used your tutorial to add a pocket to the inside of my library tote to hold my library card. Thanks for the great instructions!

    Reply
  13. Jeanette says

    November 20, 2013 at 10:18 PM

    ohhh! can’t thank you enough! you saved my life hhaha I’ve been trying to find this! but i never understood :D! thank you sooo much ๐Ÿ˜€

    Reply
    • Delia says

      November 21, 2013 at 12:18 PM

      You are most welcome! ๐Ÿ™‚

      Reply
  14. Keira Ballantyne says

    January 25, 2014 at 12:43 PM

    This is a wonderful tutorial, thank you so much!

    I made a sample first so that I could see how it turned out. Two things that you might want to add into your instructions: first, if the pocket fabric has a right and a wrong side, you want to pin the pieces right sides together. And second, in the cutting step where you snip the pocket openings and the triangle edge pieces, I wasn’t sure if I was supposed to snip through just the pocket piece or both (both, of course!).

    Reply
  15. Raquel says

    March 21, 2014 at 8:37 PM

    Thanks so much! just used this tutorial for the lining of my Cargo Duffle!

    Reply
    • Delia says

      March 22, 2014 at 5:10 PM

      awesome! That makes me so happy! ๐Ÿ™‚

      Reply

Trackbacks

  1. catnap cargo duffle (with mini tutorial on how to add a lining) | skirt as top says:
    January 30, 2014 at 6:01 AM

    […] using a 9โ€ zipper and what i learned from making the Envelope Clutch; Delia Creates has a great free tutorialย if youโ€™d likeย – or just add a patch […]

    Reply

Leave a Reply Cancel reply

Your email address will not be published. Required fields are marked *

Recipe Rating


This site uses Akismet to reduce spam. Learn how your comment data is processed.

Primary Sidebar

Search this site:

Reader Perks

Reader Perks

Footer

  • Facebook
  • Instagram
  • Pinterest
  • YouTube

All Images On This Site Are Protected By Copyright

You may not use any images from this site unless you meet one or more of these requirements: 1) You receive permission in writing from Delia Randall for each specific image you would like to use. 2) You use ONE image in a round up or feature post with a link back to the appropriate post or the main site for credit and for full posts/tutorials. Thank you!

Archives

Search This Site:

© 2023 delia creates · Design By Bloom