• Skip to primary navigation
  • Skip to main content
  • Skip to primary sidebar
  • Skip to footer
delia creates
  • FREE TUTORIALS & PATTERNS
  • SHOP
    • SHOP
    • Cart
    • ACCOUNT
    • Refund, Returns, and Shipping Policies
  • CONTACT
  • ABOUT
    • ABOUT
    • Privacy Policy
    • TERMS OF USE
    • PRESS
    • Featured
  • HOME
  • Instagram
  • Pinterest
  • YouTube
X
delia creates
  • FREE TUTORIALS & PATTERNS
  • SHOP
    • SHOP
    • Cart
    • ACCOUNT
    • Refund, Returns, and Shipping Policies
  • CONTACT
  • ABOUT
    • ABOUT
    • Privacy Policy
    • TERMS OF USE
    • PRESS
    • Featured
  • HOME
  • Instagram
  • Pinterest
  • YouTube
delia creates

delia creates

  • FREE TUTORIALS & PATTERNS
  • SHOP
    • SHOP
    • Cart
    • ACCOUNT
    • Refund, Returns, and Shipping Policies
  • CONTACT
  • ABOUT
    • ABOUT
    • Privacy Policy
    • TERMS OF USE
    • PRESS
    • Featured
  • HOME
  • Instagram
  • Pinterest
  • YouTube

Almost Origami Ornament Stars

December 23, 2013 · Delia 10 Comments

I’m bringing this tutorial home for the holidays! 馃槈聽I originally posted it over at Make It Handmade HERE.

Origami Stars (22 of 31)

__________________________________________

Hi Make It Handmade readers!

It’s a pleasure to be here having a holiday ornament swap with Palak.

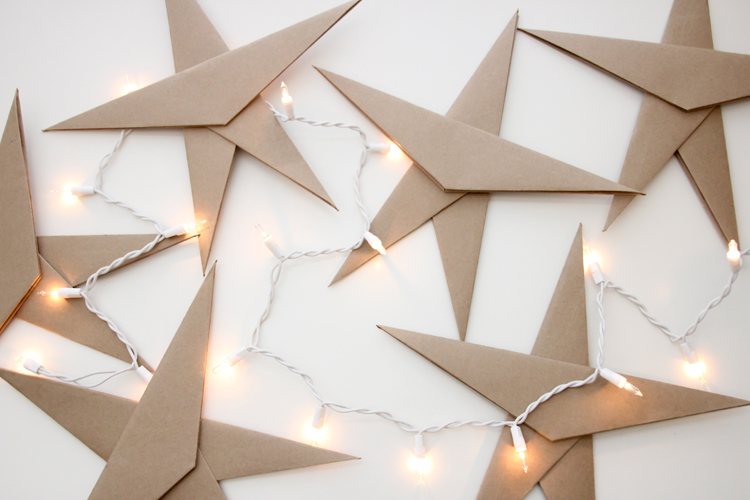
My ornaments today are just paper and glue, and they don’t require hooks. Simplicity at it’s best. 聽I call them…

Origami Stars (23 of 31)
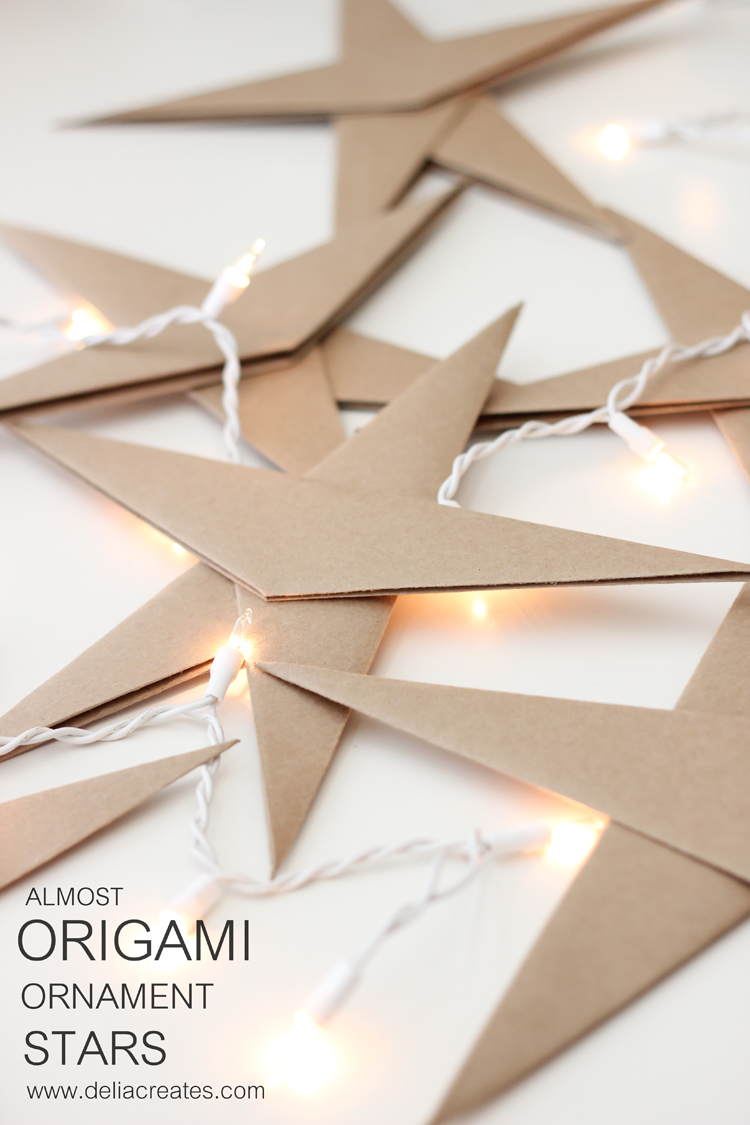
I say almost, because we are gluing them together after we fold them. 馃檪

Let’s get started.

You need:

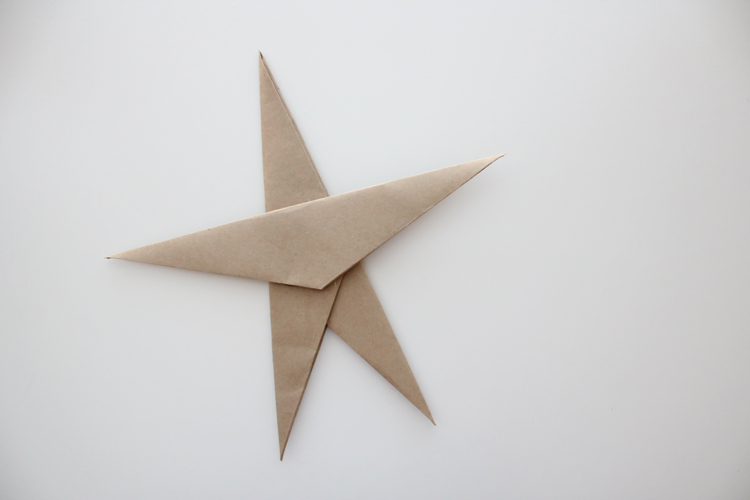
*cardstock, three pieces per large star
scissors
a ruler or bone folder
hot glue and hot glue gun
聽

*I used a coupon on this 50 pack of kraft cardstock from the Hobby Lobby, which made this project really inexpensive.

And here is a visual for how to fold your card stock.

edit2
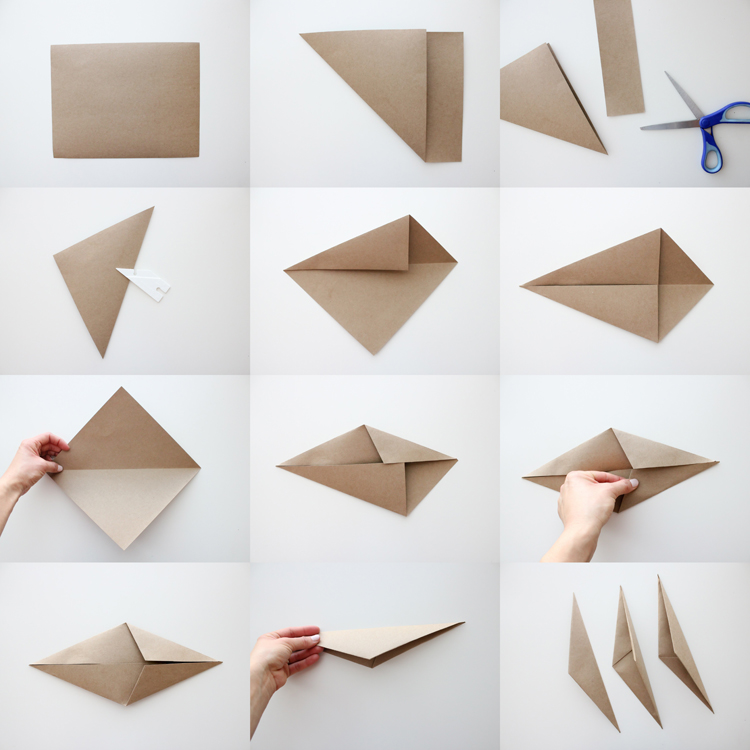
Use a ruler, or a bone tool (I used my point turner ;)) to make the edges fold nice and crisp.

Repeat the process three times so that you end up with three star pieces.

edit3Take one of the pieces and open it up.

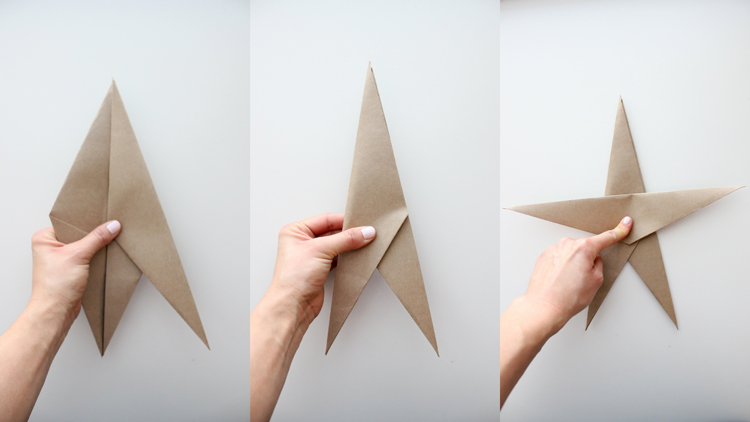
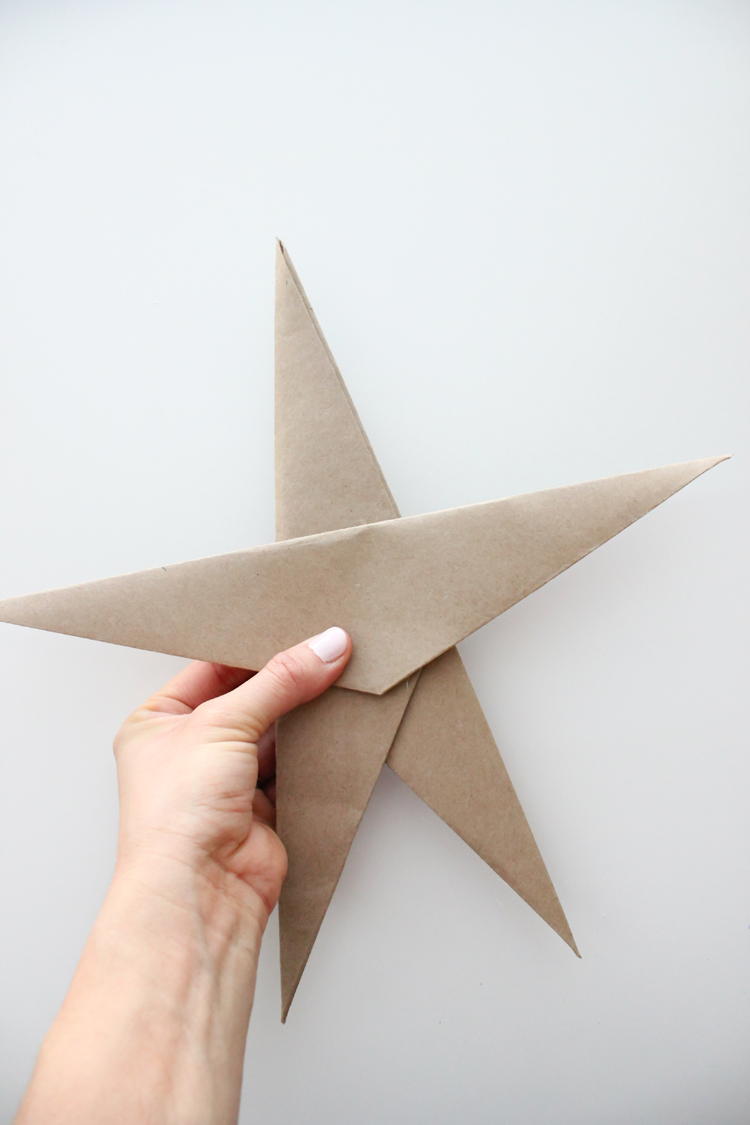
Slide another piece inside of it. Last, take the third piece and place it on top.

Hot gluing it all together as you go of course.

Origami Stars (17 of 31)

Origami Stars (18 of 31)
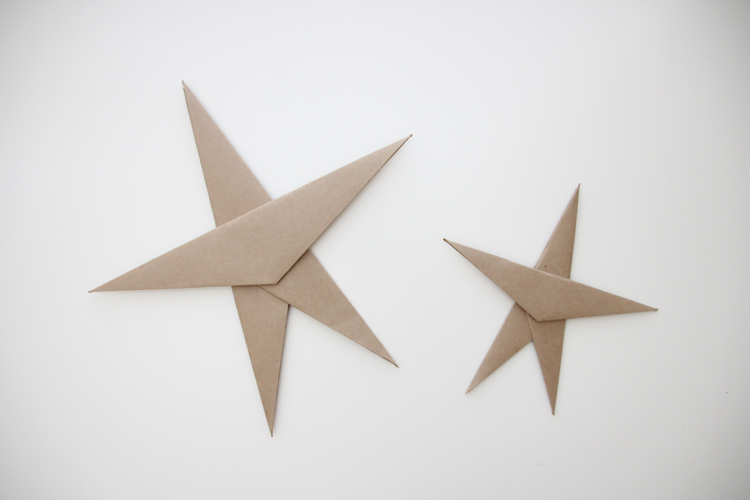
To make smaller stars, cut your cardstock in half first and treat each half paper like you did a full sheet. Three full sheets makes 2 small stars.
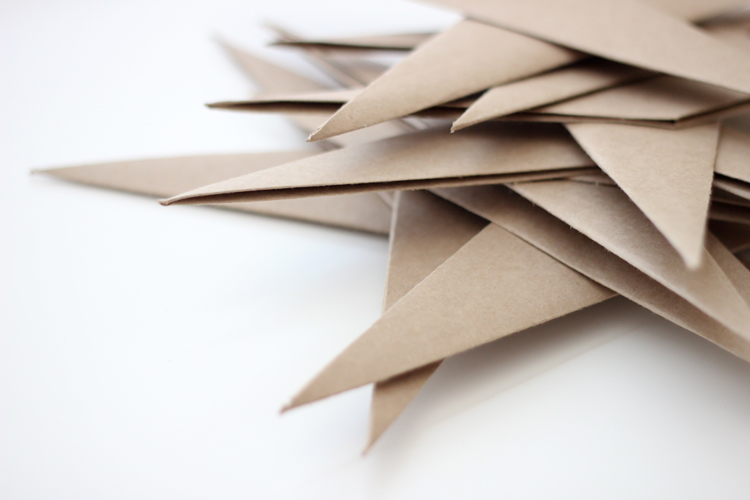
Origami Stars (24 of 31)

Now make a bunch…

Origami Stars (26 of 31)

…and adorn your tree!

Origami Stars (27 of 31)

The stars are big enough, sturdy enough, and yet light enough for you to simply nestle them into the branches.

edit2-001 Origami Stars (28 of 31)

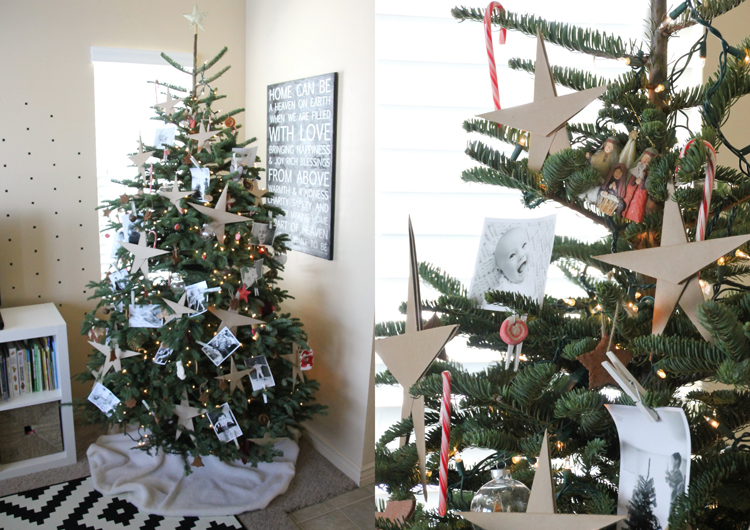
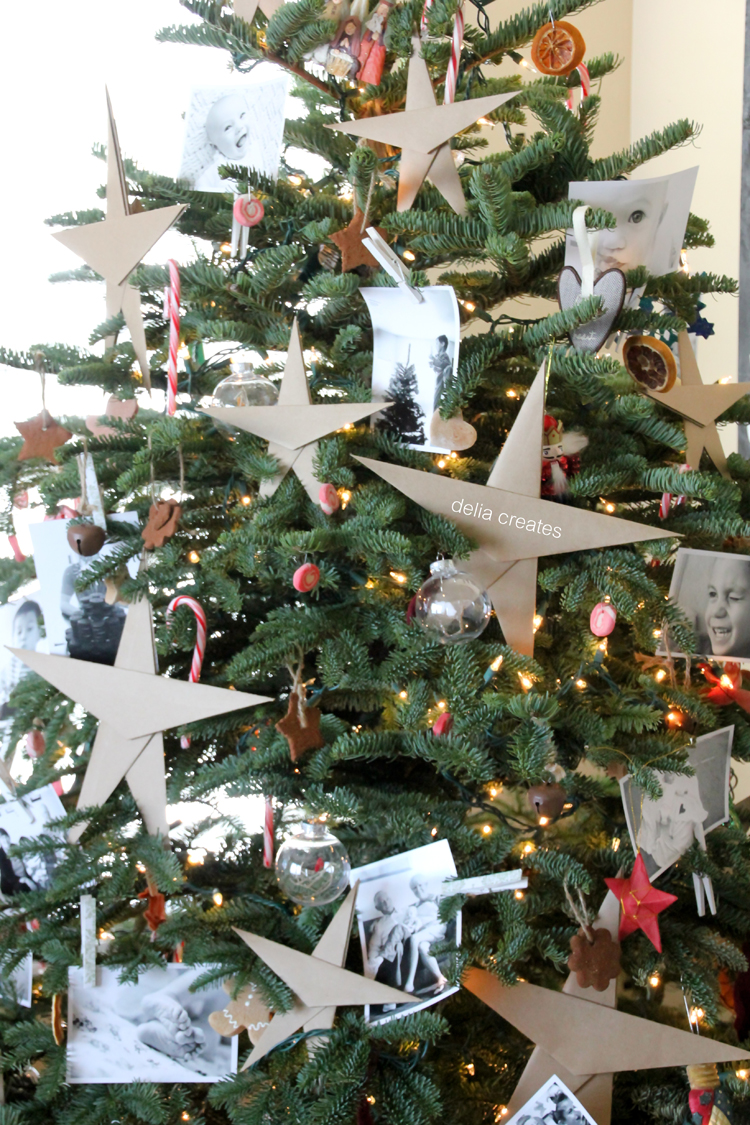
Of course, you can always hang these from the ceiling instead, or use the small ones as gift tags…

Origami Stars (21 of 31)

They are perfectly versatile to whatever you need!

Happy Holiday crafting!

Christmas, crafts, holiday, tutorial

Previous Post: « Natty Janes Baby Shoe Pattern GIVEAWAY
Next Post: Caramel Apple Cinnamon Rolls (dairy free!) »

Reader Interactions

Leave a Reply to Kathy Graig Cancel reply

Your email address will not be published. Required fields are marked *

Recipe Rating


This site uses Akismet to reduce spam. Learn how your comment data is processed.

Comments

  1. christina says

    December 23, 2013 at 1:08 PM

    beautiful tree and such a cute idea!

    Reply
  2. Ann Martin says

    December 11, 2014 at 8:21 AM

    Such a nice and easy idea and your photos are gorgeous! Happy to share.

    Reply
    • Delia says

      December 11, 2014 at 9:07 AM

      Thank you Ann!

      Reply
  3. Kelsey Wismer says

    October 26, 2016 at 10:54 AM

    Would there be a missing step between photo 6 and 7 of the grid directions. I’m not exactly following how it’s done…

    Reply
    • Delia says

      October 26, 2016 at 11:08 AM

      I’m sorry, that does look confusing doesn’t it. The seventh photo should actually be the fifth photo. I hope that helps it make sense!

      Reply
  4. Melanie says

    December 18, 2016 at 3:25 AM

    I love this star! Thank you for the instructions!
    Melanie

    Reply
    • Delia says

      December 22, 2016 at 2:09 PM

      Thanks Melanie!

      Reply
  5. Kathy Graig says

    December 18, 2018 at 4:24 PM

    I am having difficulty making the star. Can you explain steps 6 – ? Thanks

    Reply
    • Delia says

      December 19, 2018 at 11:22 AM

      Sure! Ignore the seventh picture that shows it opened up. This is an older post and I didn’t realize that photo was out of place. Fold the square in half, one corner to the opposite corner. Open it up. Fold the sides in so it looks like a kite. Fold the other corners inward as well so it looks like a diamond. Then fold the whole thing in half making a triangle shape. Repeat with two other sheets of paper. To make the star, take one of the three triangle pieces and nest it into another triangle piece. You should end up with a v shaped piece. Glue it together with hot glue. Glue the remaining triangle piece shut and then glue it on top of the v shaped piece. I hope that helps clear things up! Let me know if you have any more questions.

      Reply

Trackbacks

  1. 8 must-try paper DIYS: Holiday |Ecru Modern Stationer says:
    December 5, 2014 at 12:12 PM

    […] Paper Christmas Trees by tell love & chocolate 7. Hanging Paper Advent Calendar by lenemade 8. Hanging Paper Stars by delia […]

    Reply

Primary Sidebar

FEATURED POSTS

Granny Square Tote - free crochet pattern and video tutorial // www.deliacreates.com

Granny Square Tote – free crochet pattern

Summer Mesh Sweater - Free Crochet Pattern SIZES XXS-XXL // www.deliacreates.com

Summer Mesh Sweater – Free Crochet Pattern Sizes XXS-XXL

Jute Mesh Tote – Free Crochet Pattern

Basic Easter Basket - Free Crochet Pattern and Tutorial // www.deliacreates.com

Basic Crochet Easter Basket – Free Pattern

Footer

  • Instagram
  • Pinterest
  • YouTube

漏 Delia Creates, LLC 2010-2025. All Rights Reserved.

All content on this website is copyrighted. Please contact the copyright owner for permission to use any photos, templates, patterns, tutorials and content at [email protected].

Categories

  • FREE TUTORIALS & PATTERNS
  • SHOP
  • CONTACT
  • ABOUT
  • HOME

Copyright © 2025 路 Recipe Blogger Theme 路 Genesis Framework 路 Privacy Policy 路 WordPress 路 Log in