

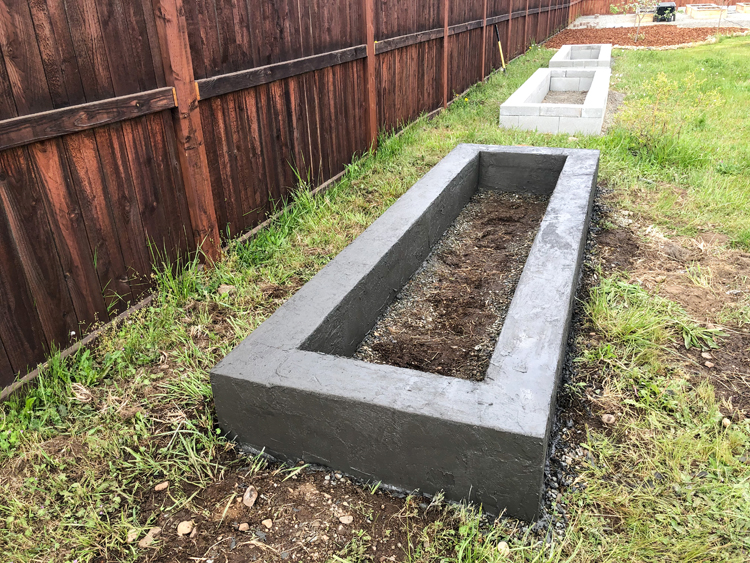
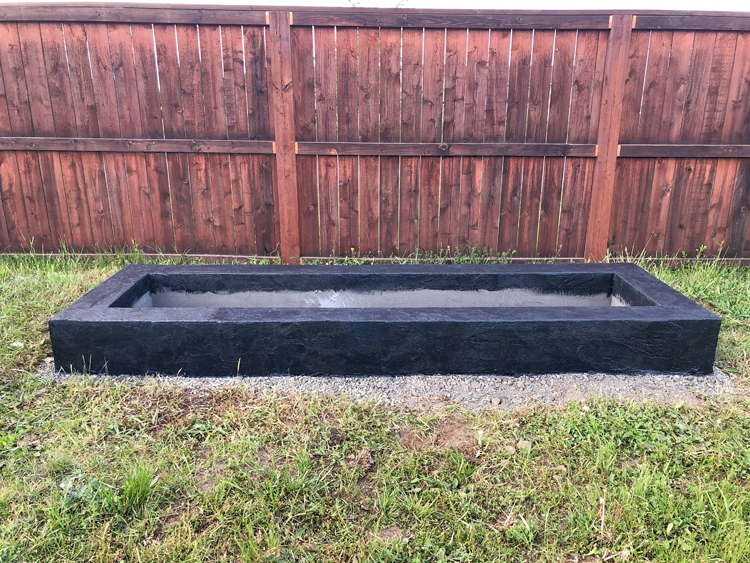
These are actually concrete block garden beds covered in surface bonding cement, but that was too much of a mouthful for a title. Ha!
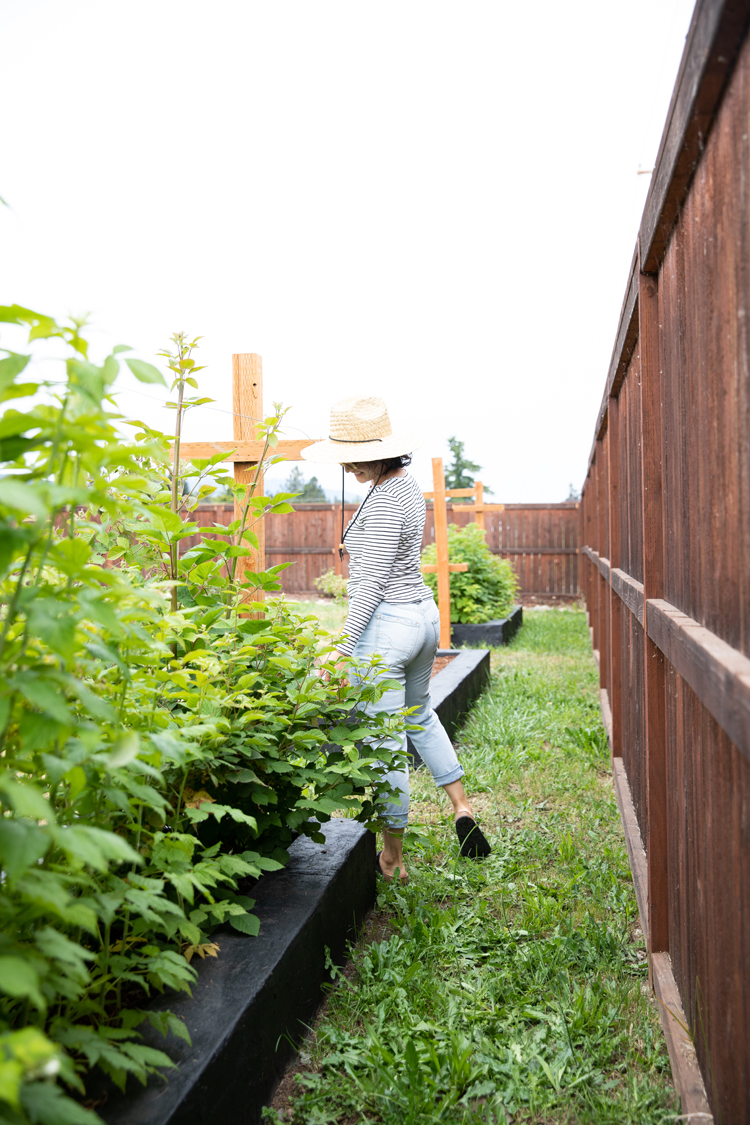
I wanted to plant some berry plants along our fence line, parallel to our septic lines, but I didn’t want well….poop berries or a ruined septic system, so I needed to come up with a way to contain the berries and keep them the requisite 10 feet away.
Concrete block beds seemed like a good choice, but I didn’t want them to look like concrete blocks. I found this QuikWall product from Quikrete that not only pretties up the blocks a bit but also literally cements them together into a sturdy, permanent structure. It was all a bit of an experiment because the only tutorials I could find when I started this project last year, were for small walls. It made sense though that if this stuff can make walls sturdy then it could handle a foot tall garden bed…And it did!
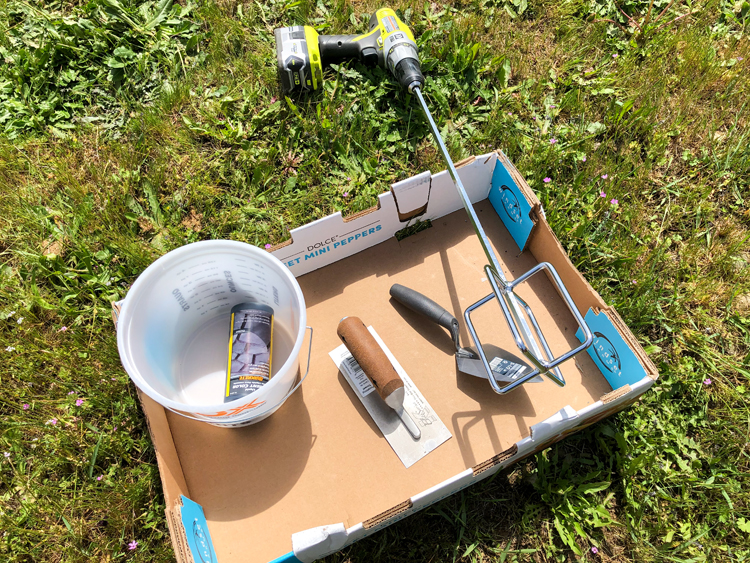
MATERIALS
- concrete blocks*
- concrete block caps*
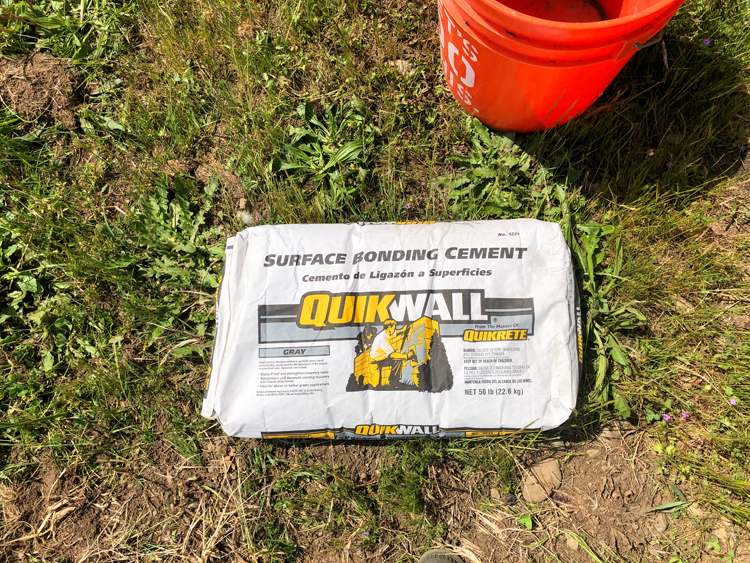
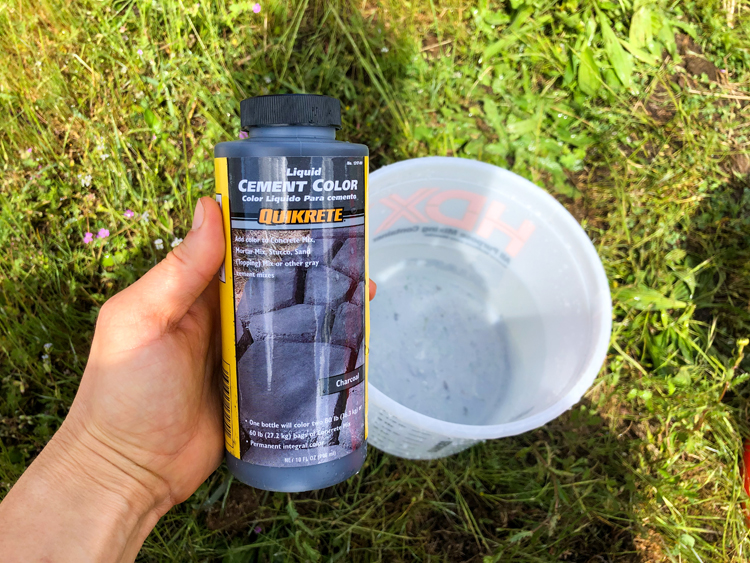
- QuikWall surface bonding cement made by Quikrete*
- finishing trowel
- drill and drill mixer attachment
- garden hose
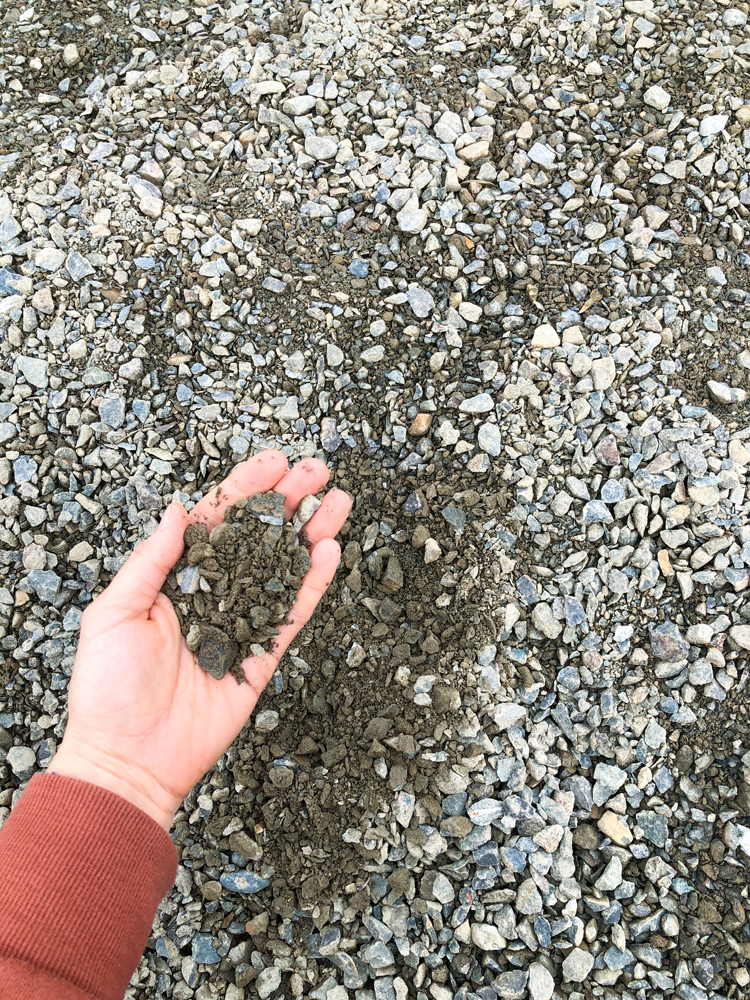
- gravel plus minus**
- hand tamper
- level (preferably a long level that’s at least 2 feet)
- shovel/pick axe
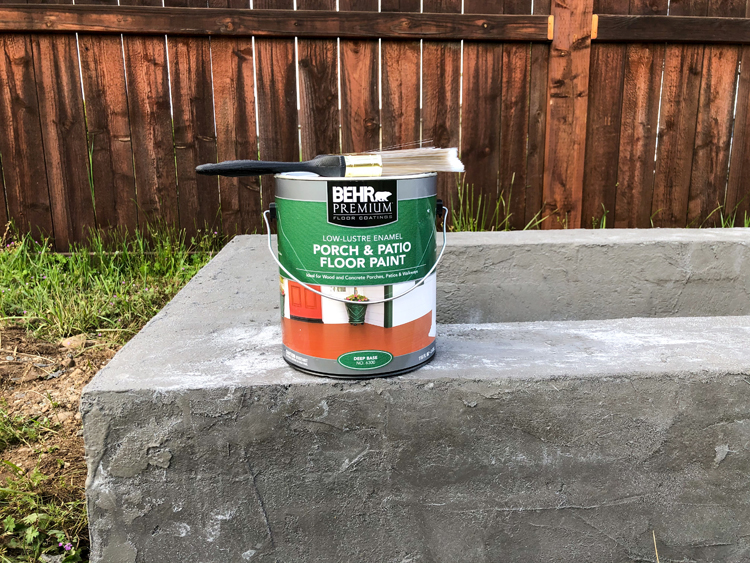
- optional: patio paint or garage flooring epoxy paint and heavy duty rough texture paint brush
Material Notes:
*I used 19 concrete blocks, 19 caps, and about 1.5 bags of surface bonding cement per bed. I found my concrete blocks from Home Depot for $1.45 a piece.
*I wasn’t able to find QuikWall at my local big box store, although I think some locations carry it, so I ordered it through my local tile shop.
**You want to use a gravel that can be compacted like what is used in driveways. I used granite gravel with “minus” or gravel dust that gets in between the rocks and helps it compact so that when you walk on it, you don’t sink. Do not use pebble gravel or any gravel that has smooth rocks. This will not compact and will create an unsteady base for your blocks.
VIDEO TUTORIAL
I put together a video tutorial below that documents what I did. It shows you how the mixture looks being spread on, which is probably the most helpful part. I still recommend reading the written tutorial because there are lot of details that I didn’t include because it would have made the video too long.
***PLEASE NOTE***
I sometimes use the word “cinder” in place of “concrete” when describing these concrete blocks. To a lay person, these terms are often used interchangeably and I wanted to use terms that would be easily recognized. I also used them interchangeably, not knowing there was an important difference, until I shared this post.
Older cinder blocks are made with fly ash and contain chemicals that can be harmful to your health. Newer concrete blocks that you can get at the hardware store do not contain fly ash. They are made of water, stone, and concrete and they are safe for food. If you are using these beds to grow food, please use new concrete blocks.
WRITTEN TUTORIAL
Step One: Determine Location and Size
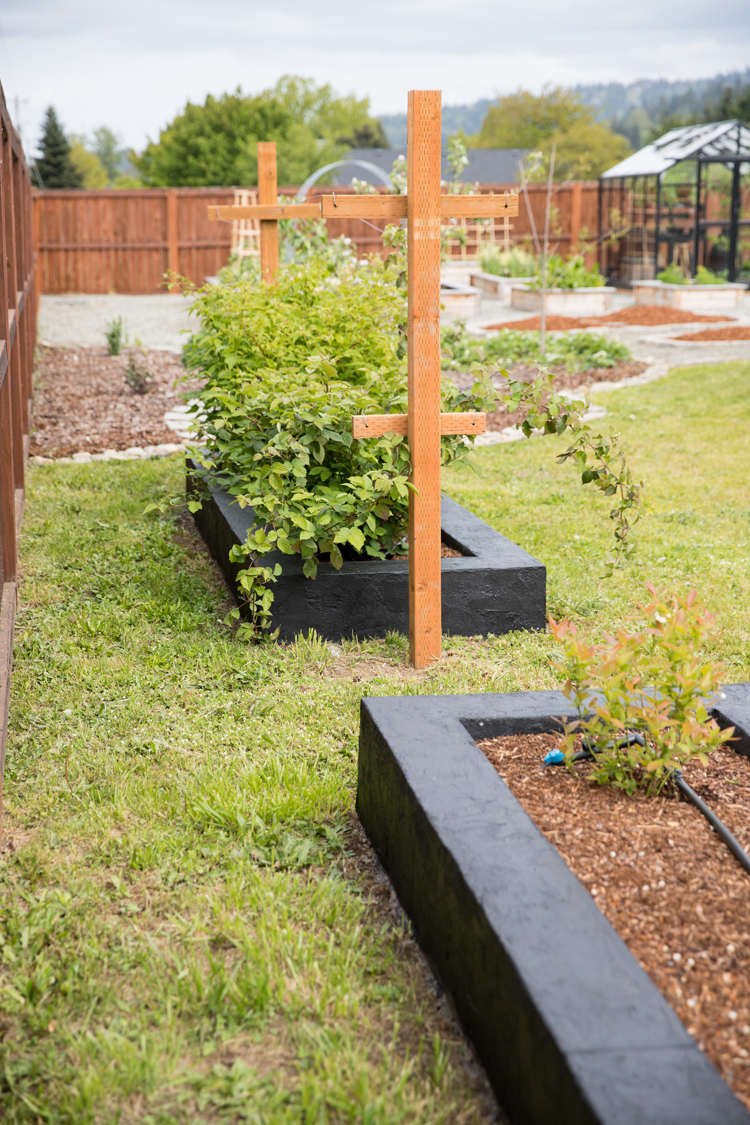
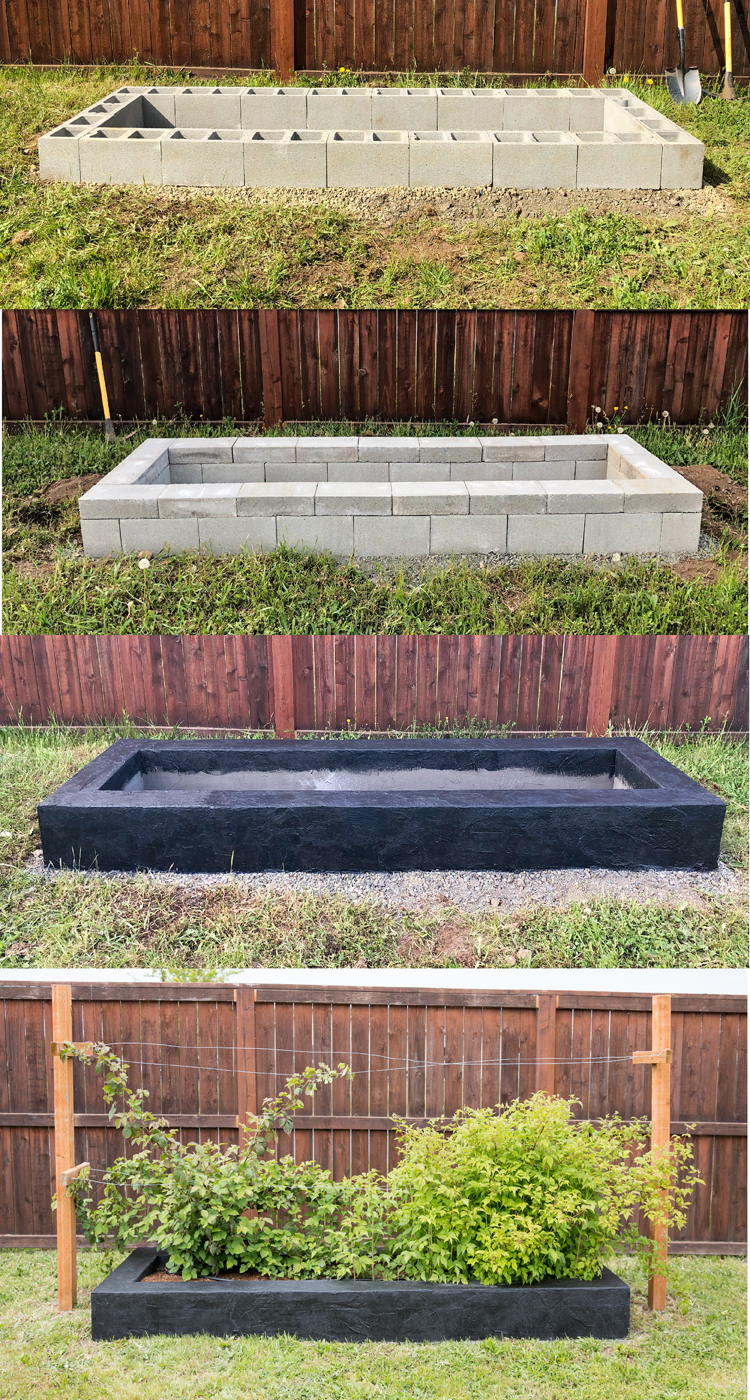
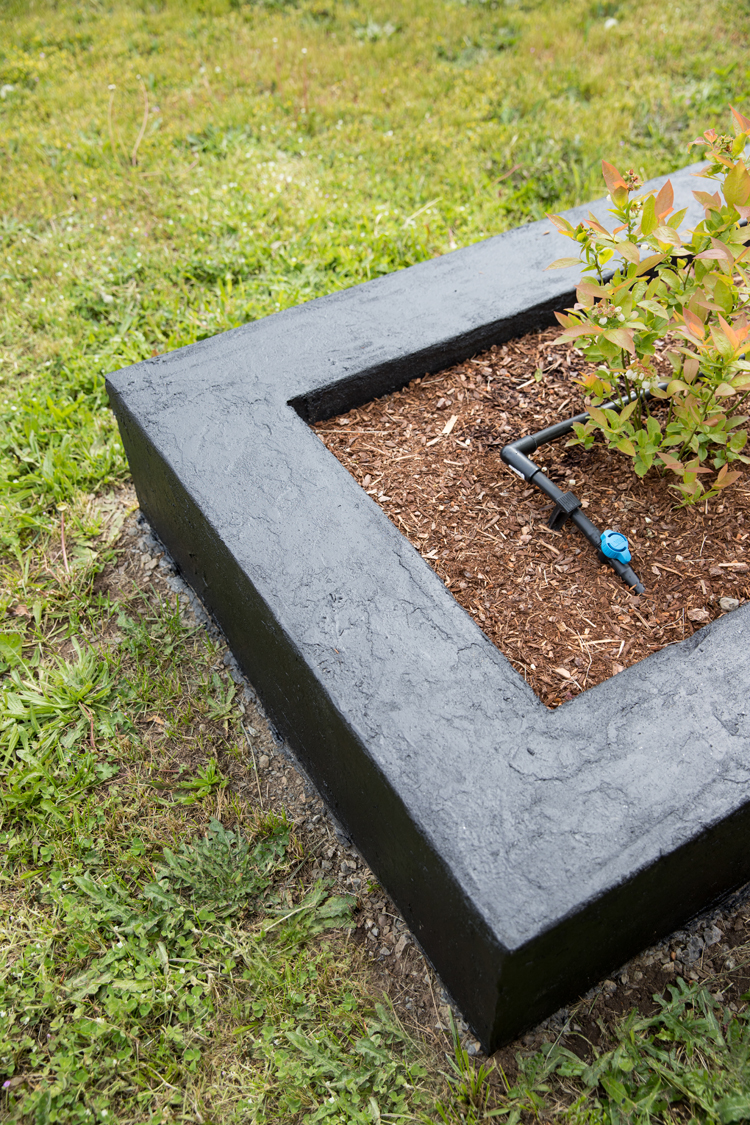
My beds used 19 concrete blocks and 19 caps each which created a bed about 3.5 feet by 10 feet (39.25 x 125.75 inches). The actually growing space is more like 2 x 9 ft. though because the blocks are about 8 inches wide.
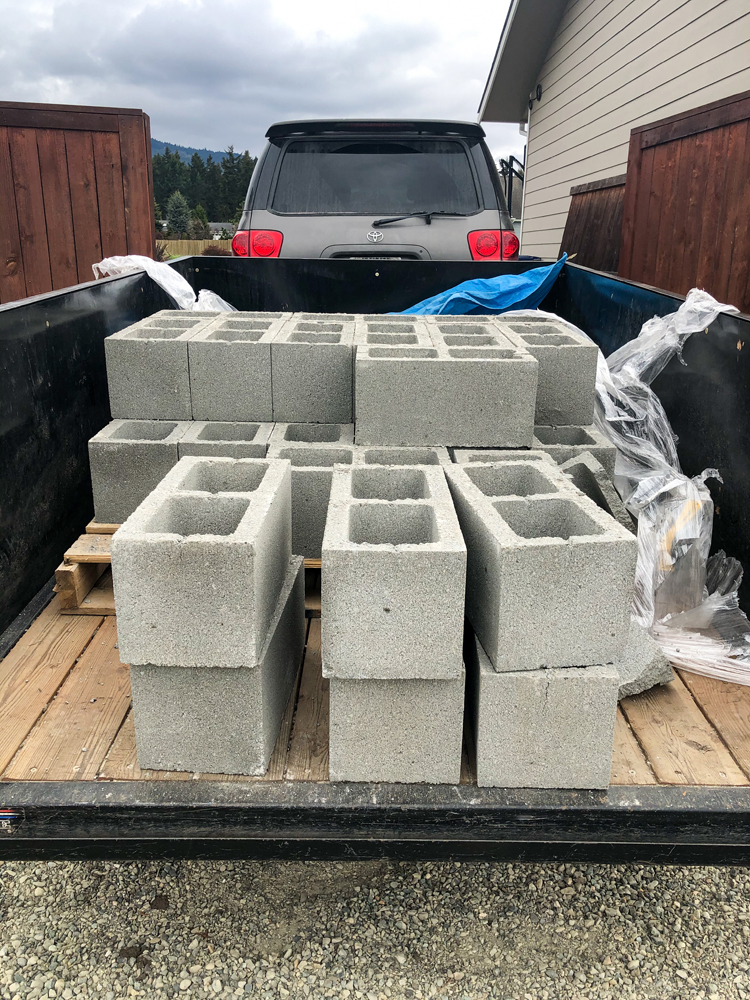
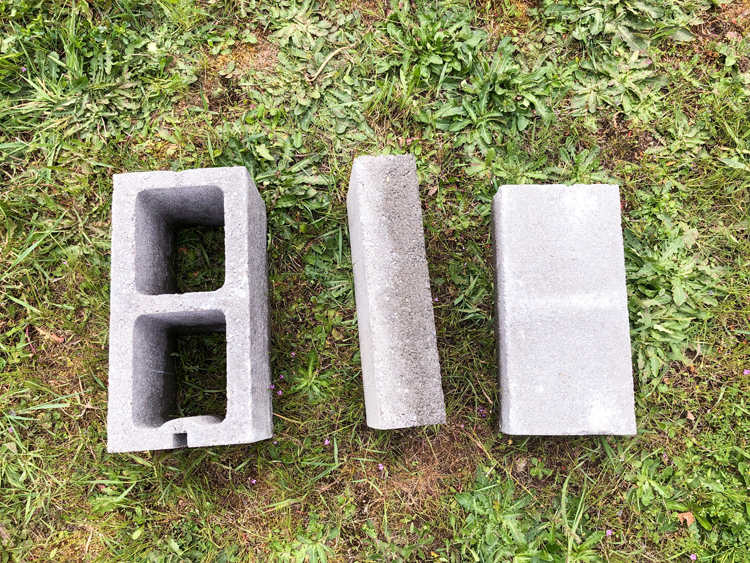
The concrete blocks are 8 inches tall and the cap blocks are 4 inches, which makes this bed about a foot tall.
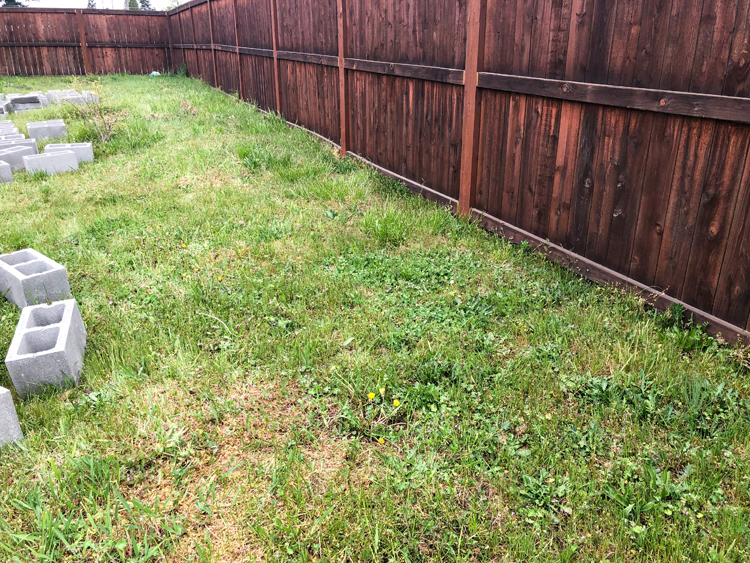
Step Two: Prep the area and remove the grass.
Remove any grass or weeds from the area and start leveling out the ground if you’re on an incline. The gravel that will be added in the next step will help with the leveling a little bit too, so don’t worry if it’s not perfectly level at this point.

If you have rocky soil like I do, then I highly recommend using a pick axe rather than a shovel. It will save you so much time and frustration.
Step Three: Add a gravel base.
Lay at least 1-2 inches of gravel underneath where the blocks will go, compacting it with a hand tamper and leveling it as you go. For some of my beds on more of an incline, I had to add more like 3-4 inches of gravel.
You will likely have to adjust the amount of gravel you need in the next step, so you don’t have to get too picky about how precisely it’s leveled just yet.
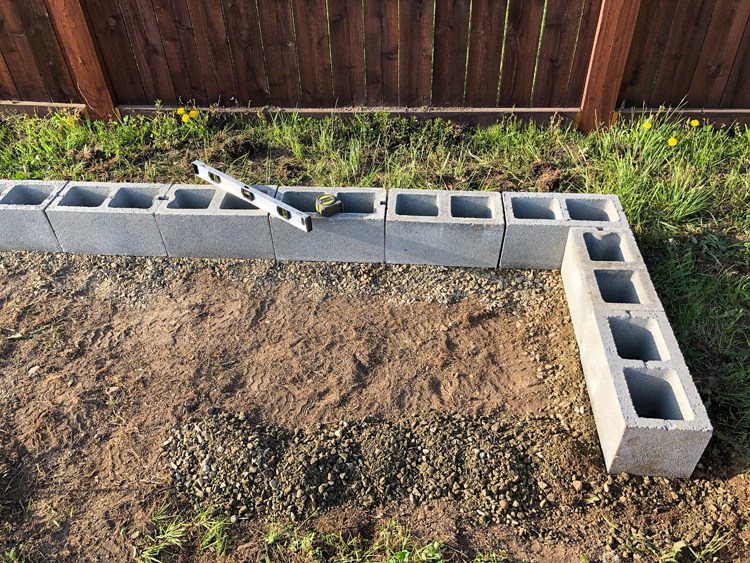
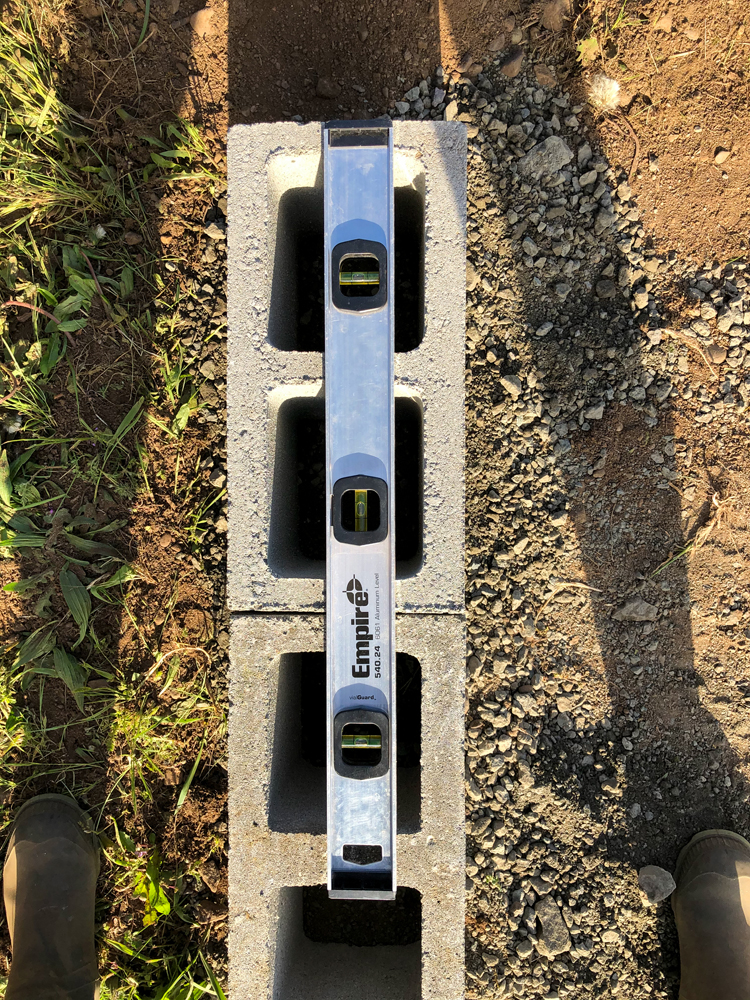
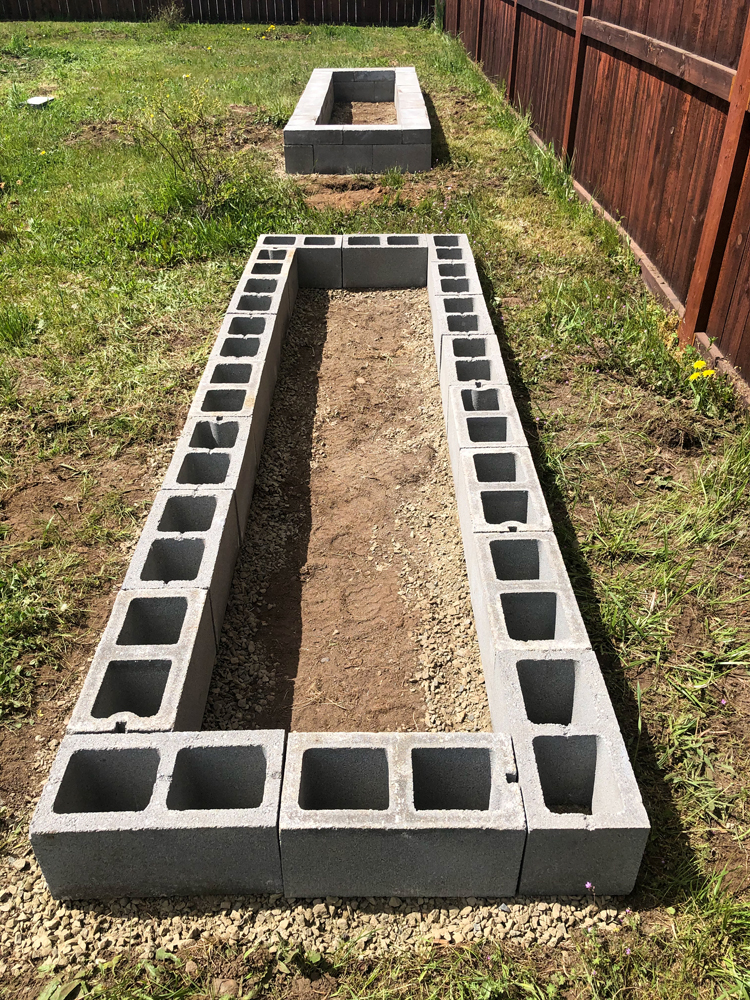
Step Four: Add concrete blocks.
Now is the time to get picky about leveling. As you add your concrete blocks, ensure that they are perfectly level. You may have to add or subtract gravel to get this just right. I also recommend re-compacting any disturbed gravel, which I didn’t always do and ended up regretting later (I’ll explain at the end).
This step takes the longest, but it’s very important to get right as it determines the stability of the beds and makes the next steps much easier.
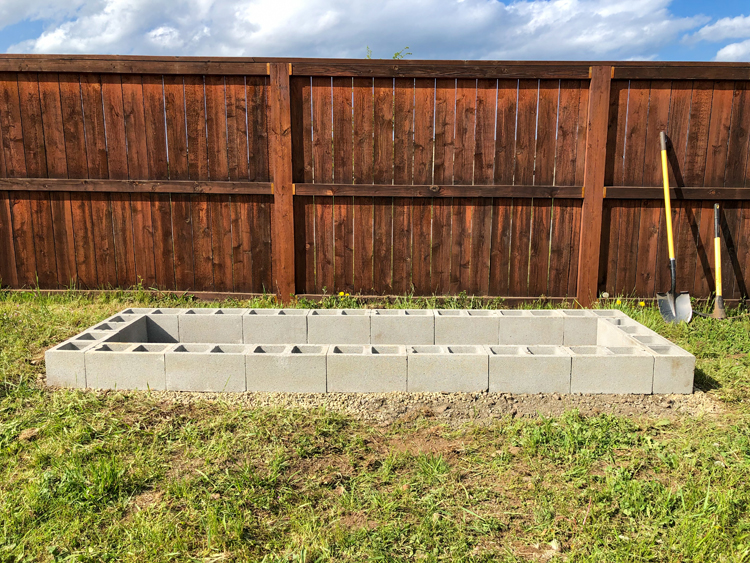
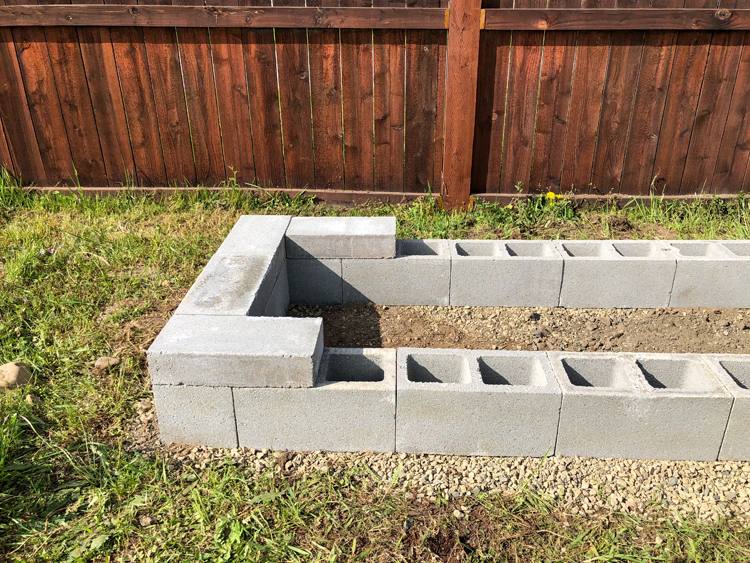
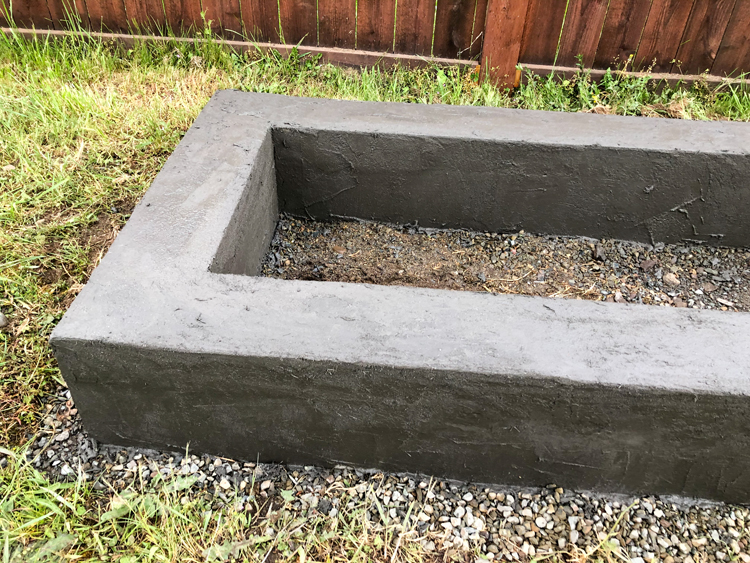
Step Five: Add cap blocks.
This part is fun. Just add the cap blocks, ensuring the placement is staggered with the concrete blocks. It goes by super fast because you already did the hard work of leveling the first layer!

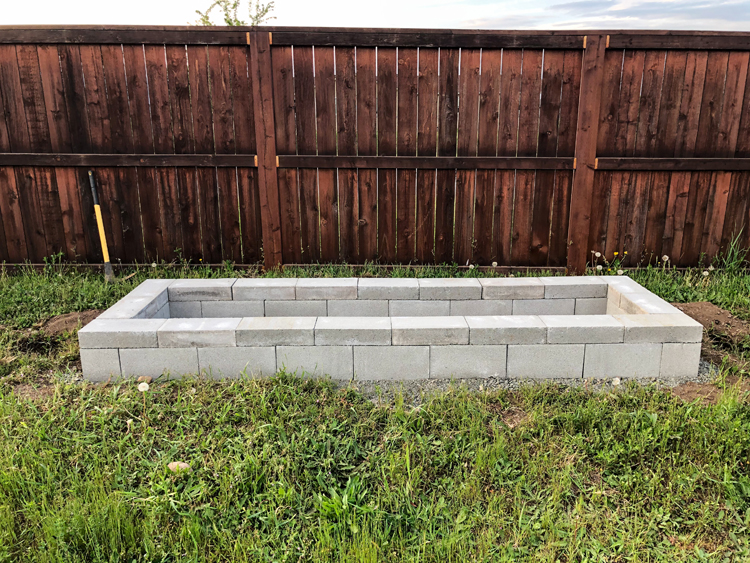
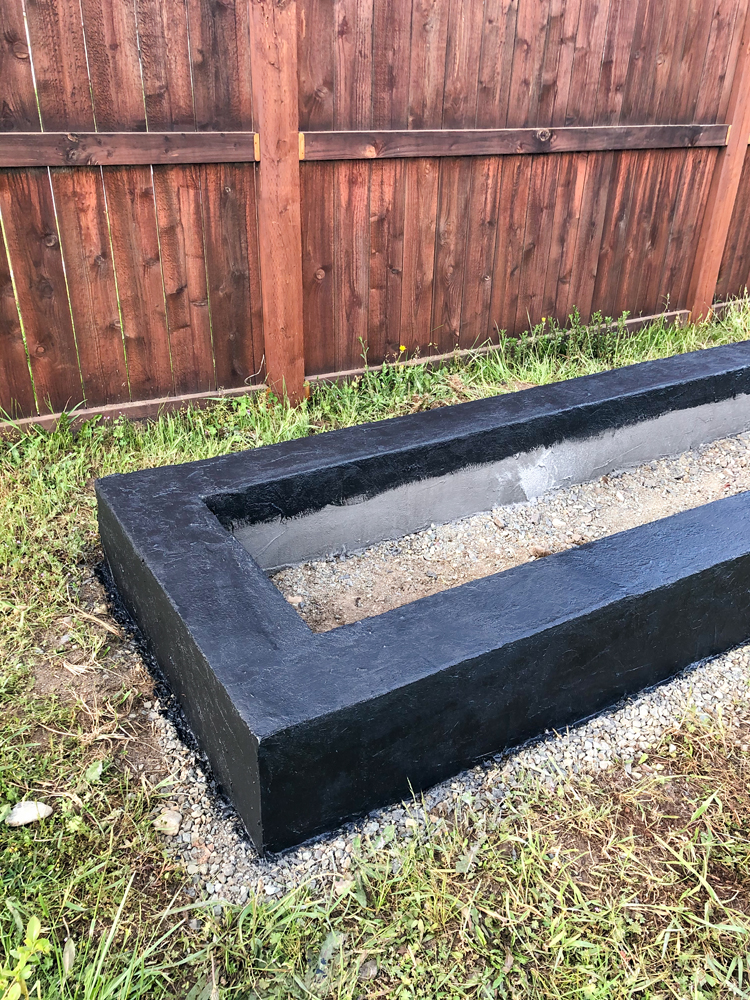
Step Six: Add the QuikWall surface bonding cement.
Spray the concrete blocks down with water to help the surface bonding cement adhere to it. You will need to re-wet them as you go, especially if the weather is hot and sunny.
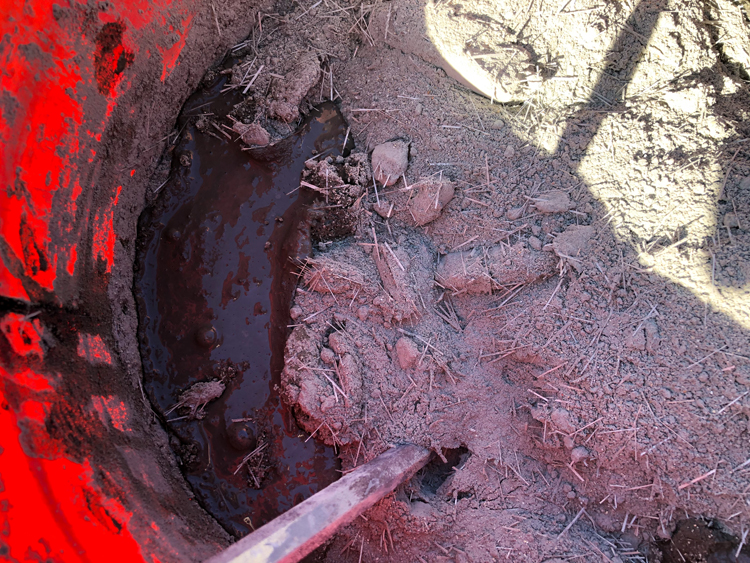
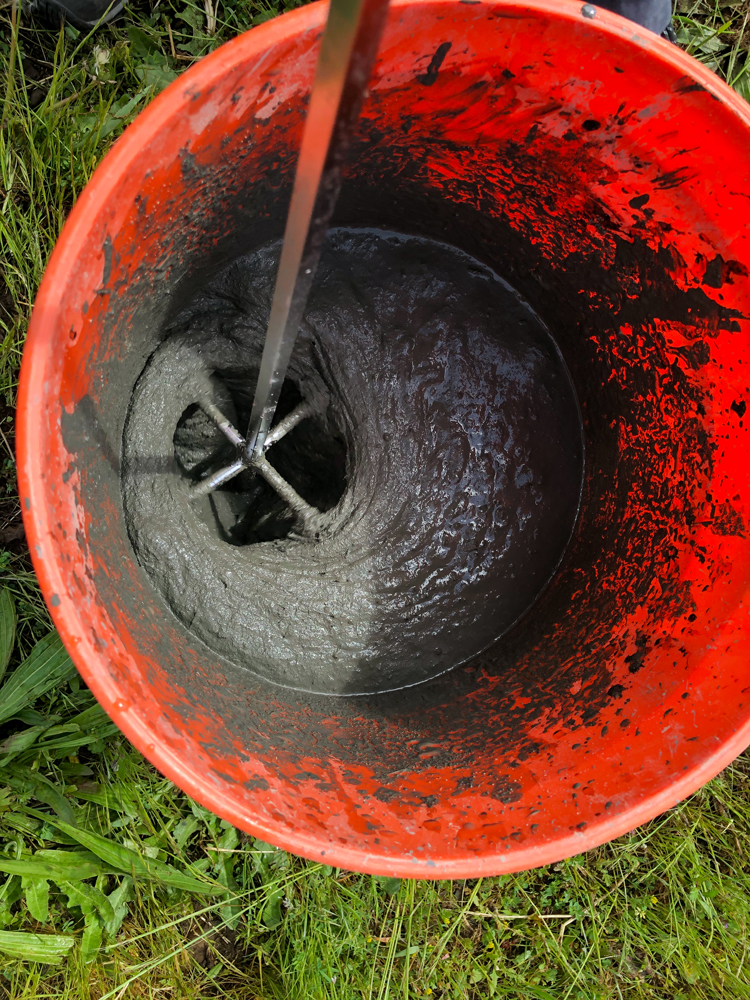
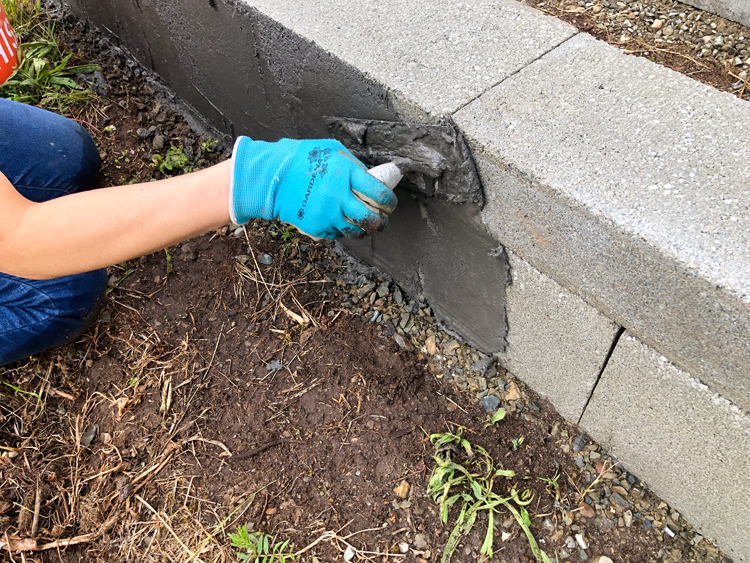
Mix the surface bonding cement according to package directions until you get a mixture that is the consistency of a thick pea soup. Then you spread it on like you’re frosting a giant cake. You want it to be thin enough to spread to about 1/8 -1/4 inch on the blocks. If you are working with it on a hot day, you will want to start with a little bit thinner mixture because it will thicken up quickly. If it starts to get too thick to spread thinly, you can add water to maintain the proper consistency.
Which leads me to a note about cement dye: I wanted my beds to be black, so I also added a cement dye to the water before mixing it with the QuikWall. Not only did it not give me as saturated a color as I was hoping for, it was also hard to keep consistent if I needed to add water to the mixture as I worked. So, if you are a novice like me and want a color other than gray cement, plan on painting them and skip the dye.
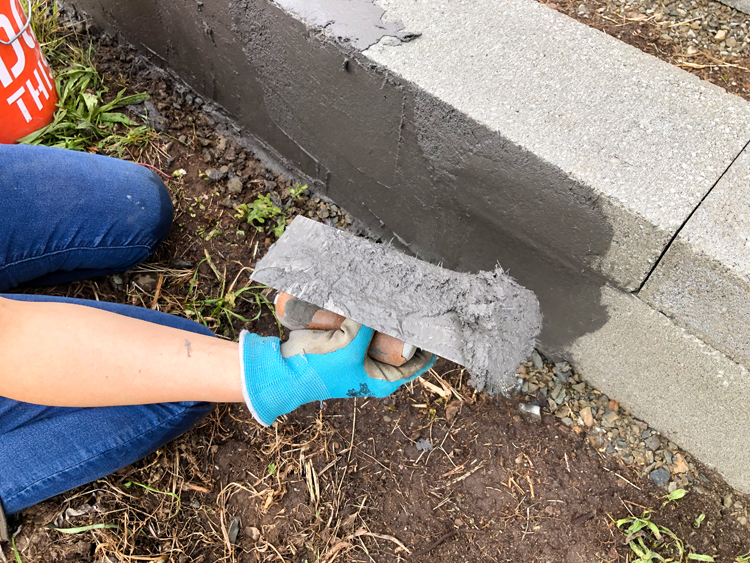
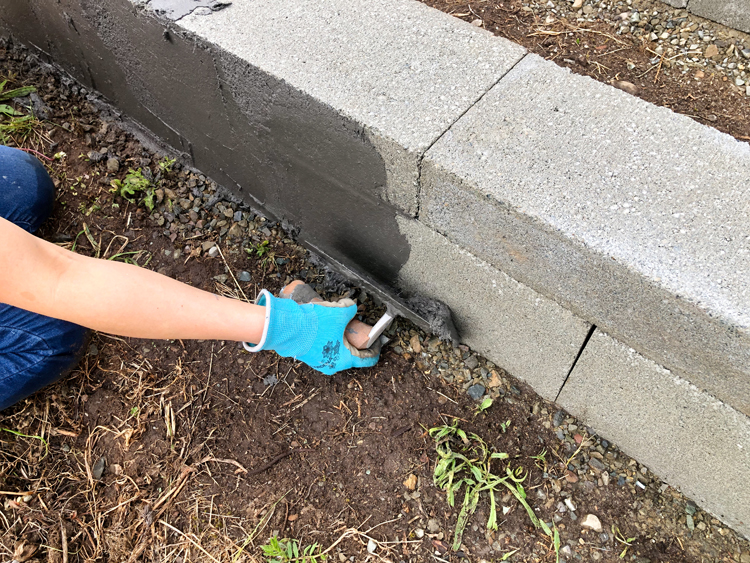
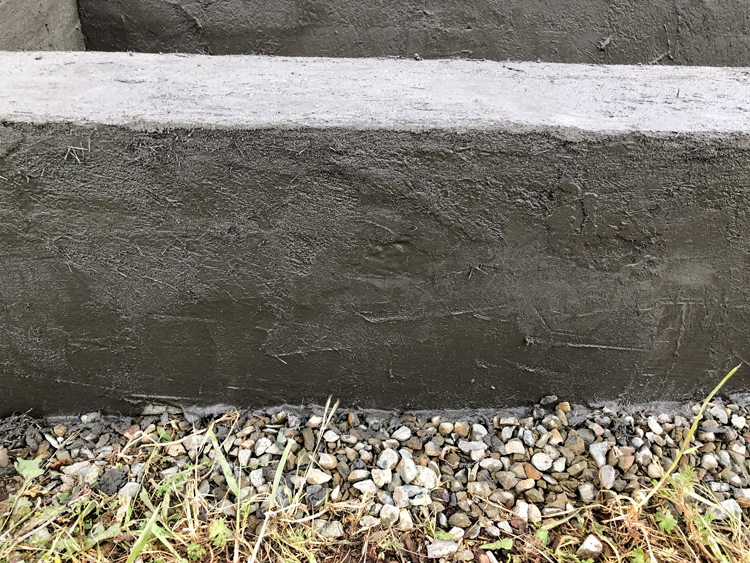
Spread a thin layer 1/8 inch to 1/4 inch thick of QuikWall on the outside, tops, and inside of the blocks. I mostly left the rugged troweled texture, but did smooth the corners and edges using a gloved hand.
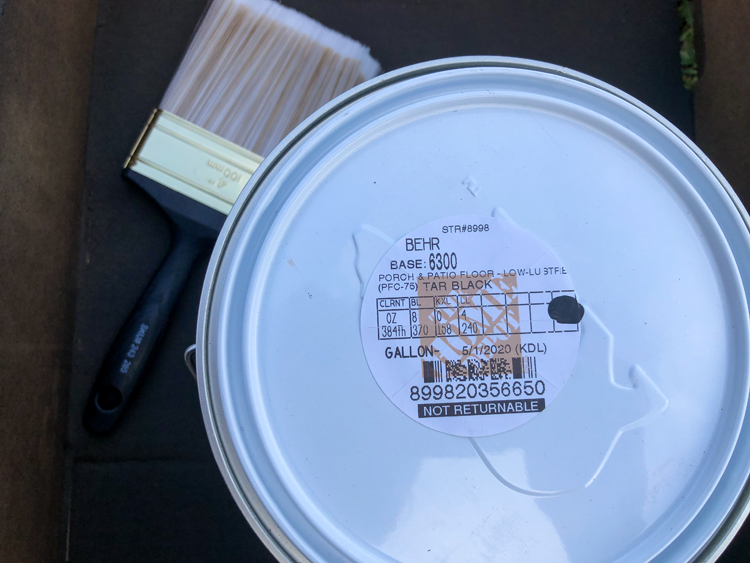
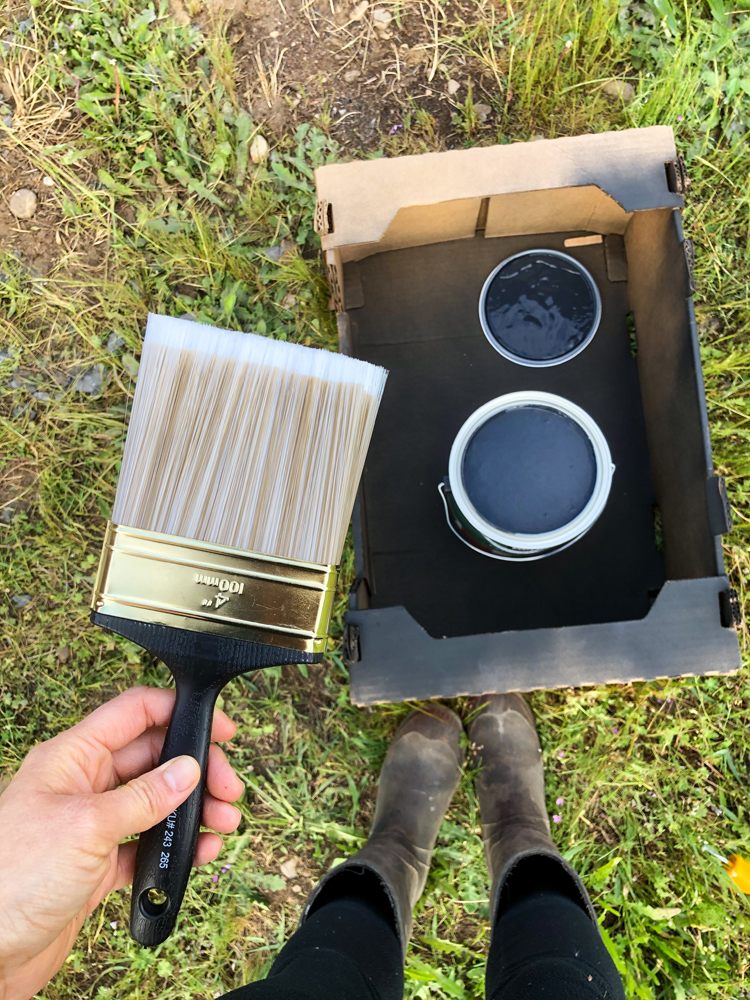
Optional: Paint the garden beds.
Let it cure according to the package instructions before painting. I used patio and porch paint, but have since touched it up with garage epoxy flooring paint from my stenciled greenhouse flooring project. Use a brush made for exterior, rough surfaces.
COLOR TIP: I should have known, but I found that black paint makes dirt and bird poop very obvious, so it needs to be cleaned and refreshed more often than white or a lighter color to stay looking nice. Dark paint can also heat up the soil in the bed. This is actually an advantageous thing in our cool climate, but may work against you if you live in a hot climate.
A YEAR LATER
I made these beds last year, but decided to wait to share my tutorial until I had used them for a year to see how they fared…remember this was an experiment.

A year later, two out of three look great! One has a couple of cracks I think where the ground settled over winter. This is why I recommend re-compacting any disturbed gravel in step three. The cracks are just cosmetic though and have not affected the integrity or stability of the bed which is the most important thing. If I get around to it, I may try patching it with some leftover surface bonding cement. Maybe. Ha!
I also decided to add another coat of black paint because it had gotten a bit hazy and dingy over winter and I wanted it to look fresh and new for this post. 😉
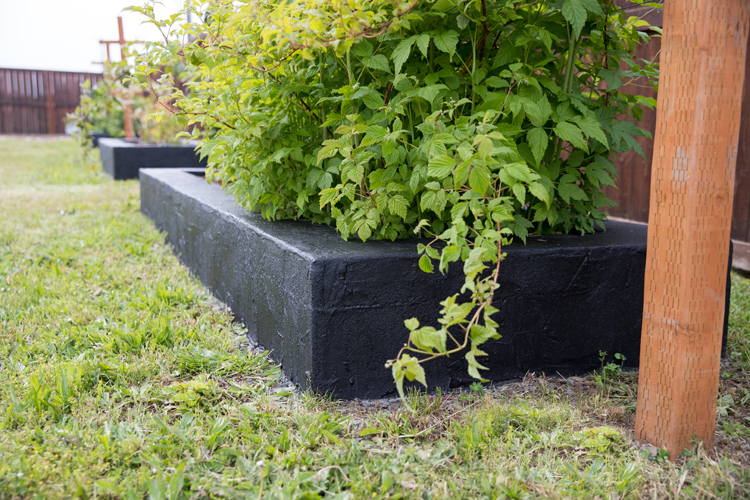
So far, they are doing a good job at keep the berries in check. We’ve had a few runners pop up outside the beds but we are able to easily mow it down when we cut the “grass.” I put that in quotes because it’s really weeds at this point. Ha!
Some things to consider:
After this post did well on Pinterest, I got a few questions, and a few comments that I thought I would address.
- The color. If you live in a hot climate, black will not work for you and may cook your plants. Unpainted it may even do this as well…consider your climate. If you live in a cooler climate like mine, black or darker colors can work to your advantage. It will keep the soil warmer and help it warm up sooner. I will say that it is harder to keep looking clean though. Birds poop on the beds and it shows up really well. 😉 They get dusty looking in the summer when our lawn dies (which is a common practice in Washington state to help conserve water, but that’s another topic). I am considering repainting them a lighter color purely for aesthetic purposes. Just thought I would mention that.
- Concrete blocks. As mentioned earlier, newer concrete blocks are safe to use with food. Do not use older “cinder” blocks as they contain chemicals that can be harmful.
- Foundation. This is not a wall and nor should you use this tutorial to make anything taller than I did. If you do, you will need to consider a frost line foundation and using mortar between blocks.
- The surface cement. It is meant to applied thinly. Please refer to product information from the manufacturer. It does not crumble, or chip, or fall apart. My beds are 2.5 years old and are holding up beautifully. They are super solid and I just created four more.
these are not cinder blocks but concrete blocks big difference
Thank you for your comment and for your interest in ensuring my post is as accurate as possible. I looked this up because I didn’t know the difference between cinder blocks and concrete blocks. They seem to look the same, but while concrete blocks are made of pure concrete, cinder blocks are made up of concrete with ash mixed in. You’re right that these are concrete blocks. I have updated my post to reflect that.
Most people still call them cinder blocks.
Concrete basically has three ingredients: cement, sand, and aggregate. Most concrete uses stone for aggregate but you can use other ingredients.
Cinder is just a type of stone so cinder concrete is very similar to regular concrete.
It can be “recycled” from burnt coal and is used in landscaping, among other things. It collects in the bottom of coal furnaces so it has to be removed periodically.
Cinder used to be cheaper than stone so that’s why it was used. New rules requiring cinder to be cleaned and processed in a way that removes harmful toxins is what drove up prices.
It is basically indistinguishable from regular concrete though, so the historical use of cinder for concrete aggregate is more of a “fun fact” and not something that will get you in trouble anywhere.
Thanks for the information! That is really interesting.
This is so great thank you for this!!!
I’m wondering if the QuikWall surface bonding cement will leach into the soil?
That’s a good question. I’m not sure, but I found this information sheet on Quikwall that details what it is made of. That may help answer your question: https://www.quikrete.com/pdfs/data_sheet-quikwall%20sbc%201230%201231.pdf
Most people still call them cinder blocks.
Concrete basically has three ingredients: cement, sand, and aggregate. Most concrete uses stone for aggregate but there’s no rule that concrete has to use stone.
Cinder is just a type of stone so cinder concrete is very similar to regular concrete.
It can be “recycled” from burnt coal and is used in landscaping, among other things. It collects in the bottom of coal furnaces so it has to be removed periodically.
Cinder used to be cheaper than stone so that’s why it was used. Newer rules requiring cinder to be cleaned and processed in a way that removes harmful toxins is what drove up prices.
It is basically indistinguishable from regular concrete though, so the historical use of cinder for concrete aggregate is more of a “fun fact” and not something that will get you in trouble anywhere.
Sorry I meant to reply to the other comment :/
Hi! Thanks for the tutorial. I have just the right place in my yard for something like this. I need to add a second layer of the cinder blocks before I put the caps on. The space is very uneven so I have to raise it up otherwise the plants won’t grow in some spots.
I also won’t be doing the quiktrete. Do I need to add any bonding agent between the layers of blocks and under the caps since I’m skipping this step?
That’s a good question. I’m not sure because I used the quikrete as my bonding agent. I have heard of people dry stacking bricks and that as long as you stagger them, they can be pretty sturdy on their own. Best of luck!
Yes you will need to use an adhesive for concrete block, otherwise they will shift You still need to offset each level to the one below it.
If I stack my bed 2 blocks high + covers do I have to add a bonding agent in the middle on top of the first layer of blocks? Or will everything solidly together nicely after the cement wall mixture has been applied all over?
If you are going higher than I did, I would put mortar between the layers as well. I mean…supposedly, you can built a wall with these, but I would at least put cement glue between the blocks to be safe.
Really interesting and helpful idea. Thanks for sharing!
I’m sorry if I missed a part where you explained it but what is the difference between Quikcrete and Quikwall? I have some leftover bags of Quikcrete and I’m wondering if I could use those instead? I’m new to all of this….
Quikcrete has bits of gravel in it and Quikwall has fibers in it to help with stabilizing. They are different. I don’t think Quikcrete would spread the same and I don’t think it could hold up vertically like Quikwall is designed to.
Sorry for my super delayed response. I hope this helps.
The gravel is just for stability on the ground, correct? I have a cement pad from an old dog kennel that we are building raised garden beds on top of. With that in mind, would you say that the gravel could be foregone or perhaps just a layer on the bottom for drainage?
It’s for stability, leveling, and helps with expanding and contracting that can happen with weather changes. If you are building on top of a cement pad, then I don’t think you would need gravel. You are correct.
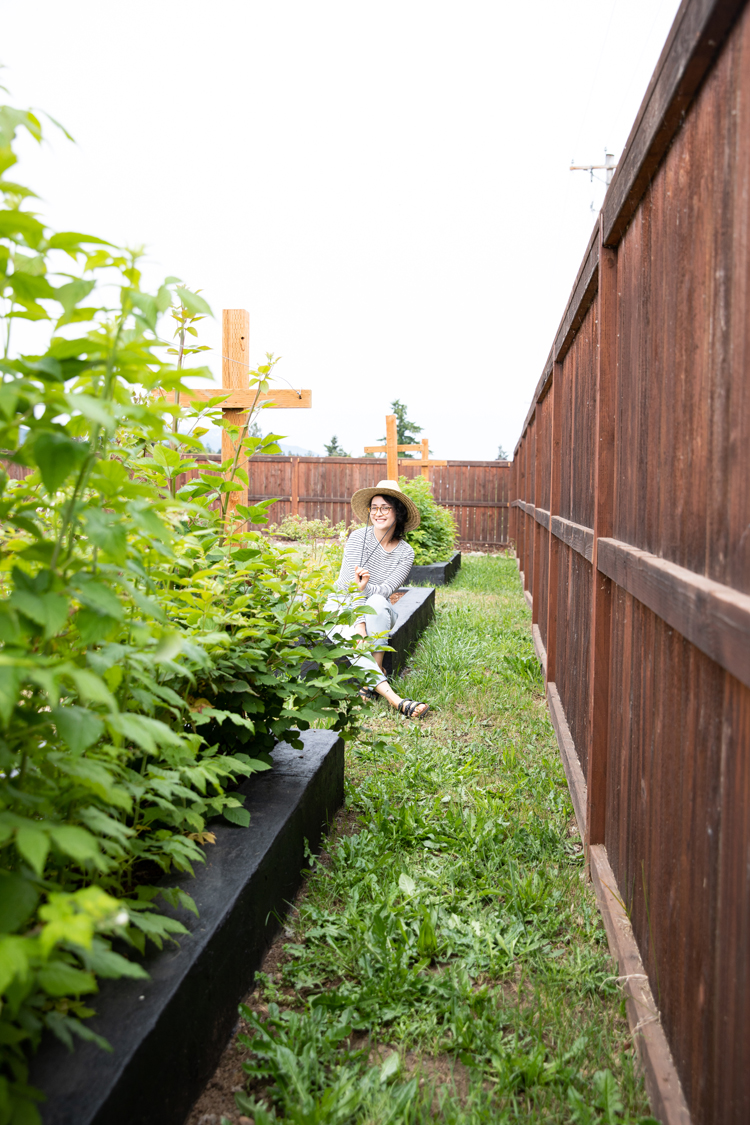
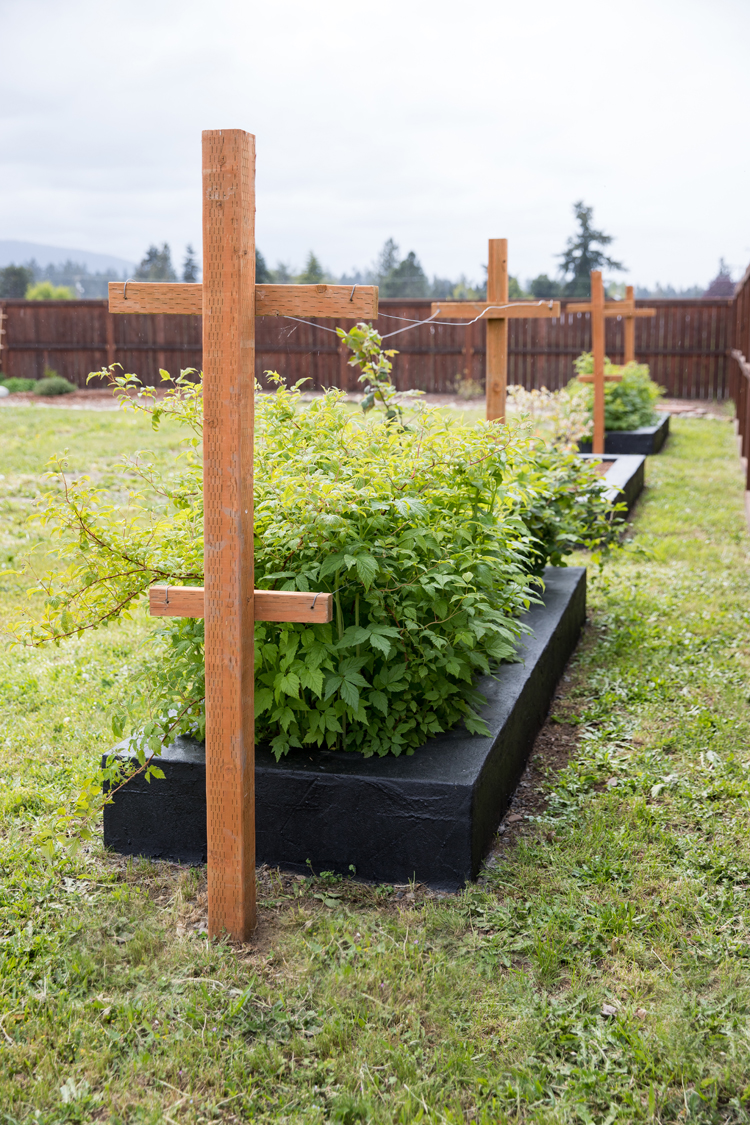
I like your project, but I look at them and am a bit scared, especially with the wooden crosses 🙁
They are berry trellises, not crosses. Some of the photos cut off the second horizontal beam on top so you may be mistaking it for a cross.
Hello I like this idea what would u say the overall cost was for this project
When I first made these I think they came out to around $75/80 per bed and they are quite large (I think around 10 feet by 3 feet). Of course, material costs have risen, so it’s probably more like $90+ now.
The flower bed is beautiful and please provide the interior materials that you used for the bed.
What you put inside from the bottom up.
Thank you
Hi Olivia. I simply filled it with dirt/compost. Sometimes I fill beds with some decaying wood and branches first before adding soil, to add some nutrients to the soil that will break down over time. I didn’t line the beds but I did mostly avoid painting below the soil line. Does that answer your question? If you want a faster response, email me: [email protected]
This was extremely helpful.
I have a cement patio with cement block planters on the exterior of it.
I have wanted to add cement to cover the cement blocks and paint them white. Your experience with this was very informative. I appreciate your post.
So glad it was helpful! I have been thinking of converting mine to white or tan too. I love the black but it shows dirt so much more easily.
I love this! Thanks so much. I am going to do this in my back yard.
Did you leave the concrete blocks empty when you put the cap on? I am just wondering if I should fill mine or not? Thanks
I just let them empty before putting on the cap. They are pretty heavy and don’t need to be filled.
How much did this cost you?
Pricing has changed with inflation but I just built more beds (a little smaller) last year and they cost about $65 each (It’s a rough estimate because I had some gravel and paint from other projects). It saves money per bed to make more than one, because with careful planning you don’t have as much leftover materials when you’re done. I was able to get cement blocks at a discounted rate when I was buying more in bulk as well.
Great idea! Looks beautiful. I was wondering if that quickwall stuff could possibly be stamped or textured for a cool design? If so I wonder at which stage or maybe it needs 2 coats? Just curious on your thoughts.
So sorry for just now seeing your comment. It got wrongly put with the spam comments which I am now trying to clear out.
I don’t know if stamping would work honestly. It would probably work better on horizontal surfaces than vertical ones. For the vertical surface, it’s pretty fragile until it starts hardening and then it can be prone to cracking if you mess with it too much before it’s cured.
The beds look great. I have a retaining wall that needs to be resurfaced, and the QuikWall might be perfect for that. In your cracks, I think I would just use some cement crack filler and then paint over the repair with the original paint.