• Skip to primary navigation
  • Skip to main content
  • Skip to primary sidebar
  • Skip to footer
  • Home
  • BLOG
  • TUTORIALS
    • Free Patterns
    • Free Printables
    • SEWING
      • Technique
    • CRAFTS
      • Printables
    • CROCHET
    • Baby
    • KIDS
      • Boys
      • Girls
      • KIDS CREATE
      • Lego
      • Parenting
    • Women
    • Men
    • Holiday Projects
      • Birthday
      • Valentine’s Day
      • Easter
      • Spring
      • Mother’s Day
      • Father’s Day
      • Summer
        • Color Your Summer 1
        • Color Your Summer 2
        • Color Your Summer 3
      • Halloween
      • Autumn
      • Thanksgiving
      • Christmas
      • Winter
    • Accessories
    • Home Projects
    • No Sew
    • Gift Ideas
      • Teacher Appreciation
    • Party Ideas
    • Photography
    • RECIPES
      • Allergy Friendly
      • Baking
      • Sweet
      • Savory
      • Beverage
      • Breakfast
      • Holiday
      • Soups
      • Vegan
  • SHOP
    • SHOP
    • Cart
    • ACCOUNT
  • ABOUT
    • CONTACT
    • Featured
  • SPONSOR
    • PRESS
  • Privacy Policy
  • TERMS OF USE

delia creates

crafting, cut files, girls, kids, printable, review, tutorial, women · August 8, 2017

Metallic Temporary Tattoos (+ free cut file)

Have you seen the new metallic temporary tattoo papers from Silhouette?

They come in gold and silver and they are SO fun!

Metallic Temporary Tattoos (+ free cut file) // www.deliacreates.com Metallic Temporary Tattoos (+ free cut file) // www.deliacreates.com Metallic Temporary Tattoos (+ free cut file) // www.deliacreates.com

I started by putting some stars on my hands and cheeks…did anyone else do this in junior high? I used to glue little gems or put stickers on my cheeks all the time, probably because I was listening to Spiderweb on repeat and I thought Gwen Stefani was all that and a bag of chips. #90steen. 😉

Then it got out of control. Before we knew it, Nat and I had metallic tattoos all over our faces and arms. Ha!

Metallic Temporary Tattoos (+ free cut file) // www.deliacreates.com Metallic Temporary Tattoos (+ free cut file) // www.deliacreates.com Metallic Temporary Tattoos (+ free cut file) // www.deliacreates.com Metallic Temporary Tattoos (+ free cut file) // www.deliacreates.com

This metallic temporary tattoo paper is easily my new favorite Silhouette product. I think it would be super fun to use it with Halloween costumes, school sports, so many possibilities! Wouldn’t these stars and moons be perfect to wear for the upcoming eclipse?

***BTW… As a Silhouette Elite blogger I get to offer all my readers 10% off any regular priced item in the Silhouette Shop at ANY time using this affiliate link >>HERE<< and this code at check out: 10OFF. ***

Metallic Temporary Tattoos (+ free cut file) // www.deliacreates.com

This metallic temporary tattoo paper is also easier to use than the regular stuff. There’s no printing. Just cut, weed, and apply! Let’s get started…
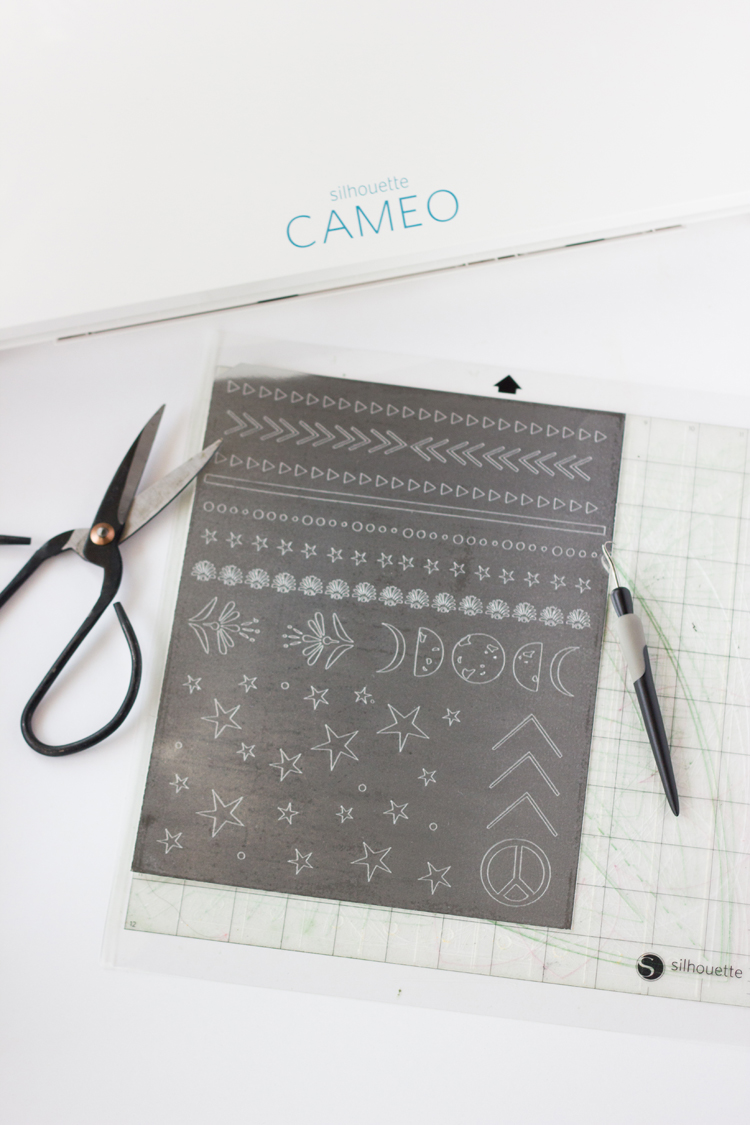
STEP ONE: Cut file. 

Prepare your cut file. You can use this free download I prepared HERE.

You’ll notice that it is quite crowded. Because of the nature of this tattoo paper, you can fit quite a few cuts on one page and reduce a lot of waste.

STEP TWO: Cut settings. 

1.Place your metallic temporary tattoo paper on a cut mat and load it onto your Silhouette.

2. Select tattoo paper under material type (printable if your studio software doesn’t list the metallic paper).

3. Use these cut settings – blade depth 2, speed 3, and thickness 25.

TIP: If using words, be sure to mirror your image before cutting! 

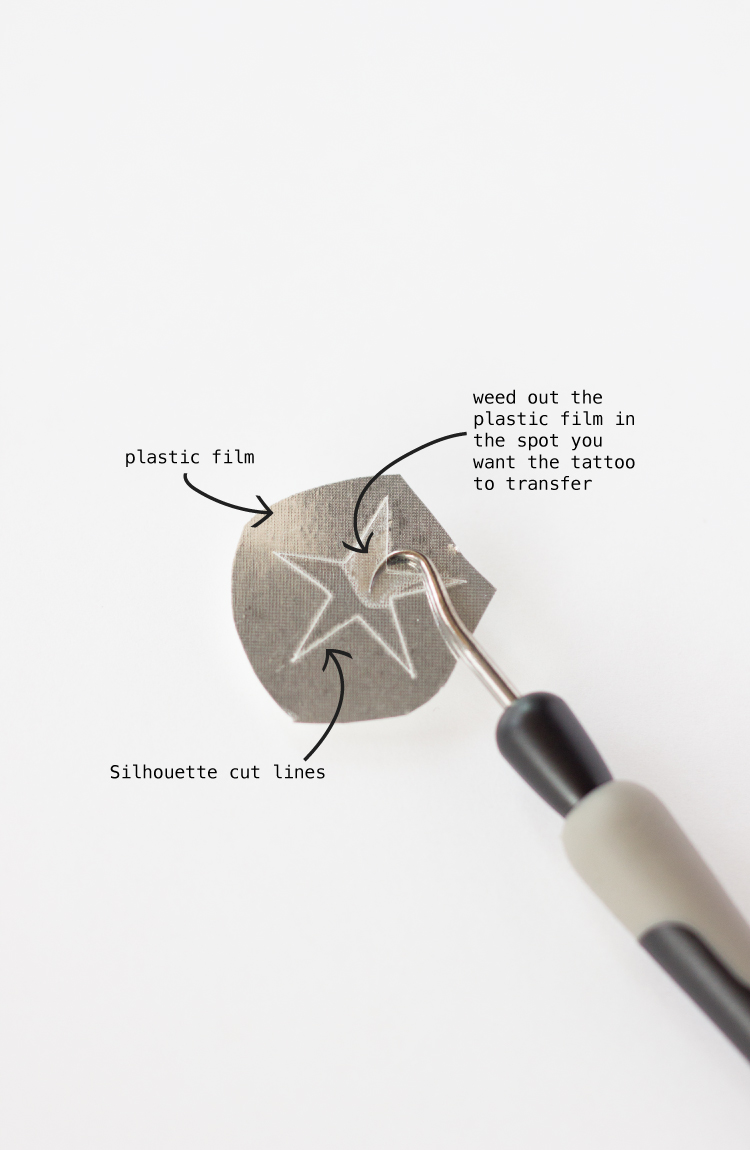
STEP THREE: Weeding.

Unlike printable tattoo paper, the metallic tattoo paper comes with a snugly adhered plastic film. After you cut it, simply remove the plastic film where you want the tattoo to transfer to skin. A weeding hook, tweezers or an exacto knife all work great.

Metallic Temporary Tattoos (+ free cut file) // www.deliacreates.com

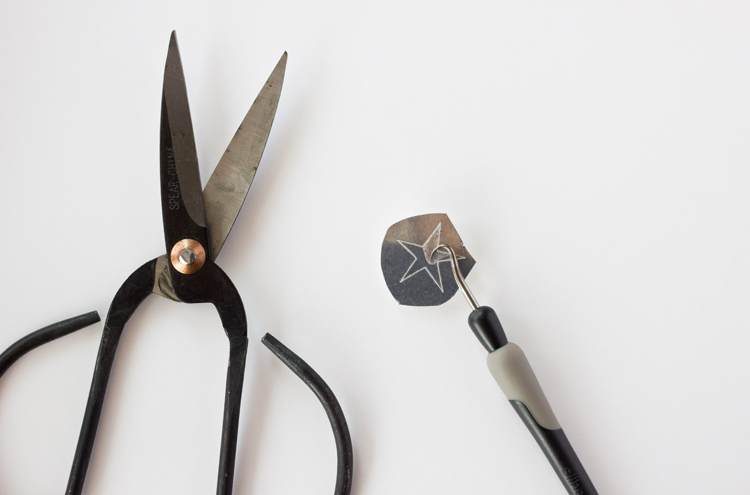
STEP FOUR: Apply tattoo. 

Cut around your tattoo with some craft scissors, then apply it face down to an area of skin that is clean, dry and free from oily moisturizers. Apply a wet rag to the back of the tattoo paper for 10 seconds and slowly pull it away.

Metallic Temporary Tattoos (+ free cut file) // www.deliacreates.com

Metallic Temporary Tattoos (+ free cut file) // www.deliacreates.com

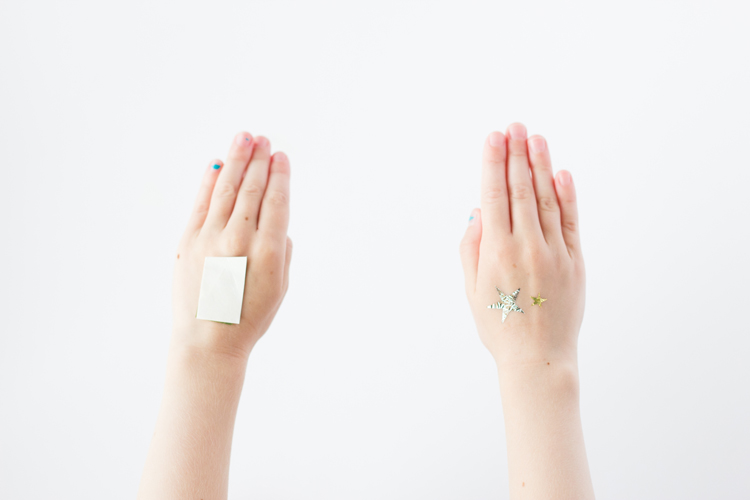
The tattoo will transfer wherever the plastic film is absent.

Easy as that!

Metallic Temporary Tattoos (+ free cut file) // www.deliacreates.com Metallic Temporary Tattoos (+ free cut file) // www.deliacreates.com Metallic Temporary Tattoos (+ free cut file) // www.deliacreates.com The tattoos wash off naturally after a couple bath times or you can scrub them off with some oily moisturizer and a hand towel.

NOTE: Immediately after application, the tattoos are more fragile and can removed very easily. To avoid this, let them dry completely before touching them too much (about 30 minutes).

Metallic Temporary Tattoos (+ free cut file) // www.deliacreates.com Metallic Temporary Tattoos (+ free cut file) // www.deliacreates.com Metallic Temporary Tattoos (+ free cut file) // www.deliacreates.com

Metallic Temporary Tattoos (+ free cut file) // www.deliacreates.comMetallic Temporary Tattoos (+ free cut file) // www.deliacreates.com Metallic Temporary Tattoos (+ free cut file) // www.deliacreates.com Metallic Temporary Tattoos (+ free cut file) // www.deliacreates.com


Previous Post: « Kindness Rocks Project
Next Post: Folk Art Inspired Floral Statement Shoes »

Reader Interactions

Comments

  1. Pattymac says

    August 9, 2017 at 7:57 AM

    OMG!!! I love this!! This is reason enough to pick up a Silhouette machine!!! Pictures are beautiful in today’s post, Delia. Love, love, love.

    Reply
    • Delia says

      August 9, 2017 at 10:28 PM

      Aw thanks Patty! <3 That means so much coming from you!

      Reply
  2. Kimberly timpone says

    June 30, 2021 at 7:47 AM

    Do you have any guidance on using a Cricut to cut this paper? I don’t know what settings to use. Thanks!

    Reply
    • Delia says

      July 1, 2021 at 1:00 PM

      I wish I did. I am so sorry that I don’t have any experience using this paper with my Cricut. You might have luck googling to see if someone else has?

      Reply

Leave a Reply to Kimberly timpone Cancel reply

Your email address will not be published. Required fields are marked *

Recipe Rating


This site uses Akismet to reduce spam. Learn how your comment data is processed.

Primary Sidebar

Search this site:

Reader Perks

Reader Perks

Footer

  • Facebook
  • Flickr
  • Instagram
  • Pinterest
  • Twitter
  • YouTube

All Images On This Site Are Protected By Copyright

You may not use any images from this site unless you meet one or more of these requirements: 1) You receive permission in writing from Delia Randall for each specific image you would like to use. 2) You use ONE image in a round up or feature post with a link back to the appropriate post or the main site for credit and for full posts/tutorials. Thank you!

Archives

Search This Site:

© 2022 delia creates · Design By Bloom