

There are two aisles I almost always hit up when I’m in a thrift shop or Goodwill: the basket aisle and the glassware aisle.
You can get the most interesting looking pieces if you’re patient!
I usually have better luck with baskets then I do with vases because sometimes I don’t have the patience to look through ALL the overcrowded glassware shelves, but I found a few shapes I liked during my last stop. And that’s the key…look for shapes, not color. You can always change the color…which for me usually means I can always paint it black. 😉 Haha.
Case in point.
I like adding to my vase collection this way because 1. I can get completely unique pieces, since I get to add my own flair to it, and 2. I get to keep old glassware out of the landfill and give it new life!
I also love the idea of giving one of these vases as a gift with a bouquet inside. Give the gift of a unique, semi-handmade piece that will feel really personal.
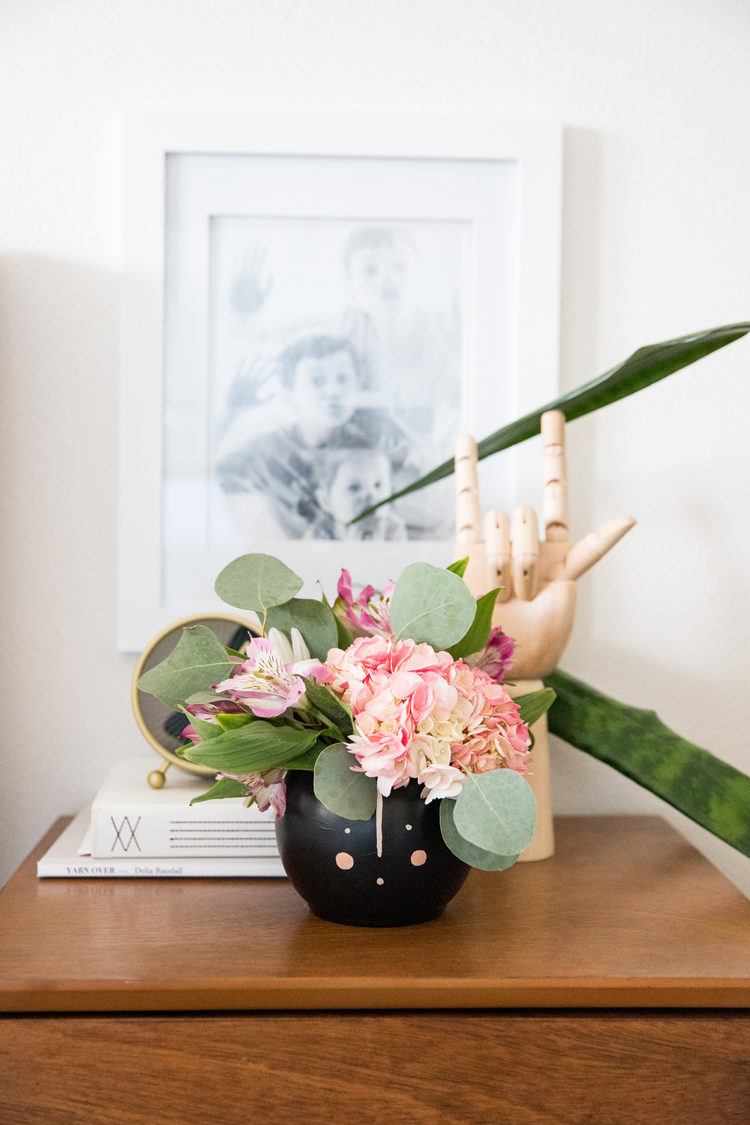
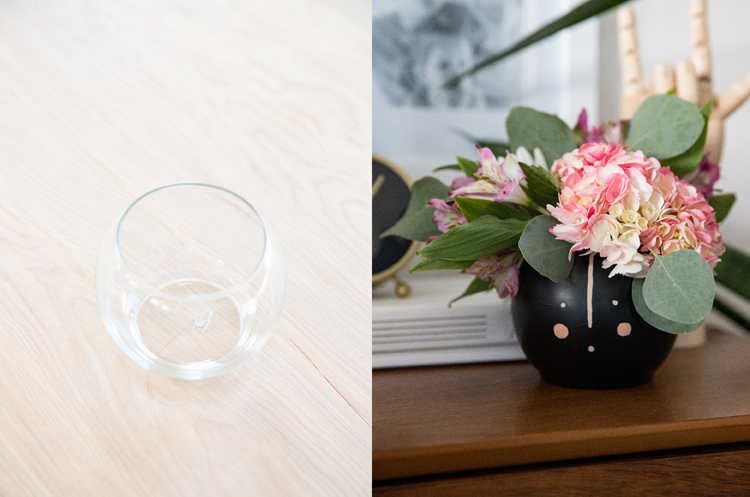
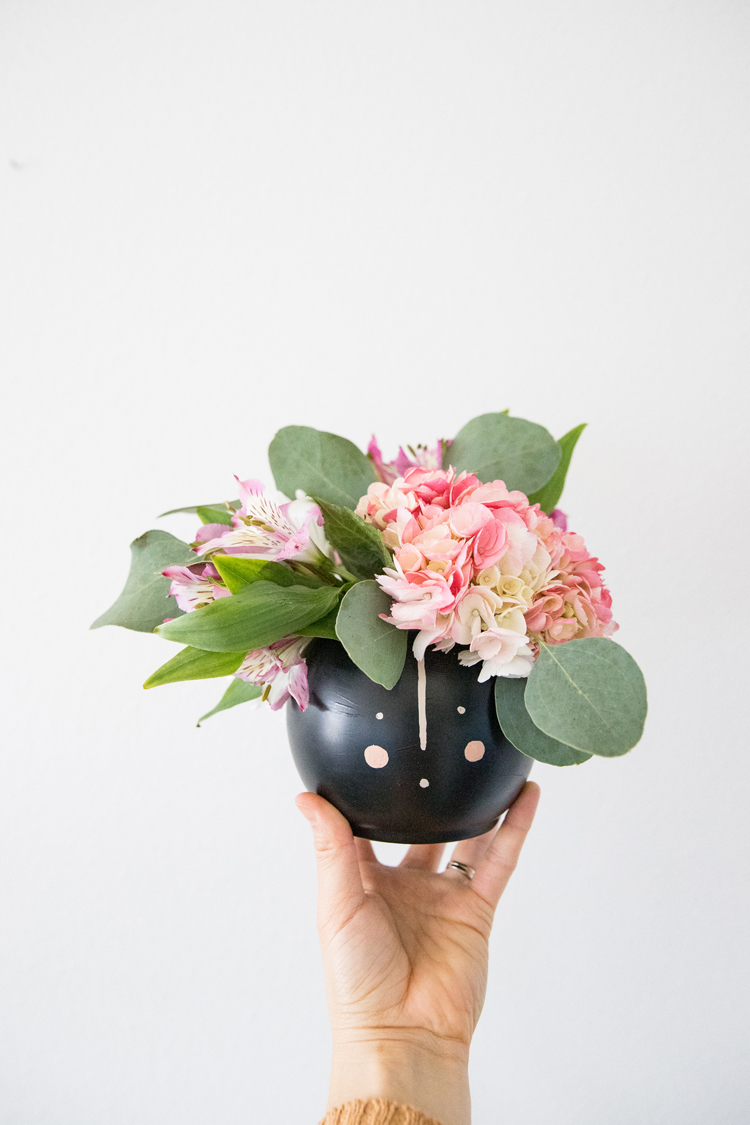
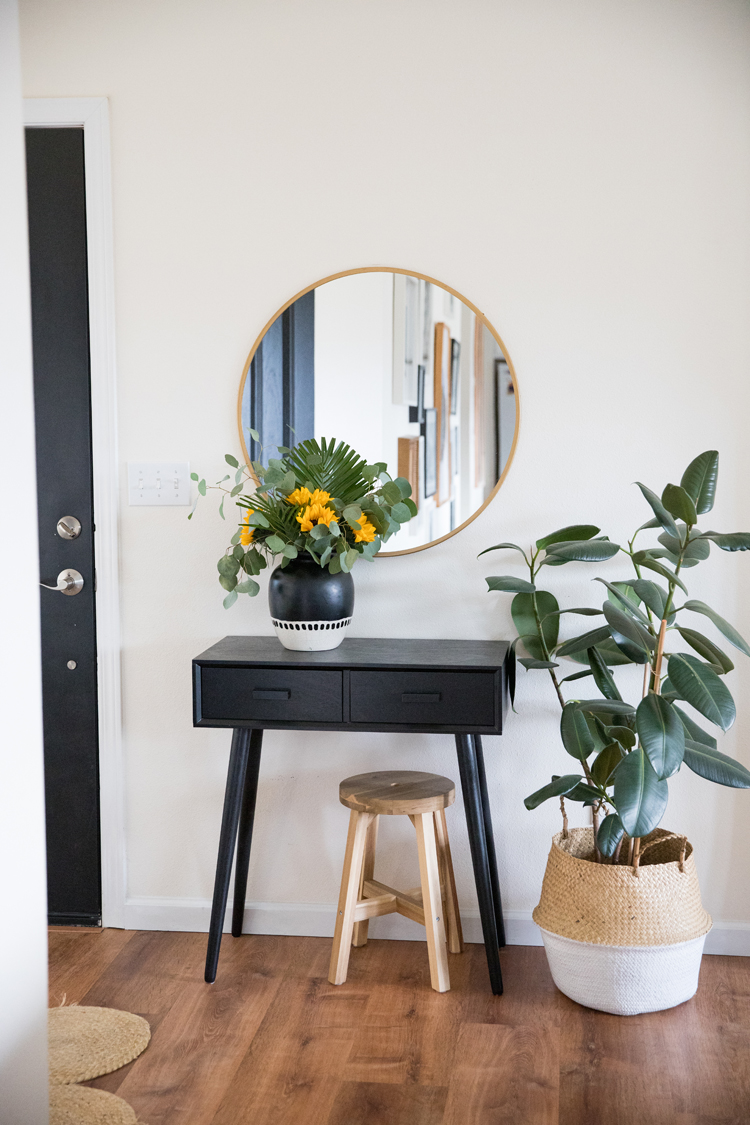
One of the vases is a round votive style that you can find pretty much anywhere and I actually think it might be my favorite. I’m totally a fan of the faces on vases and plant pots trend. It just makes me smile!
I feel like the instructions are too simple for a tutorial, but here’s a quick video and some tips.
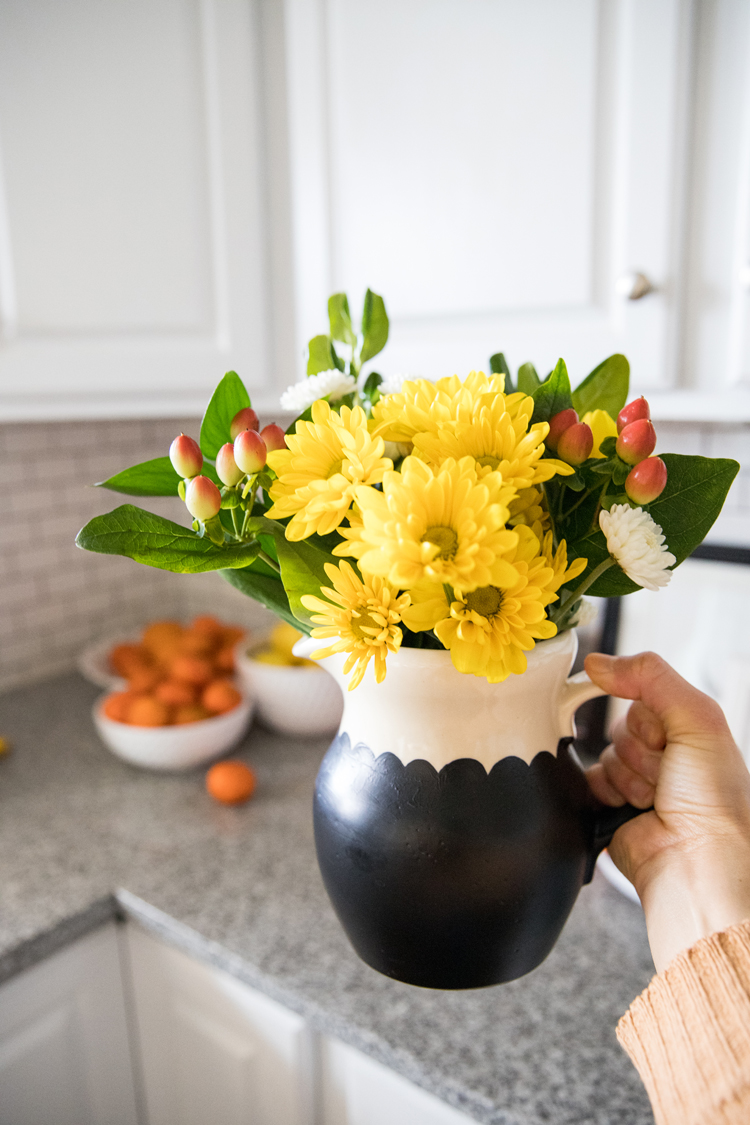
To speed things up, I started with spray paint to cover the largest areas. Then I went in with craft paint and a small paint brush to add details, like the scallop edging or the facial features. Although, you could easily hand paint the whole thing. I find the residual brush stroke texture to be perfectly charming.
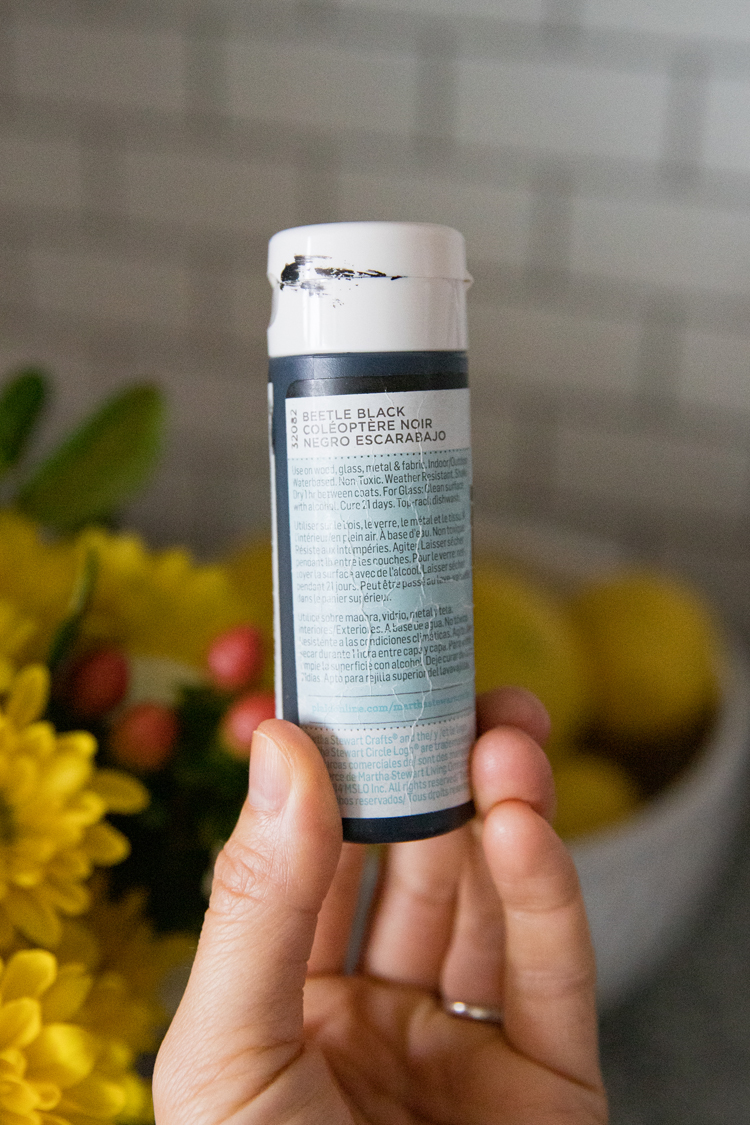
TIP: If you use Martha Stewart craft paint, it is top rack, dish-washer safe if you let it cure for 21 days (if you can see that in the cracked label in the picture). That’s a heck of a long cure time, but still useful especially considering you likely won’t be using the vase enough to need to pop it in the dishwasher right away.
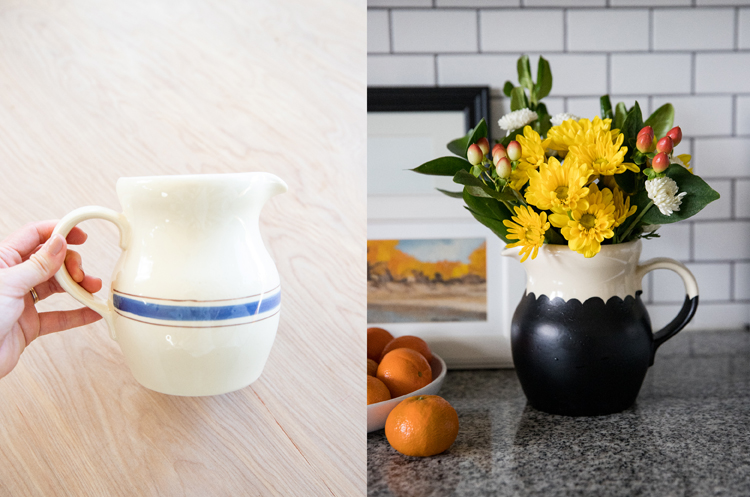
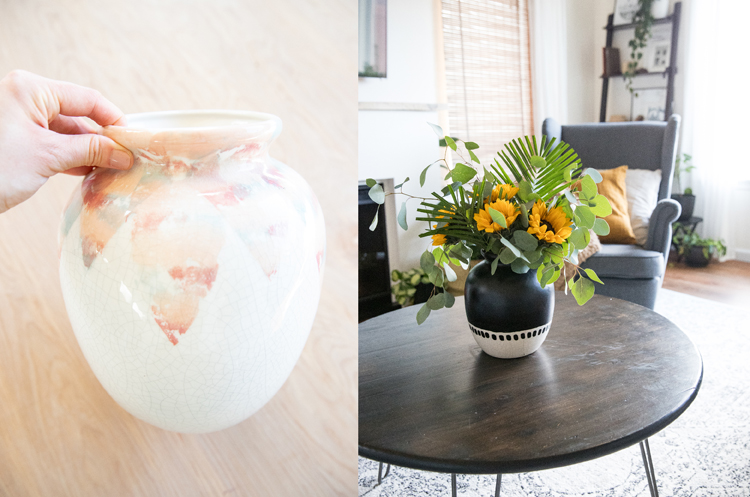
NOTE: One bit of warning and something that I failed to do…is to check to see if your vessels can hold water BEFORE you paint them. The large vase unfortunately started to sweat a puddle water after these pictures. The exterior is glazed but the interior is not, which is what is needed to make it waterproof. (face palm) As a hobby ceramicist, I should have known better.
So, this one will have to be used for fake florals or something like that.
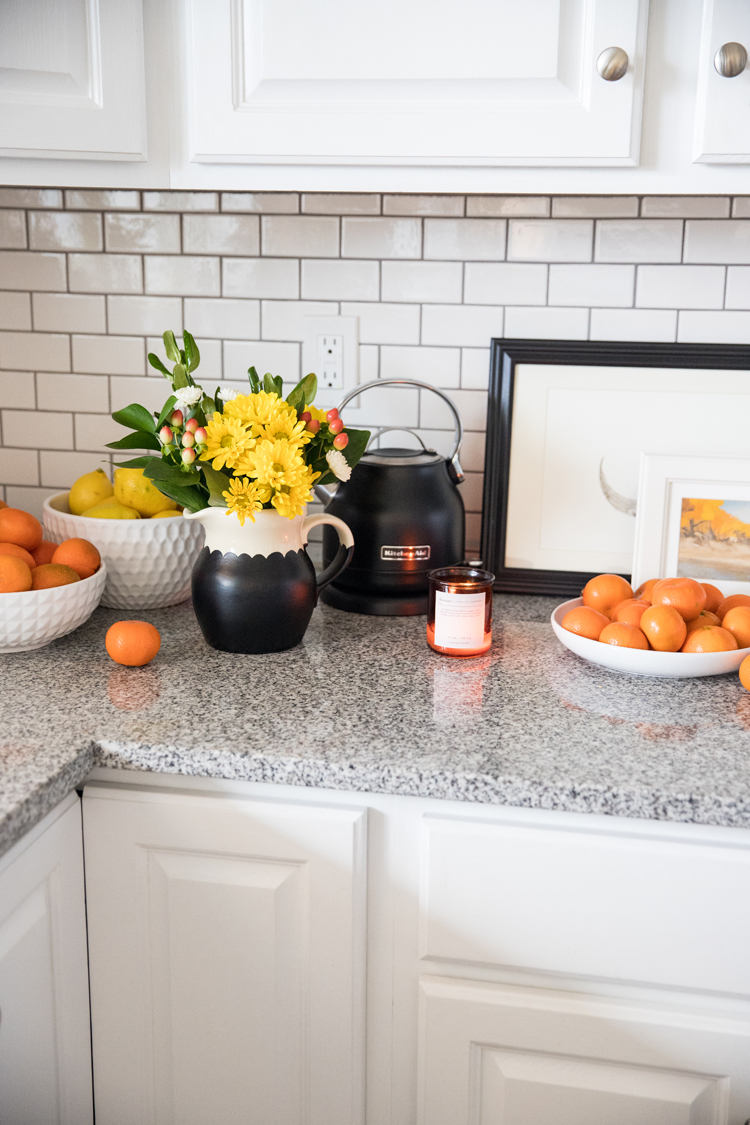
This pitcher though….I think might get more use once it’s cures. I can see it making a cute little addition to our breakfast table.
What an improvement! Try adding an insert for leaky items. In a similar position making planters/prop stations from found containers, I add inserts. To date, I’ve repurposed jars and many many random plastic containers such as large yogurt/cottage cheese tubs and various bottles with the tops cut off : soda, water; 1/2 gallon milk jugs/hydrogen peroxide (when I need square inserts). I am currently ‘collecting’ hydrogen peroxide containers as inserts for a galvanized wall organizer that I want to convert to a planter. It’ll take me a bit of time, but will be worth it. And now I have some ideas about decorating it 🙂
This is such a great idea. Thank you Kammy! I would love to see your wall organizer planter when you’re done. That sounds so cool!
This is such a great idea. Thank you Kammy! I would love to see your wall organizer planter when you’re done. That
How do you get a neat edge around the rim and stop the spray getting inside the container?
Good question. I flip it upside down and spray paint it with the rim side down. That usually does the trick. Sometimes I’ll need to touch up any missing bits with a paint brush when I flip it upright. That worked well with the black paint, but it may prove tricky with other colors. In that case, instead of touching it up with a paint brush, I’d tape the inner rim with painters tape, so that half the width of the tape is just sticking up out of the vase (sticky side facing outward). Then I’d do a light coat around the top. I hope that helps!
The painter’s tape tip is a great idea – less likely that I will make a mess that way. I suspect if I just flipped the item over so it stood on the rim, when I came to turn it back the right way it will have stuck to any substance I put to protect my work surface from getting sprayed