

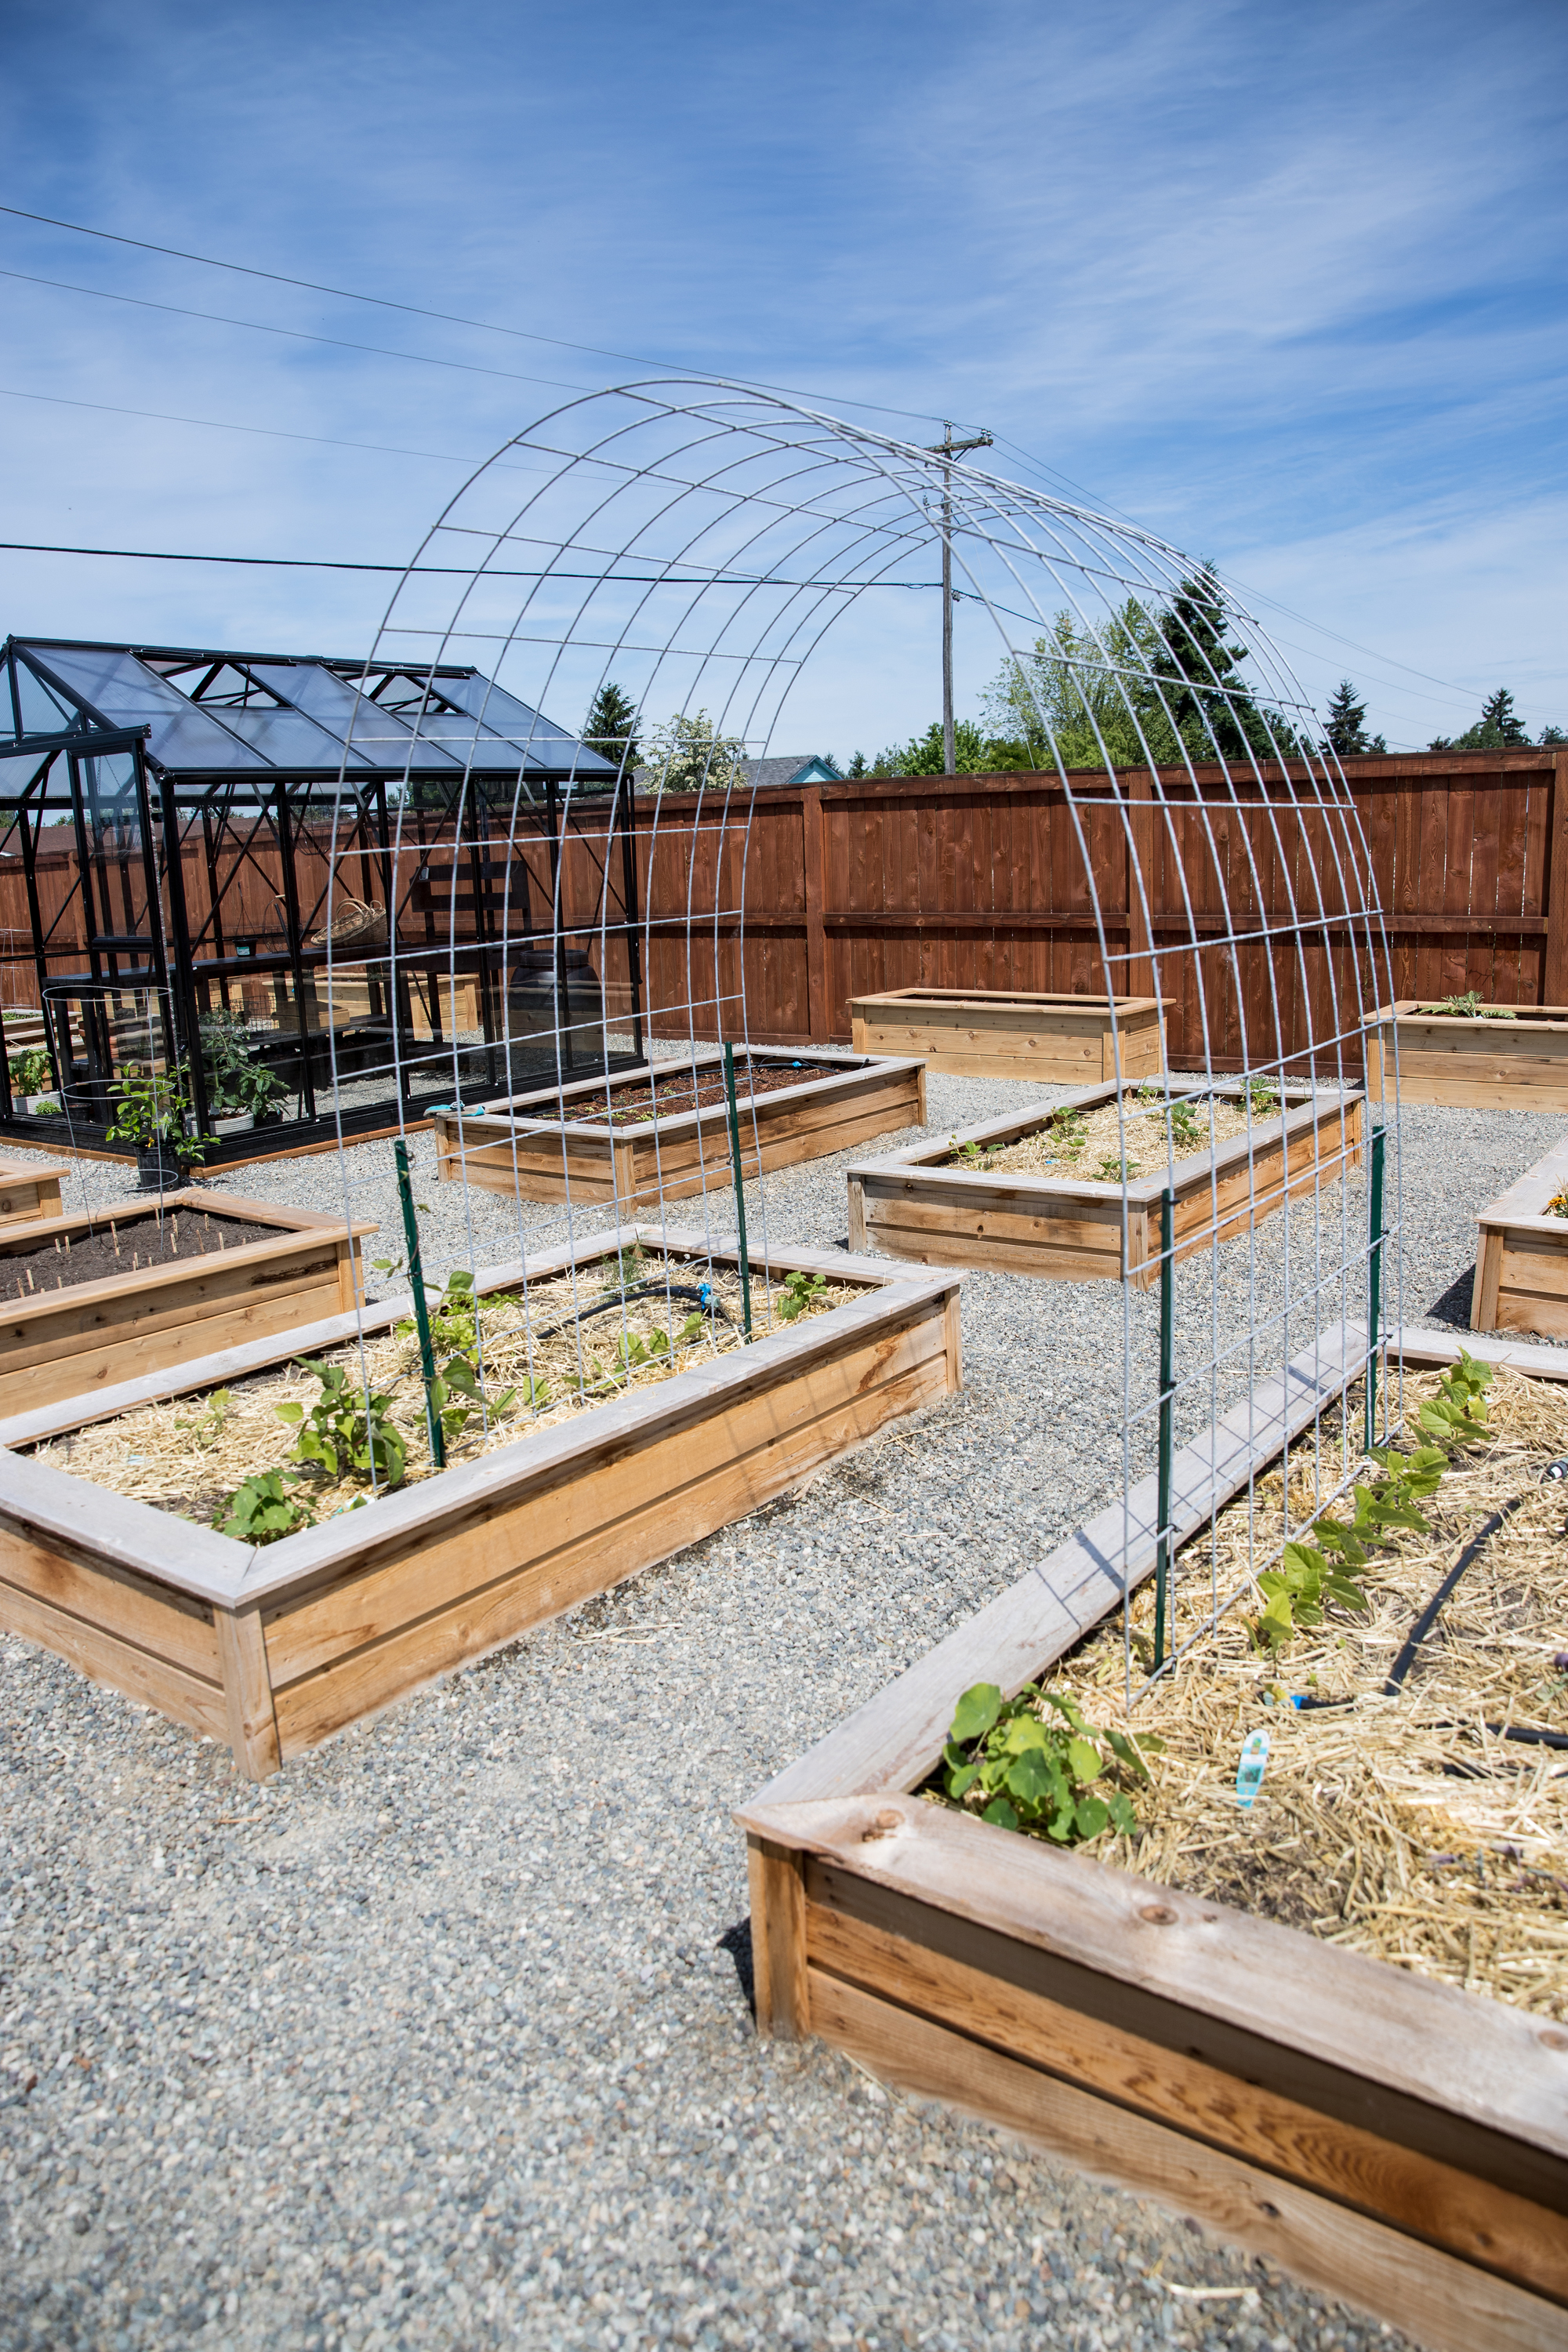
You’ve seen these on Pinterest. This is not a new idea. In fact, it was post after post of these cattle panel garden arches that kept popping up in my Pinterest feed that made me finally build my own! So, I’m adding our own into the mix. 😉
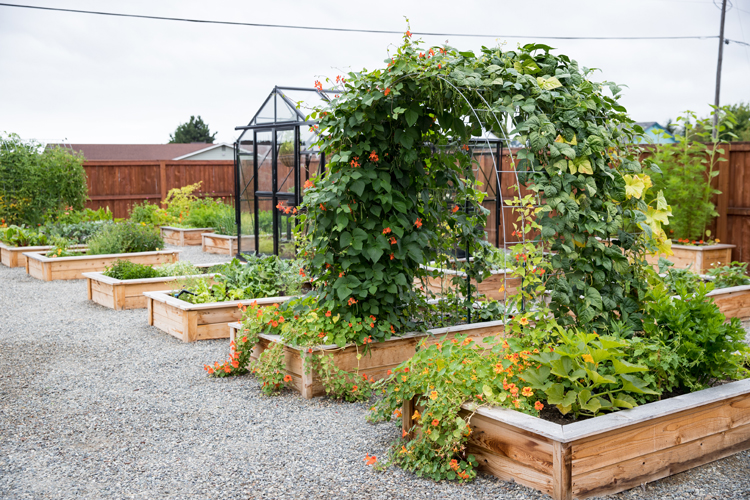
We put in a bunch of raised beds this year and I thought it would be fun to add some trellises to some of them for our climbing vegetables. Scroll down to step 4 to see what we planted.
But first, let’s talk trellis…arch. Arched Trellis? You can probably see now why my title reads like a list of descriptions. Ha!
My favorite part of this type of cattle panel arch is that it costs around $40 for each arch! So, you can get a lot of wow factor in your garden (once it fills up with plants) for just a small investment.
MATERIALS
- 4 – four foot tall, medium duty T posts (may also be called U posts), about $4 each
- 1 – 16 foot long by 50 inch wide galvanized steel cattle panel, we got a 5 gauge panel, about $25
- Post pounder
- Zip Ties
- Raised beds set about 3 feet apart
Material Notes:
- I got most of our T posts from Home Depot but they didn’t have quite enough for both of our trellises – we built two – so I went to a local farm store. They called the medium duty T posts, U posts.
- Our cattle panel was about $25 from Coastal which is chain farm store in the Pacific Northwest. Most farms stores will carry them for about the same price.
- We borrowed a post pounder. You only need it for less than an hour, and it can run you $25+, so it’s worth asking around to save money.
- We had a bunch of zip ties on hand, but I think you can get a bunch for around $5 or use some galvanized wire.
- I’m not sure that our method of arch installation would work as well without the support of the raised beds. If you want to put them straight in the ground with raised beds, there are many other tutorials that will provide better info on how to do that probably with heavier duty T posts. Note: I didn’t include the beds in the total cost of the garden arch.
HOW TO
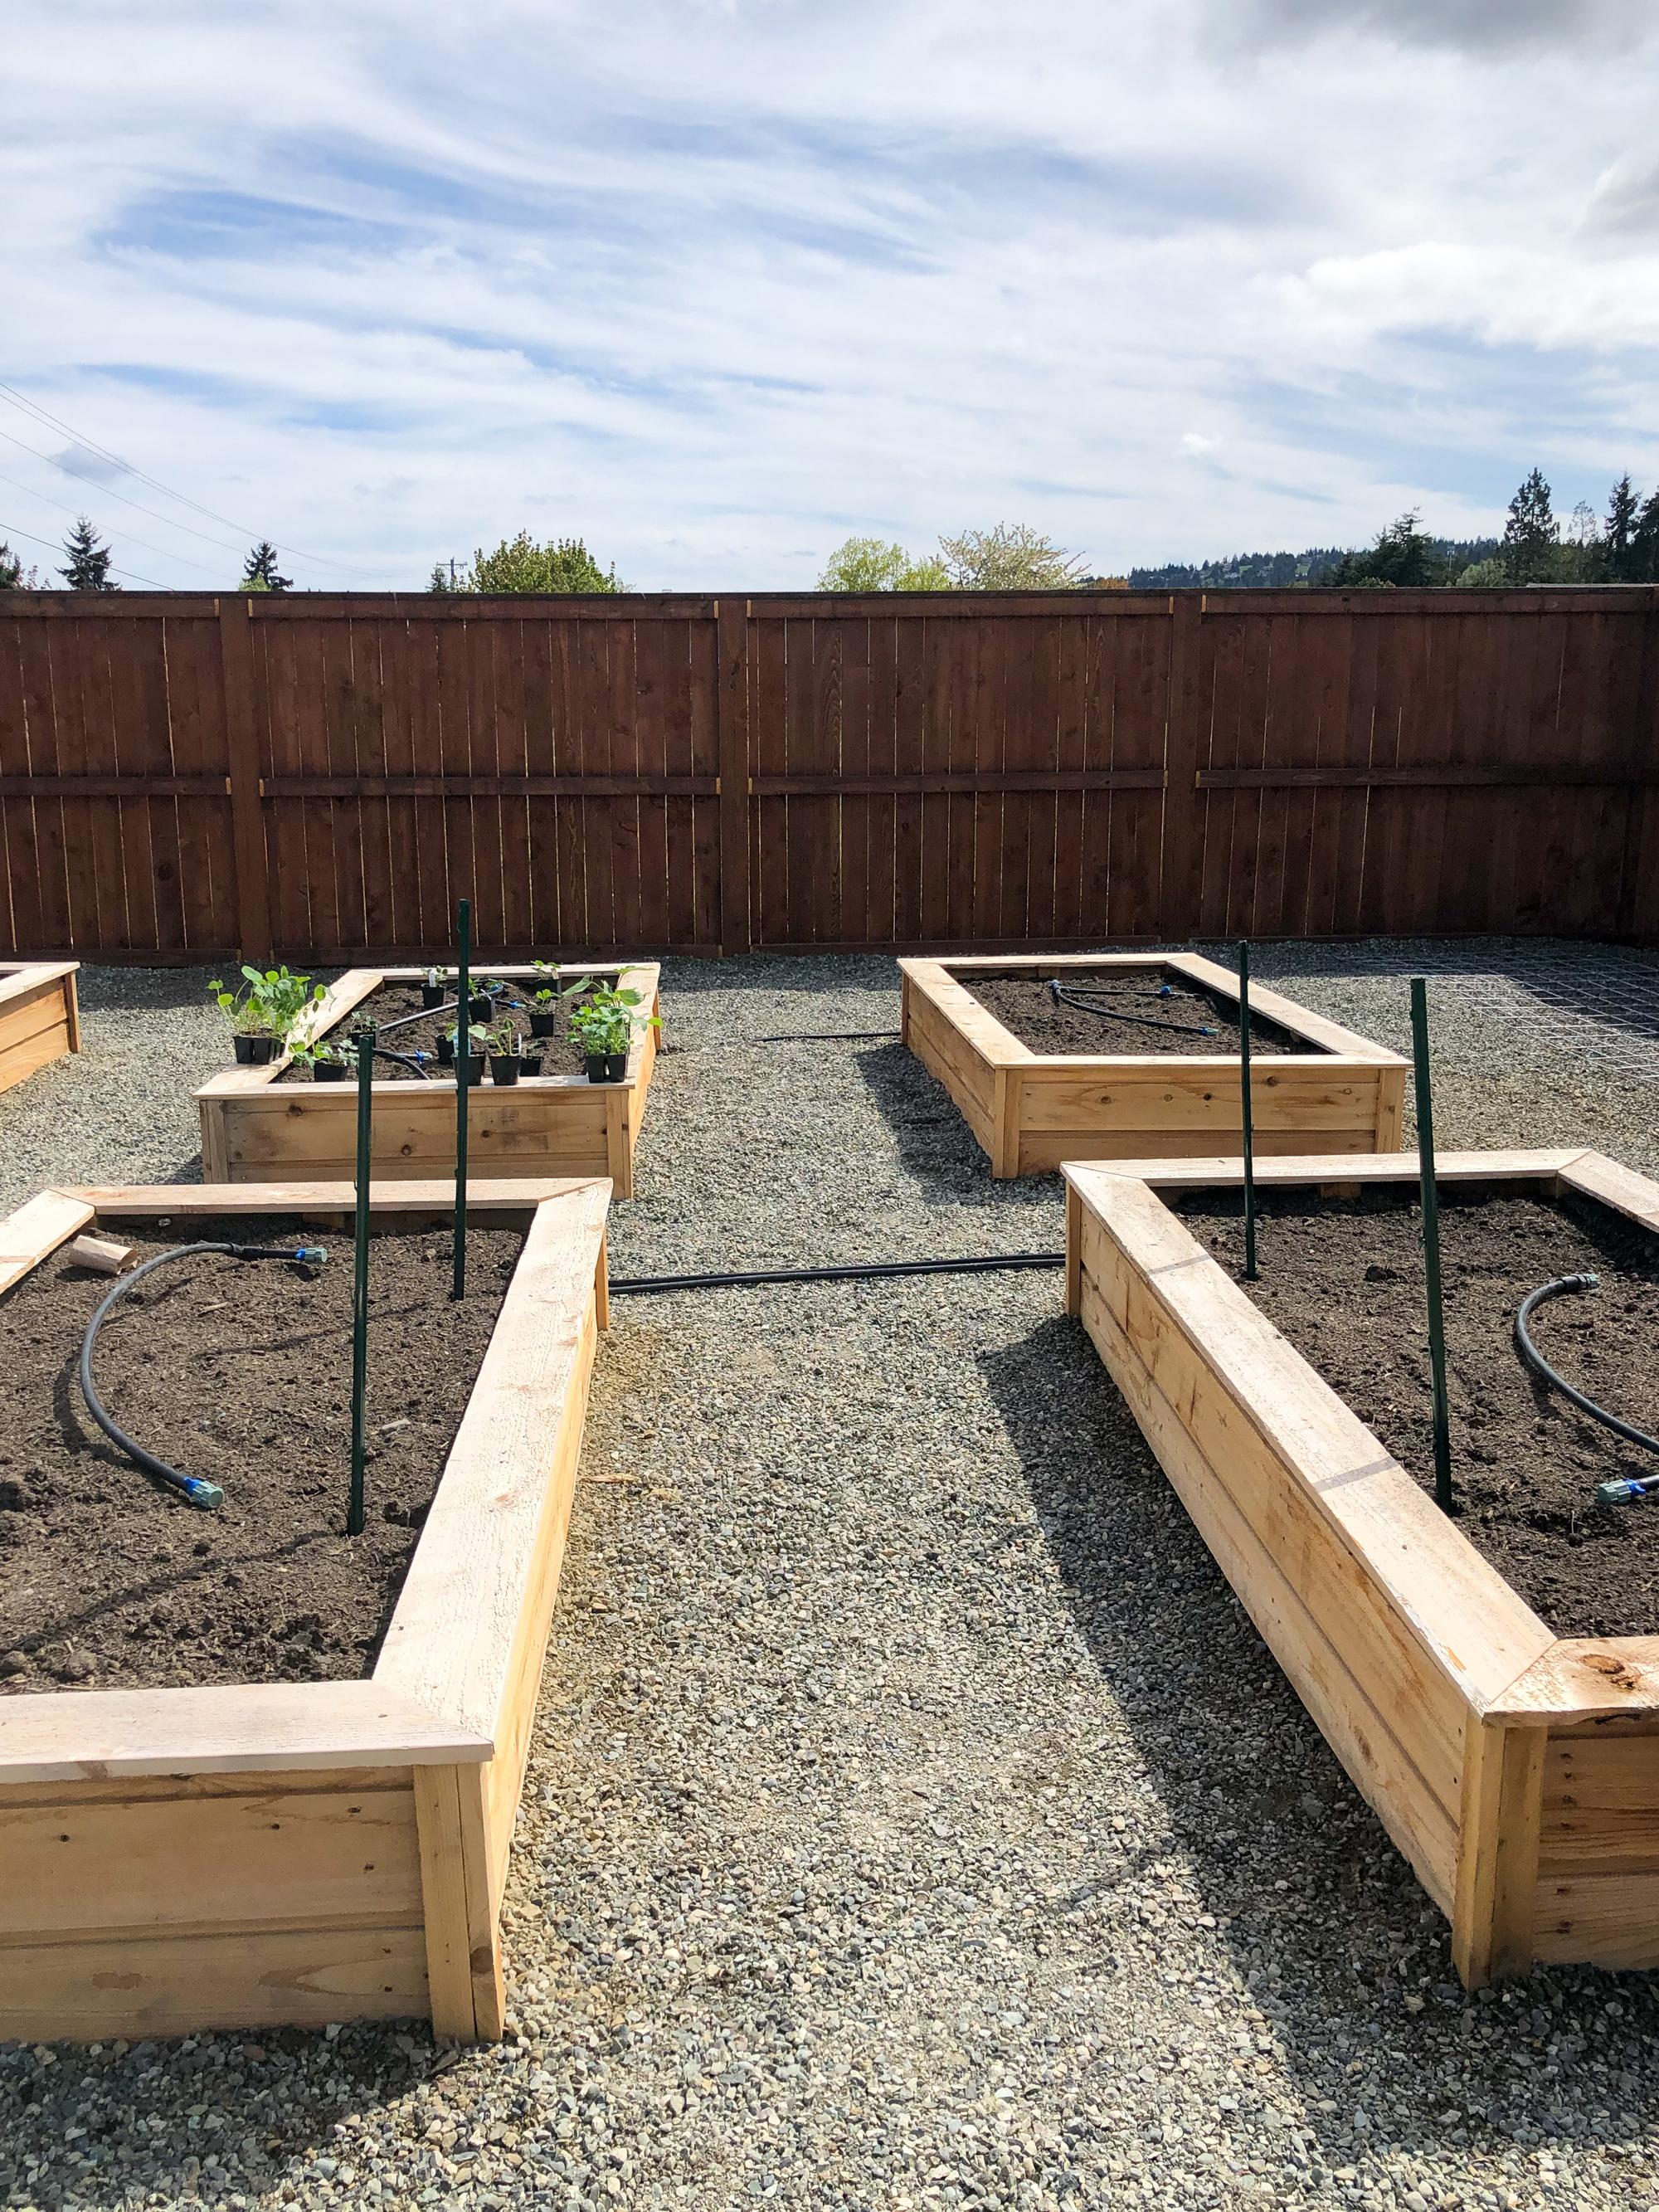
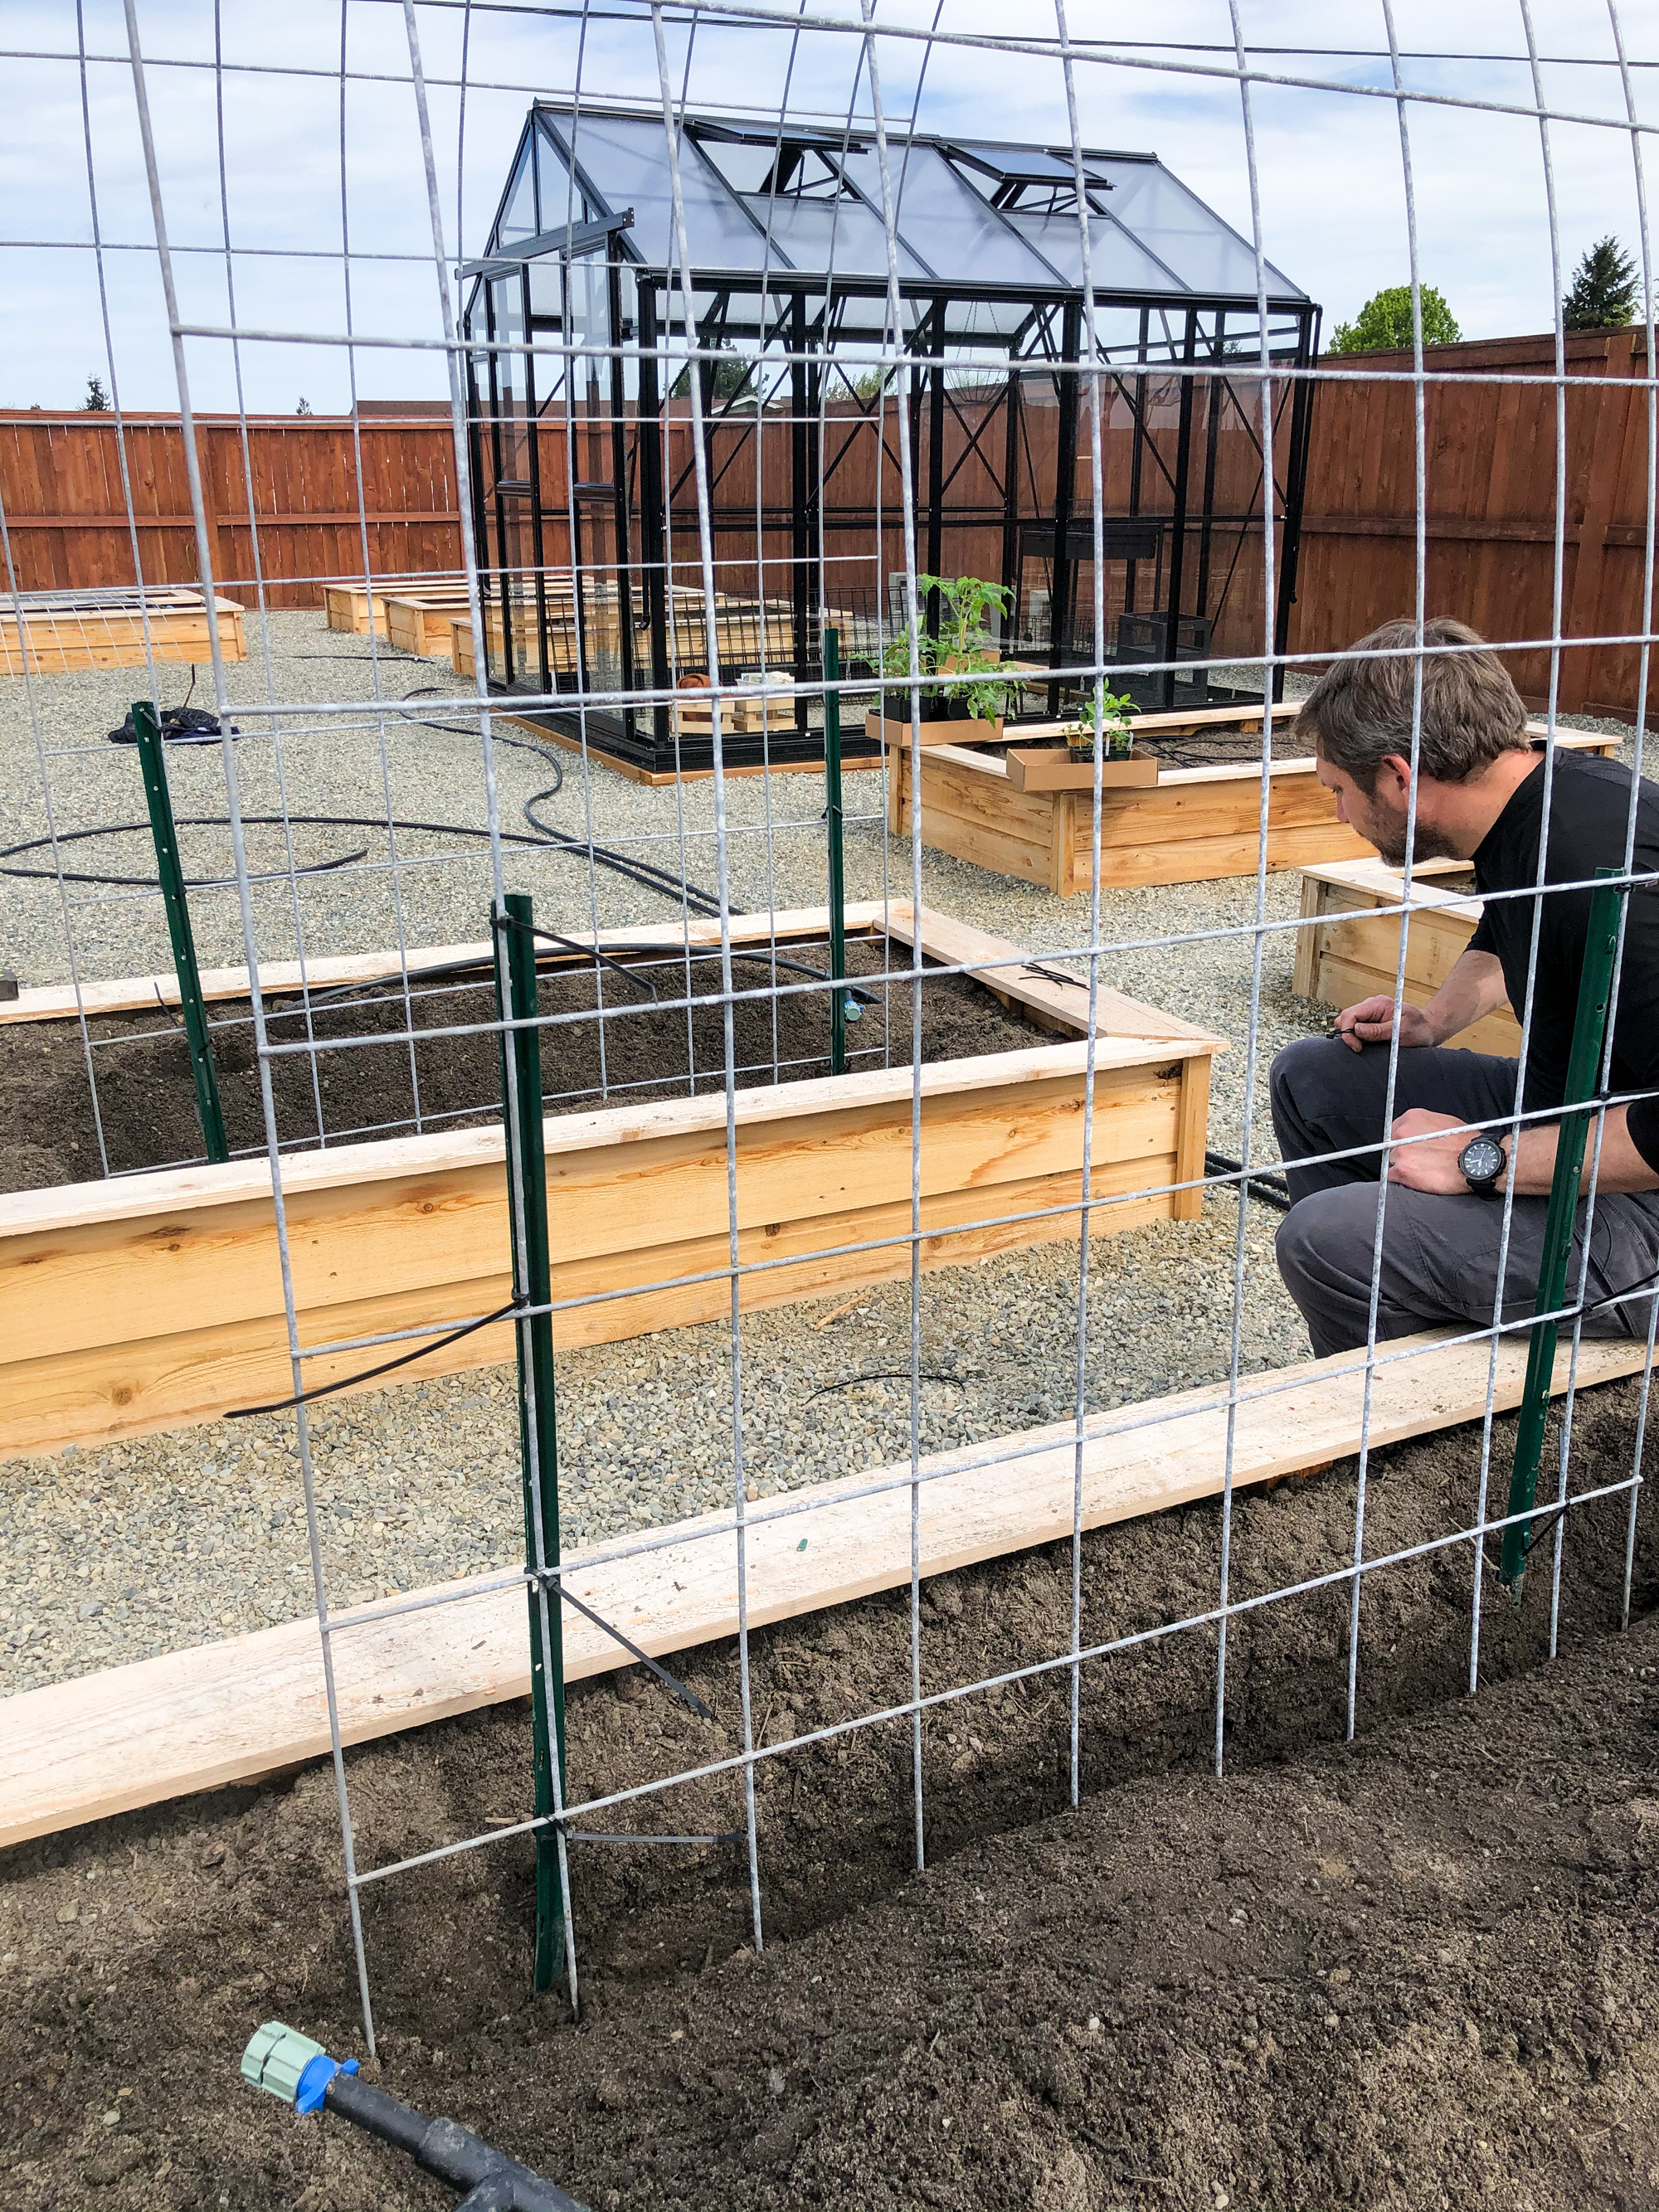
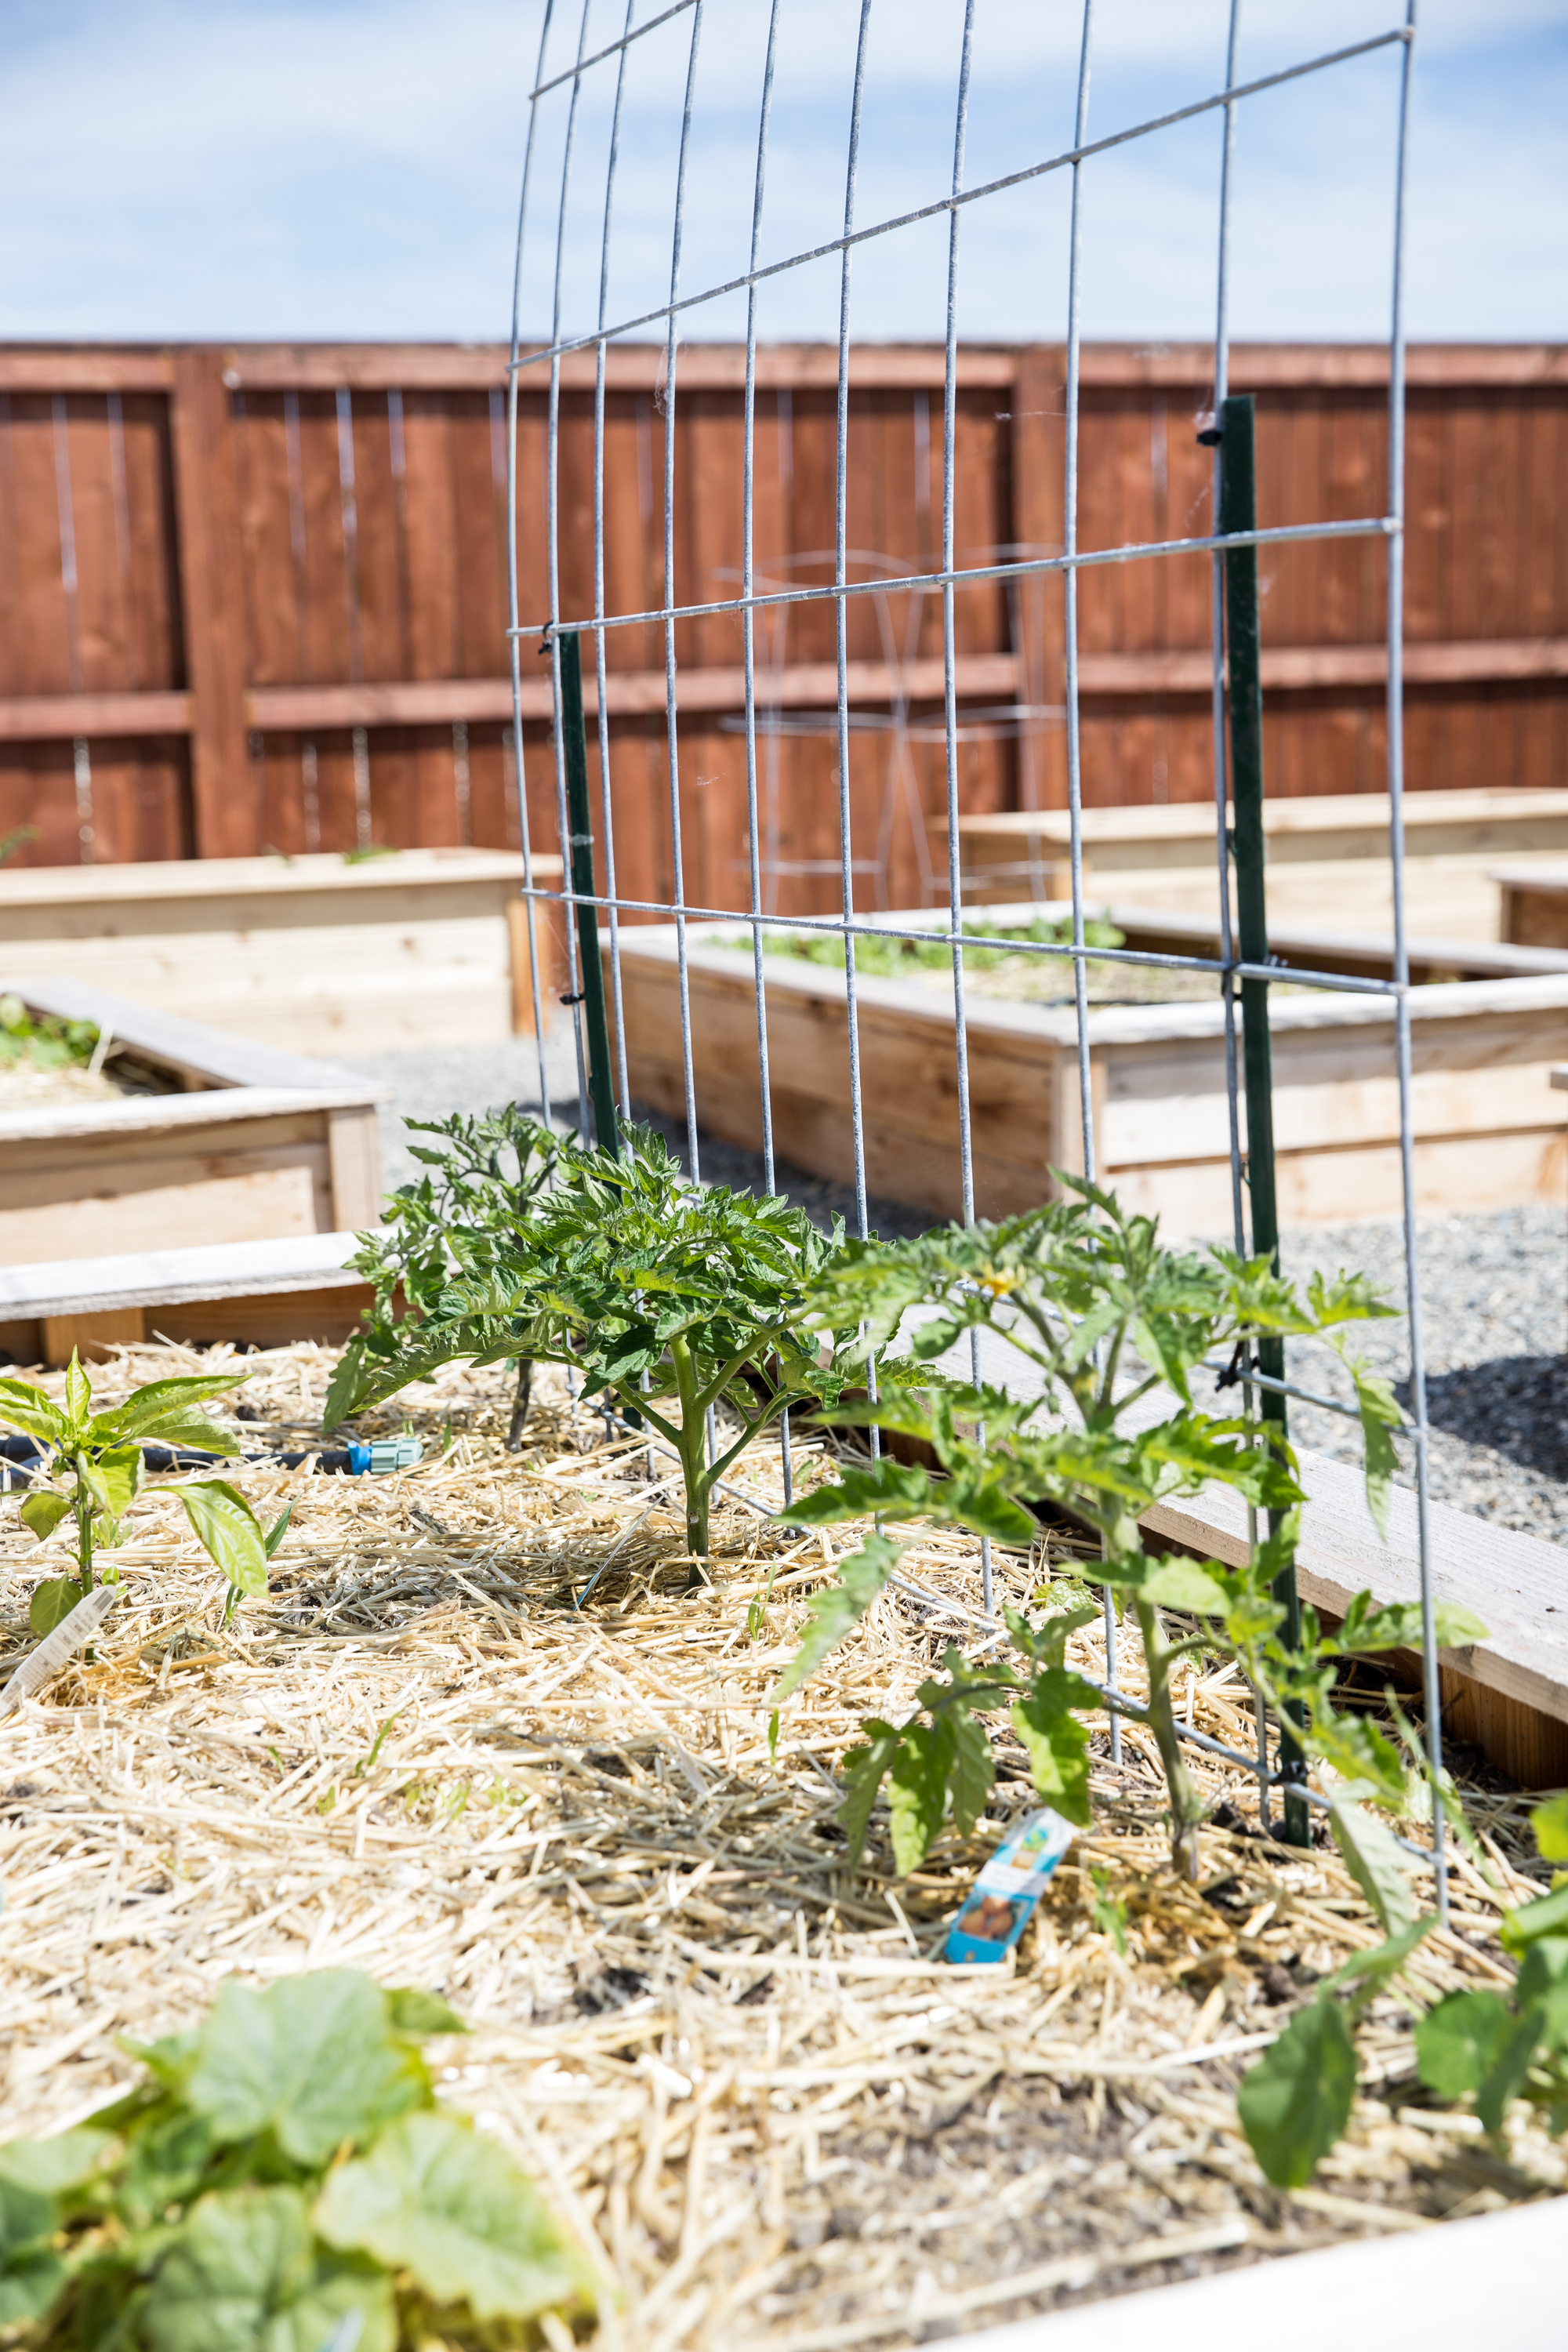
Step One: Install T posts.
Measure placement of the T posts and then pound them in with a post pounder at least a foot below ground level (not including soil in the raised beds).
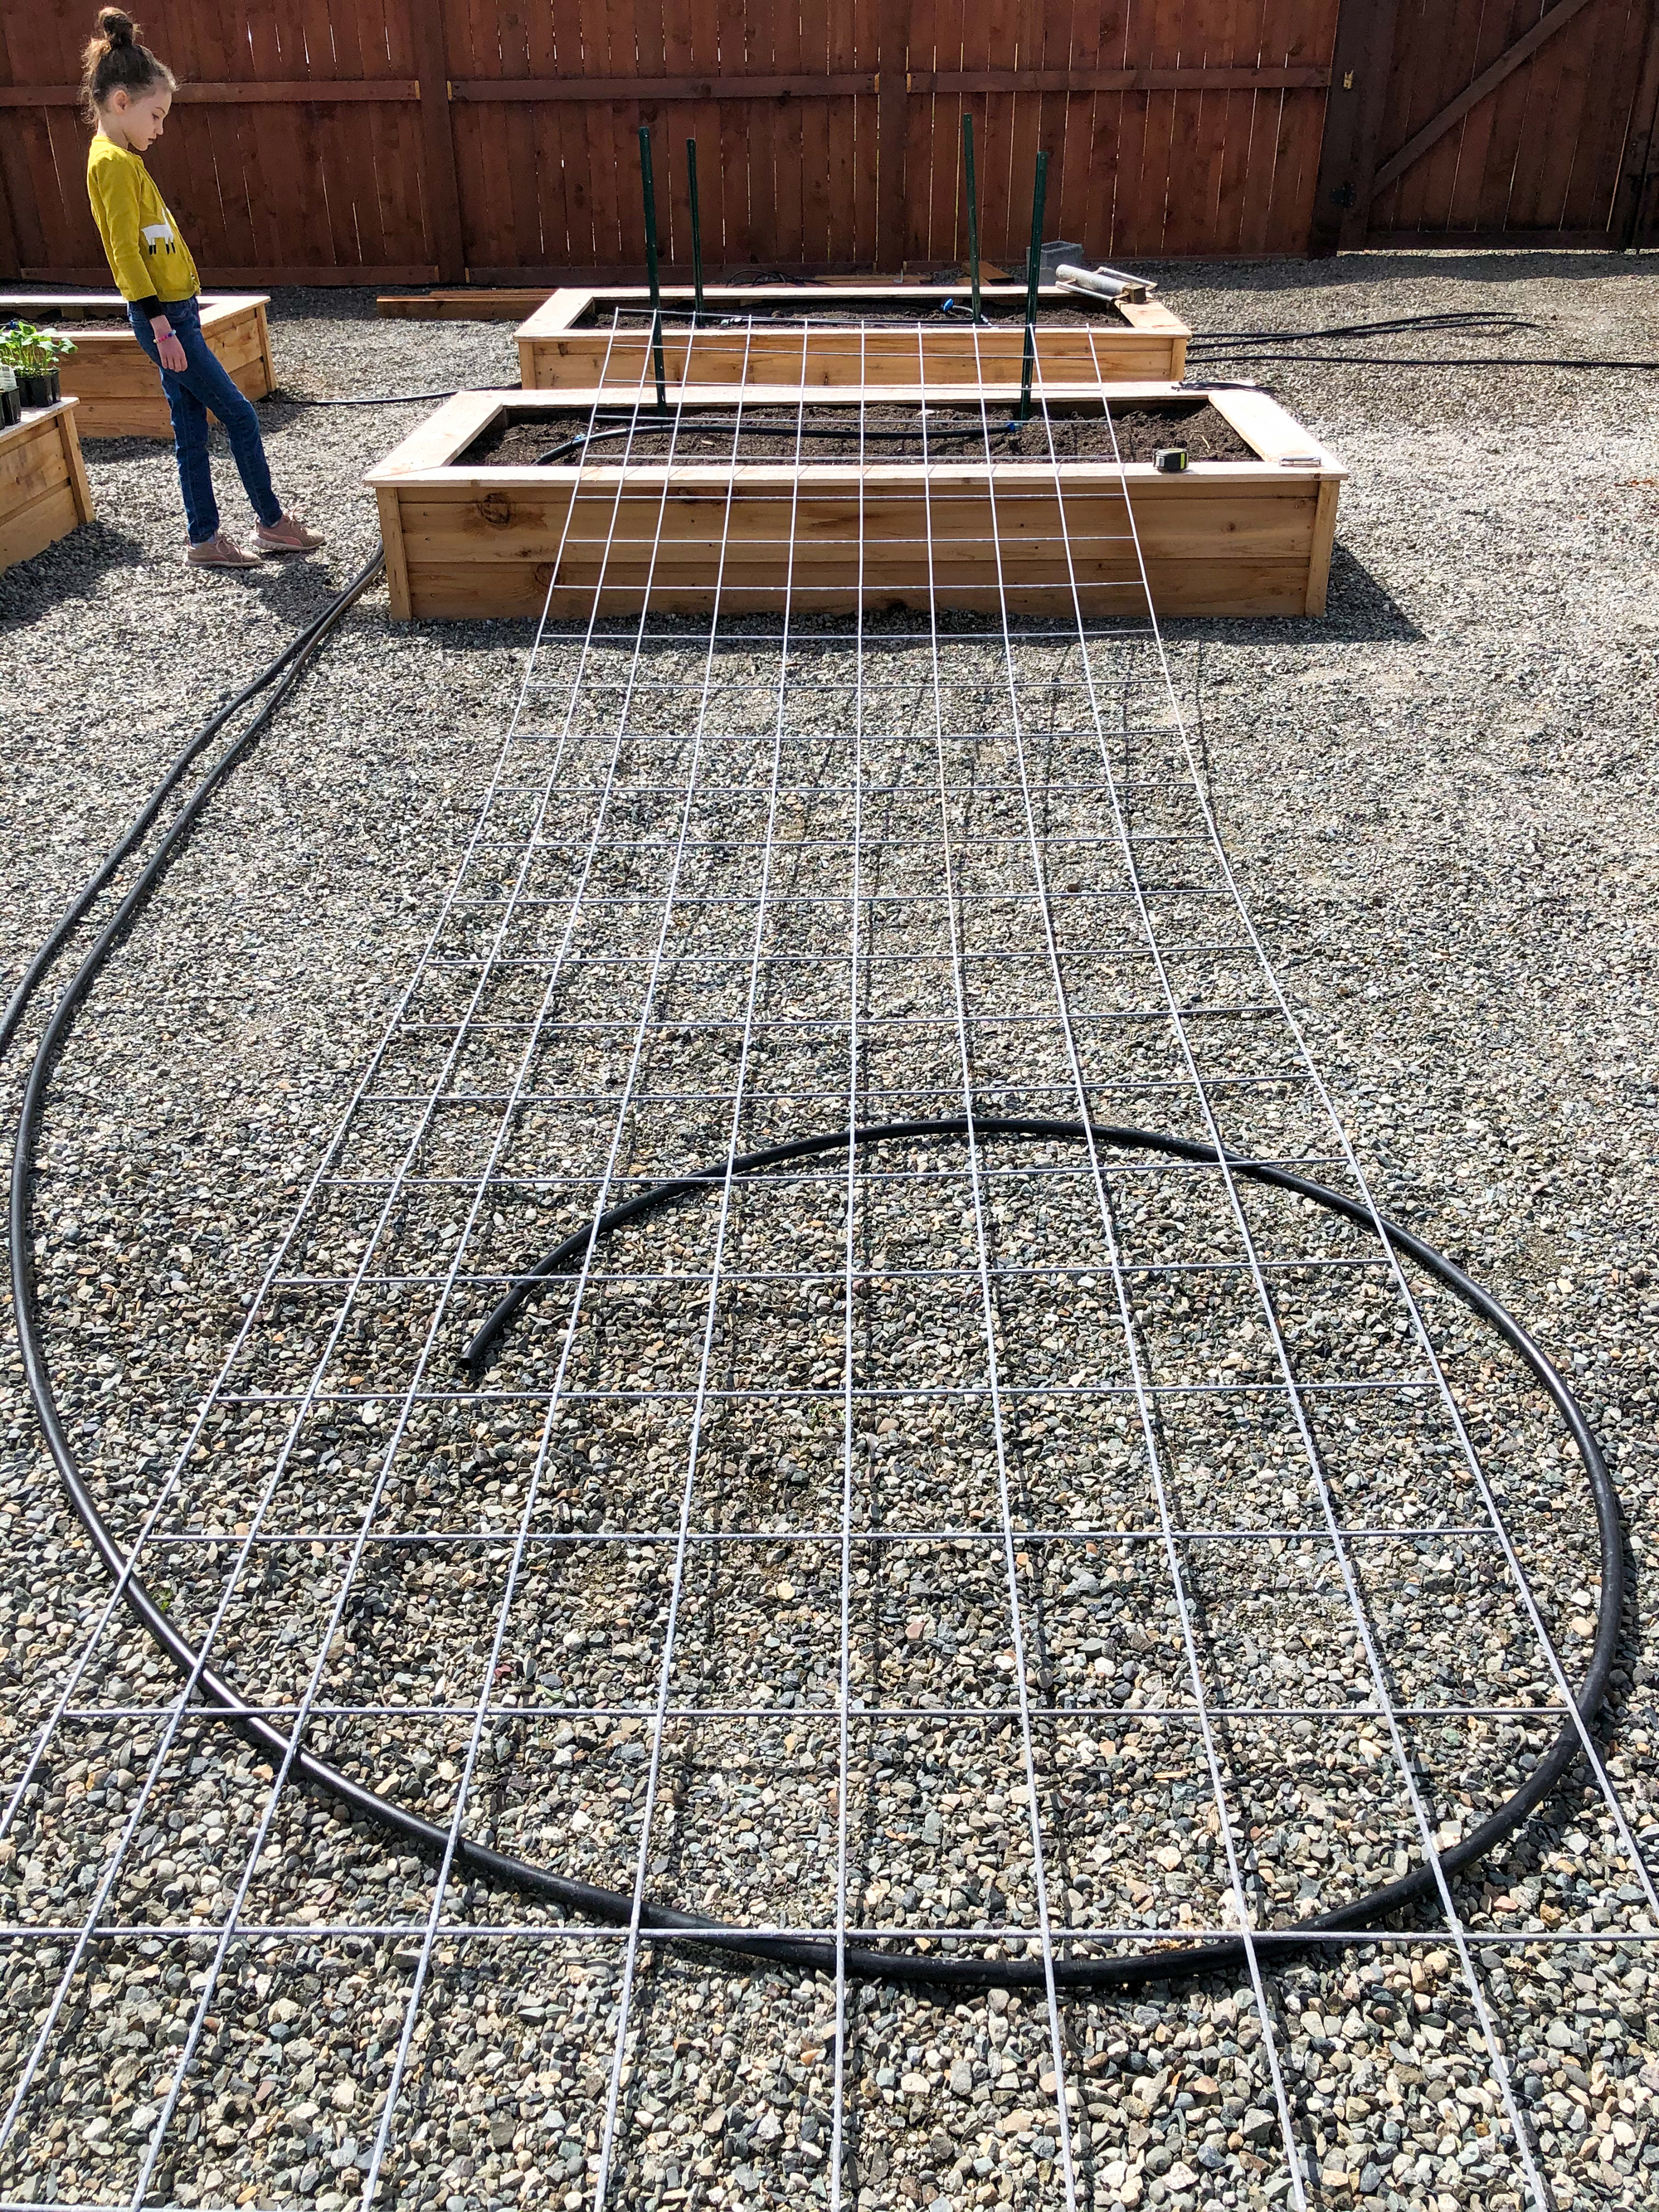
We found it helpful to lay the cattle panel on top of the raised beds to see where we wanted it. One of the long sides of the cattle panel has a narrower spacing between wires as well, so it helps have the panel in place to get the spacing accurate.
Step Two: Dig a trench in the raised beds.
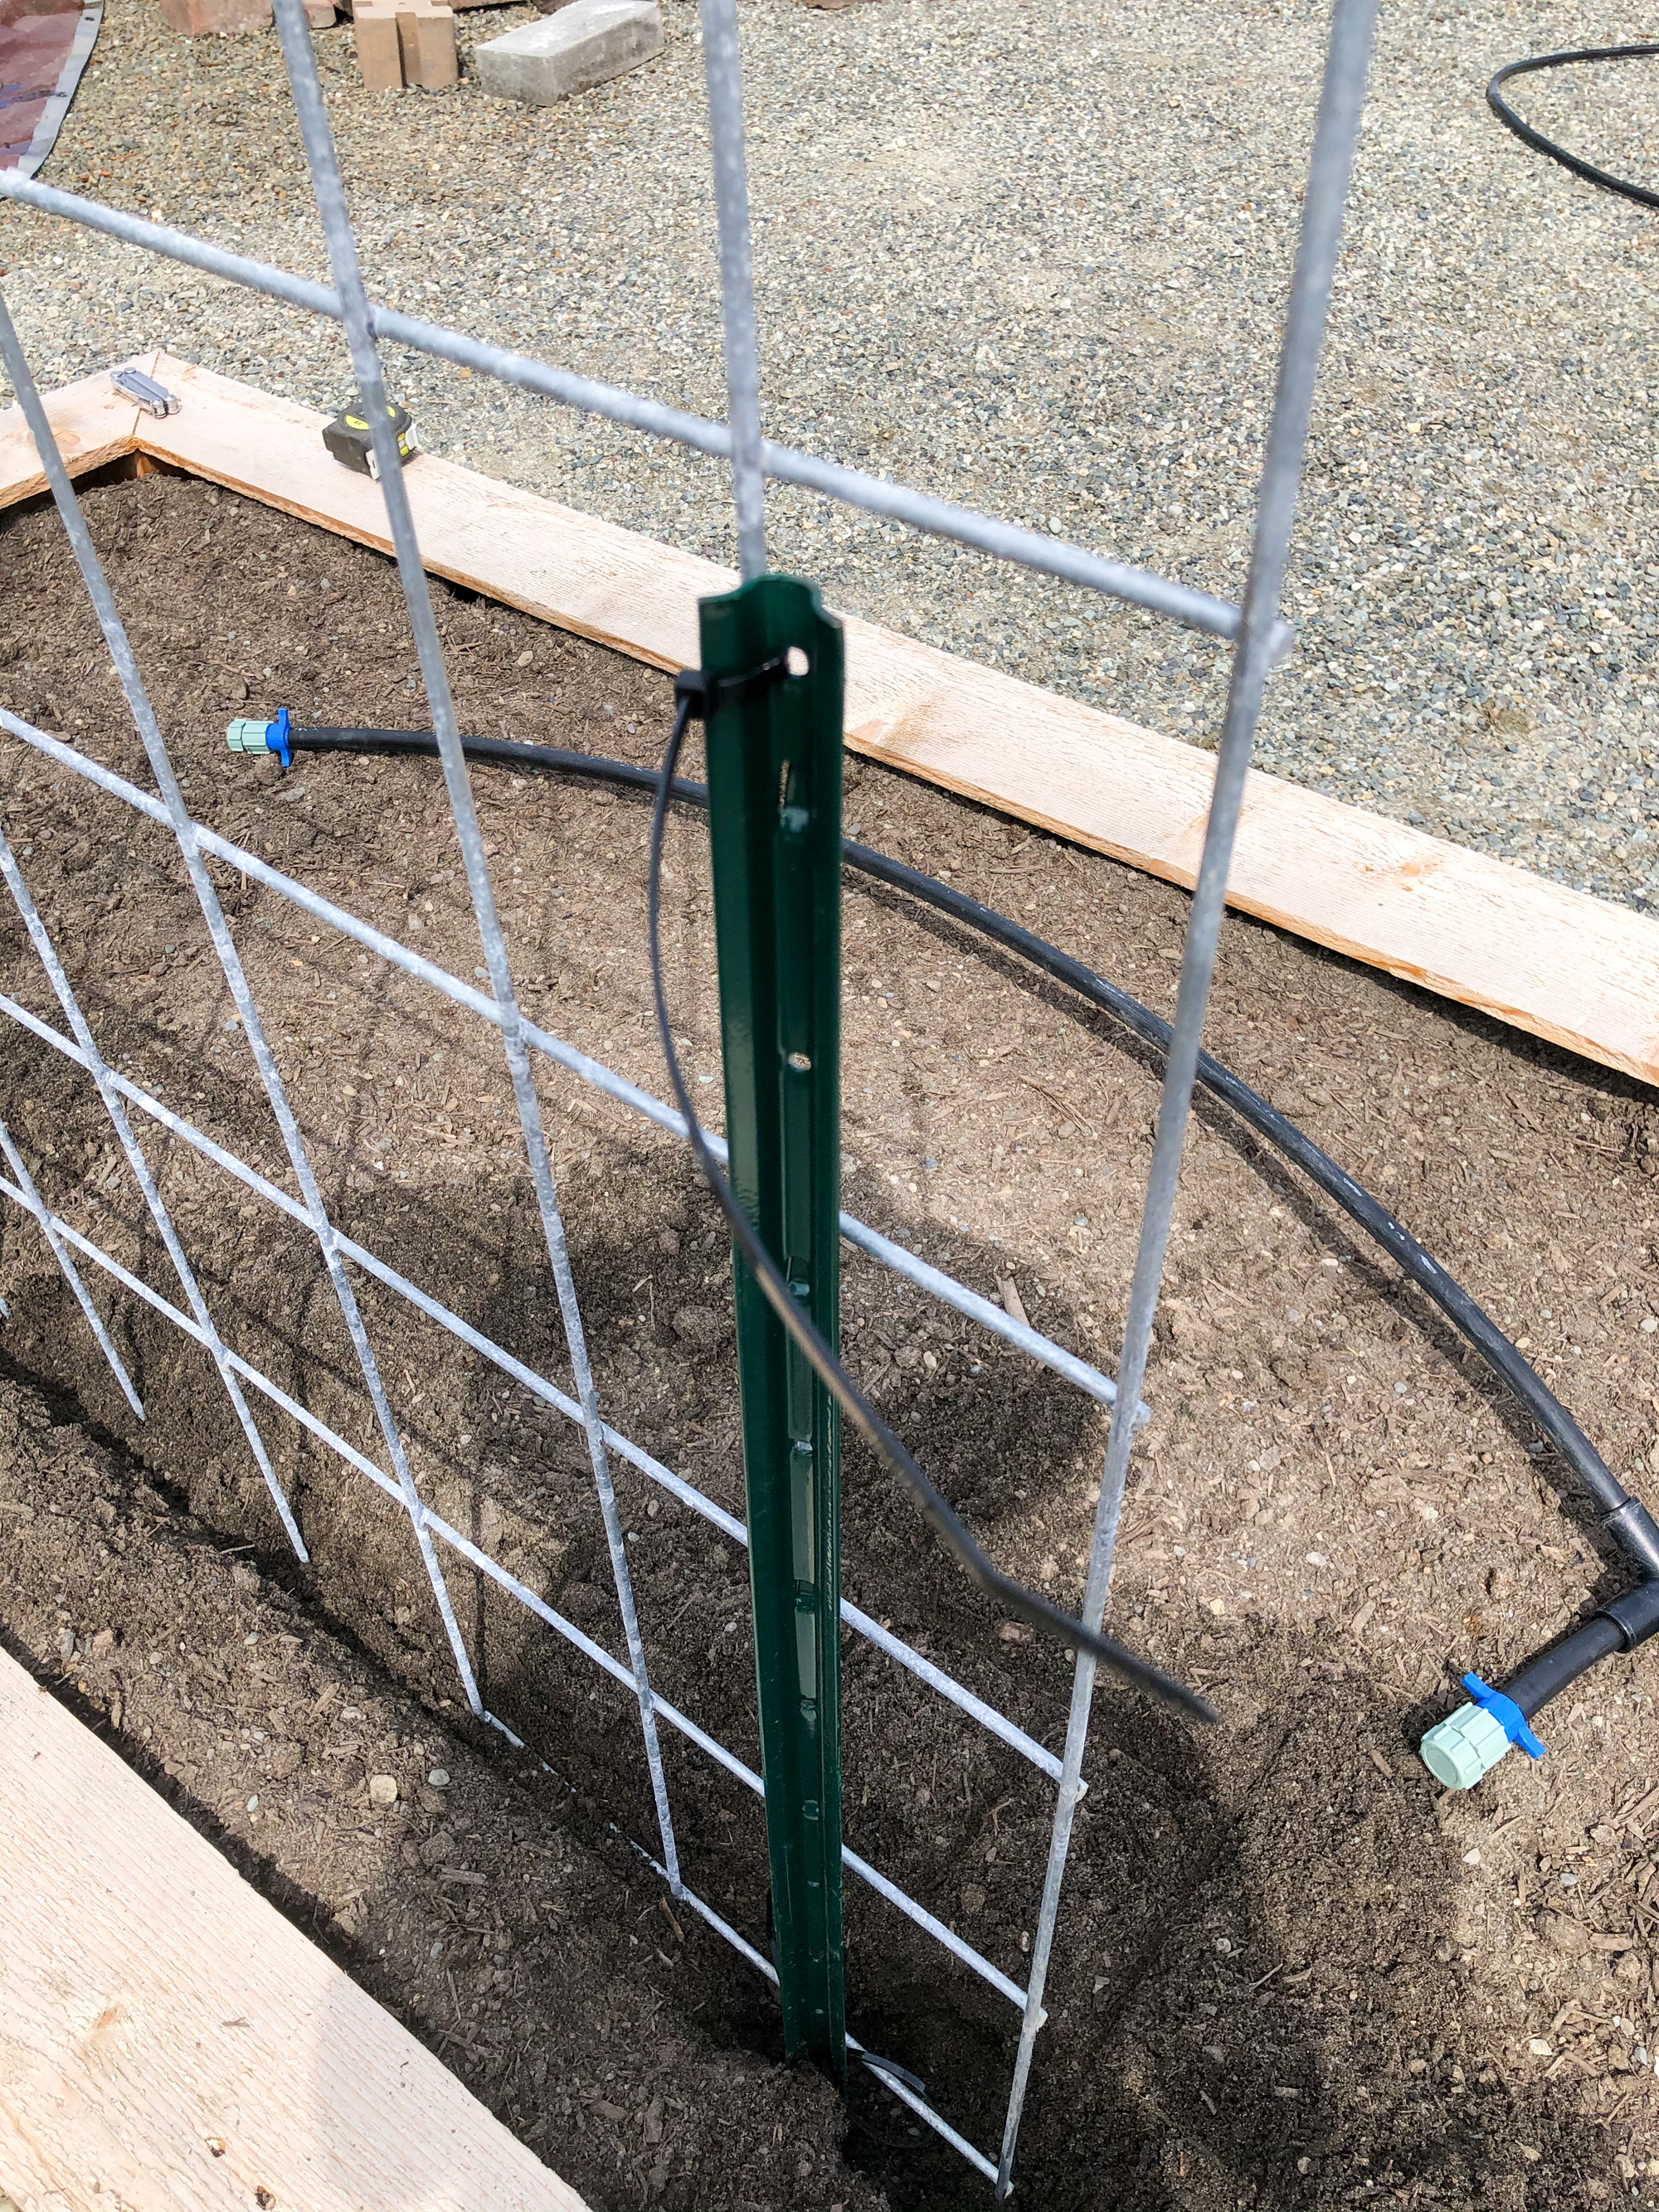
Dig a trench between each pair of T posts in each raised bed where you want the cattle panel to go.
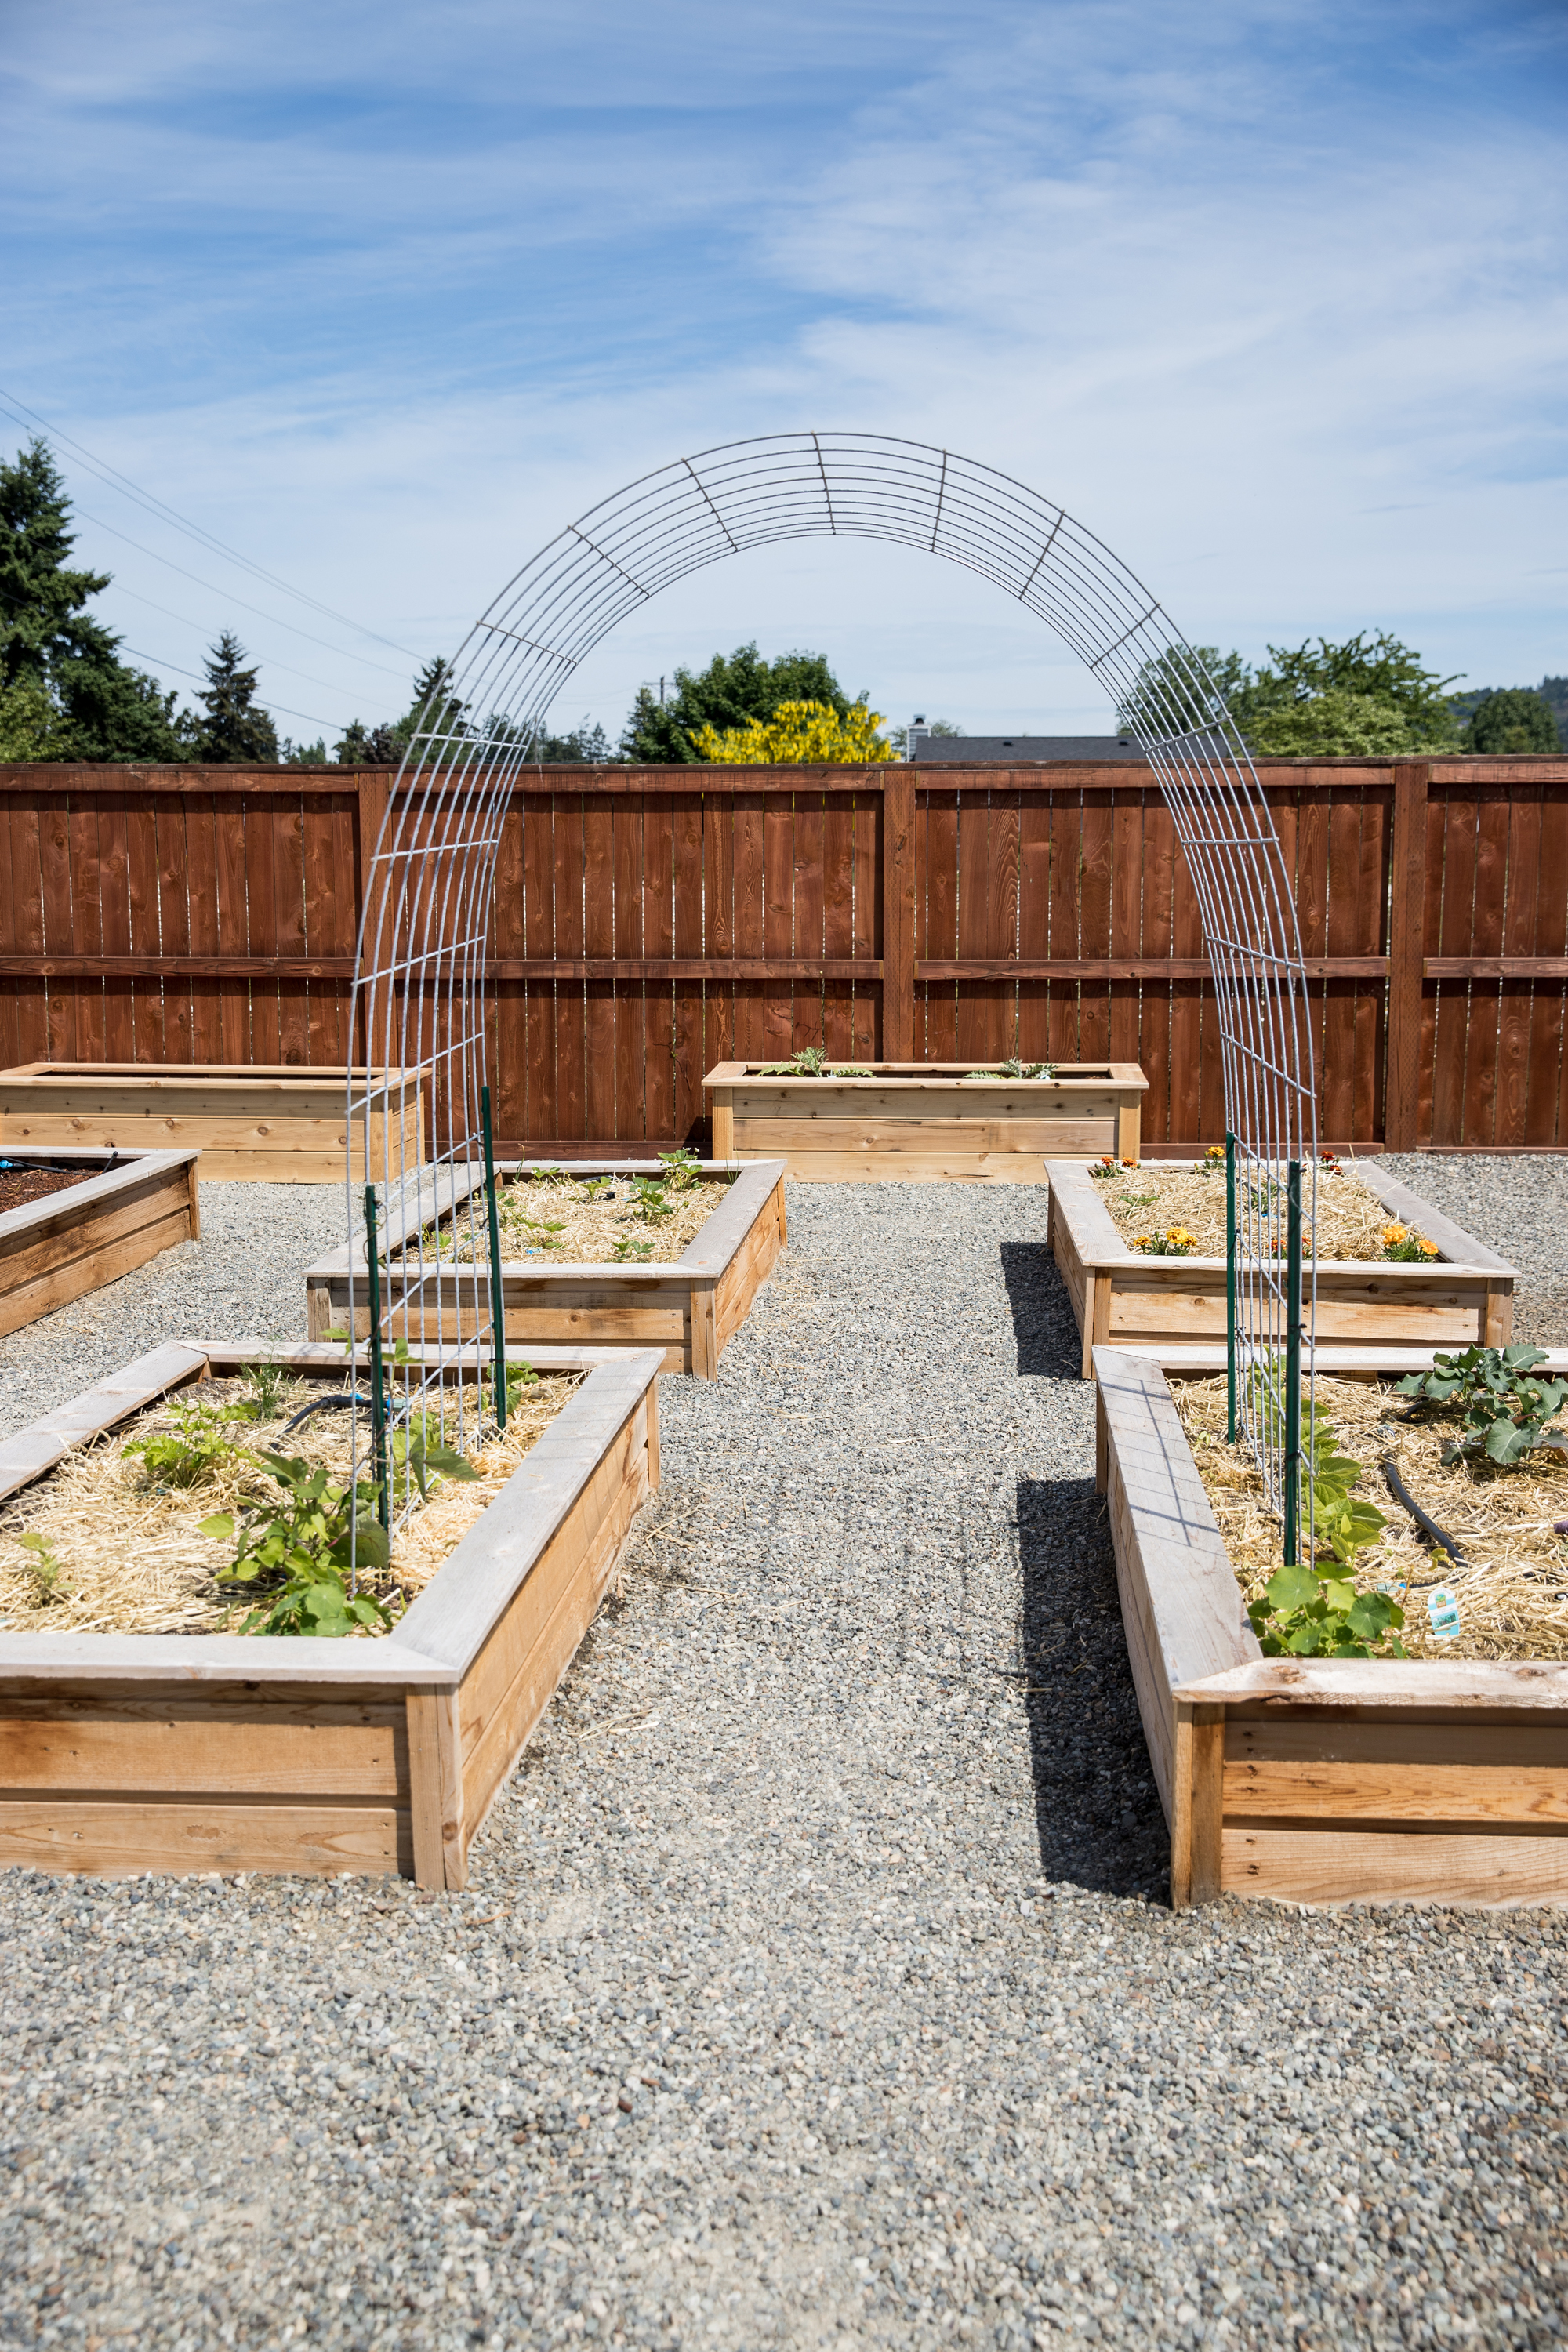
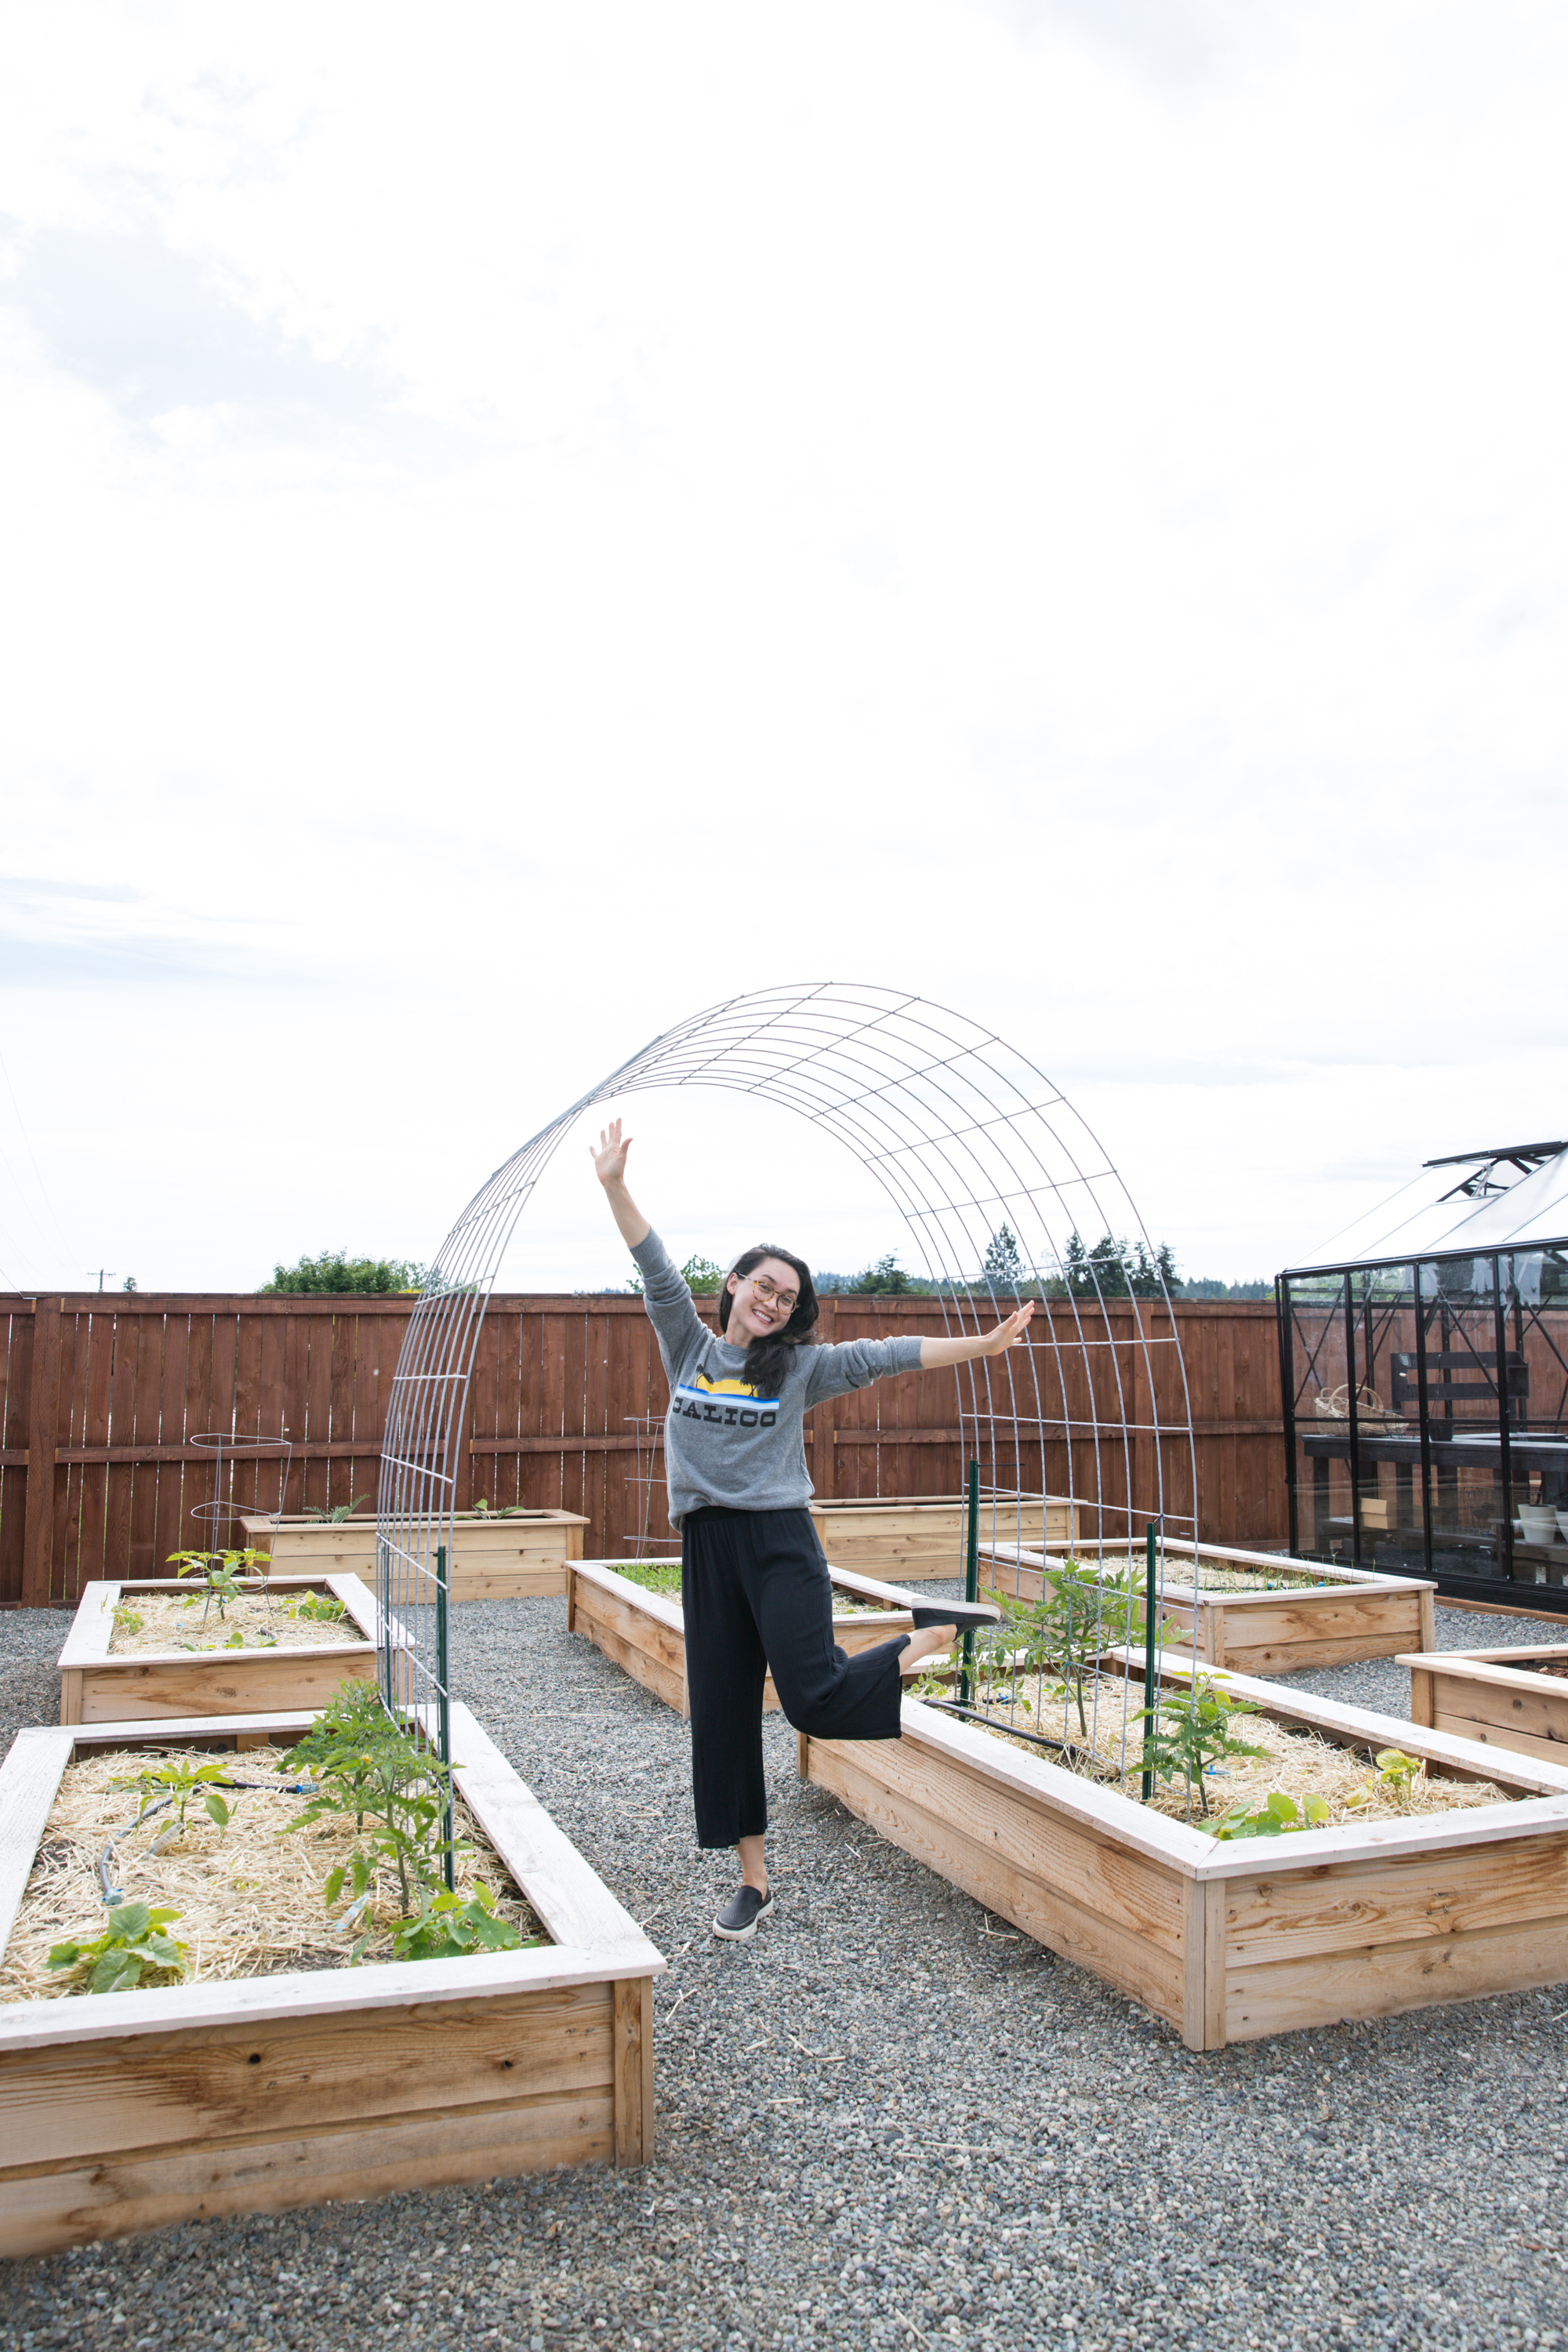
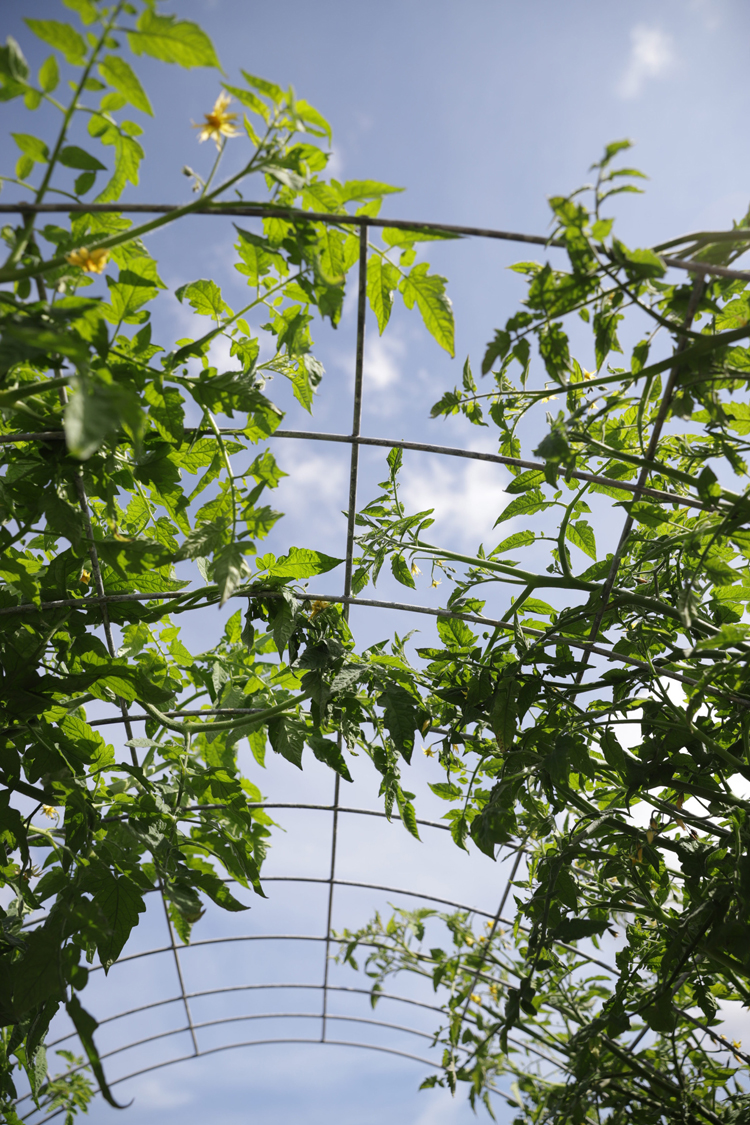
Step Three: Install cattle panel.
Place one end of the cattle panel in one trench and secure with some zip ties while another person holds up the other end of the panel. This project definitely takes at least two people.
Then bend the cattle panel into the other trench and zip tie it in place.
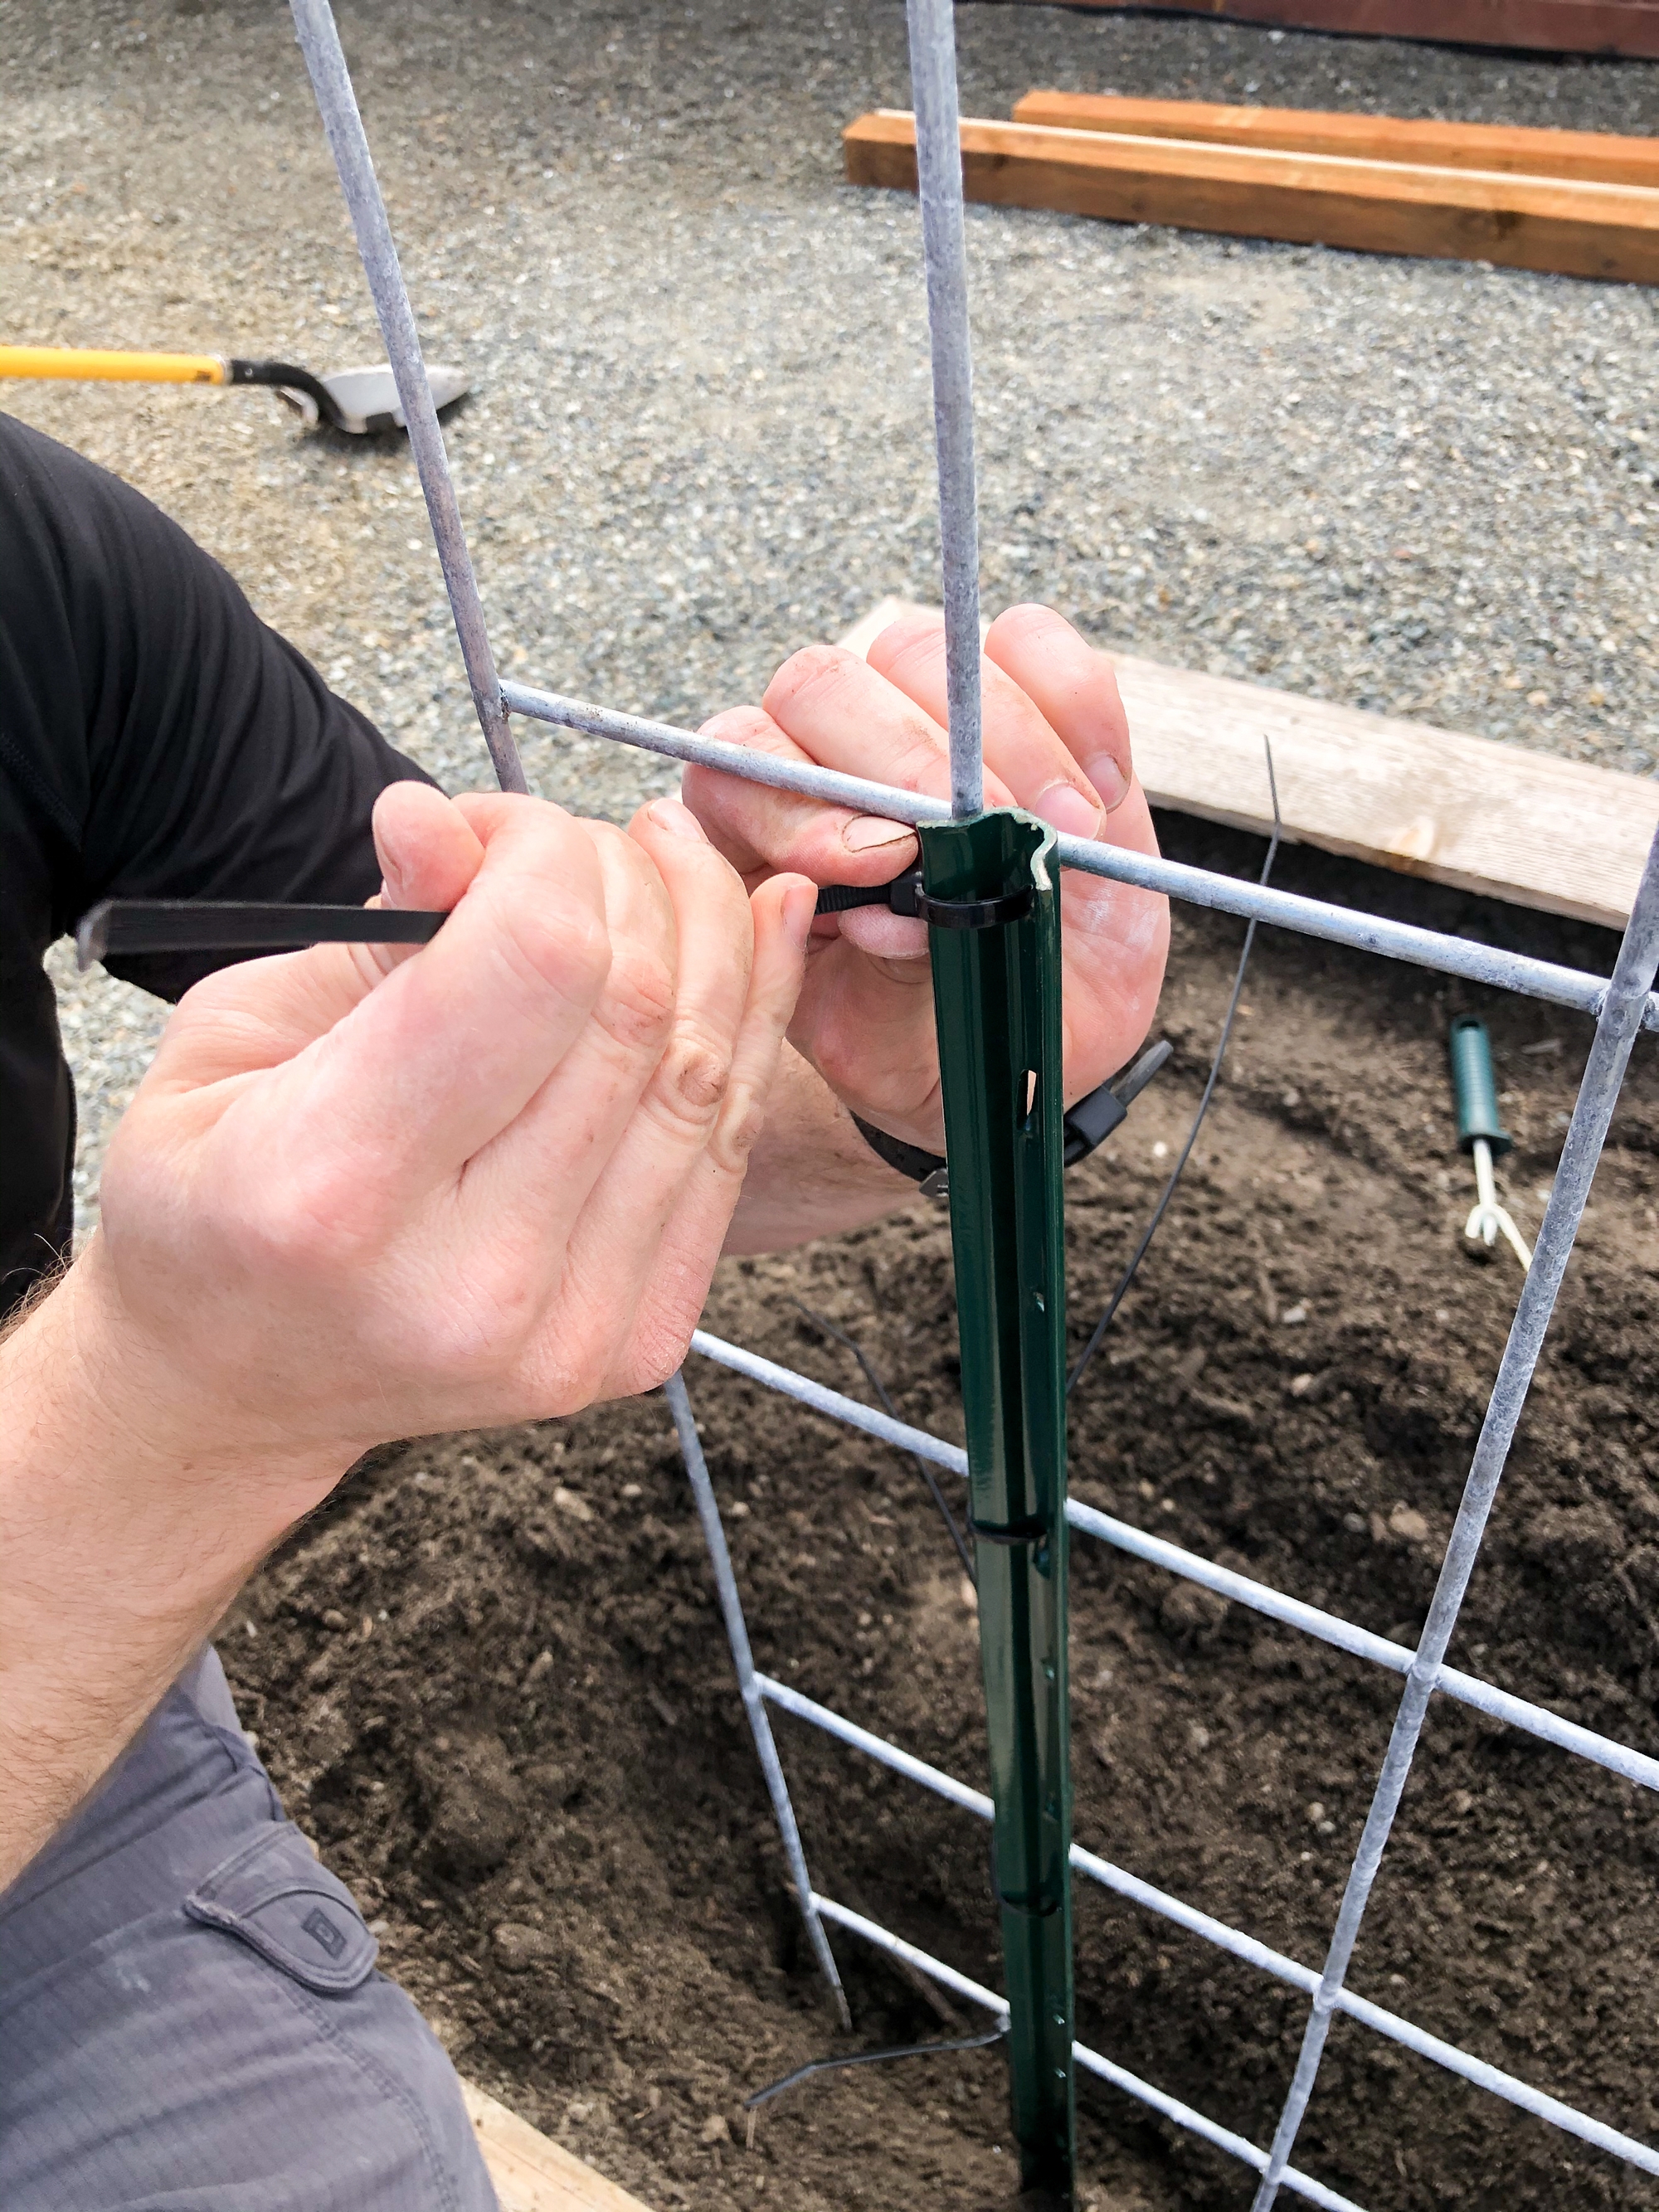
We secured each T post with at least four zip ties, spaced evenly from as close to the ground as possible to the top of the T post. We then cut the excess ends off and sanded them down so they wouldn’t be so sharp (well most of them…we still haven’t gotten to all of them yet ha!).
Then fill the trench with soil, compressing it as you go, and bury the bottom of the cattle panel to the level of the raised bed.
Step Four: Plant climbers.
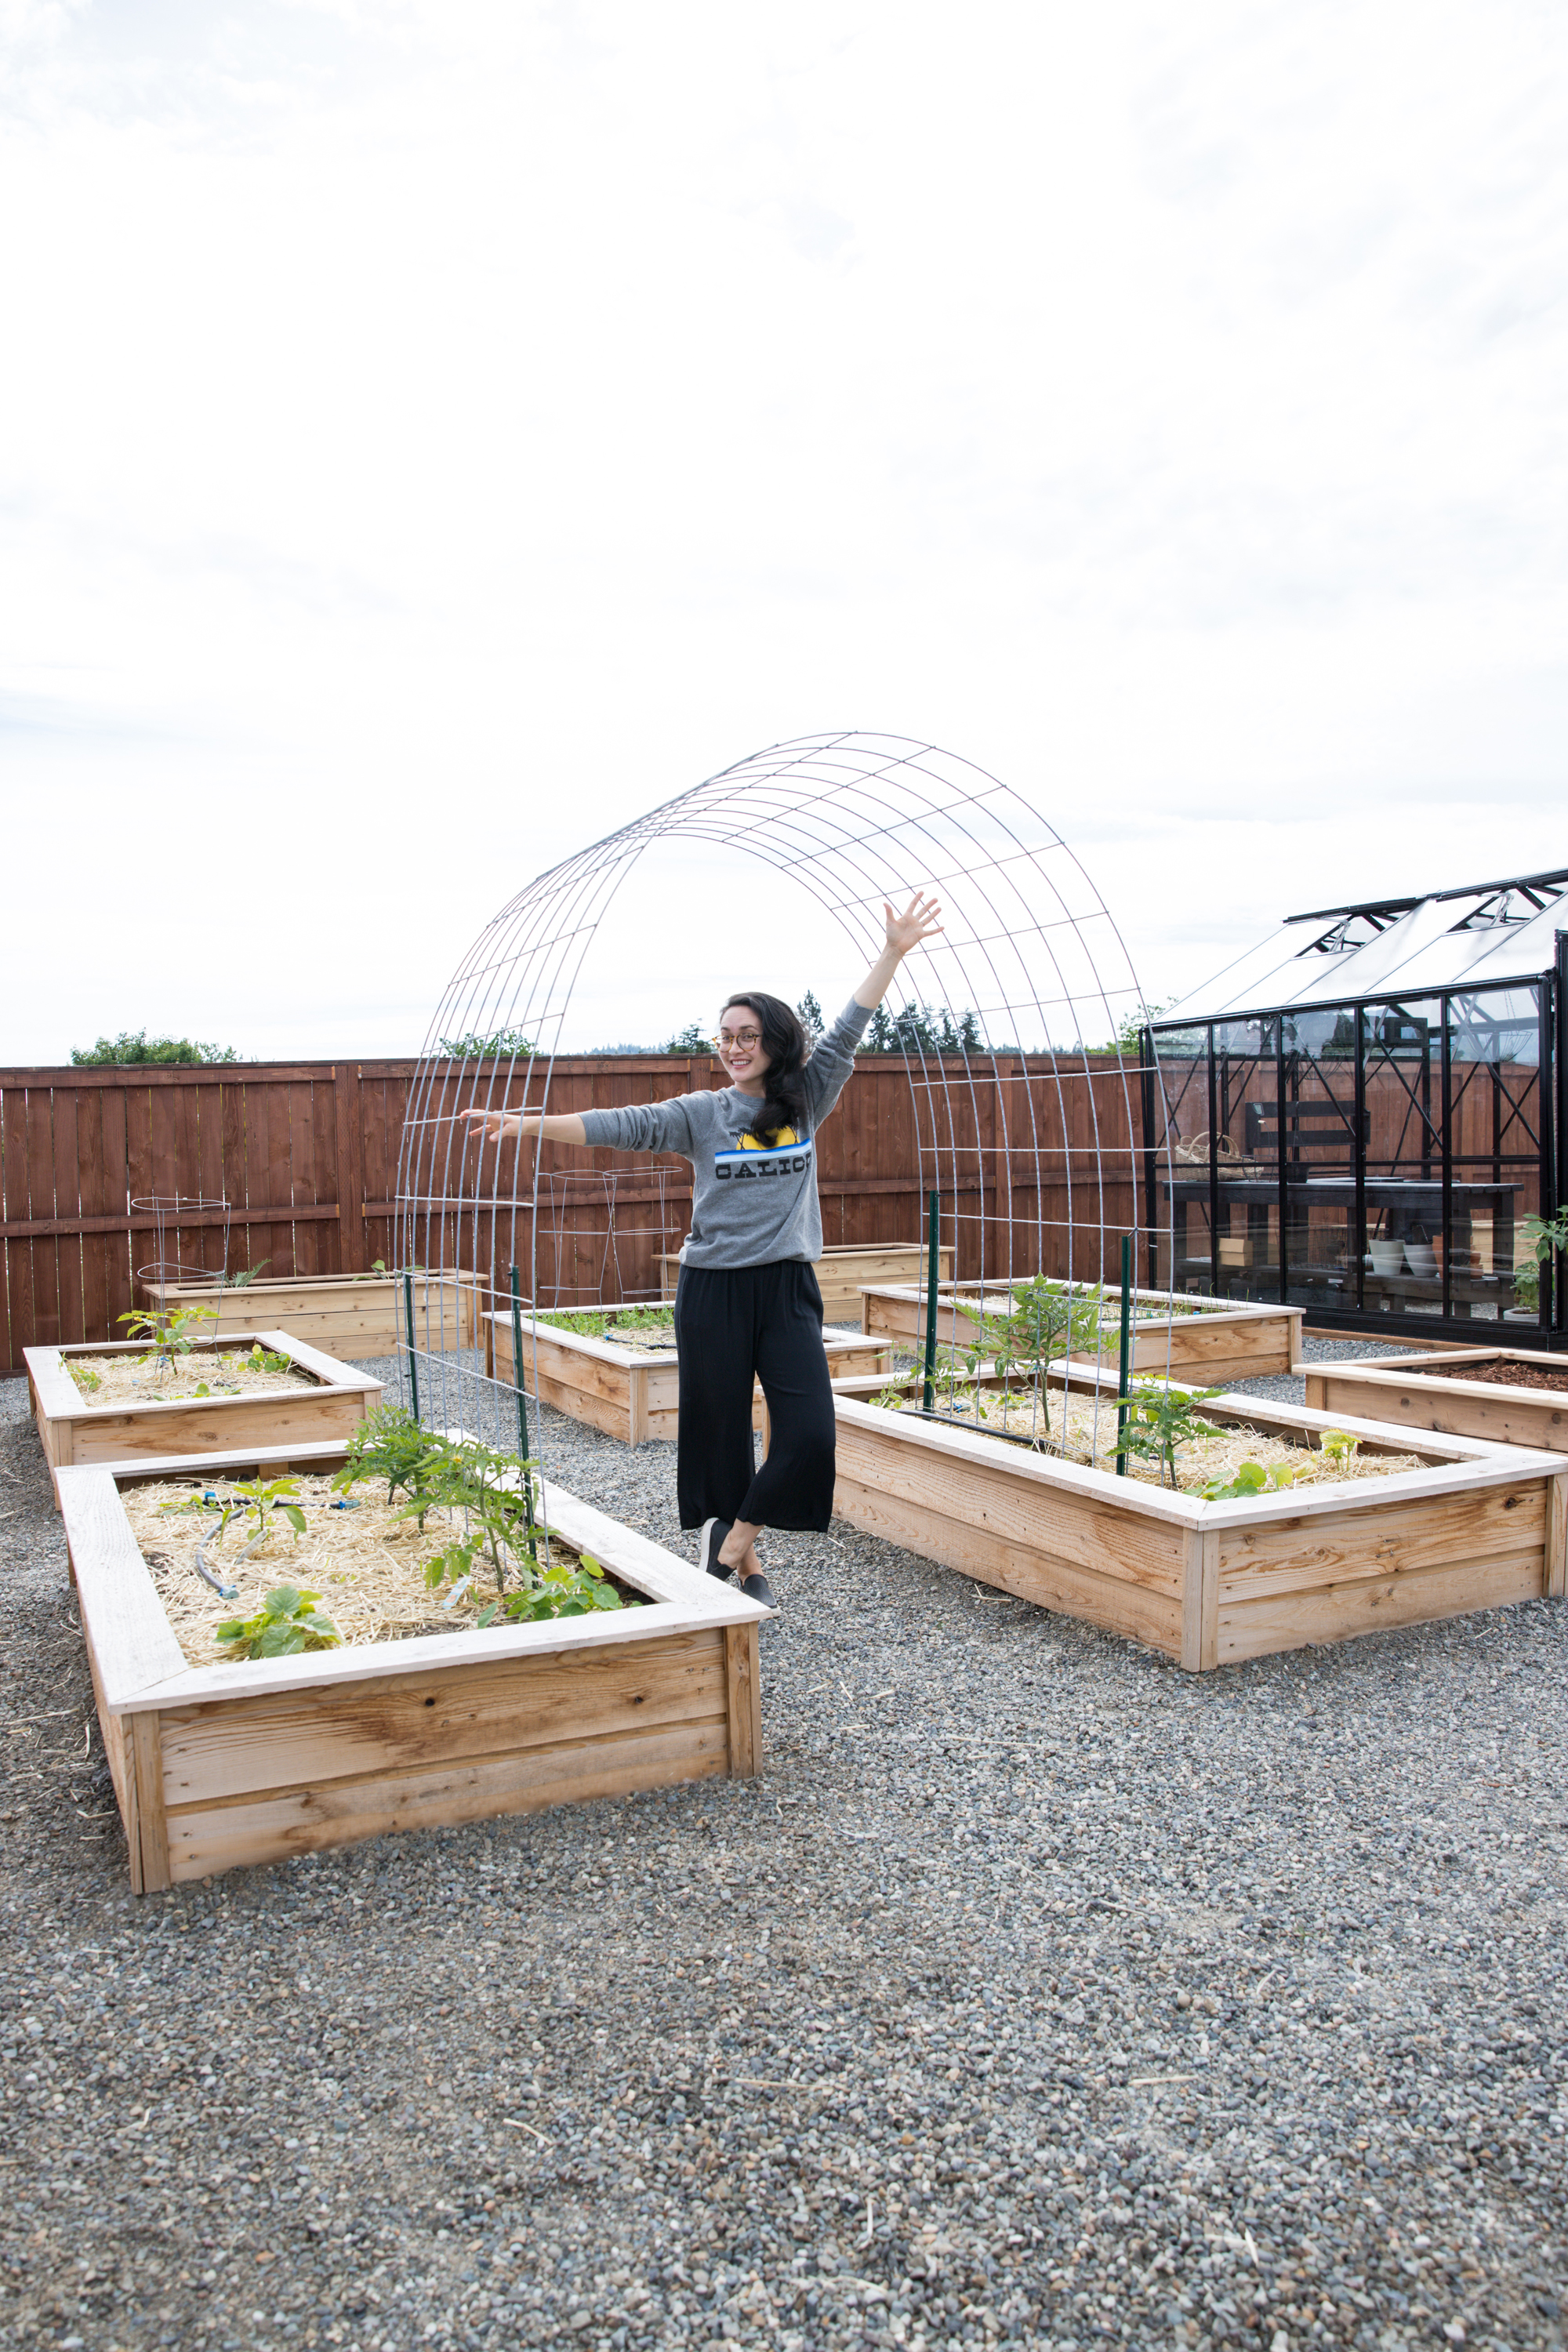
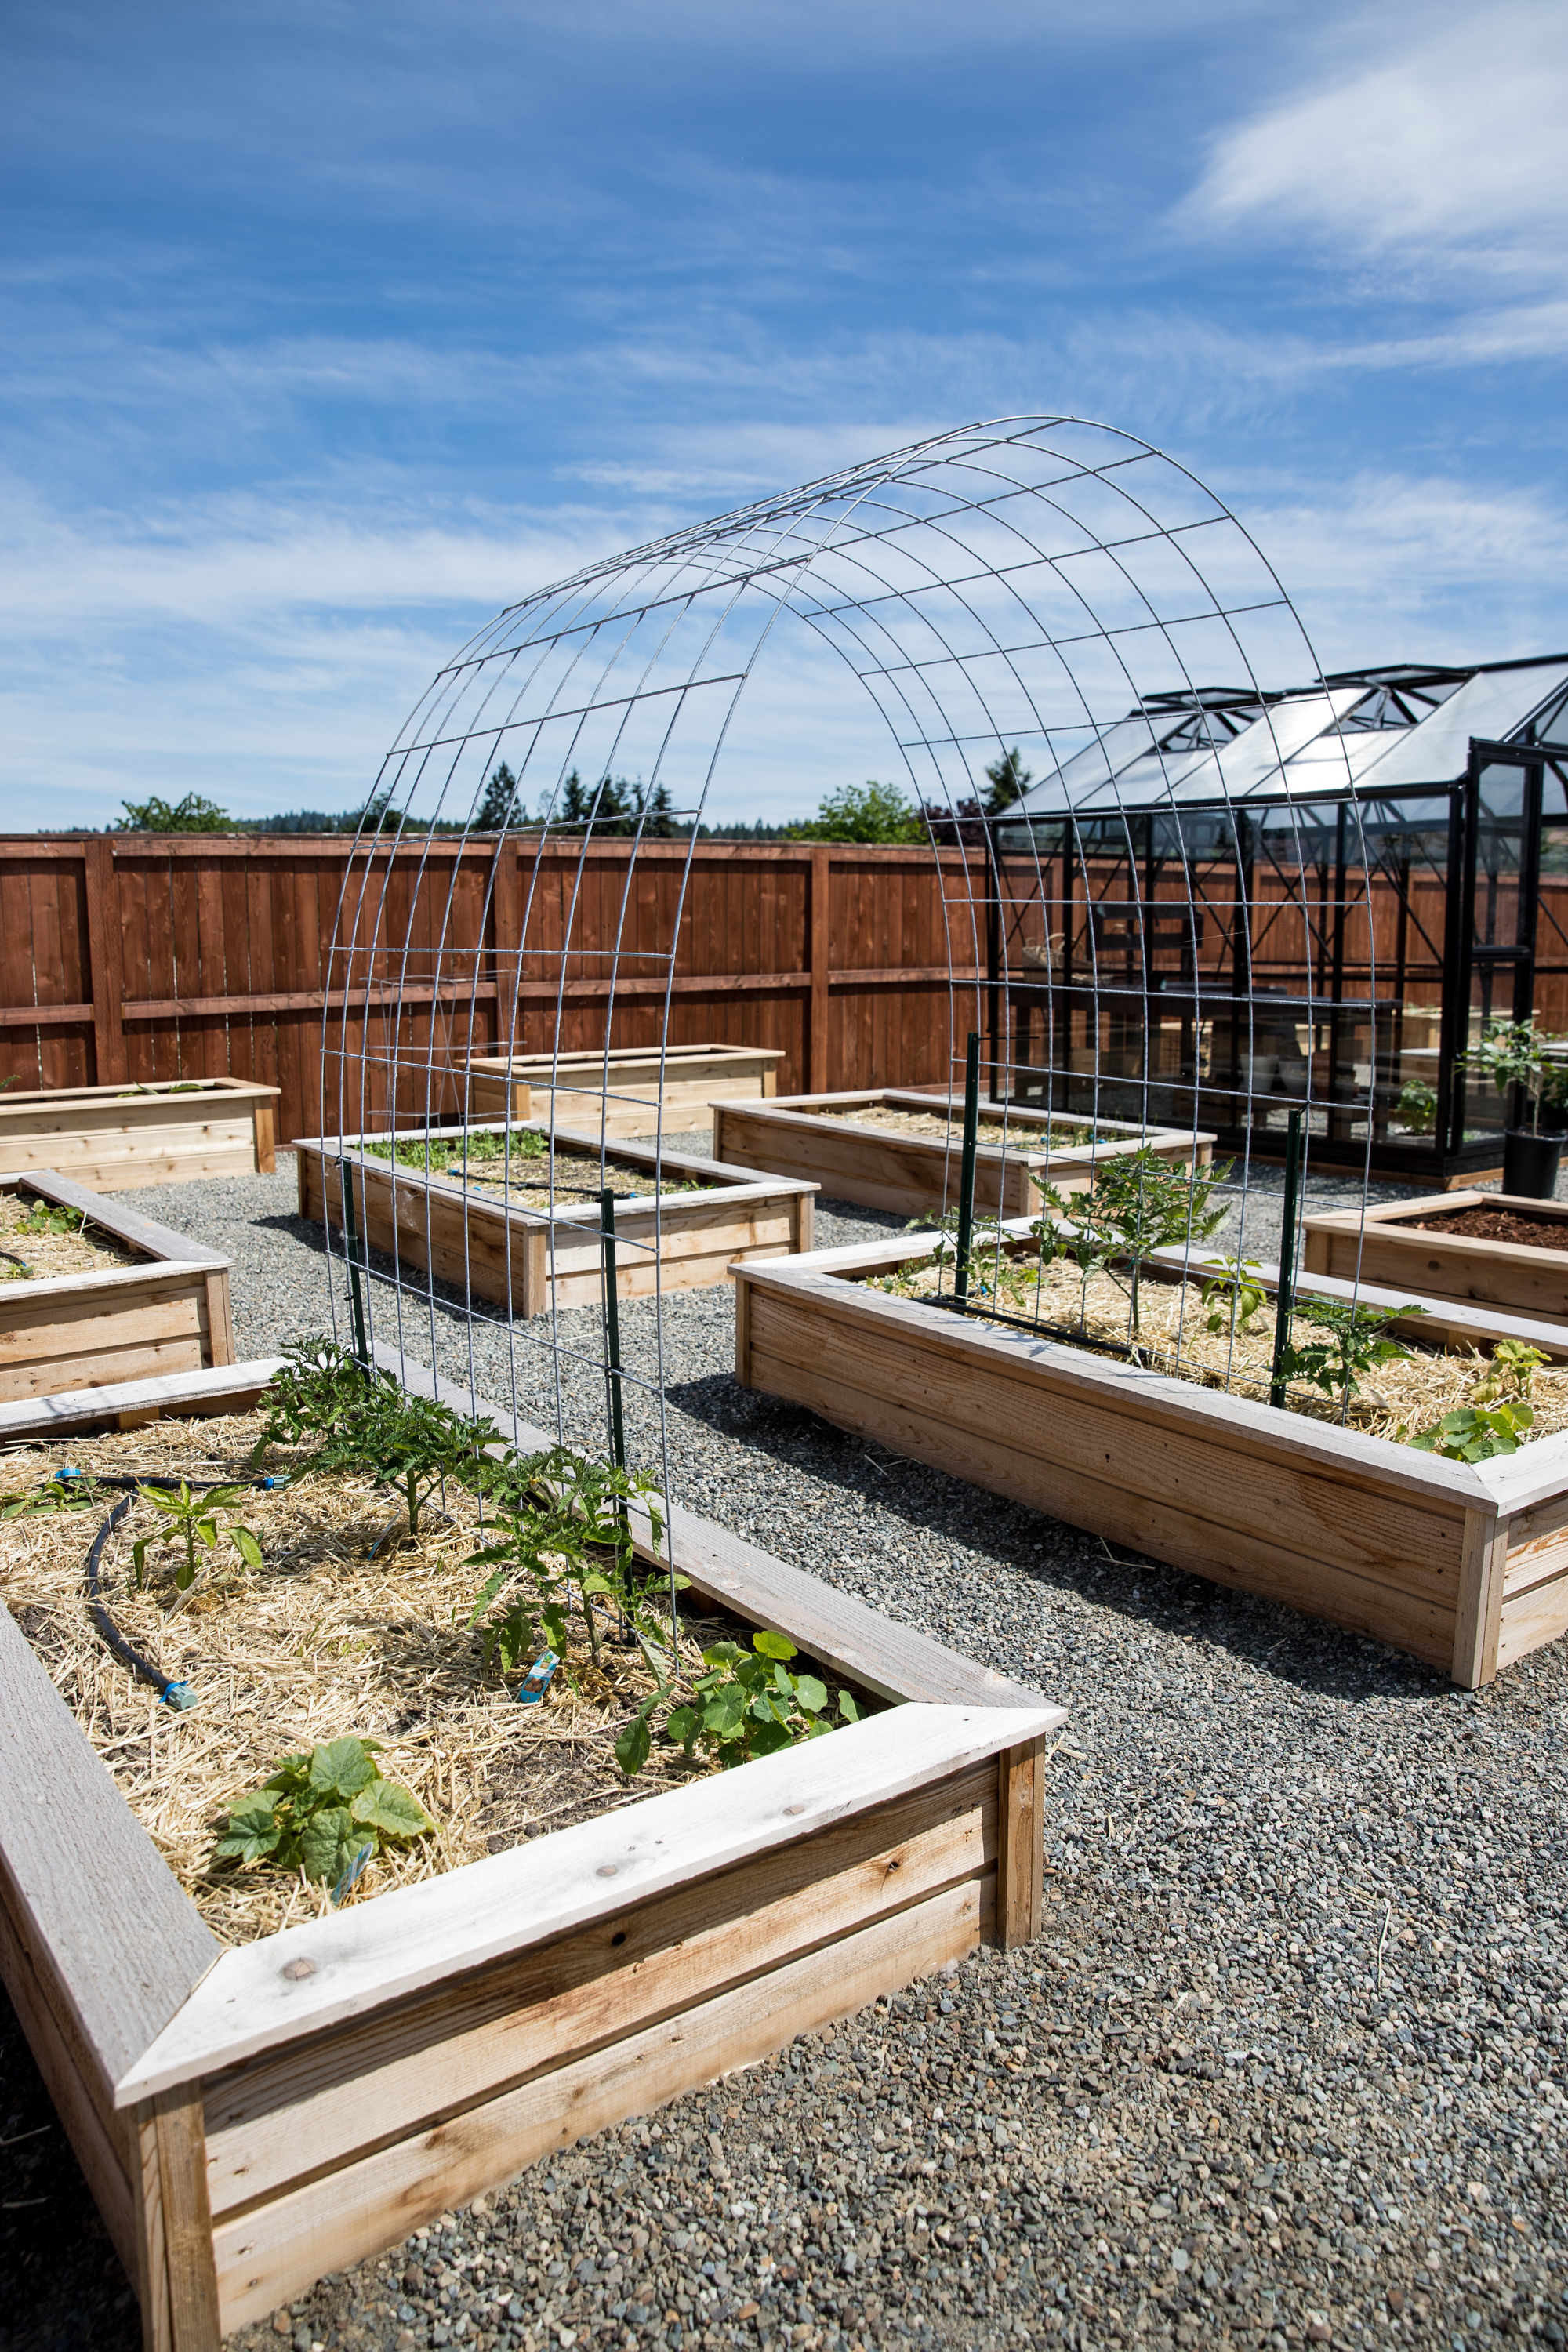
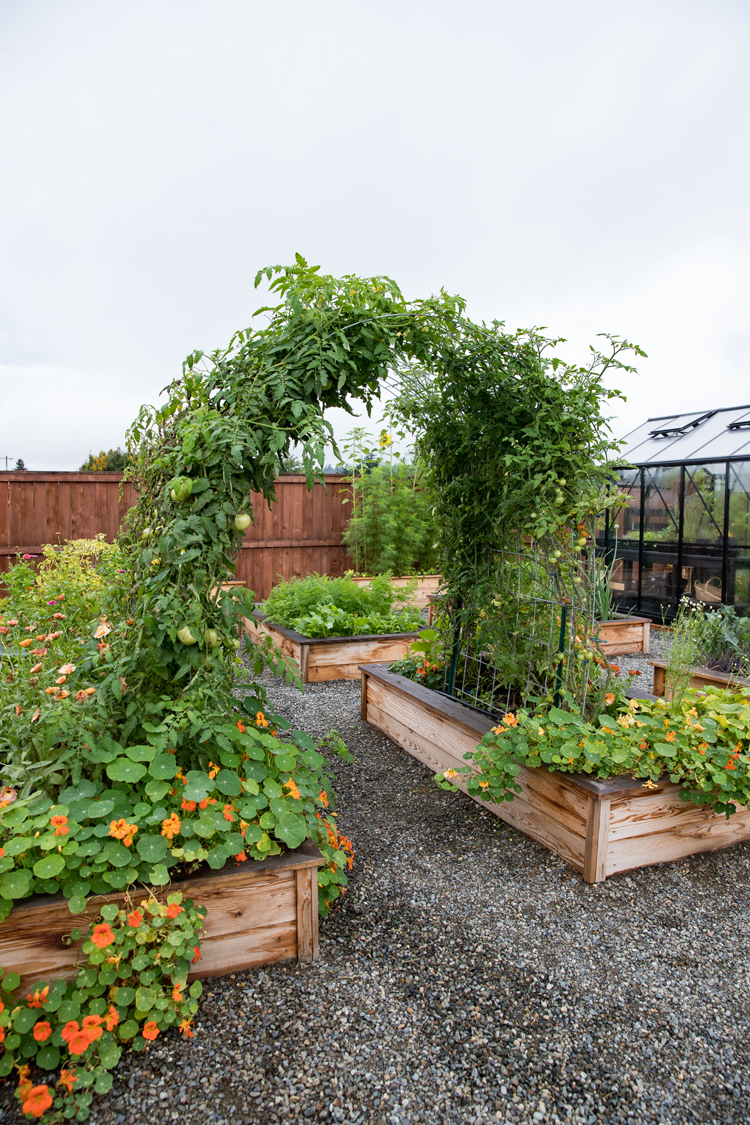
We built two arches.
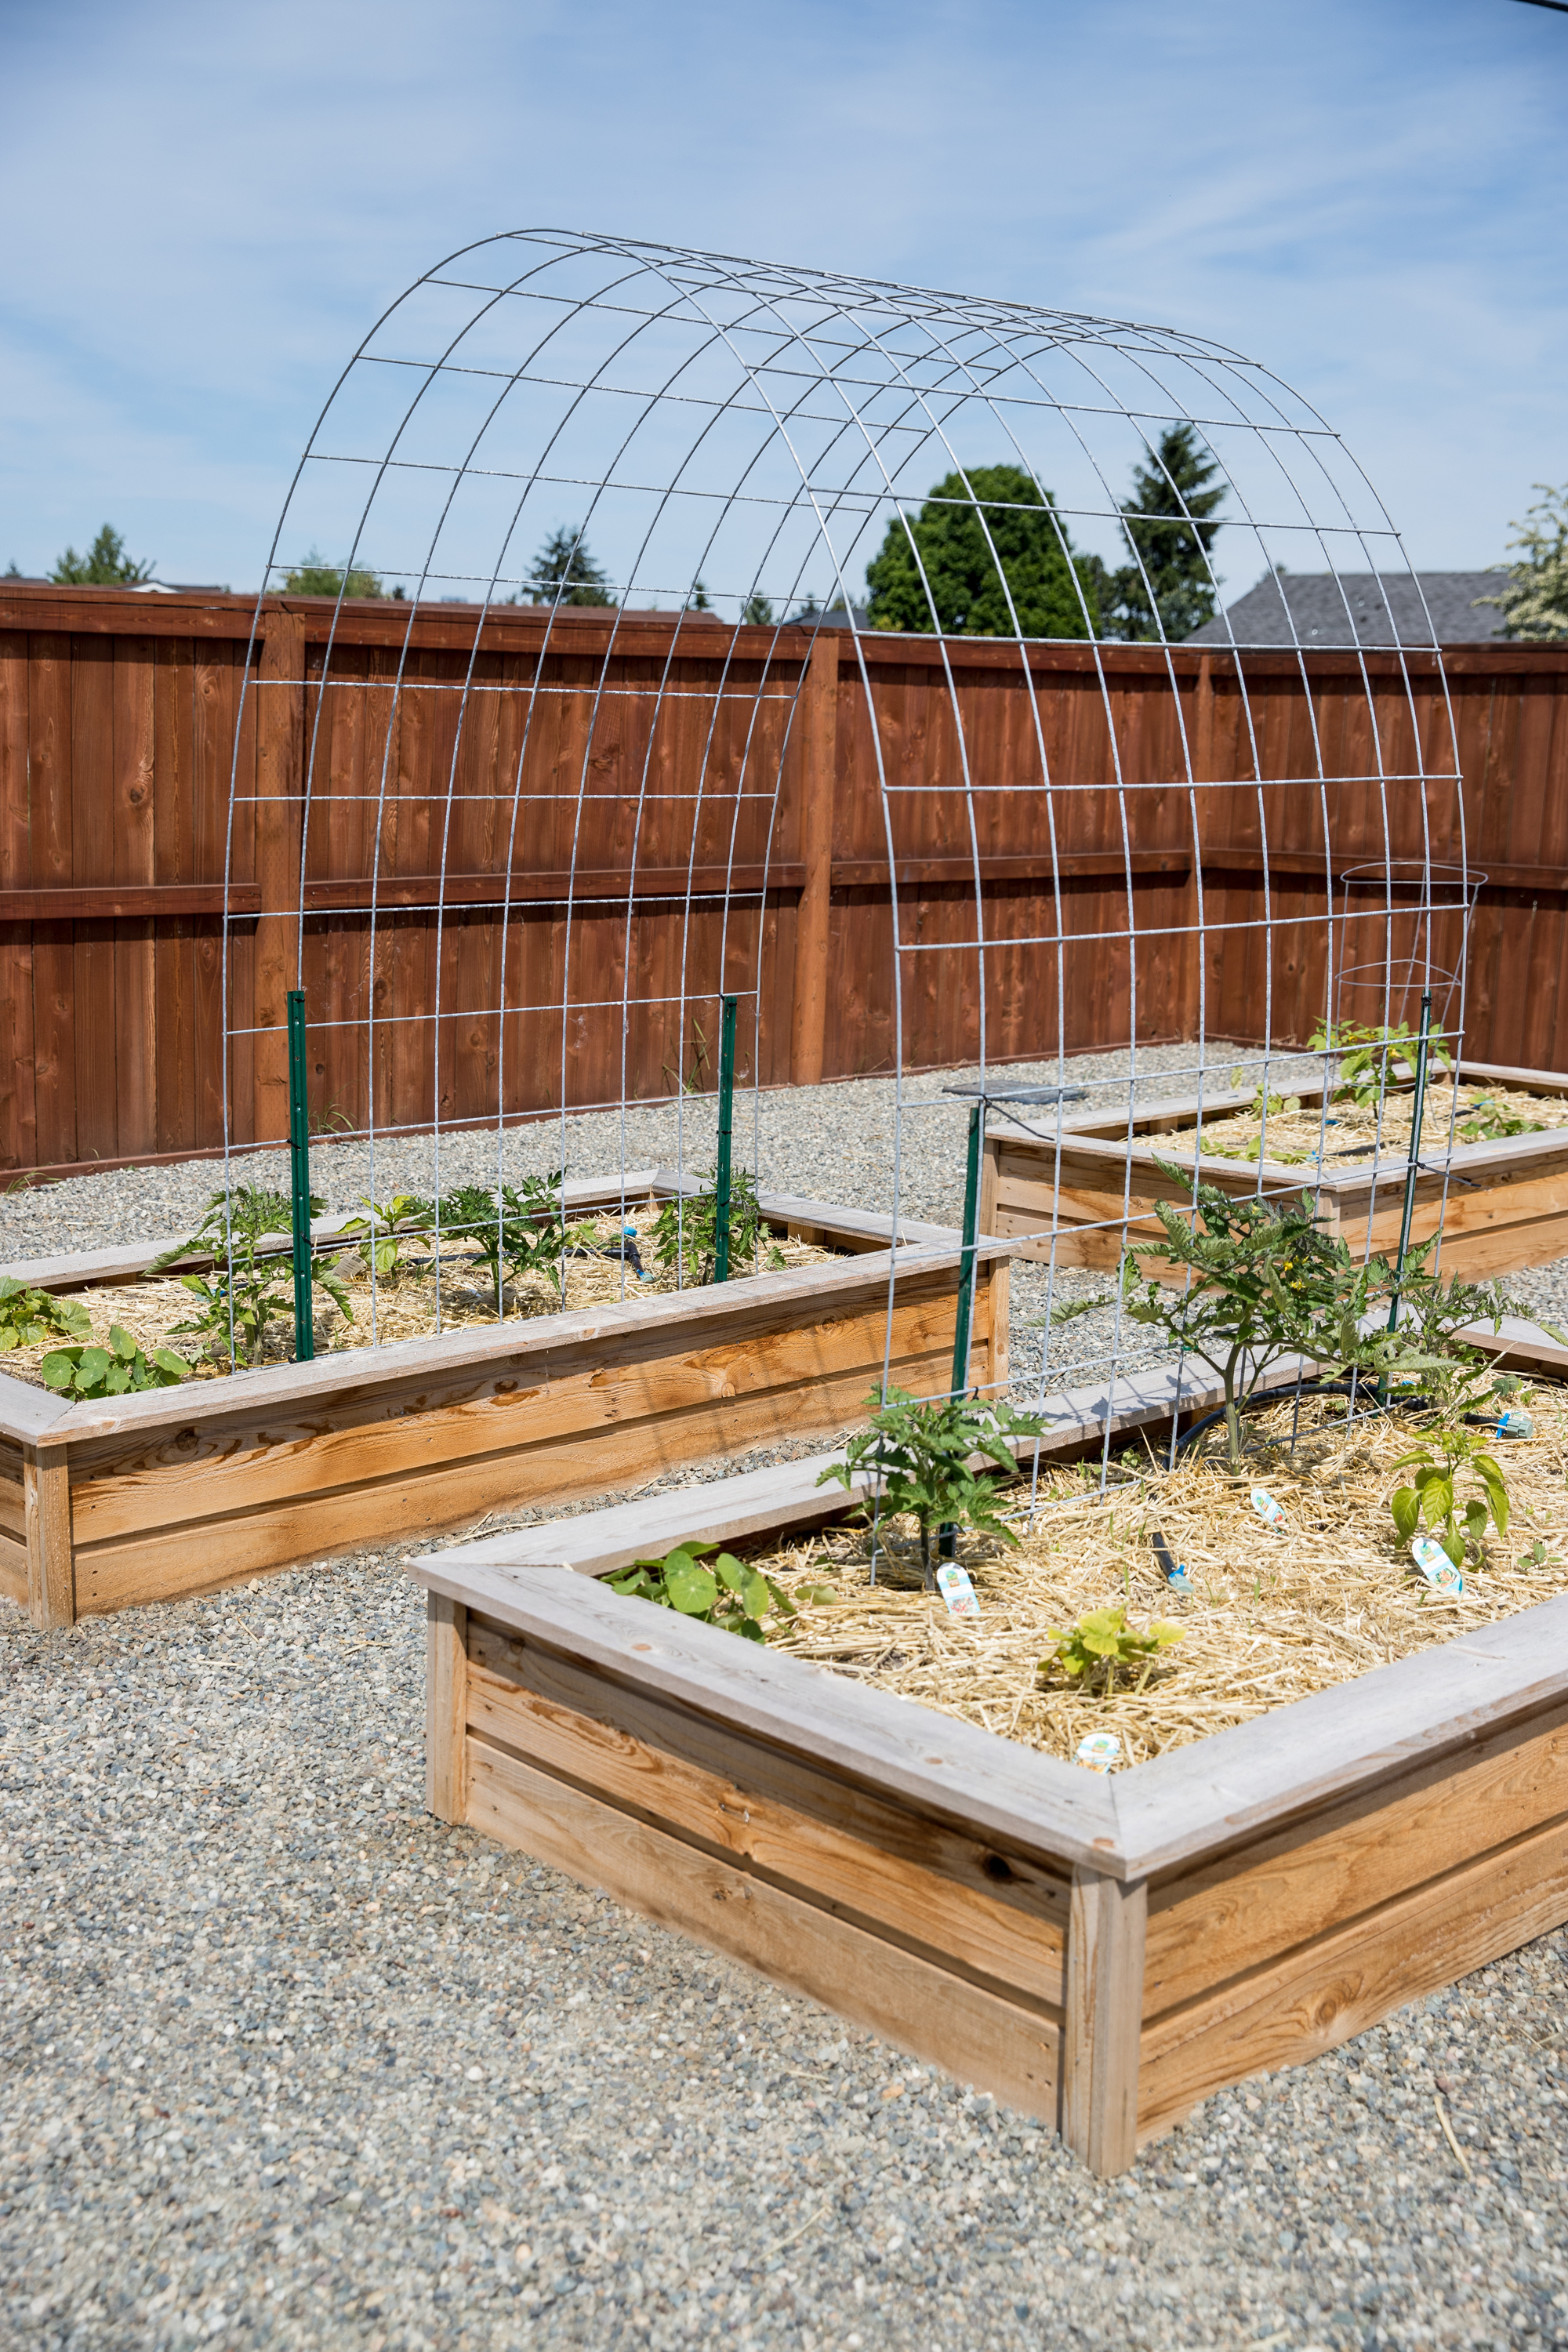
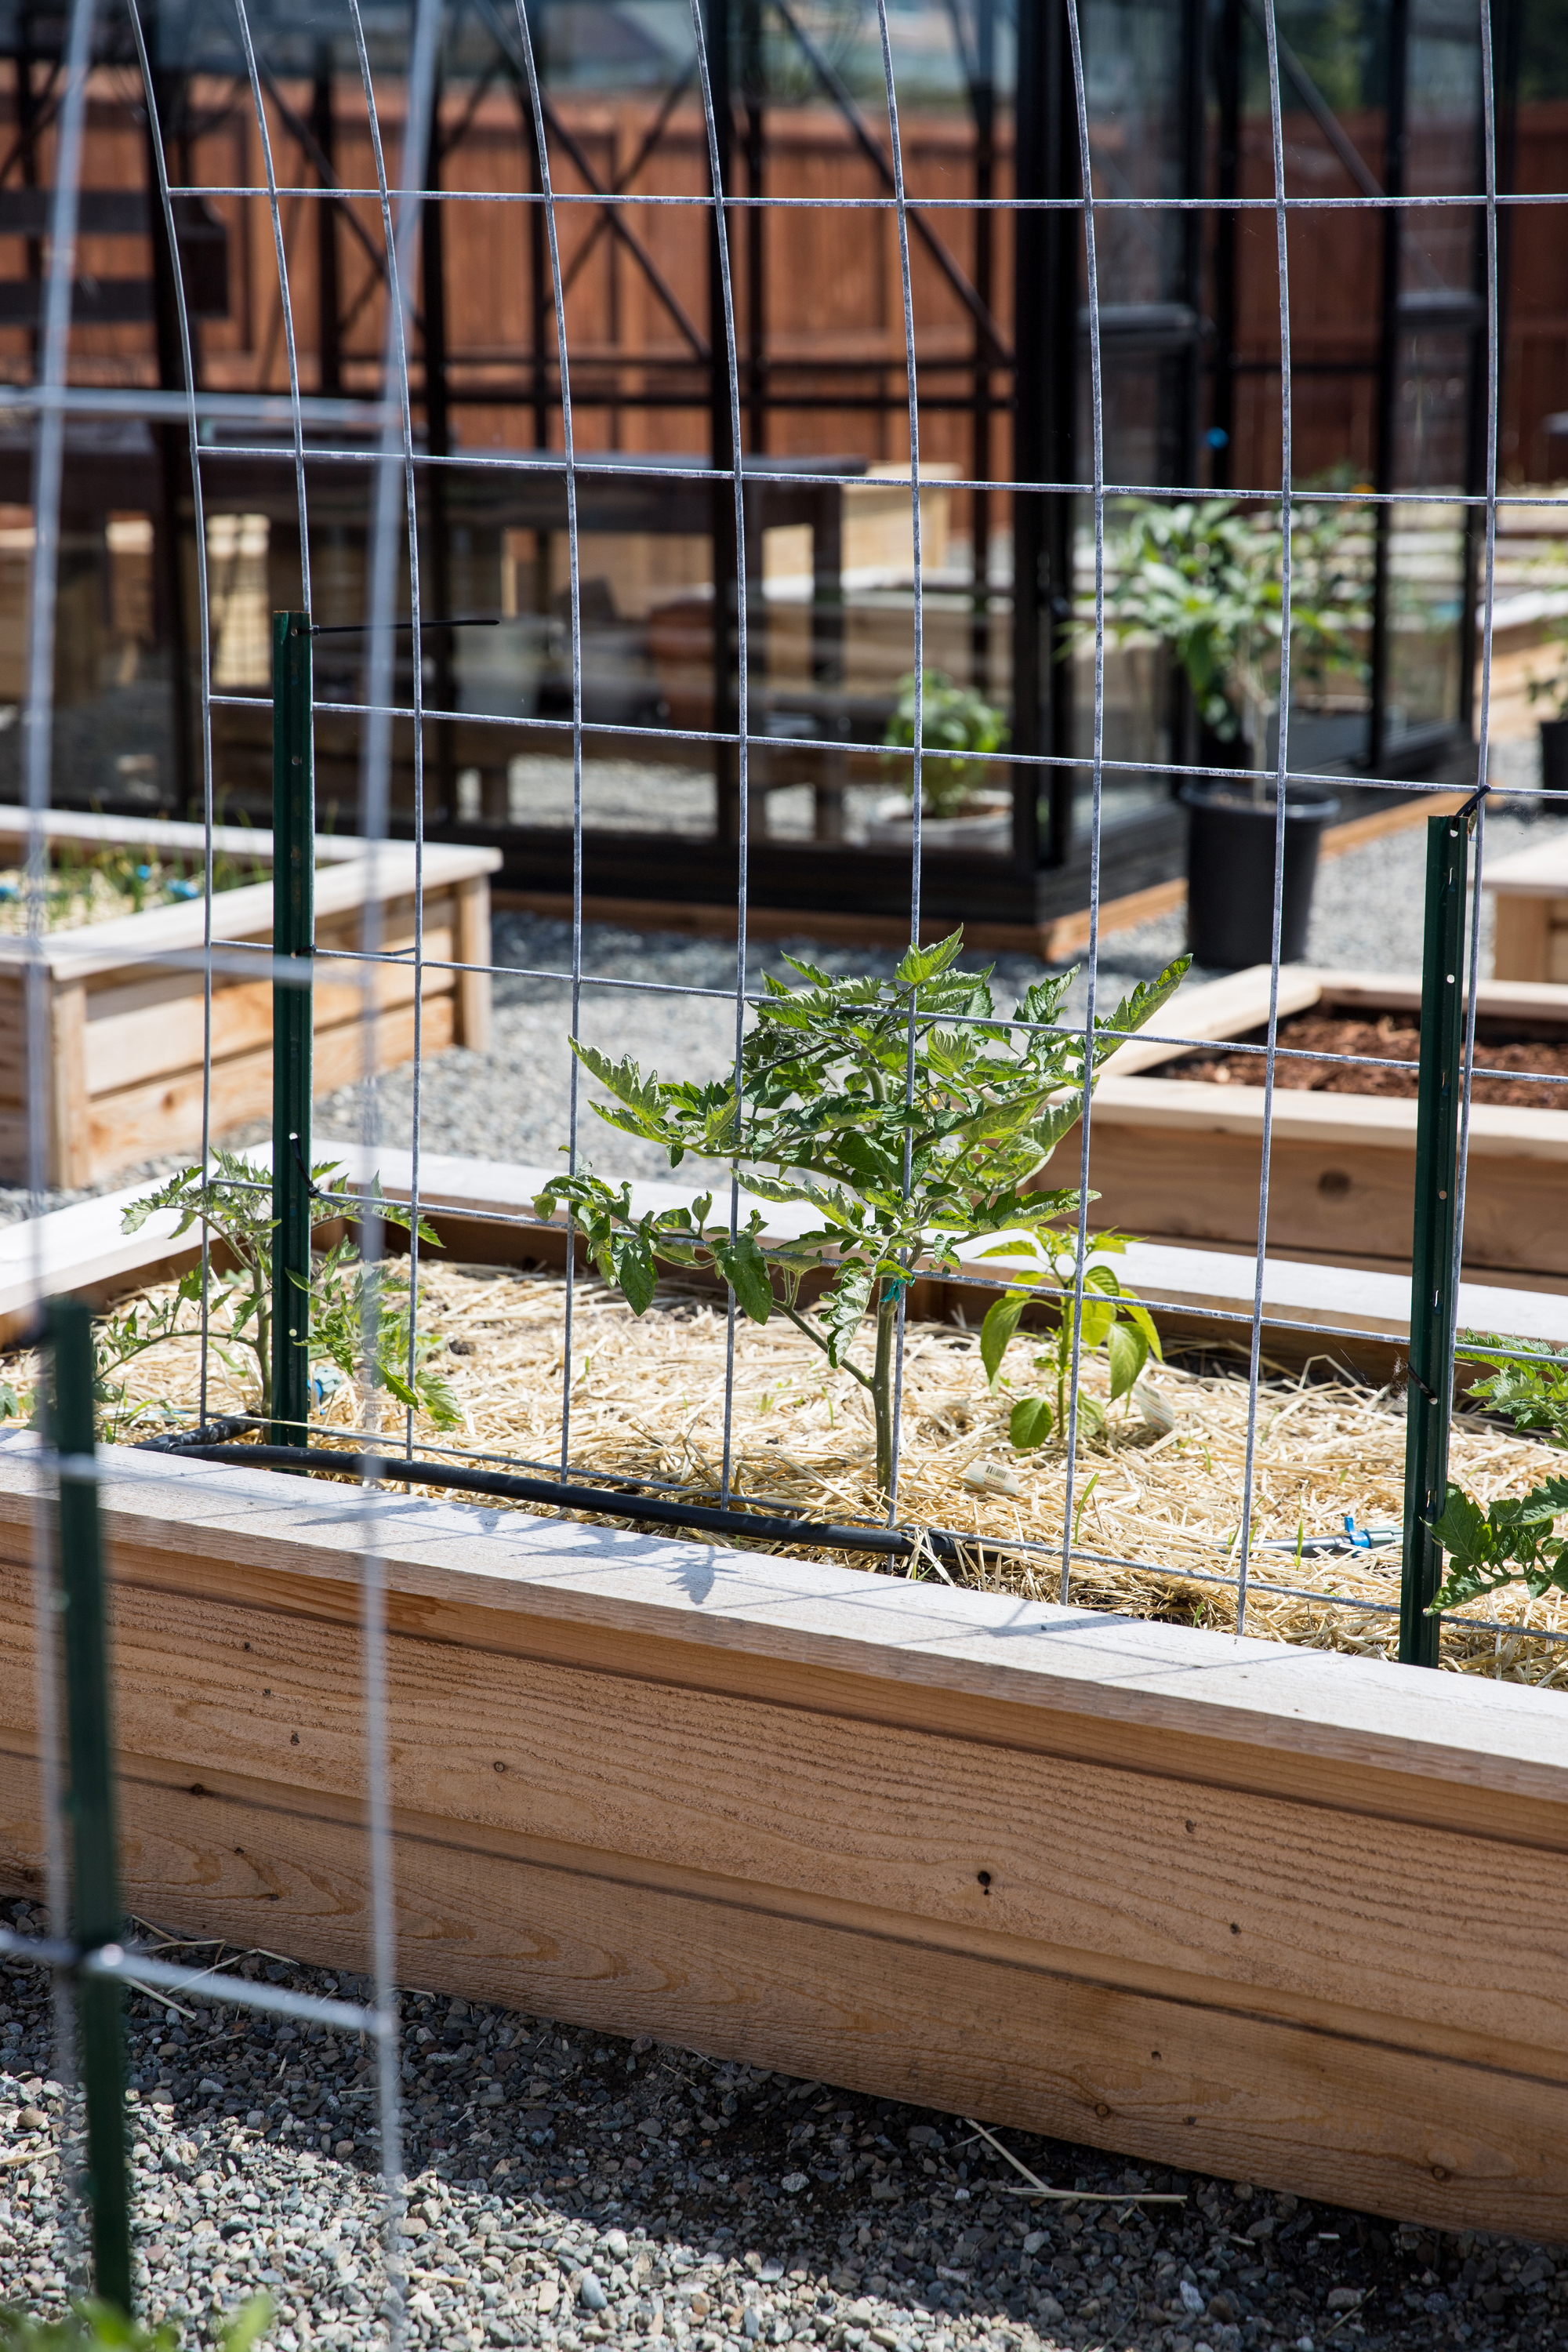
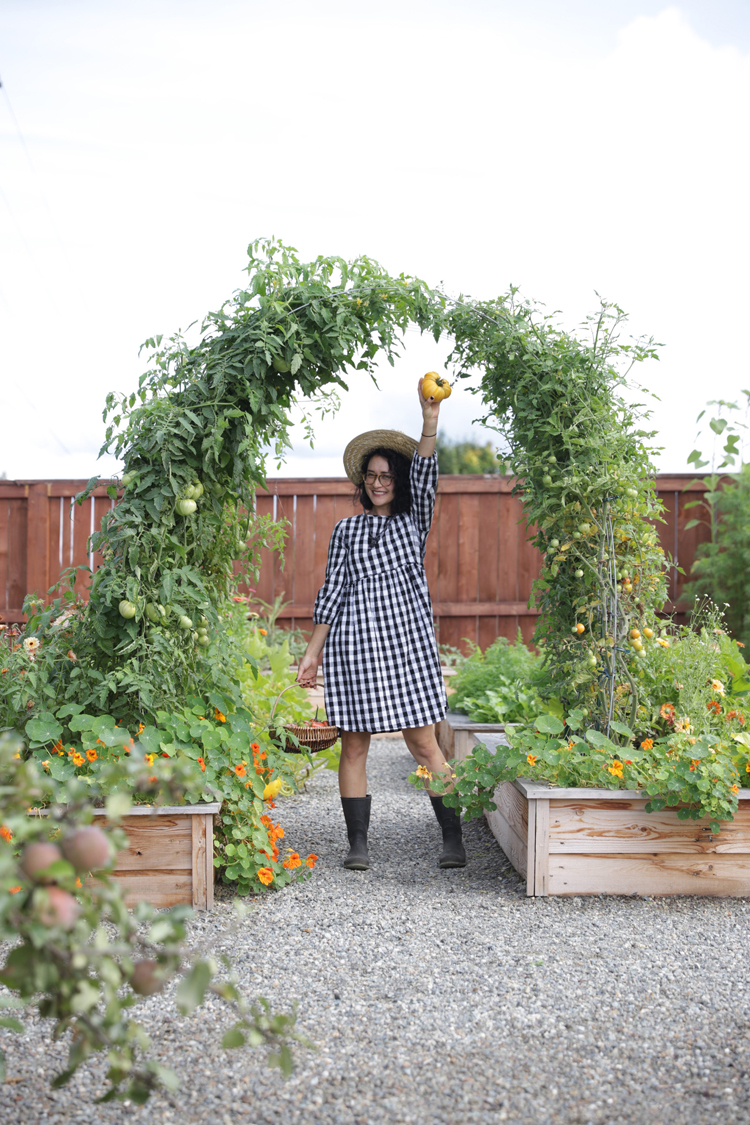
For one arch, we planted a variety of heirloom indeterminate tomatoes on each side. Indeterminate tomatoes, unlike bush or determinate tomatoes, like to vine and climb. We’re hoping they grow enough to climb over the top. Fingers crossed! Tomatoes can be a tricky crops to grow in Western Washington. Putting gravel around our beds to add some heat and getting an early start with some larger tomato plants will hopefully help them thrive. We also added morning glories and black eyed susan climbers to help attract pollinators and add more color.
*See the end of this post for updates on how these plants did with pictures!
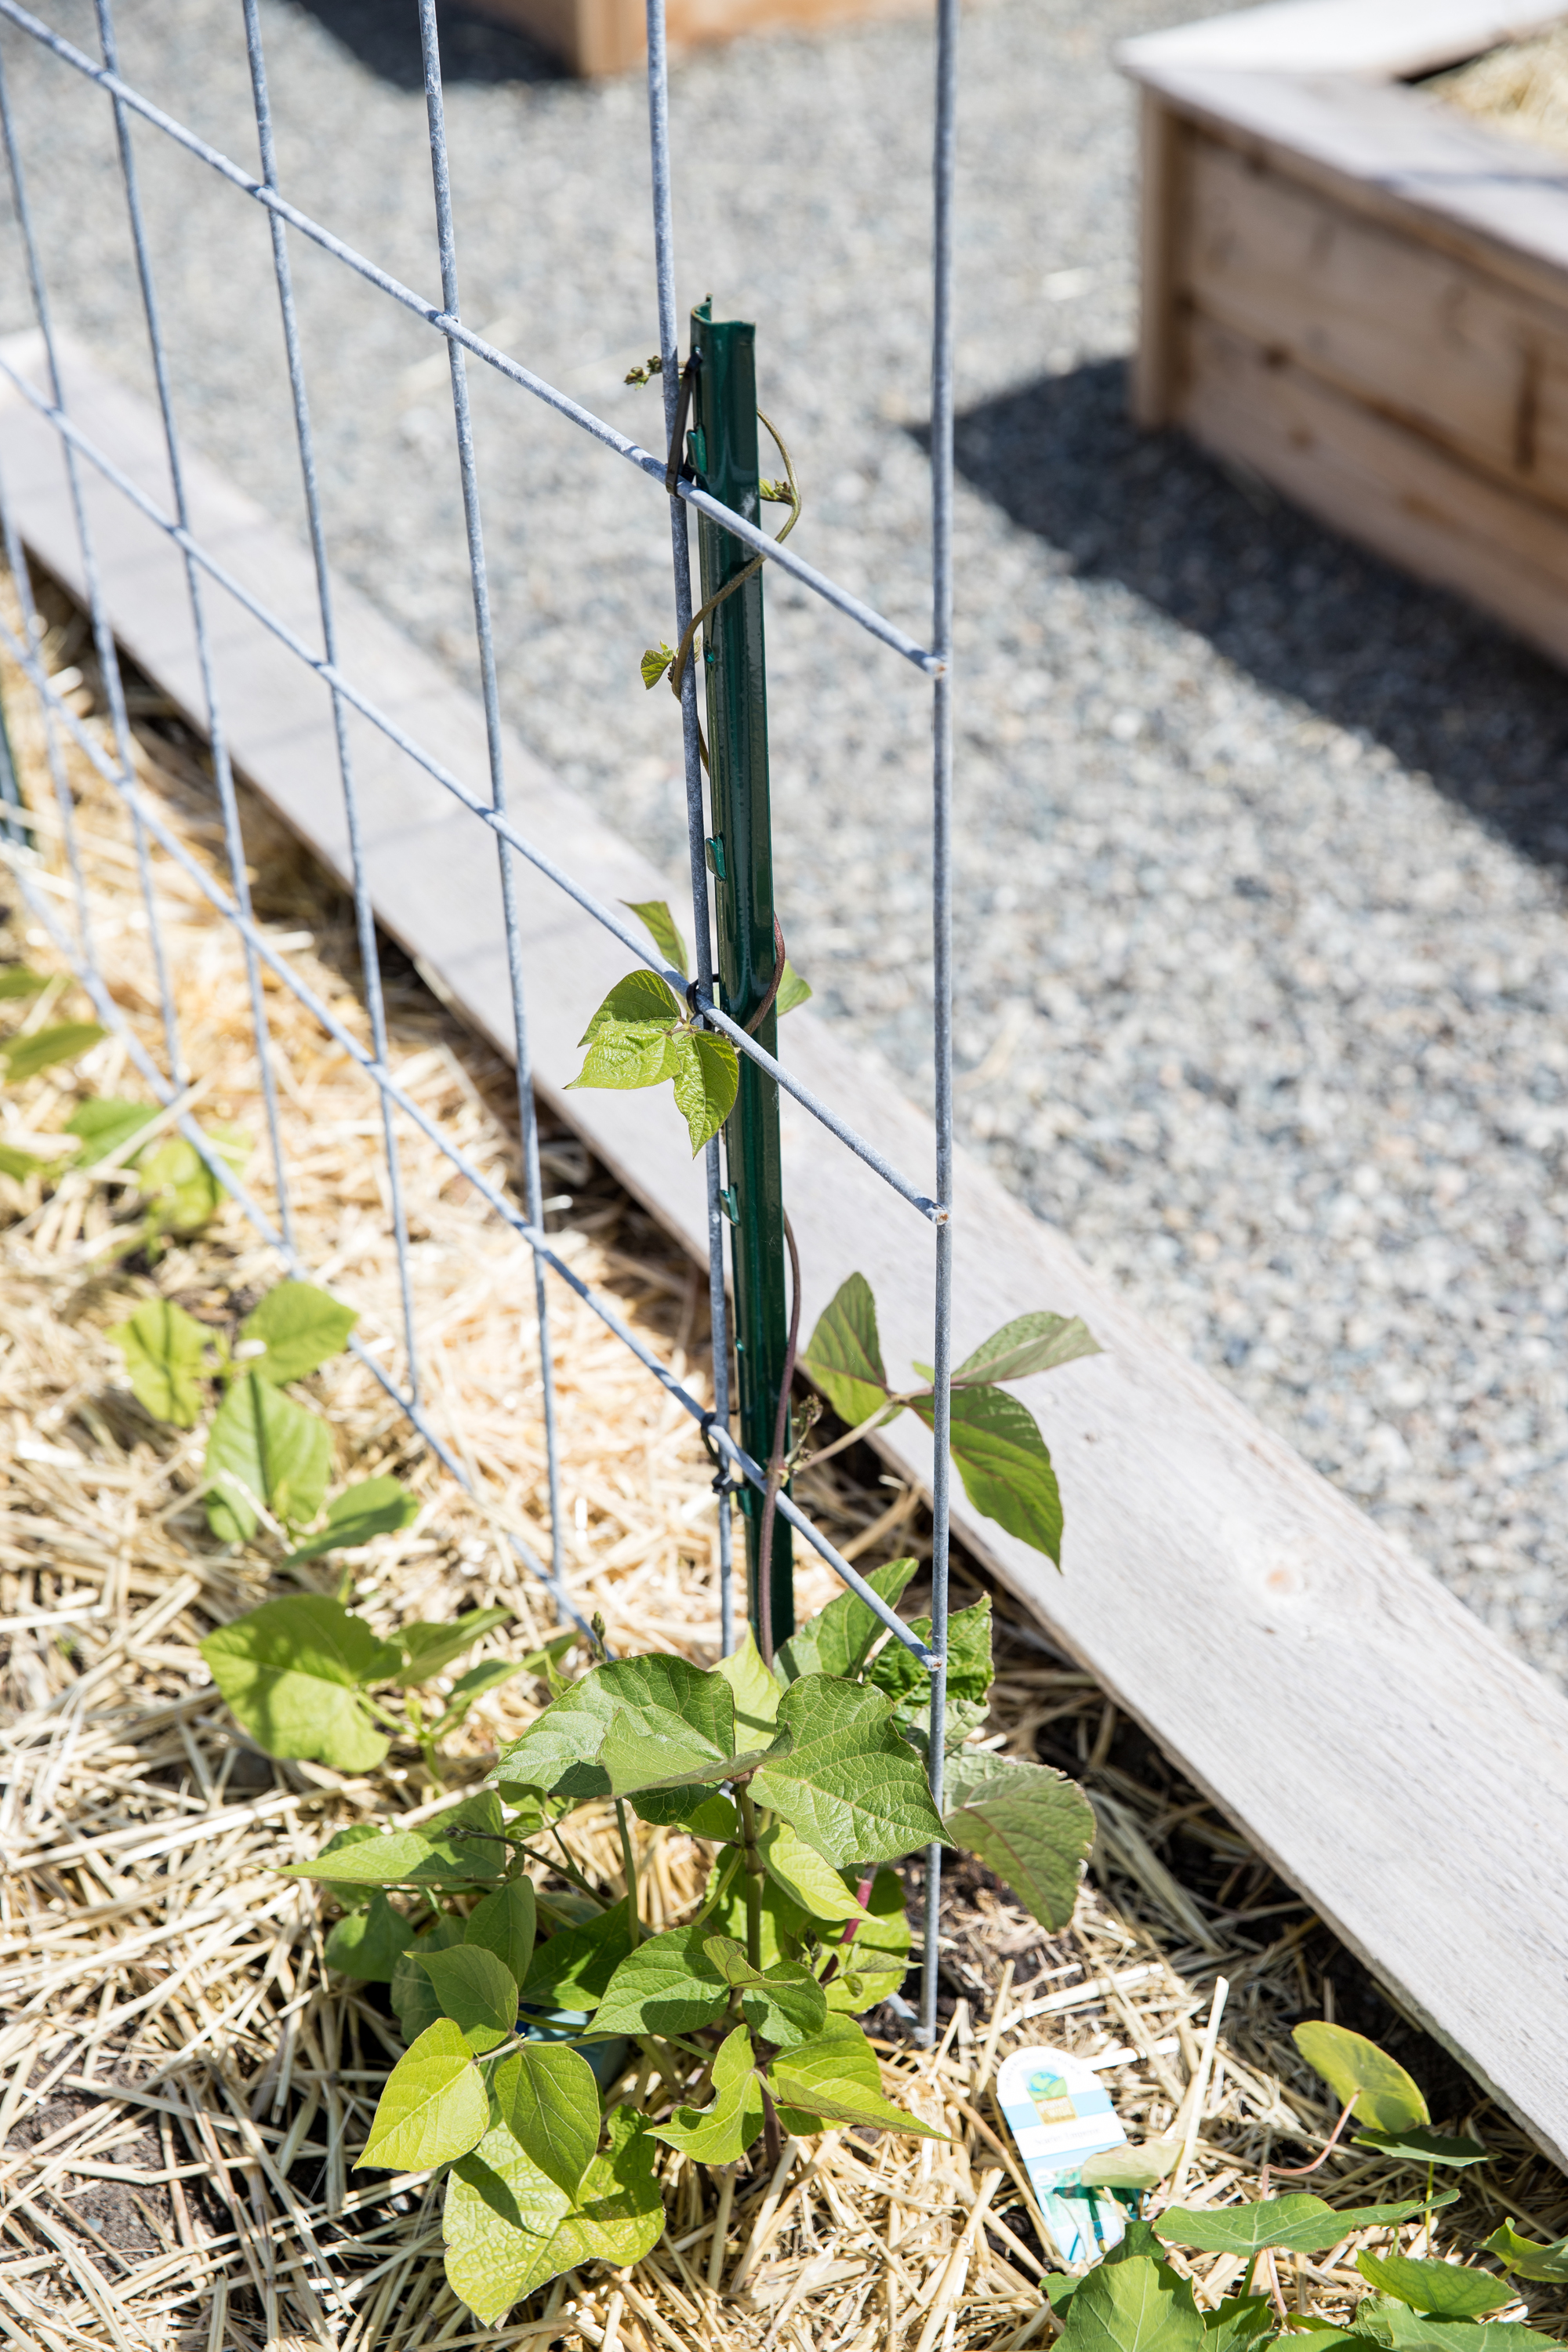
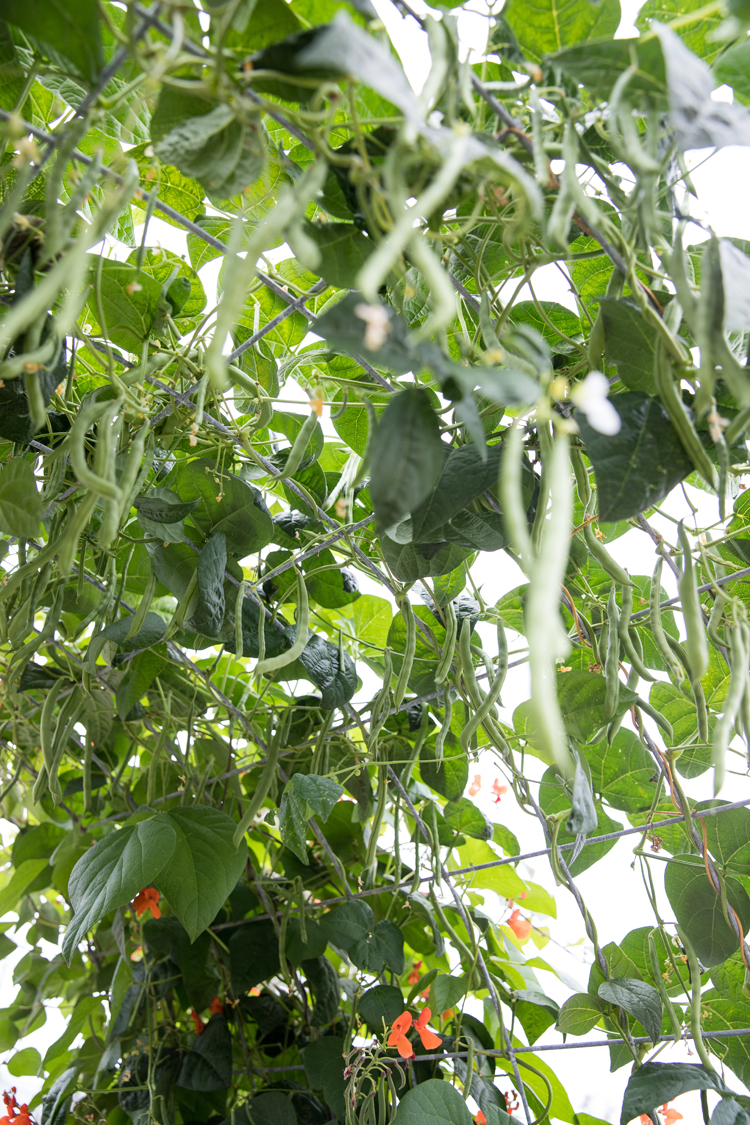
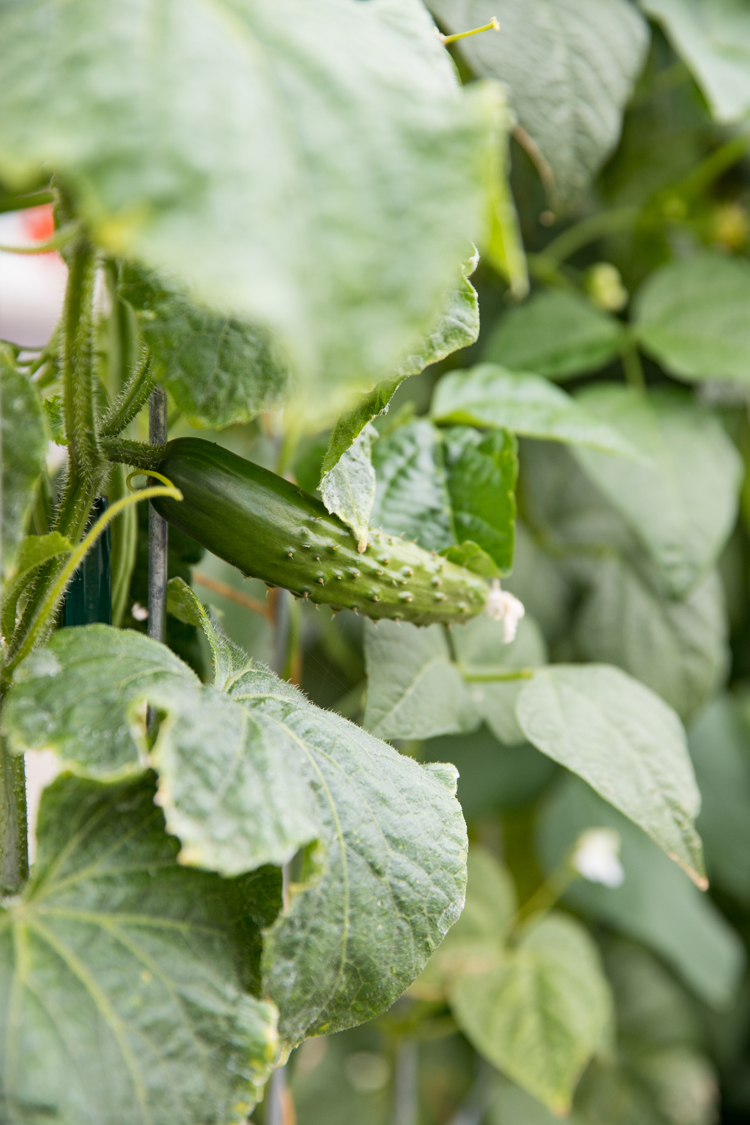
For our second arch, we planted green beans: Scarlet Emperor and Blue Lake, and some cucumbers. We also added some of the same flowers but in different colors.
Now will this work? Will the arches fill up with plants like we hope they will? Honestly? I don’t know. We’ve never built and grown something like this successfully, so we’ll see. I plan on adding an update picture at the end of the summer either way. —SEE THE END OF THIS POST FOR PHOTOS AND UPDATE
Now the trellis themselves of course work. They are not anything you want to hang from but should be sturdy enough to support a good weight of climbing plants. We live in a windy area and have not seen any movement with either one. I’m sure that it helps that they’re big grids of holes at this point. I’ll update you as it fills in with plants.
UPDATE: It held up great this year! Even with a full trellis, we had no structural issues. Some swaying happened in a very strong wind storm, but no weakening of the trellis.
TRELLIS UPDATE
I promised to follow up with how the plants grew and how the trellis held up, so here you go:
It went great!
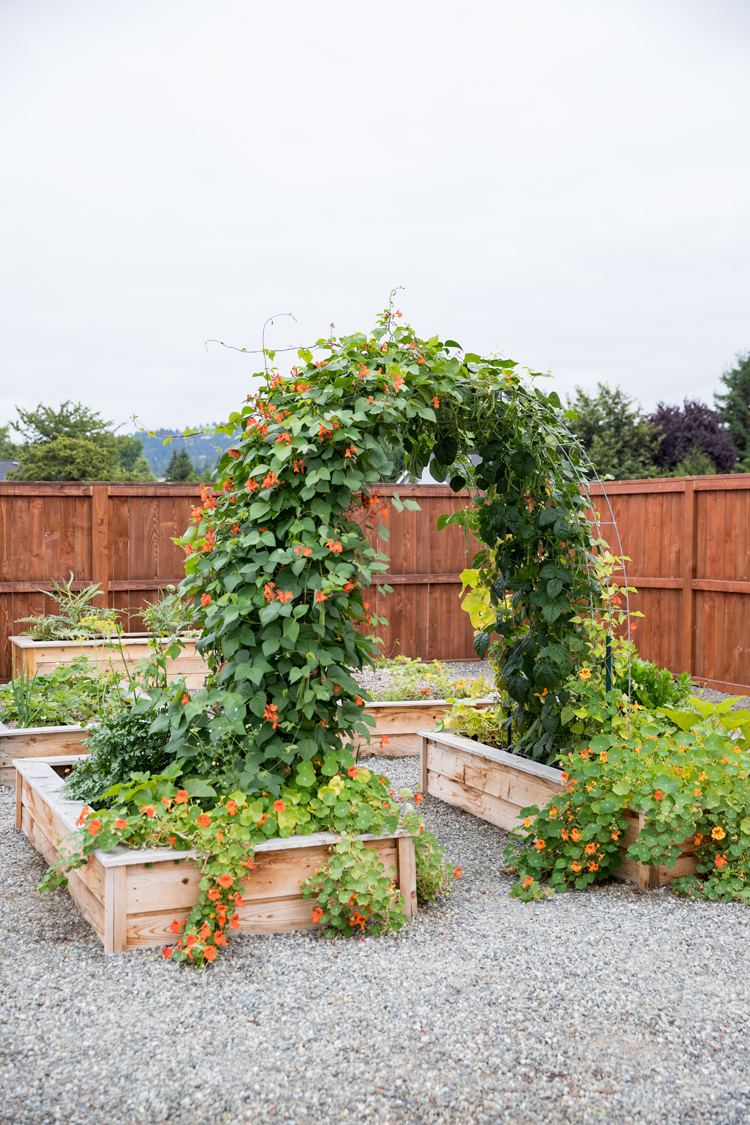
The green bean trellis was a smashing success. In fact, as I type this in mid-October, it is still green and producing beans which blows my mind. It’s days are numbered though, and we’ll probably clean it up in the next week.
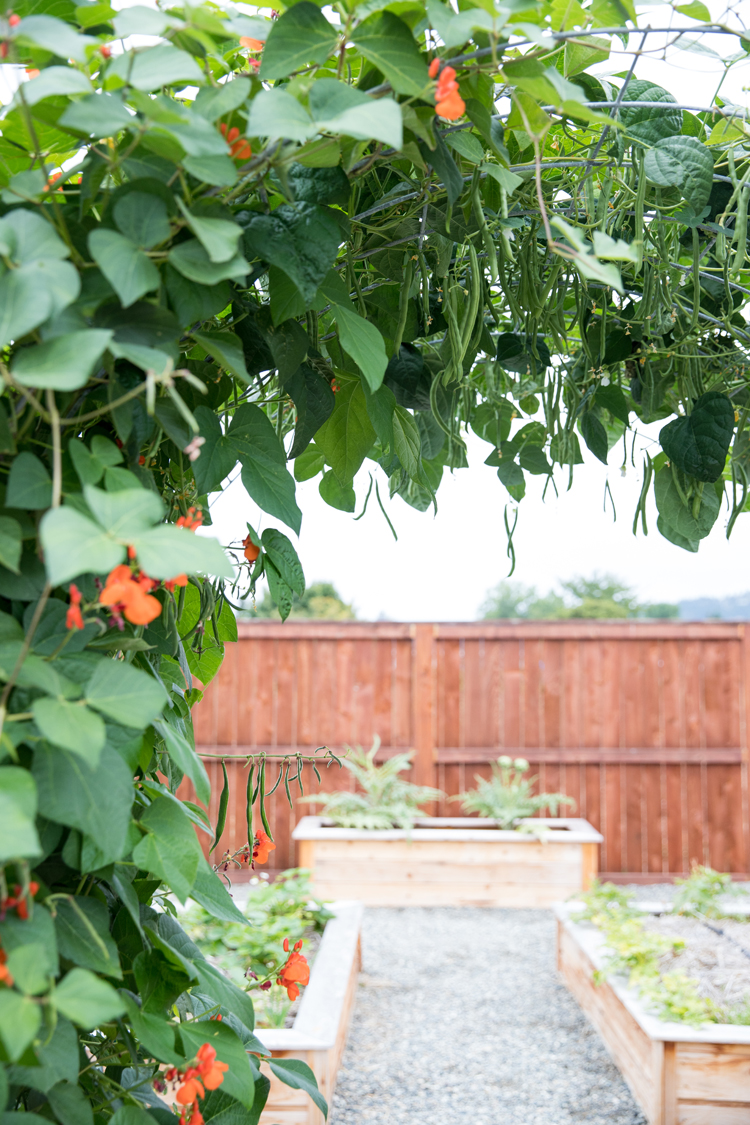
It filled up the trellis at the beginning of July and just got fuller and more beautiful as the summer transitioned into Fall. I added cucumbers at the backside of the trellis and those did okay too. They produced but would definitely not grown to fill the trellis like the beans did.
The tomato trellis did succeed as well but it was WORK.
A week after the vines finally touched at the top and started to fill in what I affectionately called it’s bald spot, it succumbed to wet weather and fungal issues that I have been battling all summer. I think I will stake my tomatoes next year and try different climber next year…maybe a baby pumpkin or a gourd?
I think I put the plants too close together. I should have had two plants per side, instead of three. That would have helped with air flow and reduce fungus issues. But they also just didn’t really start growing or producing until later in the summer, so it looked awkward until the end.
But boy was it fun to try. It was beautiful at the end too.

Tell me about your green house! We are moving to the desert from mild CA. 🙂
I love this idea. I live in PA. Tomatoes grow like crazy in my raised bed garden. The first year I planted them they grew into a mini jungle. Something like this would have helped. I can’t wait to see your results at the end of the summer.
~Melissa
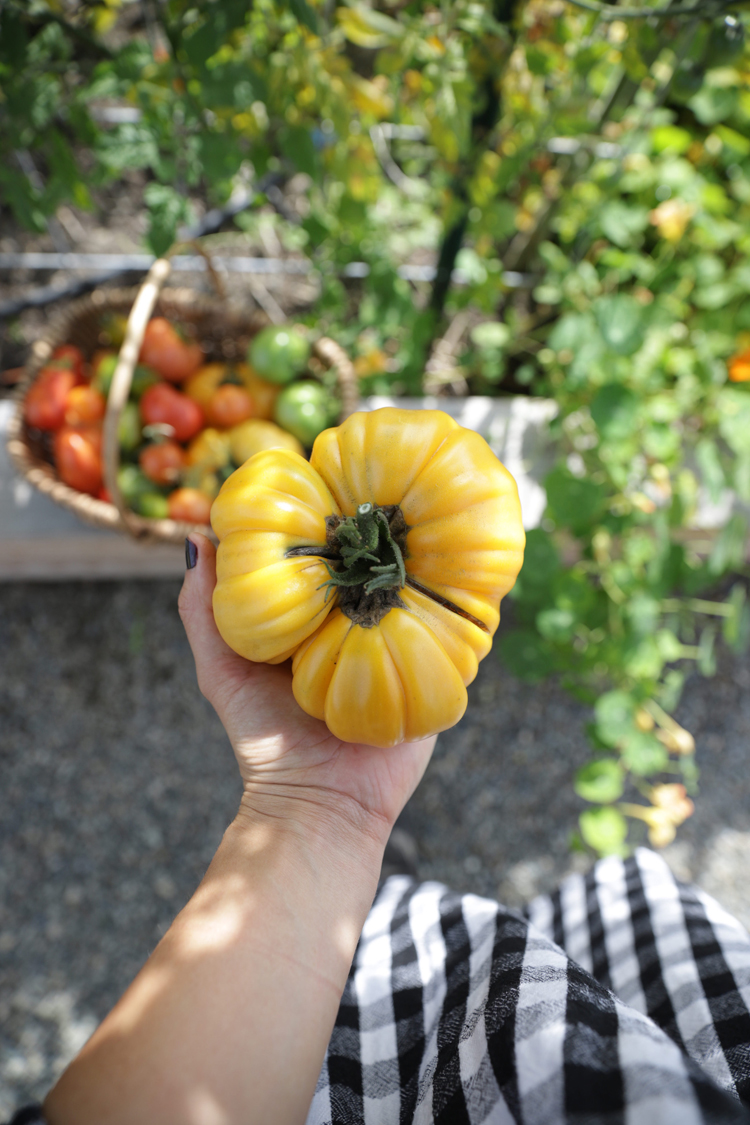
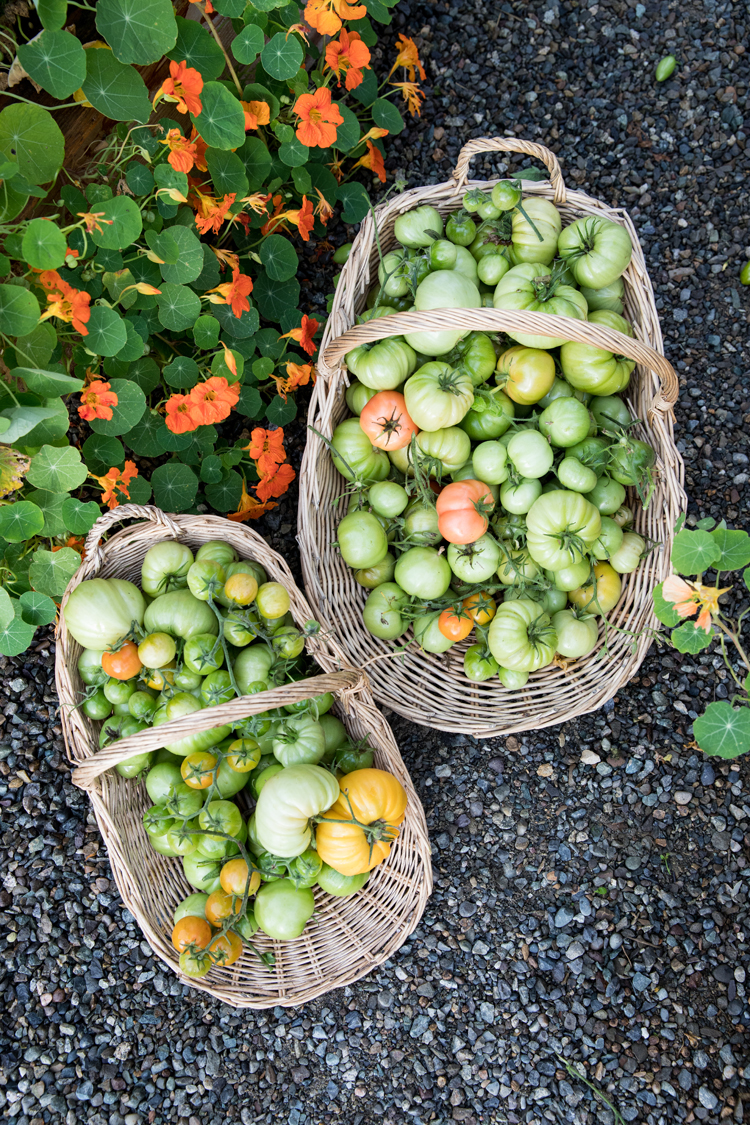
Looks amazing, but why are you picking the green tomatoes?
Thanks! I picked the green ones because rainy and cold weather had set in and wanted to save them before they turned moldy. The window of hot weather here in Washington is pretty narrow and tomatoes need nighttime heat to ripen. So I end up picking green tomatoes at the end of every summer and let them ripen inside my garage.
What size are your beds?
Thank you
I have more information about them here: https://www.deliacreates.com/how-to-make-cedar-raised-garden-beds/
Thank you for this tutorial! What size are your garden beds?
So glad it helps! I have a post all about my raised beds here: https://www.deliacreates.com/how-to-make-cedar-raised-garden-beds/
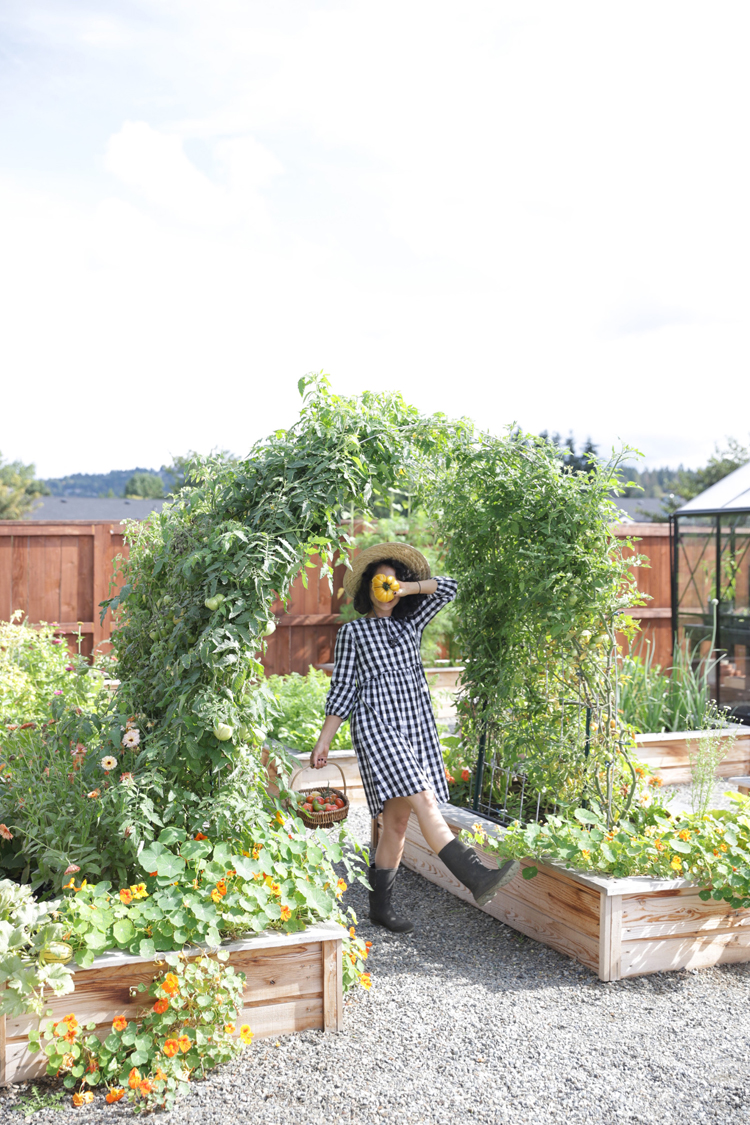
Great trellis! Where are your cute wide pants and checkered dress from??
Thanks! The wide leg pants are actually from one of my tutorials: https://www.deliacreates.com/sewing-my-own-wide-leg-pants-and-an-inseam-pocket-tutorial/. The dress is a few years old from a company that is no longer in business. Sorry I don’t have a better answer for that one.
How far apart did you grow your beans? So beautiful!
Good question! It’s been awhile since I planted them so I can’t remember exactly, but I think I planted them 2 inches apart and then thinned them to maybe 4-6 inches apart? I didn’t do a second row but I tried to keep neighboring plants about a foot away. I hope that helps.
I love your arched trellises. Which direction do they face? Do they create a lot of shade in your beds?
Thanks Cathy! The openings of the archway face west and east. They do cast some shade for surrounding plants and beds but I haven’t noticed enough shade to block growth. My beds are at least 3.5 feet apart from each other which might help. I hope that helps. Let me know if you have more questions.
I must know… where did you get your gardening basket?
Michaels… They had gathering baskets as part of their seasonal line last year. I hope they bring them back. I also get baskets from Goodwill.
Love it!
How did u transport the panel?
Trying to figure out a way to transport without a truck ?
Oh yes…it would be pretty tricky without a truck. We used our trailer. I wish I had a better answer for you…I think you need to find a way to get a truck or trailer.
We are going to try this this year – hoping for the best. Can you share what types of plants you planted that have the orange flowers? Any recommends for fast growing vines as well?
Oh yay! I’m so excited for you! The orange flowers are nasturtiums. They don’t climb, but they do trail and I’m sure you could train them up the arch a bit. I don’t know how long they’d get. Mine only extended max maybe 2-3 feet. Other fast growing vines depend on where you are. Peas and pole beans are good edible climbers. Sweet peas are planted in spring and climb. I just got passion flower seeds which get really long and can be trained over an arch. I don’t know about that from personal experience yet though. You can also train pumpkin and gourd vines over the arch but they probably won’t get long enough until later in summer. I’ve heard loofa is a good climber too…but again I don’t have personal experience with that one. I hope that helps!
With indeterminate tomatoes, if you pinch off leaves as they set on fruit you reduce the possibility of fungus and blossom end rot.
Thanks!
Silly question, but do you have to plant the same thing on both sides of the trellis? I already planted my snap peas but haven’t planted anything in the opposite box yet.
Also, My boxes aren’t as far apart…do you think it matters?
Not a silly question. You do not have to plant the same things on either side. I only did for symmetry. I think it would be lovely to mix it up! If your boxes are closer together, I think that’s fine too. You might end up with a taller trellis which isn’t a bad thing.
I have done the hog (cattle) panel trellis in my garden raised beds for the past few years. It works great!!!!! I have grown tomatoes, beans and cucumbers. Room enough for them to grow and grow! I will also hang a flower basket on the top part of the curve of the trellis to help attract pollinators to the garden. I will be growing the same plants on the trellises this year. I can’t wait to start!!! Good luck to anyone wanting to try this way of growing veggies!!! It’s a great way to go UP!!!!
I love the idea of hanging a basket from the top. So smart! So glad you’ve found success with using a cattle panel trellis too.
Your garden is beautiful!
Question- was it hard to harvest from top of arch? I want to do this but don’t want to have to use a step ladder to get stuff growing on top or arch.
Thank you! Good question. I usually stepped up on the tops of my garden beds to reach the top. The beans mostly hung down, so I didn’t have to worry about harvesting from the top, just from underneath.
My hubs and I loved this and went right out and made our own trellises. One for honey suckle and one for white table grapes. We were so please that it really was as easy as it sounds. Including the transporting and purchasing we were done in a little over 2 hours! Can’t wait to see how it turns out!
That makes me so happy to hear! Honeysuckle and grape vines are going to be so gorgeous on your trellises!
I love these trellises. Just curious…how did you get the panels home from the store? That’s the one issue I have not figured out.
Thanks! Fortunately we have a pick up and a trailer. You can bend the panels into an arch to fit the width of a truck or trailer bed.
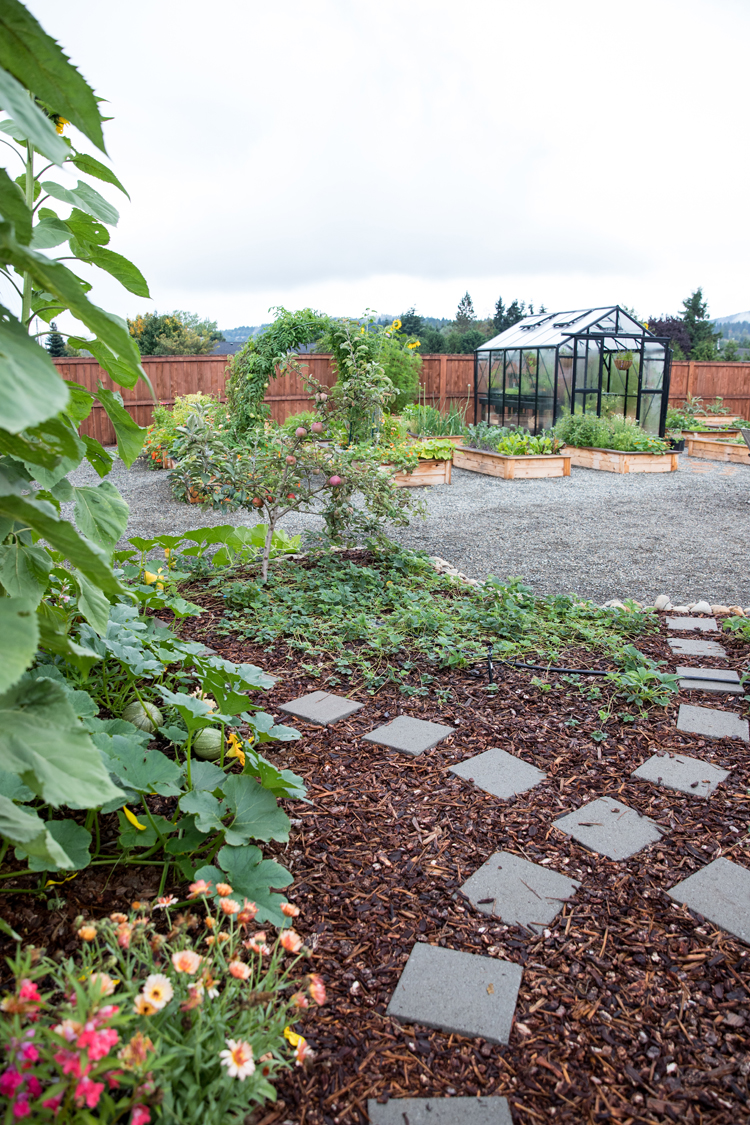
Your greenhouse is so gorgeous! Where is it from?
Thanks! I got it from a local dealer who doesn’t ship outside Washington state. To be transparent, they weren’t very honest and helpful to deal with either, so I don’t recommend them anymore. I have seen a similar one from Palram’s Glory Line (skip the hobby line). I hope that helps!
This is beautiful! Do you think a similar arch could be accomplished using a roll of hardware cloth instead:
https://www.homedepot.com/p/Fencer-Wire-1-2-in-x-2-ft-x-10-ft-19-Gauge-Hardware-Cloth-CA19-2X10MF12/306743891
Looking to grow sweet pea vines between my two small raised beds which are each 2′ wide.
Thanks for your input!
As long as the hardware cloth is very difficult to bend like a hog or cattle panel, it should be sturdy enough to work. Otherwise, it will likely buckle under the weight of the vines and leaves, especially if you get a lot of wind. That’s a guess on my part though.
Could you place the panel more into the center of the raised beds and grow tomato’s/squash on both sides? Love this design just trying to think of ways to maximize my space!
Good question! The beans create a really dense canopy of leaves, so it will block sunlight from getting to the plants on the inside of the trellis. It may also cause air flow problems which can lead to fungal issues. I’m not saying it wouldn’t work, but those are good things to consider when choosing which plants to grow. Plants that may be able to tolerate the shade of the trellis are lettuce and radishes. Onions do okay in part sun as well, but they stunt the growth of pole beans so I would avoid them. You may want to consider nasturtiums. The leaves, flowers, and seeds are all edible and they will most likely welcome a bit of shade in the heat of summer with the beans are at their peak. They are also beautiful and their roots take up little space. I usually grow mine at the edges of my beds so they can spill over the sides.
Your garden is beautiful. Thank you for the design tips for the trellises. I have been wanting to do something like this for a while and hope to get it done for next gardening season.
Did you leave the trellis up or take it down for winter?
I leave it up year round. It has been up for three years and it’s still going strong. This will be my fourth growing season using it and it’s still holding sturdy.
What a lovely arches! I was wondering what the dimensions of the used trellis are? I’m from the Netherlands and am struggling to find panels which are long enough…
Thank you! The hog/cattle panels are 16 feet long and I arched them to be about 3.5-4 feet apart (the beds are 3.5 feet apart, but the trellises are a few inches into the beds so probably more like 4 feet wide). That makes them about 7 feet tall because some height gets lost in the arch. I hope that helps!
Tomatoes are always a labor intensive jungle that is hard to keep under control! But I love the arched trellis idea and am going to try growing all my vining plants vertically this year. We have a 6′ deer fence around the garden and I plan to grow all the squashes and pumpkins on that.
Coastal had cattle panels on sale recently and I got 8 of them for $26 each.
That’s a great deal! I love the idea of that many arches. It will be beautiful!
Was it difficult to bend the arch in the cattle panels?
Not really but it does help to have at least two people. Once you secure one side, bending it is much easier. It’s just awkward staking in that first side.
May I use a few of your photos for a presentation I am providing on growing vertical? I will provide photo credit to your site.
Thank you
Sure. If you are using them for personal use and providing credit that is totally fine. Thank you for asking.
Hello! This is so helpful! I was curious what the dimensions of the trellis are, particularly the length you cut it to. We really like your setup but would love to have a sense of how much cattle panel we can expect to use if we do something similar.
Sure! The hog/cattle panels are 34 inches wide by 16 feet long. I have a post about them here: https://www.deliacreates.com/raised-bed-garden-arch-trellis/
Thanks for this great idea. We used it a smaller version but the cattle panel was the trick we needed!
So glad that was helpful!
This is such a fun and inspiring project! I’ve been thinking about adding more vertical elements to my garden, but wasn’t sure where to start. The arch trellis idea seems both practical and beautiful — especially how it frames the raised beds and gives climbing plants something to really shine on. I’m curious — for people who’ve built something similar, do you prefer doing it all with basic lumber or using metal/pipe supports for extra durability? Also, for anyone planning their garden layout or inspiration boards, I’ve found that using tools like an AI design helper
can make visualizing different plant combinations so much easier before you pick up a single board. Anyone tried that yet?