

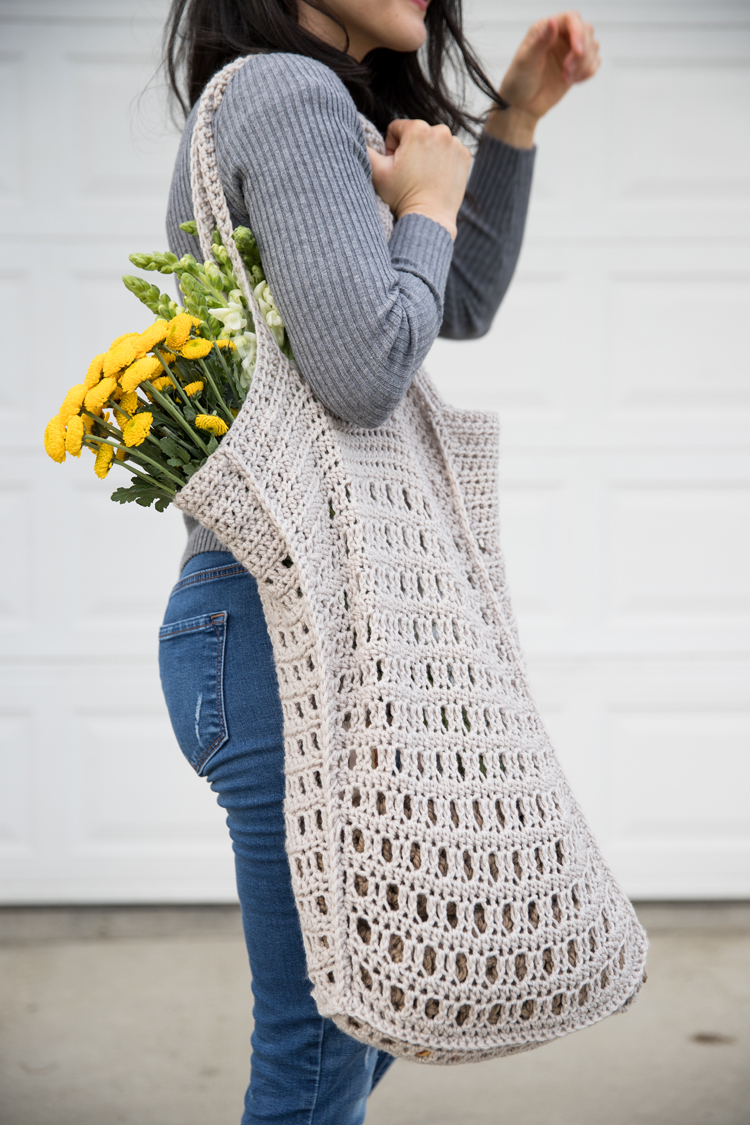
To add to my collection of reusable shopping bags, I decided to make a mesh one for produce!
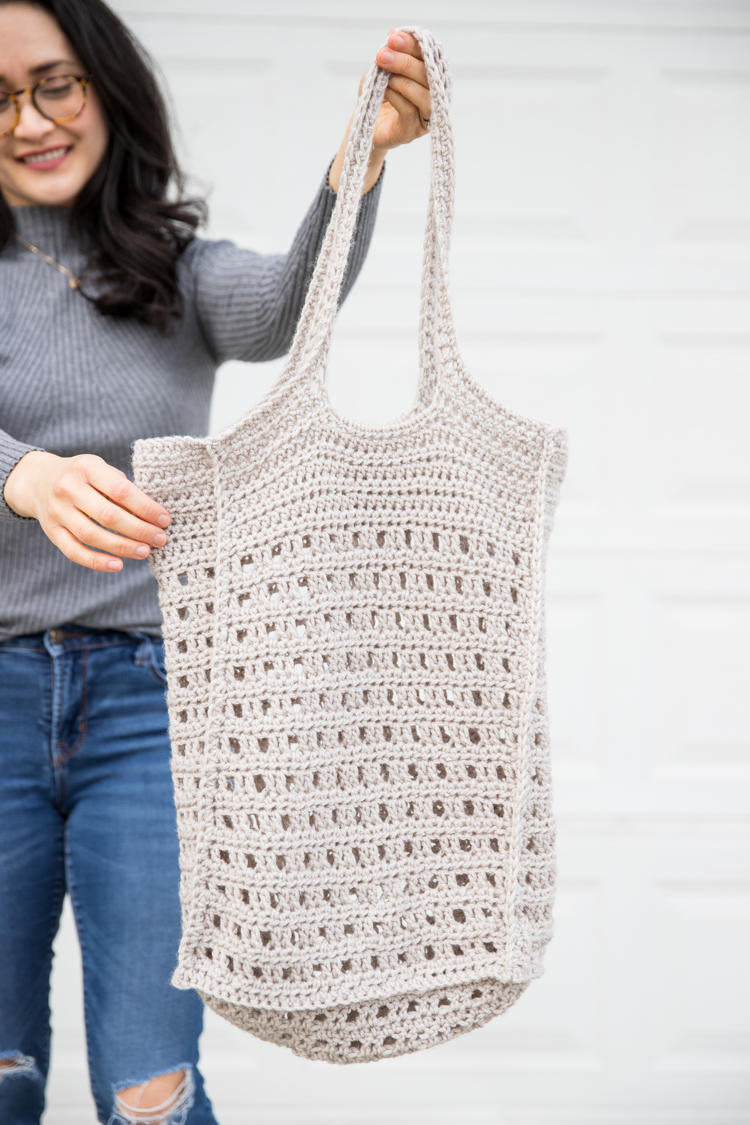
I wanted it to be mesh, but a little sturdier and denser than most produce bags.
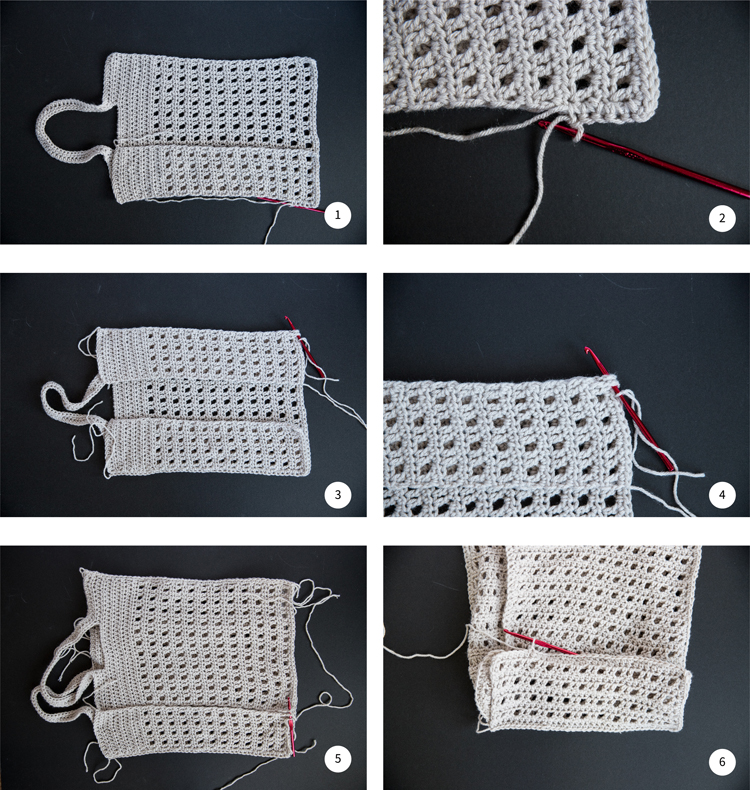
To add some structural interest, I decided to break it up into five pieces and then seam them together. Not only does it look cool, but it makes this project even more beginner friendly!
Did I mention it uses just chain, sc, dc, and hdc?… All stitches I teach in my Crochet Basics video tutorial series.
For most of my patterns, I work and rework the design before creating the final pattern. For this one though, I just sat down and started crocheting the picture I had in my head and it mostly worked out! Love it when that happens.
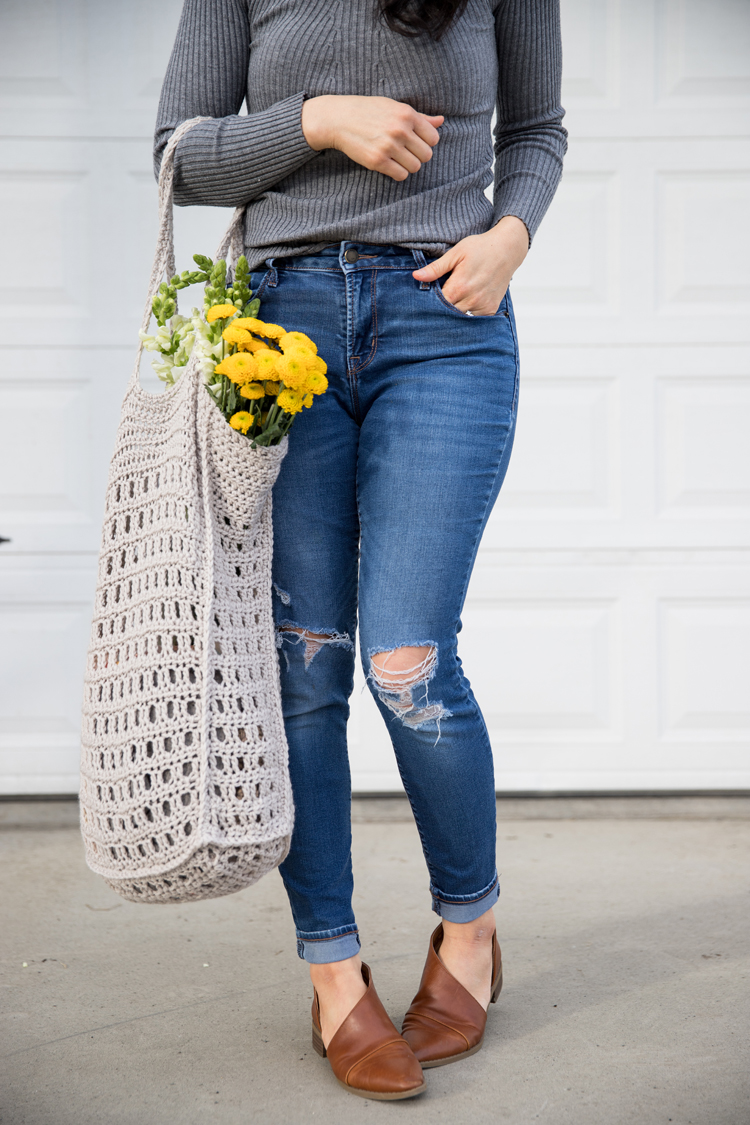
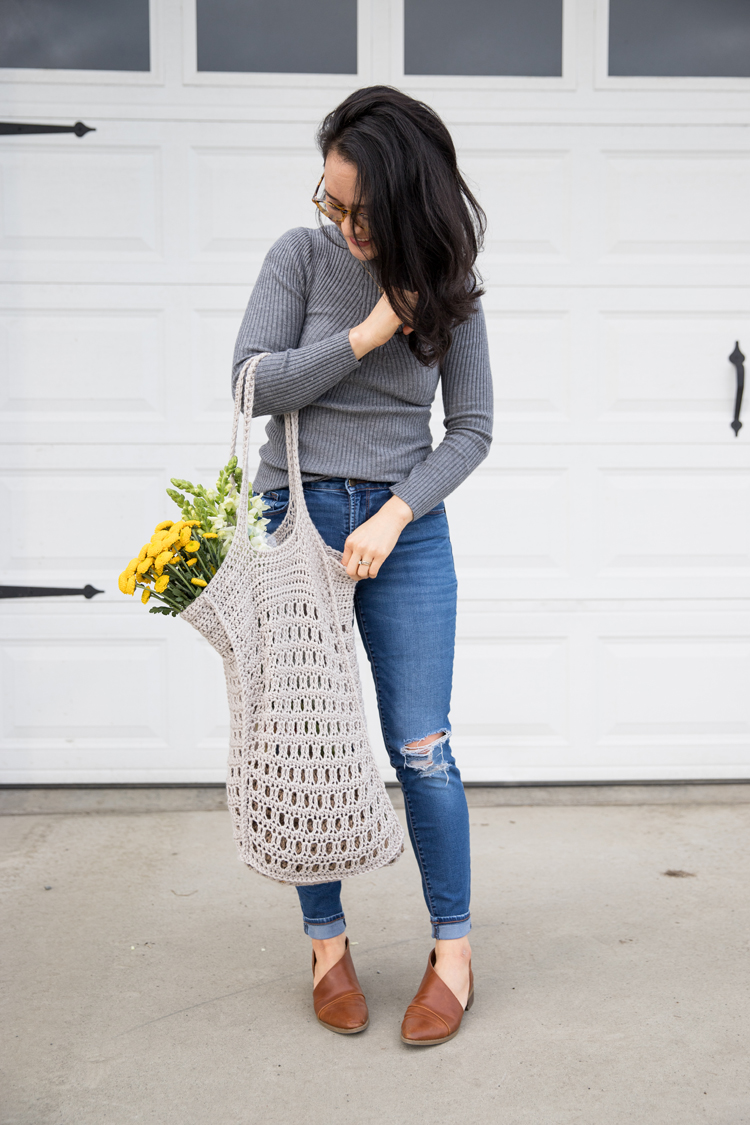
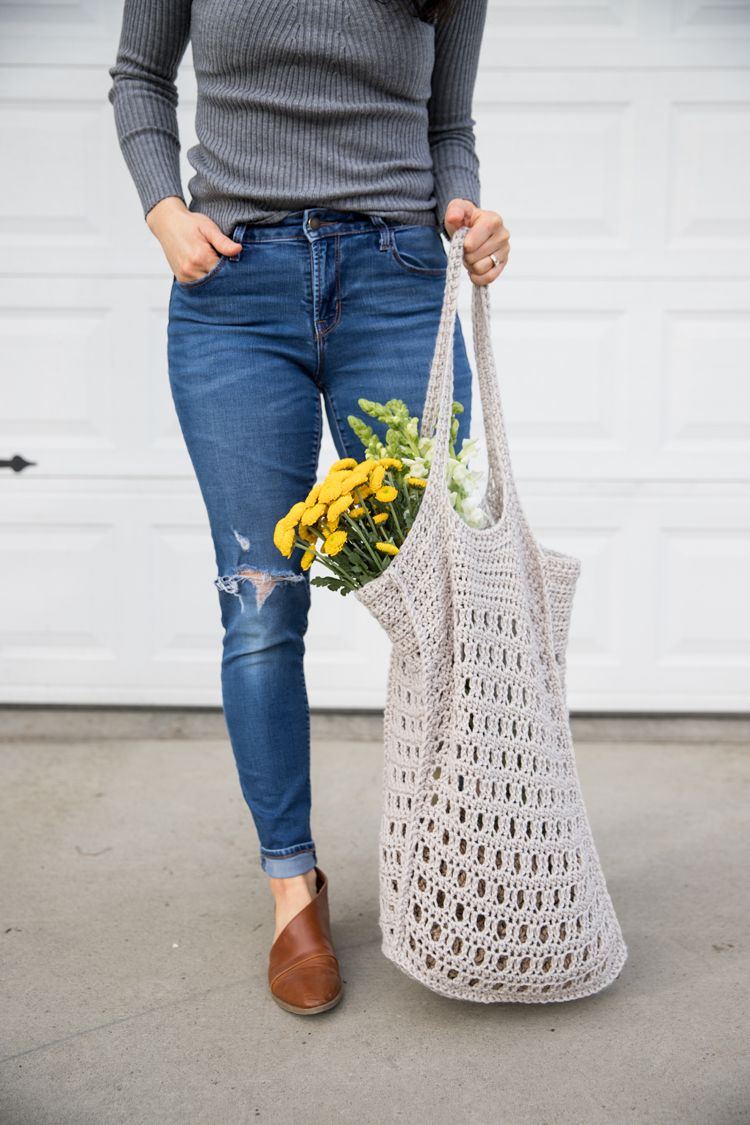
I think it’s a little long and deep, since it stretches out when you fill it. I can’t decide if I love that, because it can support long flower stems, or if I want to shorten my next bag by two rows.
I guess it comes down to preference, so I’ve included instructions for both options in this pattern.
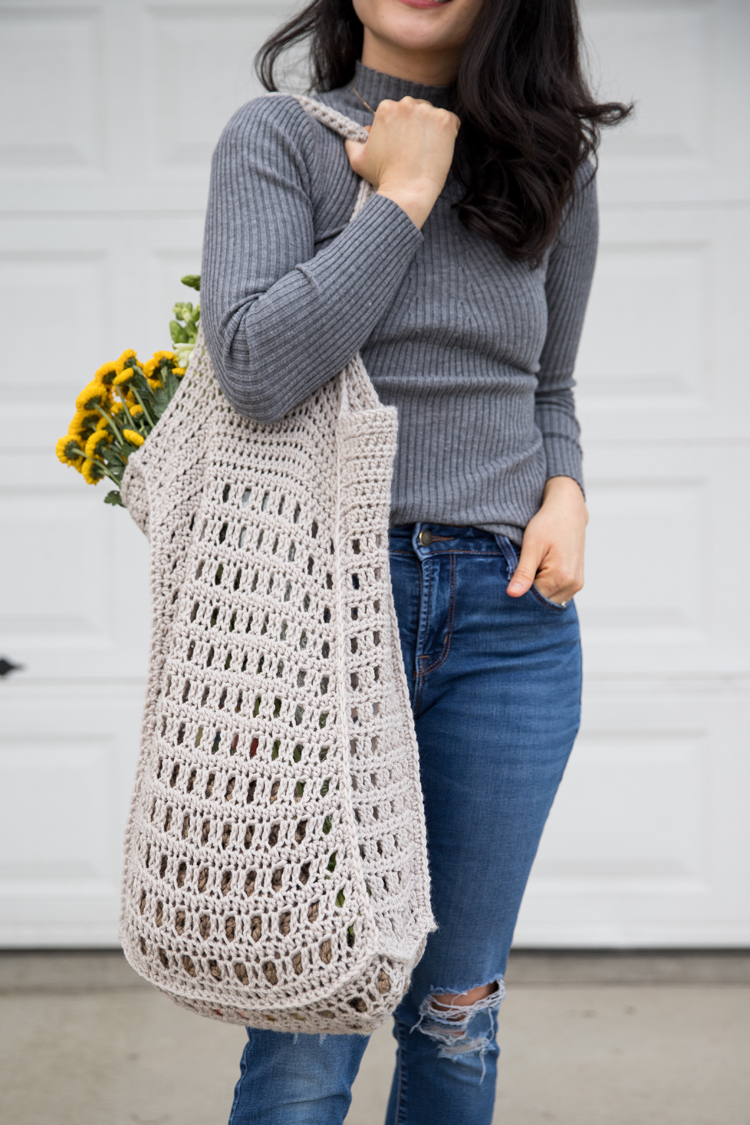
One thing I do love, is the longer handles. No arm pit choking going on here!
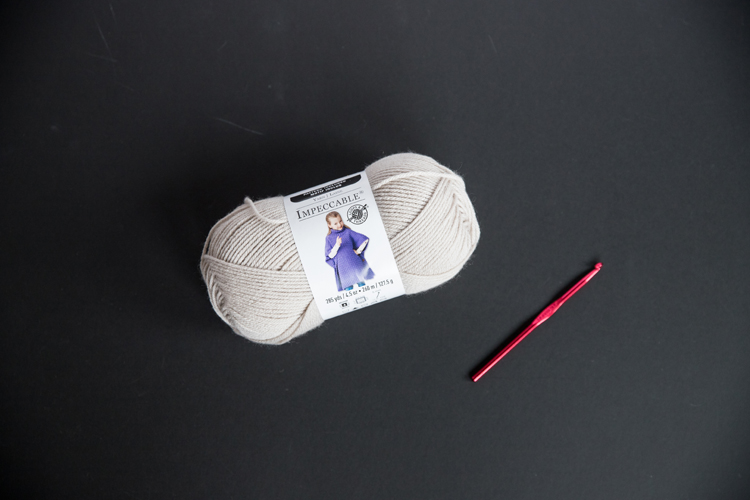
MATERIALS
- Category 4 or worsted weight yarn, about 250 yards*
- J/10 or 6.00 mm hook
- Yarn needle
- Scissors
*I used Loops and Threads Impeccable yarn in worsted weight in putty mastic from my stash, originally from Michaels (they are still shipping right now during the Covid-19 restrictions!).
It’s also a great, washable yarn which is needed in our current virus conscious grocery situation!
ABBREVIATIONS
GAUGE
3 x 3 inch square = 9 hdc x 8 rows of hdc
PATTERN AND TUTORIAL
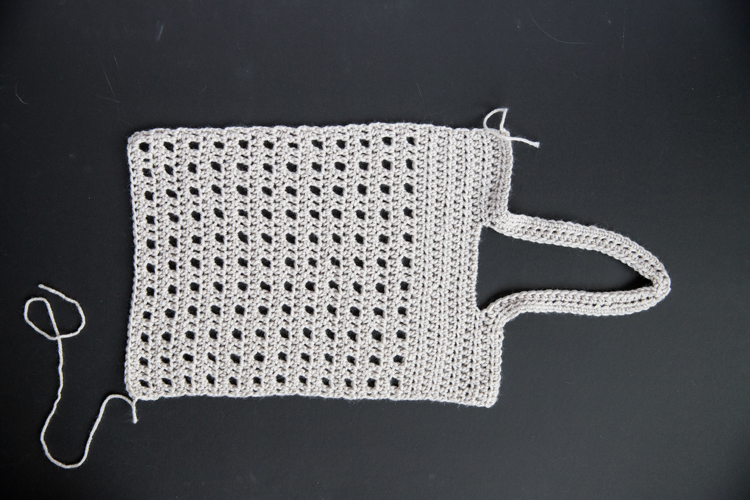
FRONT/BACK + HANDLES
Make 2.
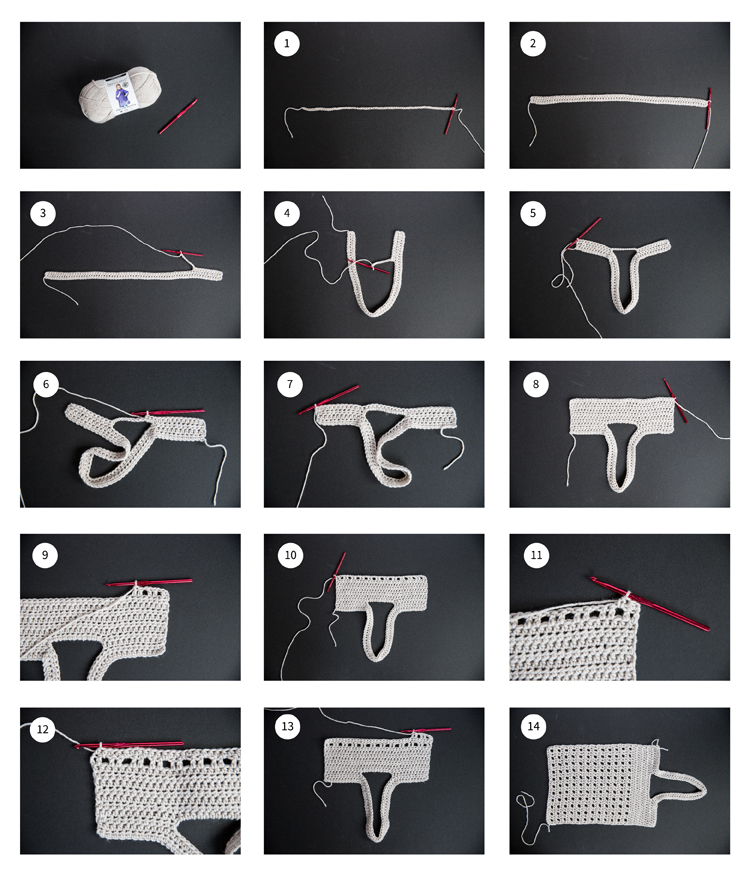
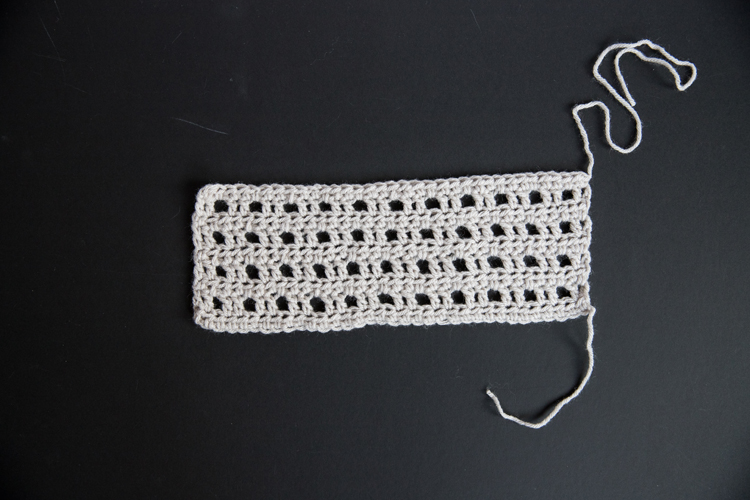
Row 1: Ch 70. Work hdc in second ch from hook. Hdc in each ch. (70, including skipped ch) – See #1
Row 2: Ch 1, hdc in each stitch in the row. (70, including ch 1) – See #2
Row 3: Ch 1, work 11 hdc. Chain 10. Skip 46 stitches and connect ch to row by working hdc in last 12 stitches. (34, including ch 10) – See #3, 4, 5
Row 4: Ch 1, work 11 hdc. Work 11 hdc in ch space. Work hdc in next 12 stitches. (35) – See #6, 7
Row 5: Ch 1, work hdc in each stitch. (35) – See #12 (note how you need to work the last hdc in the top of the chain 2 from the previous row)
Rows 6-10: Repeat Row 5. – See #8
Row 11: Ch 2, dc, ch 1, skip a stitch, dc in next two stitches. *Ch 1, skip a stitch, dc in next two stitches.* Repeat from * to * 9 more times. (35) – See #9, 10
Row 12: Ch 1. Hdc in each stitch and ch space. (35)
Repeat alternating between a mesh row (Row 11) and a hdc row (Row 12) nine to twelve more times. – See #13
Rows 13, 15, 17, 19, 21, 23, 25, 27, 29 (stop here for shorter bag), 31, 33: Repeat Row 11.
Rows 14, 16, 18, 20, 22, 24, 26, 28, 30 (stop here for shorter bag) 32, 34: Repeat Row 12.
Tie off. Don’t weave in ends until after you seam the bag together. – See #14
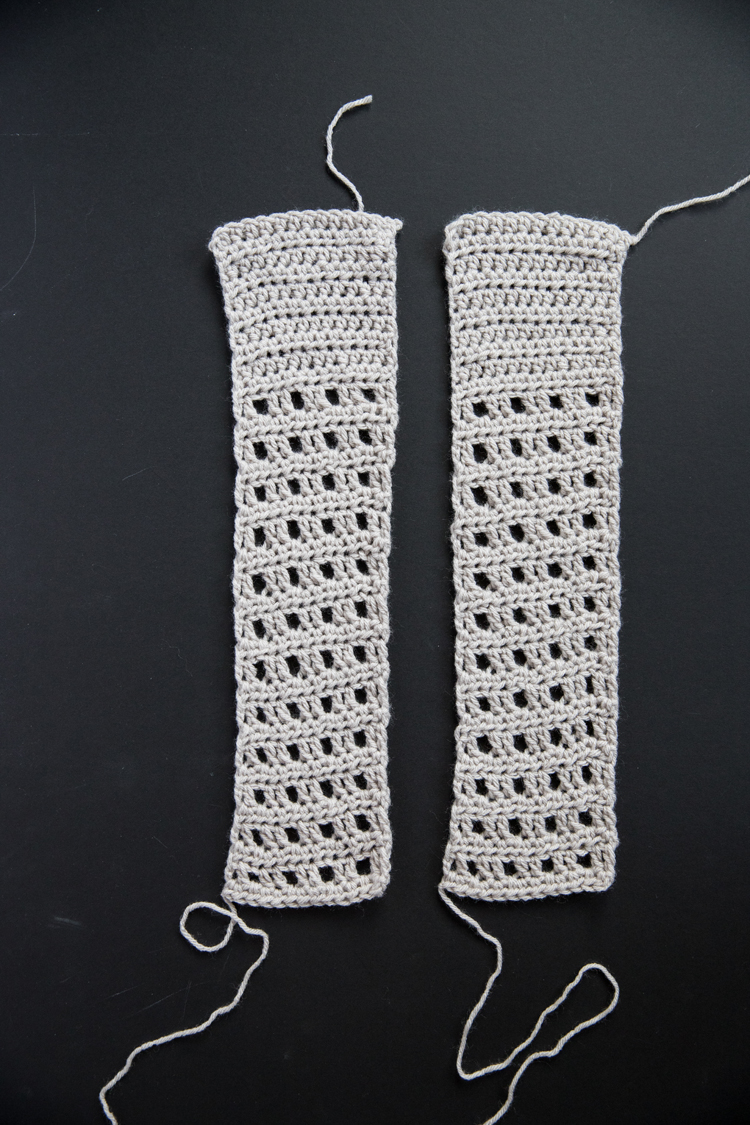
SIDE PANELS
Make 2.
Row 1: Ch 14, hdc in second ch from hook and in each ch for the rest of the row. (14, including skipped ch)
Row 2: Ch 1, hdc in each stitch. (14)
Rows 3 – 10: Repeat Row 2.
Row 11: Ch 2, dc, ch 1, skip a stitch, dc in next two stitches. *Ch 1, skip a stitch, dc in next two stitches.* Repeat from * to * 2 more times. (14, ch 2 as one stitch and single chains)
Row 12: Ch 1. Hdc in each stitch and ch space. (14)
Repeat alternating between a mesh row (Row 11) and a hdc row (Row 12) nine to twelve more times.
Rows 13, 15, 17, 19, 21, 23, 25, 27, 29 (stop here for shorter bag), 31, 33: Repeat Row 11.
Rows 14, 16, 18, 20, 22, 24, 26, 28, 30 (stop here for shorter bag) 32, 34: Repeat Row 12.
Tie off. Don’t weave in ends until after you seam the bag together.
BOTTOM PANEL
Row 1: Ch 35, hdc in second ch from hook. Hdc in each ch in row. (35)
Row 2: Ch 2, dc, ch 1, skip a stitch, dc in next two stitches. *Ch 1, skip a stitch, dc in next two stitches.* Repeat from * to * 9 more times. (35, including ch 2 as one stitch and single chains)
Row 3: Ch 1. Hdc in each stitch and ch space. (35)
Row 4: Repeat Row 2.
Row 5: Repeat Row 3.
Row 6: Repeat Row 2.
Row 7: Repeat Row 3.
Row 8: Repeat Row 2.
Row 9: Repeat Row 3.
Tie off. Don’t weave in ends until after you seam the bag together.
Seaming Bag Together
Photos 1 + 2 + 4: Align a side panel along one of the tall sides of one of the front/back pieces. Insert your hook through both layers at the end of one side. Work a sc stitch. Then work a sc through the sides of each hdc and dc stitch until the sides are sewn together. Tie off.
Photo 3 + 4: Repeat for the other side panel.
Photo 5: Attach the other front/back piece to the other side of the side panels.
Photo 6: Seam the bottom panel in place.
Weave in all ends. Done!

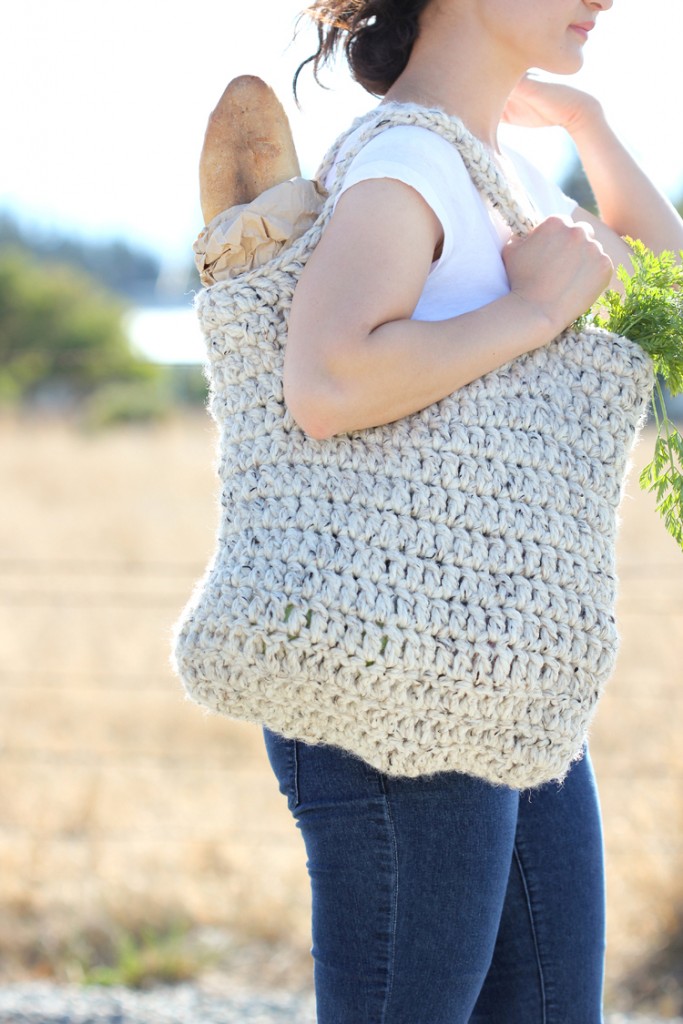
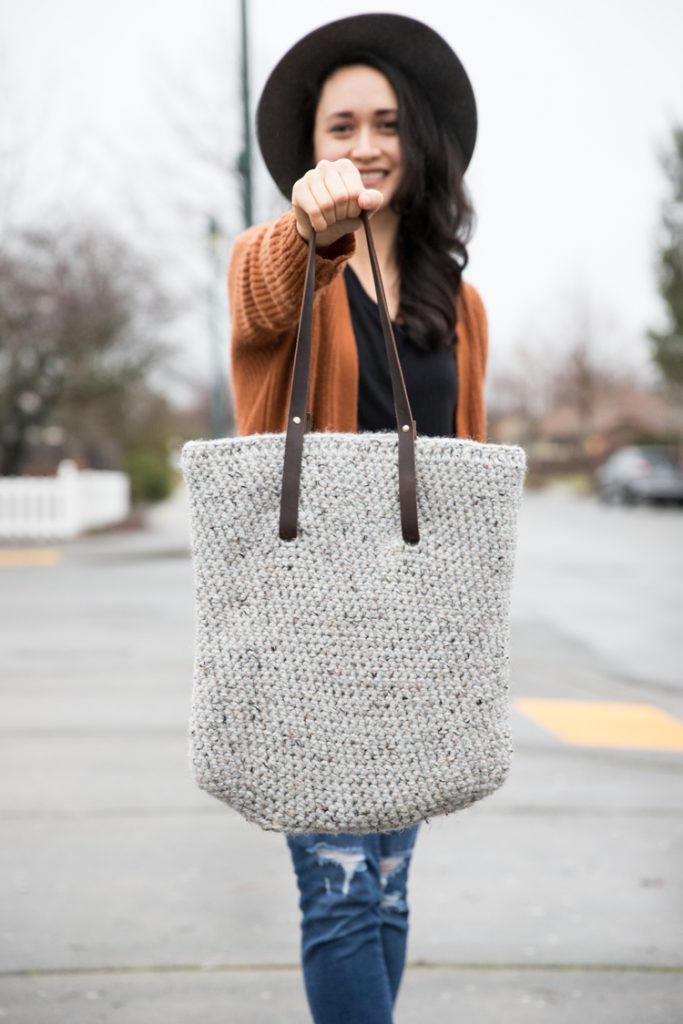
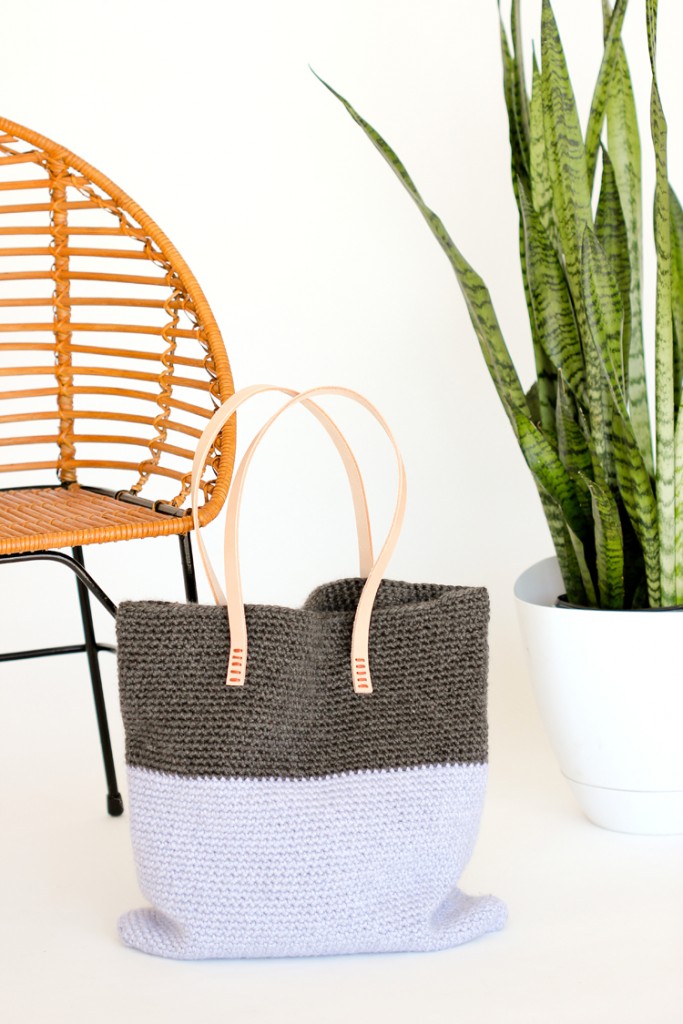
For more crochet bag patterns, check out these projects.
From left to right: Sturdy Market Tote free pattern, leather strap crocheted tote free pattern, two toned tote free pattern.
This is such a cute bag and looks easy to make! I’ll have to give this a try!
Thanks Michelle! <3
I would love to try this too!! It looks fun~~
I love the bag, but I love your shoes even more!! Can you share the details on them?
Oh thanks! They’re from Target last year. They are FreePeople knock offs.
You are the best