

My husband thinks I have too many bags. He’s nicknamed me the bag lady.
I’ll cop to that. 😉 I think it’s important to have the right bag for different jobs. Soft totes for grocery bags, zipper totes for flying, and sturdy totes for library trips, picnics… almost everything else!
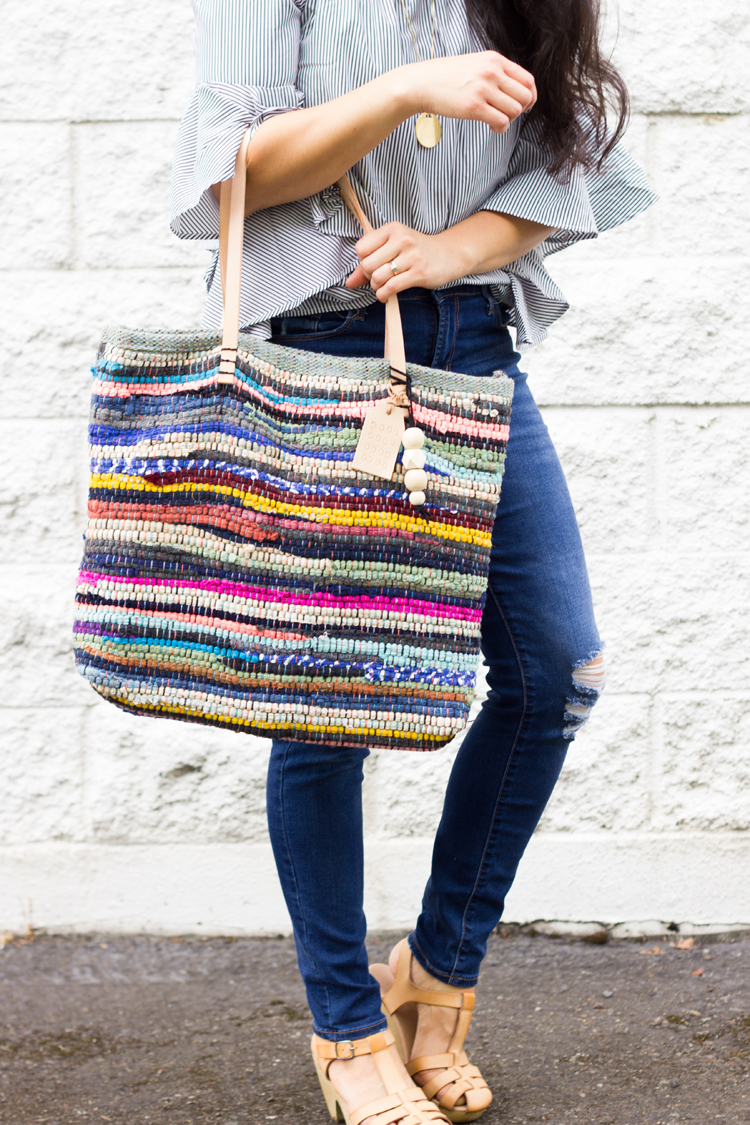
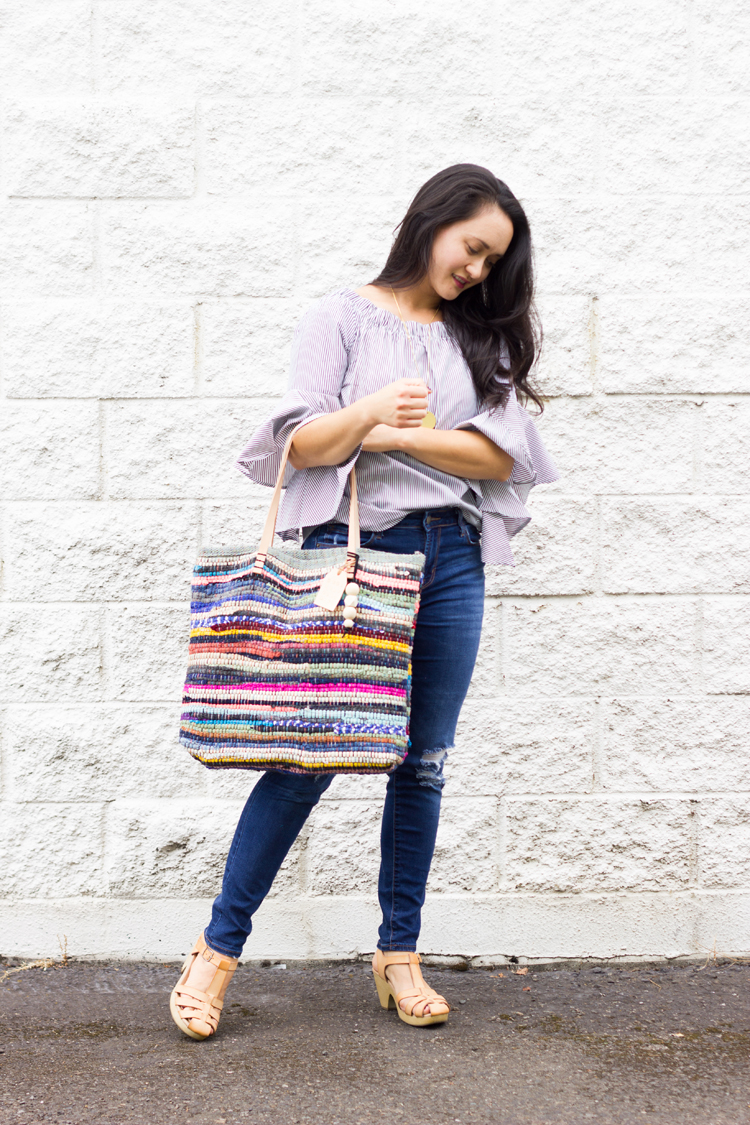
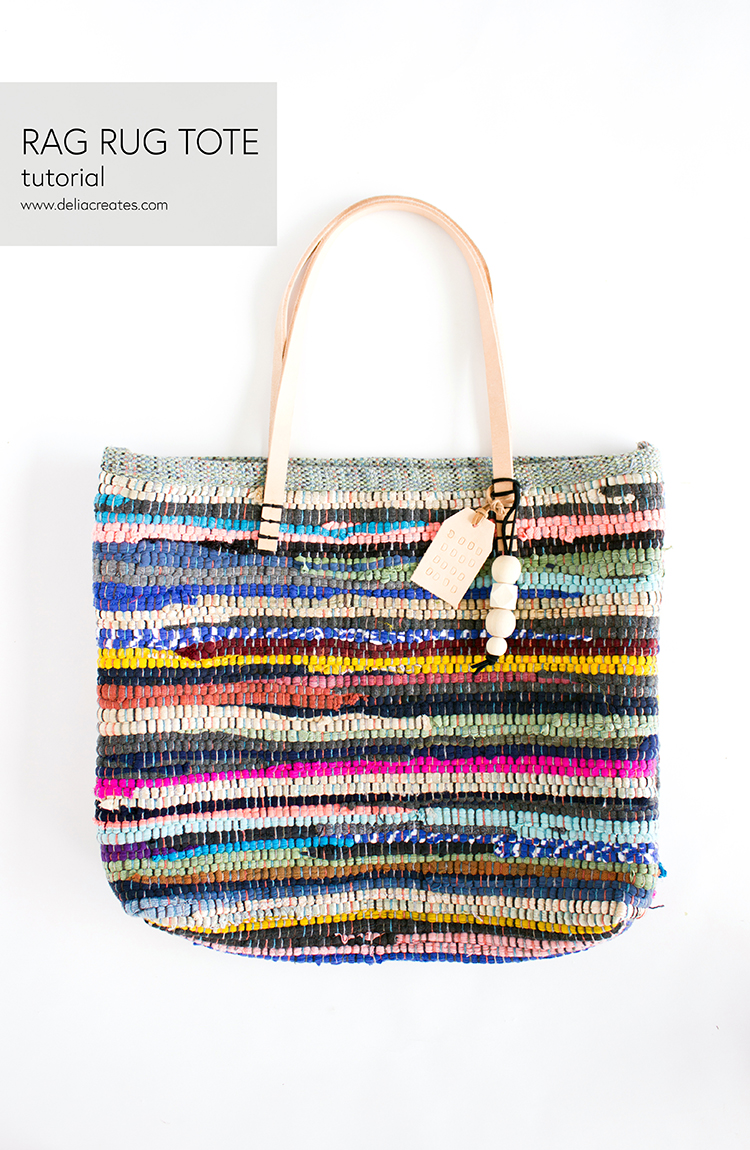
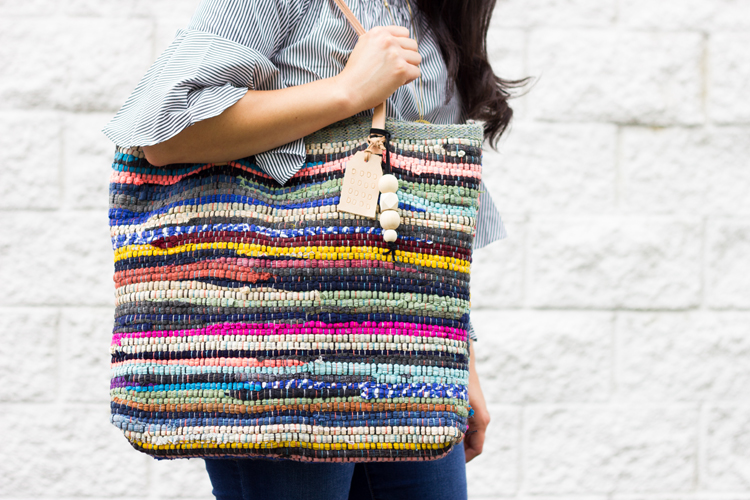
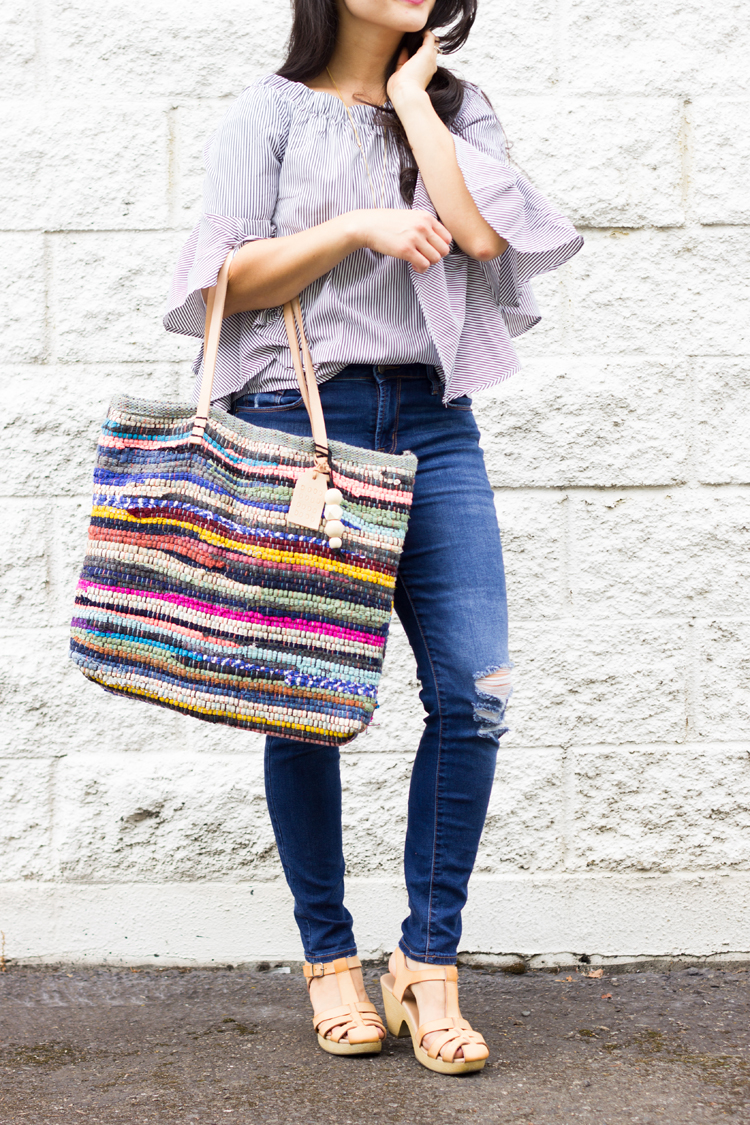
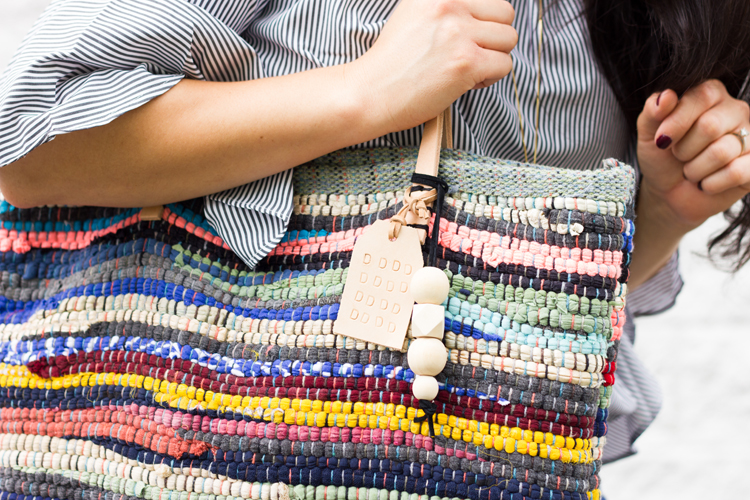
Like this rug rag tote. It’s totes sturdy, but it’s also soft enough to tuck away until you need it. Come on’….you knew that pun was coming. 😉
It’s also a super fast sew. All the edges are finished, so most of the work is done for you.
Let me show you what I mean:
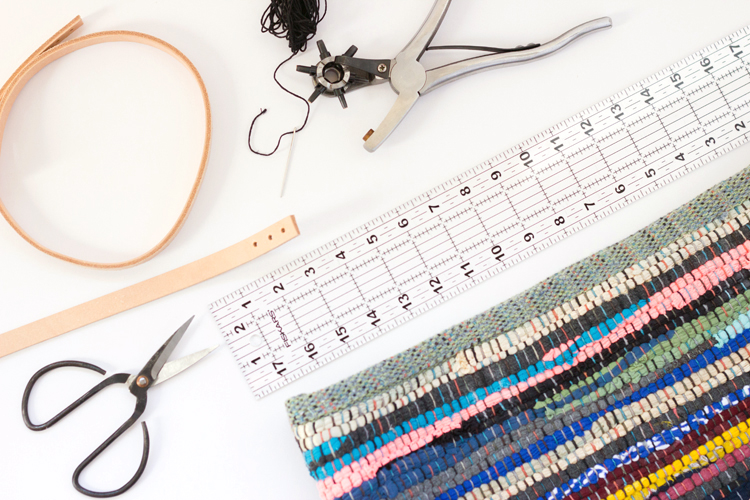
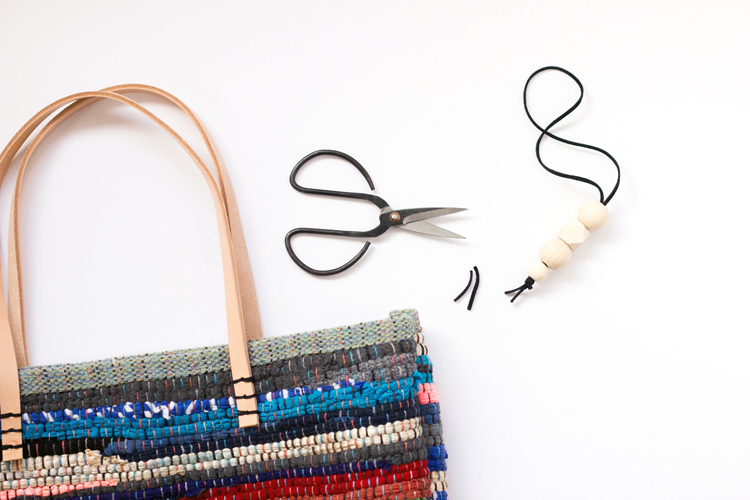
MATERIALS
- rug rag*
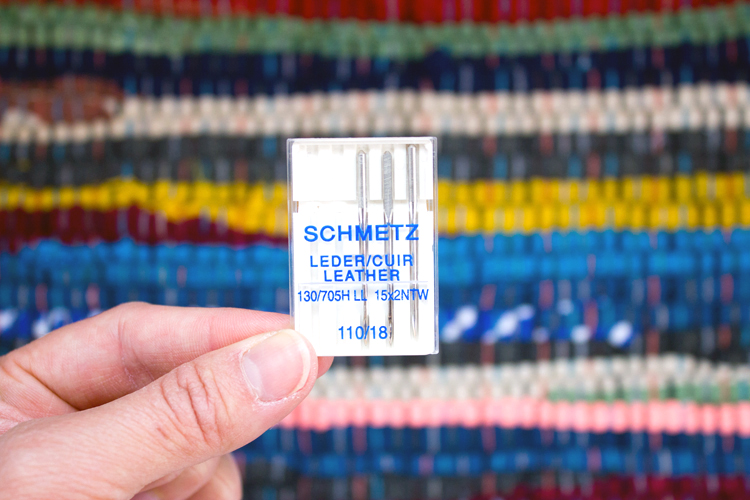
- heavy duty needle (denim or leather needle)
- sewing machine
- all-purpose thread
- scissors
- leather handles** about 27 inches long and 3/4 inch wide
- leather punch
- ruler
- yarn needle
- waxed cotton cording
Materials Notes:
*My rug rag is 21 x 34 inches and it’s the perfect size. I found mine at Walmart for $5.
**I created my leather handles from a vegetable tan leather belt kit from Michaels (coupon!). It comes 1 1/2 inches wide and 42 inches long, so I cut it in half width wise and then cut the strips to 27 inches long. I created a very similar crocheted one last year that explains more of what I mean.
TUTORIAL
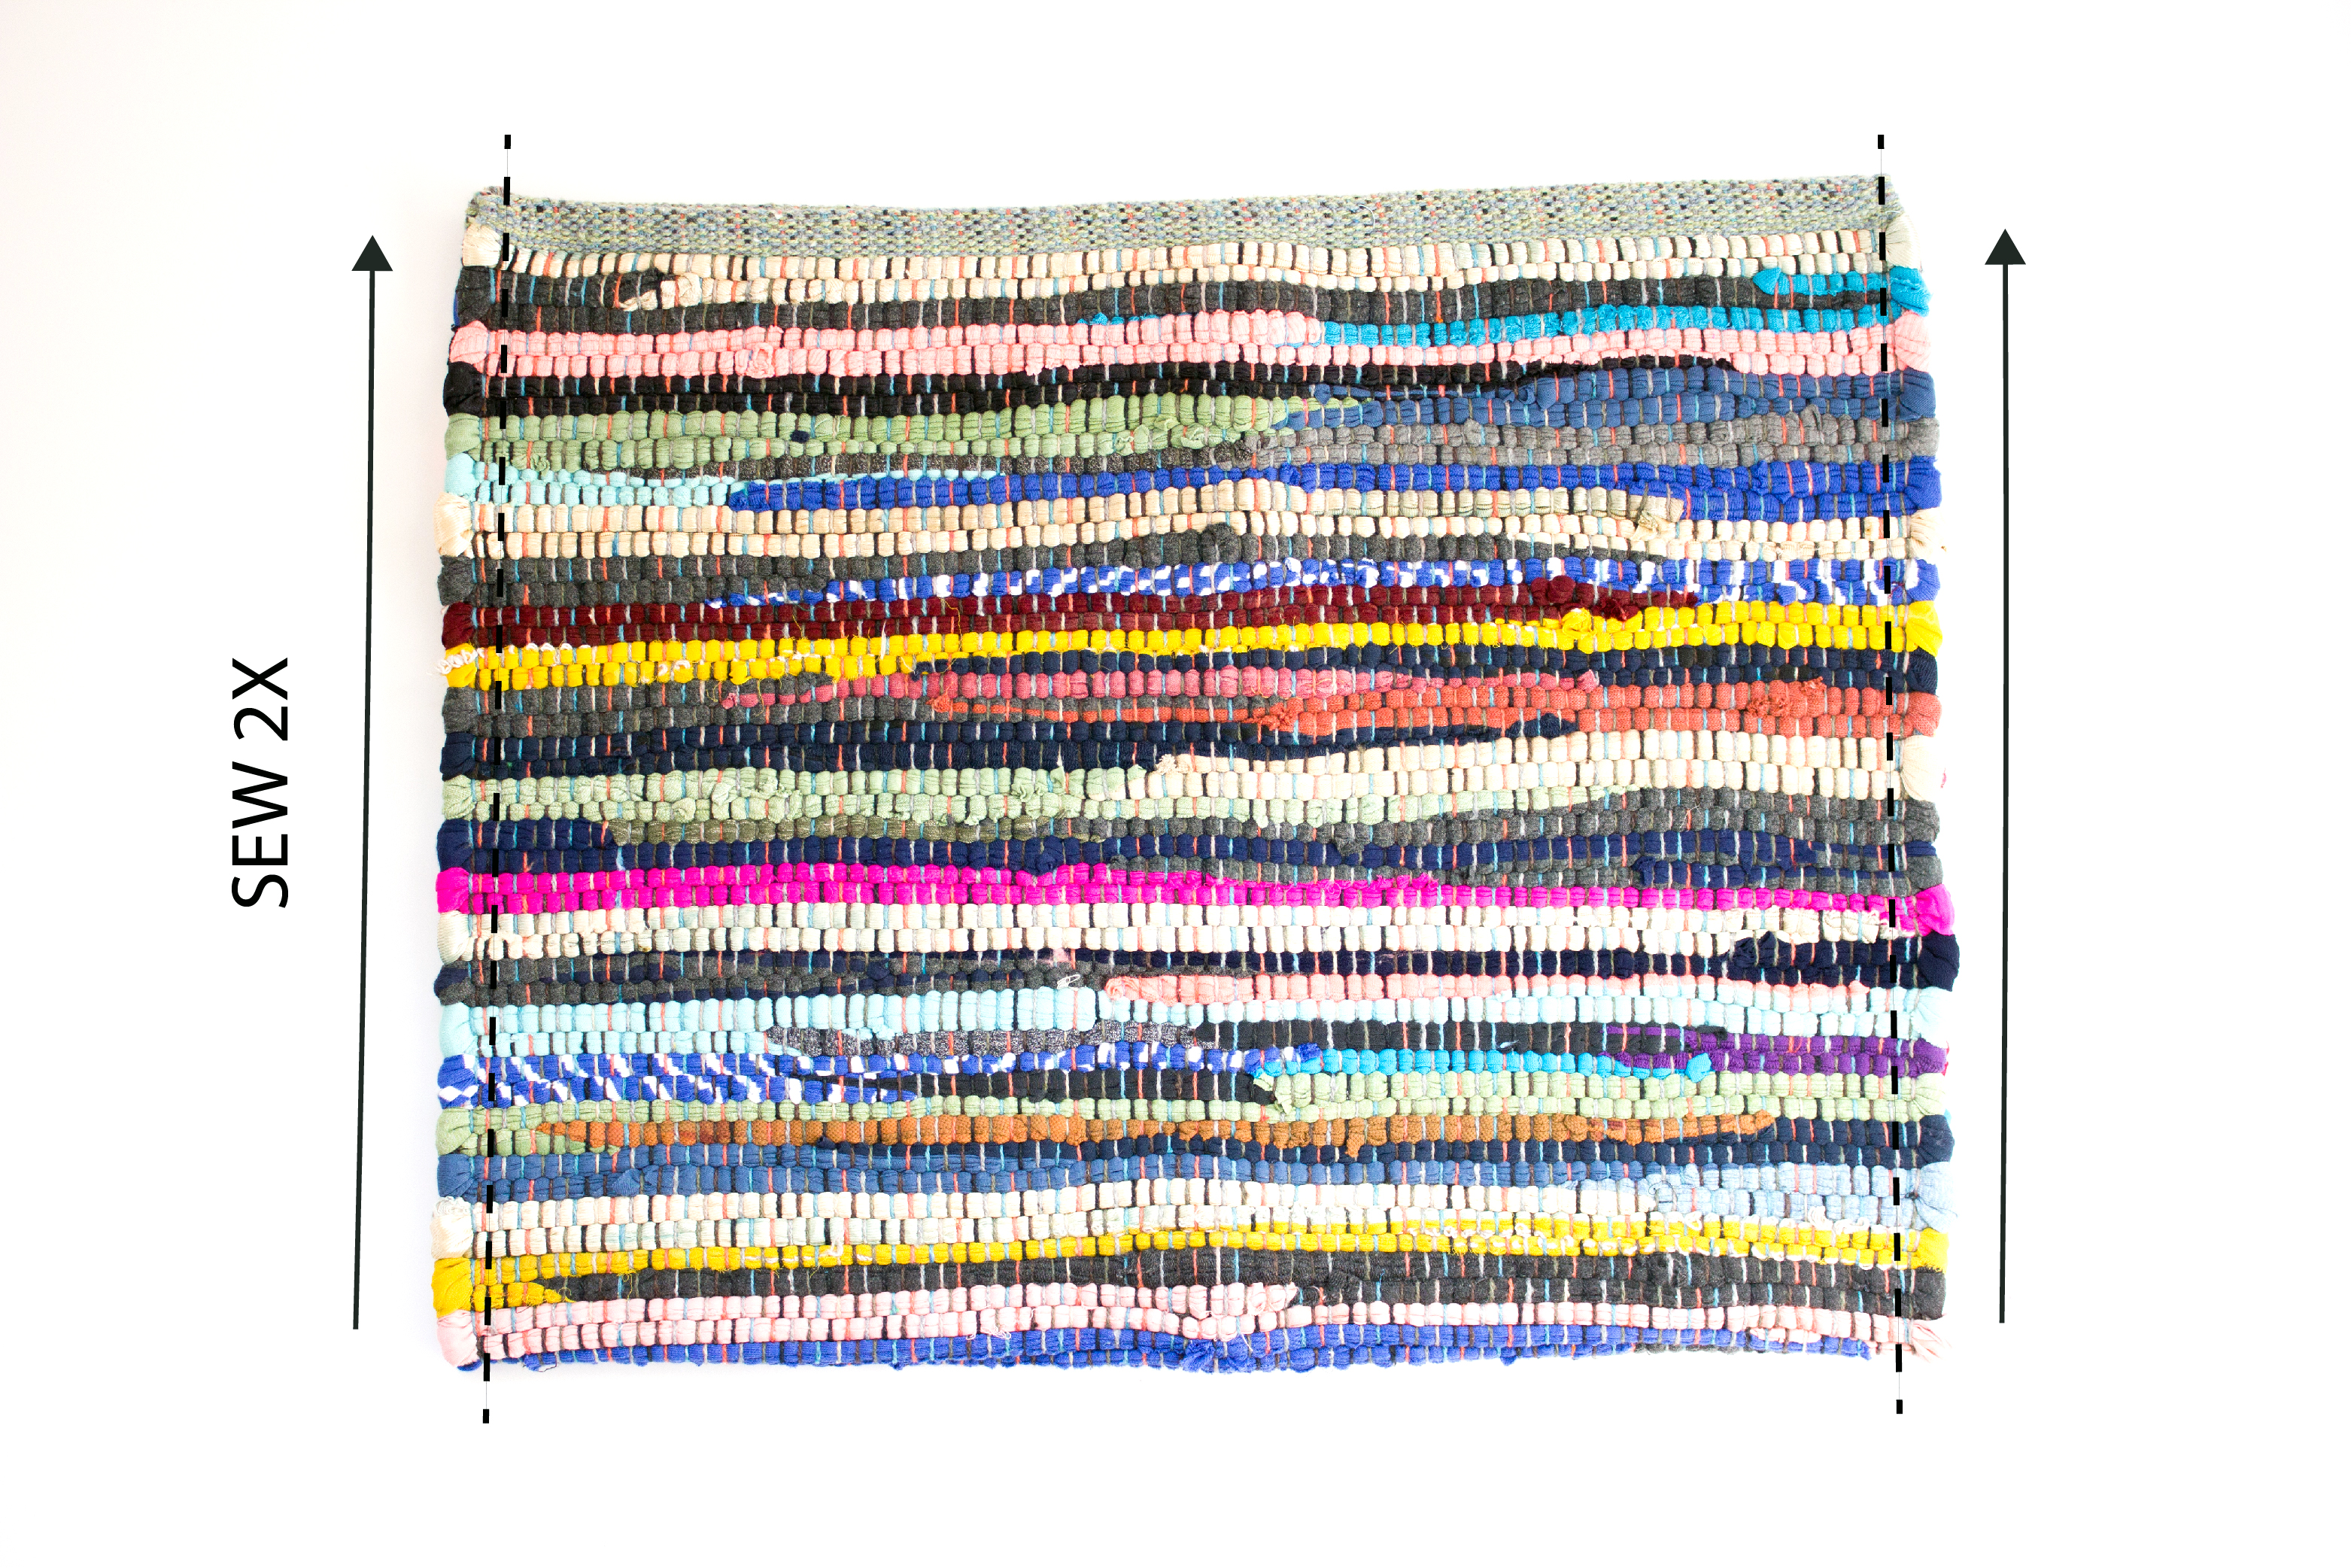
Step One: Sew up the sides — TWICE.
A doubled up rag rug is thick! It’s important to use a heavy duty needle that can handle all those layers. Going over it twice, and sewing SLOWLY, ensures that the seam maneuvers around all the nooks and crannies to create a strong bag. You may also have to hand crank through the first seam.
Because it’s so thick, it can be tricky to get things to line up just right. 😉
 Luckily rug rags are inherently messy looking, and very forgiving.
Step Two: Sew the corners.
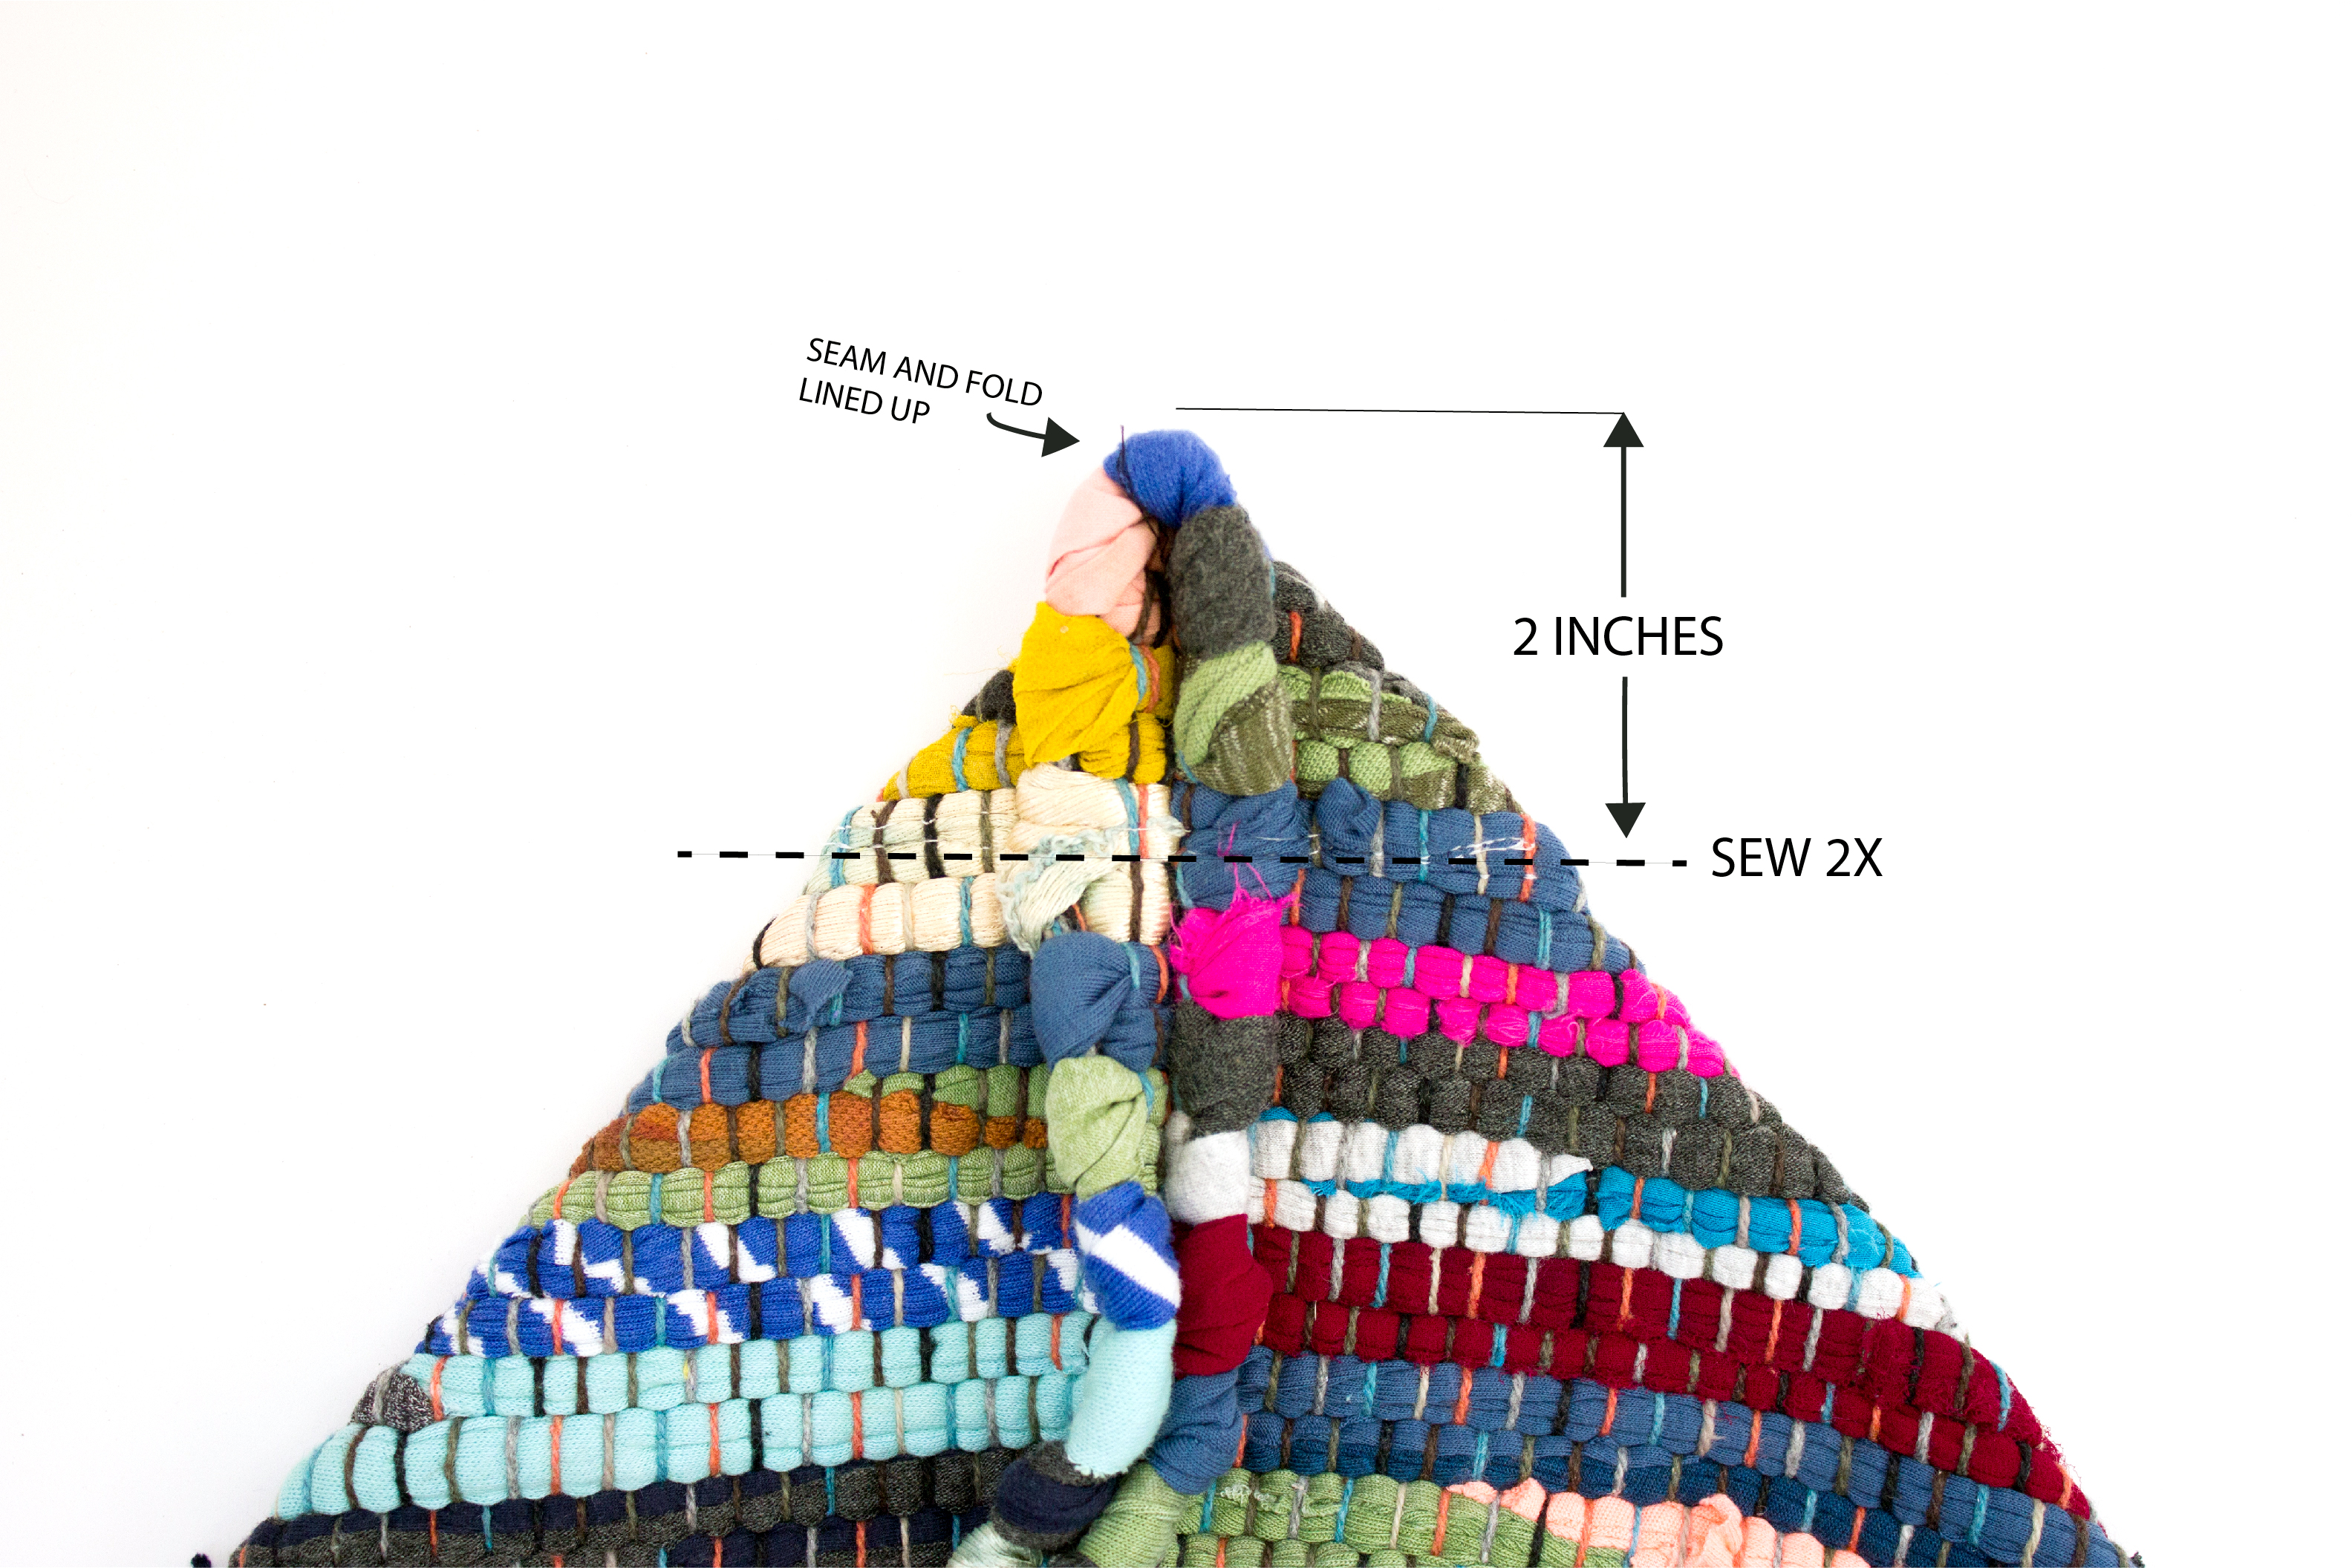
To box the corners and give the bag some depth, fold the side seams down to meet the bottom. Be sure to align the side seam with the center fold on the bottom. Measure two inches down from the tip of the corner and draw a line across the side of the bag, forming a triangle. Sew along that line…twice! 🙂
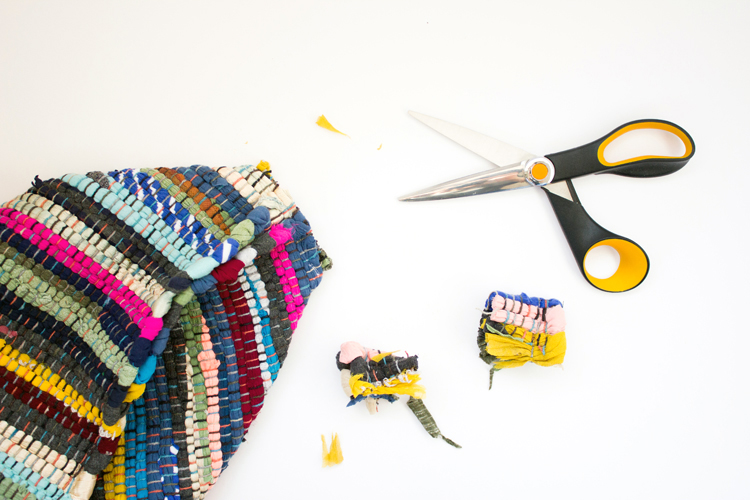
Cut away the excess corner material, being careful to leave at least a 1/2 inch seam allowance (extra material to the right of the seam). Finish the raw edge with a zig zag stitch if desired. My rag rug is mostly made of knit material which doesn’t fray, so I didn’t bother.
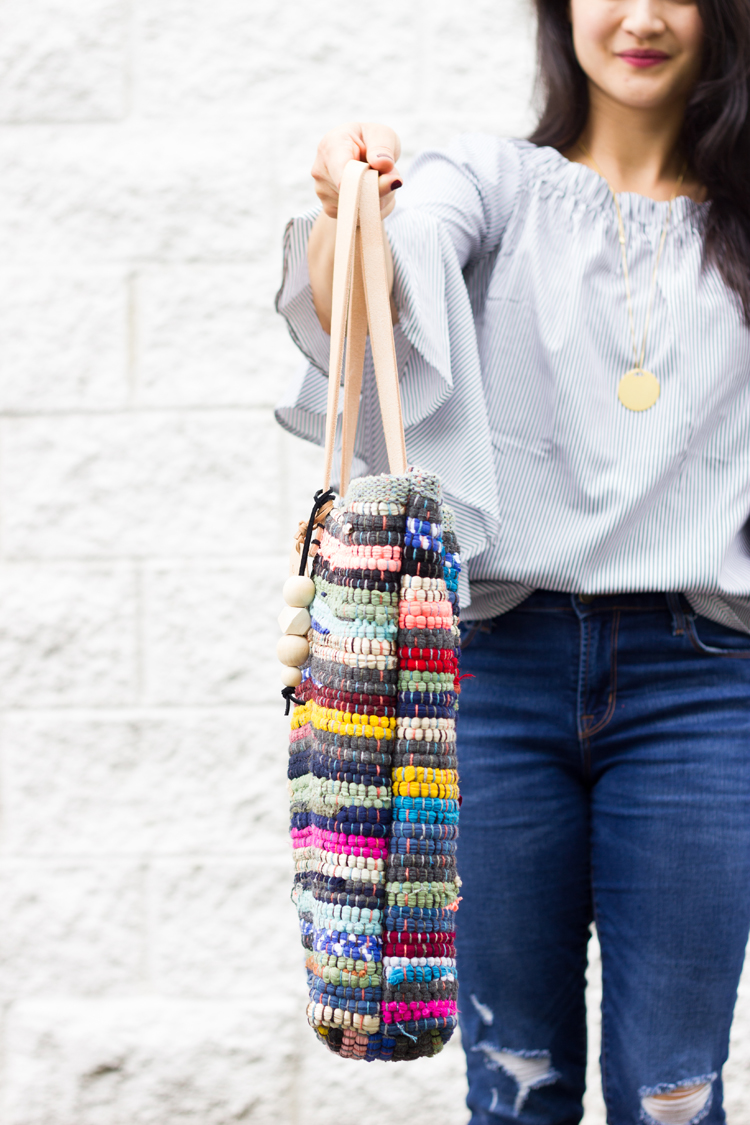
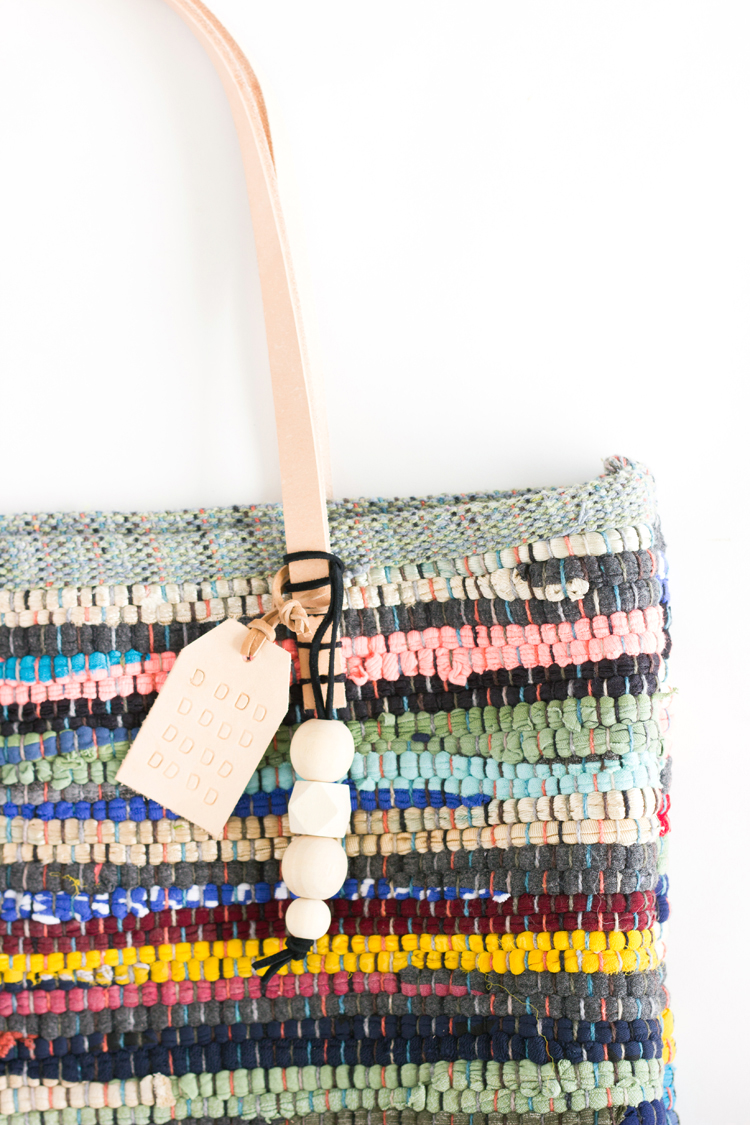
Step Three: Add handles.
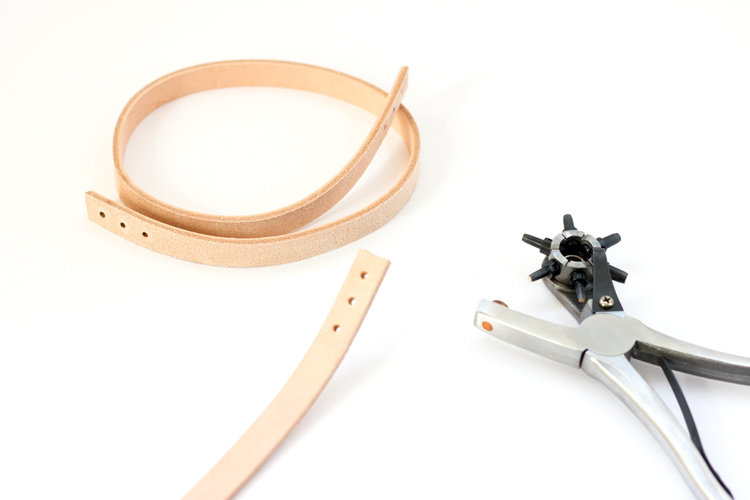
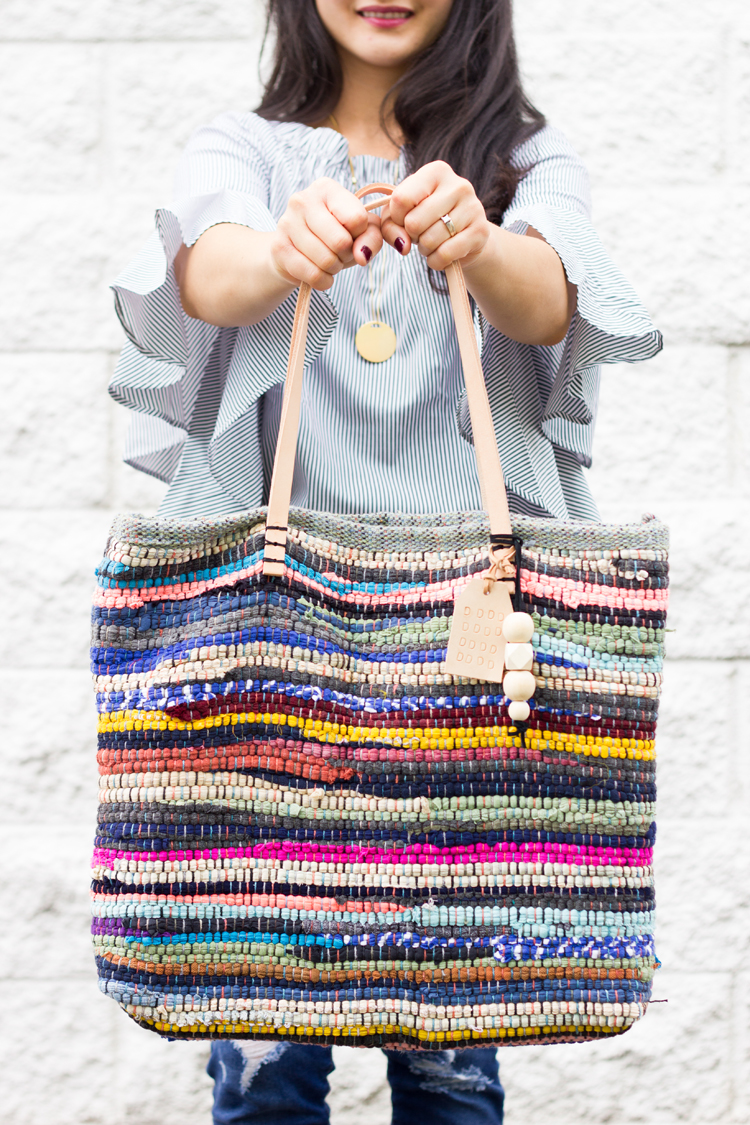
Punch holes in your leather handles. About three inches down from the top of the bag and about 8 inches apart, sew the handles in place with a yarn needle and waxed cotton cording.
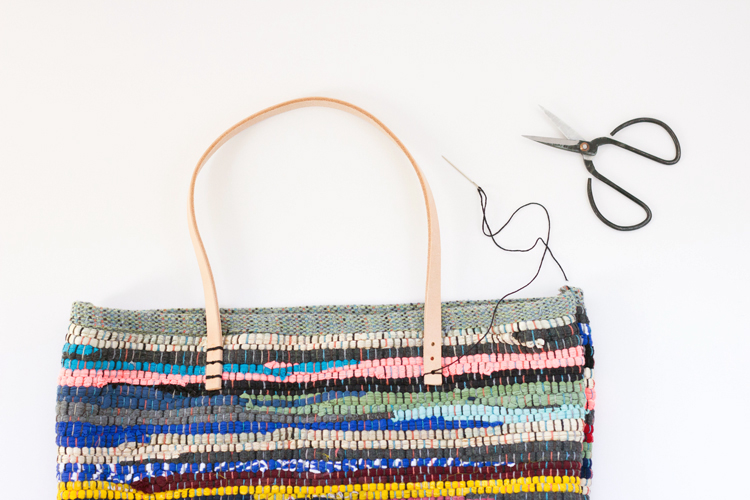
I sewed them through three centered holes this time. I have a crocheted version with the same handles that I sewed on a little differently. See it here. You could also sew X’s into the handles, or vertical lines.
I considered, and actually tried, using hardware but it had a tendency to slip through the small holes of the rug rag. Sewing allows you to make sure you are catching each stitch through fabric to keep it secure.
That’s it!
I added some extra details, like this wood bead fob, and monogrammed leather tag which I whipped together with some leftover leather scraps and some leather cording.
Pom poms or tassels would be a cute addition as well.
This bag sort of reminds me of those layered sand candles. Remember those!?
Even though it has a colorful, busy pattern, it goes with almost anything. And it’s so sturdy! It’s my new go to library tote for taking back all our overdue books from the summer. 😉 ha!
LOVE this. Man, your ideas are always clever, doable, and gorgeous. Now, I have to find a time to get to walmart to pick up a rug…….
Aw thanks Cheri! <3 You always have a kind word to say. I appreciate you.
I’m in LOVE! I can’t thank you enough for this tutorial. It’s all you could want in a sewing project and in a purse. It’s simple, quick, forgiving, customizable, cute, large, goes w/everything… It’s a bag I’d buy if I saw it. In fact, it looks a bit like a Madden bag I own! I think I’ll attempt lining the inside & adding a small pocket. I love your fobs! I’ll have fun getting creative & personalizing some fobs as well. I just love this project!
Aw thanks Michelle! A lining and a pocket would be amazing! If you share it, tag me so I can see! <3
I love the rag-rug purse; I didn’t even know what store sells it I just think it is very artsy and chic. It looks like it came out of Chanel, cause he always used tweeds, and strange textured fabric for clothes —reminds me of that. So THIS PURSE I AM GOING TO MAKE!! THANK YOU!!
Hey love the idea! I am regular reader of your blog but this time you nailed with the designs. Really appreciating!!
One thing I wanted to ask that you said about “waxed cotton cording”. What it is? I mean any wax coating or wax material?
Thank you! Great question. I did use a pretty general phrase, didn’t I. By waxed cotton cording, I’m referring to a thicker cotton thread that has been treated with some kind of coating, wax or some kind of polymer, to keep it from being fuzzy. It doesn’t have to be waxed per se, but it needs to be thicker than embroidery thread, thinner than most yarns, strong, and on the smooth side. You can find cording in the leather section or in the jewelry section. I’ve used cording/thread from both places, but the jewelry section has more variety in color and thickness. I hope that helps. Please let me know if you have any other questions.
Hey, Thanks for the instant reply..!
I checked jewelery section, all are good, now I am looking for your new blog post update.
Keep it up!! You are doing great..!
How adorable this bag is! I LOVE rag rugs for the texture and color and to think I can make a bag with one is the topper! I’m getting to Walmart soon and hope to whip up a bag thanks to your tutorial.
Question: Is it possible to cut the rug down to make a smaller size bag?
Great question! I think you could do it, but you would definitely have to bind the cut edges immediately. If you have a serger with a knife, that might be your best bet. Just to warn you though, the rug is pretty thick so it might be tricky. My best advice is to take it slow. That solves most of the issues you might run into. Good luck!
I love this bag, and just finished making one almost identical to yours. However, even with a HEAVY duty needle, I was unable to sew this on my machine. I have sewn over many thicknesses of denim without major issues, but there was no way this was working. I ended up sewing it almost entirely by hand. I did cut one side to make the purse slightly narrower. It worked just fine without binding the edge. I did lots of hand stitches on that side, so that may keep it from raveling. I used longer straps, so I can use as a shoulder tote, and I added a big white wooden button that had nine holes. I attached it with many different colors embroidery thread, and attached a loop of leather on the opposite side, so I can have the top of the tote closed if I choose to. I really like it, but it turned into more of a 6 hour project instead of a quick one. I bought my rub for $5.00 at Walmart, so I don’t think it was thicker than yours, but it was just too thick to machine sew. Thanks for a great idea. If I had a heavy duty machine I could really have made this in about 30 minutes!
Oh dear! So sorry your machine struggled with it. That’s frustrating. Some machines handle it better than others. My older, inexpensive Brother actually handles thick stuff like this better than my nicer Baby Lock. I had to hand crank at the corners a lot because it didn’t like the thickness either. I’m glad you were able to complete it. It sounds like you added some really cute details!
Two thoughts….a store near me called 5 Below has tons of rag rugs for $5…and thrift/Goodwill has piles of leather belts. No need to buy expensive belt kits.
Great tips! Thank you for sharing. 🙂
Love your tutorial. I bought a rag rug tote with zipper and leather handle many years ago at a craft show. I used it until it fell apart. I’m going to make one now. Thanks!
Oh yay! Enjoy!
Menards has really nice rugs for $2.99
Thank you so much for the tip! I will check them out.
Do you use one or two rag rugs??
Just one. Sorry for the late reply. I have looked for a rug rag similar to what I used for this project but they are hard to find now. You might need to use two small ones. I think IKEA may still make small ones.
Would dental floss work as a wax coated thread?
It comes in black now with charcoal infusion!
That’s a really good question! I personally wouldn’t use floss because I don’t know how durable it is over time. My guess is that would not have the longevity of waxed thread.
where is the pattern to be copied and/or downloaded?
I don’t have a printable version of this project, but you are welcome to copy and paste what you need into a document for personal use only.