

Last year, I created this tutorial for a feature in Mollie Makes. Today, I am bringing it home for the holidays!
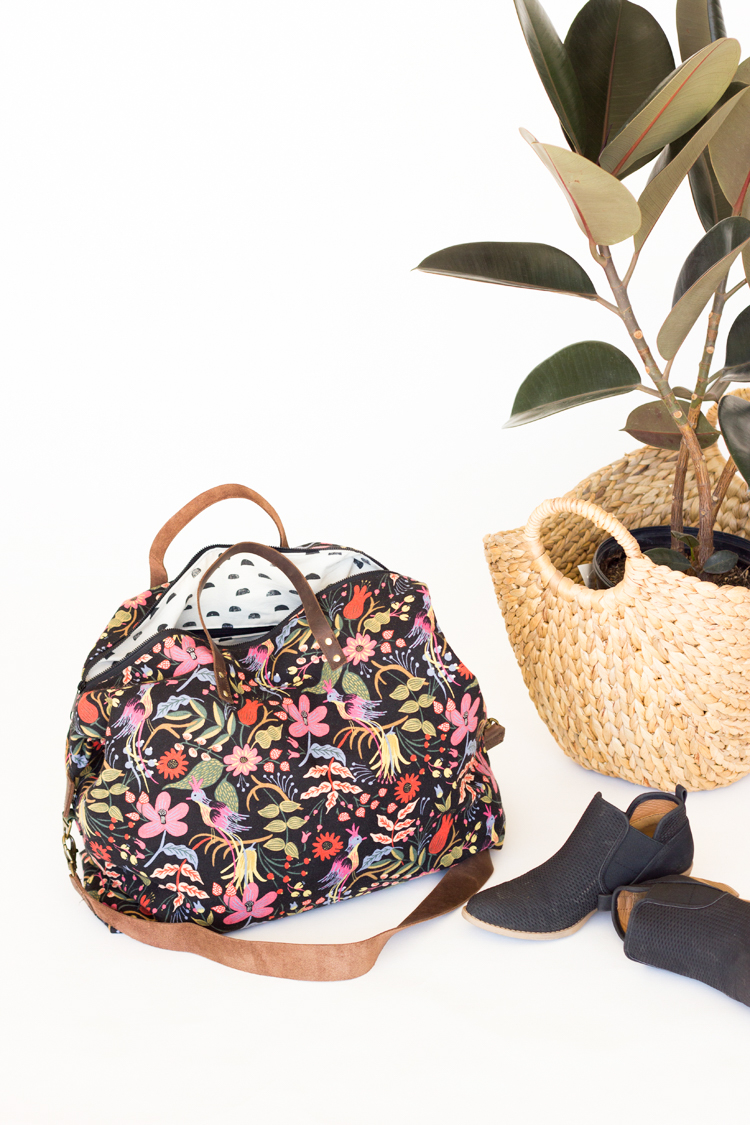
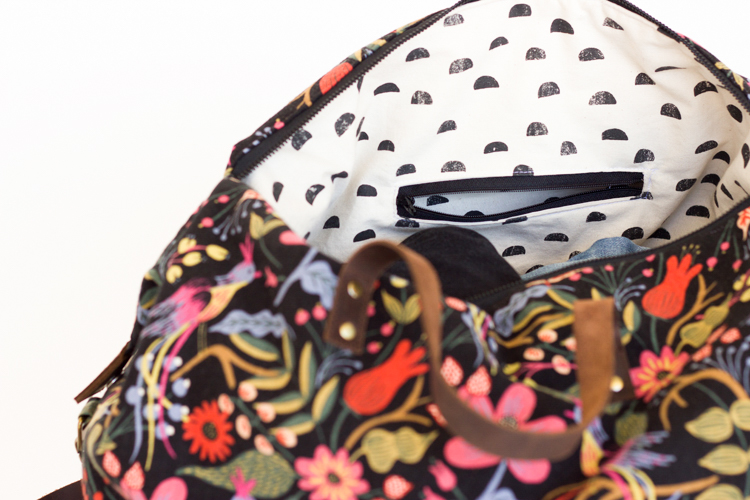
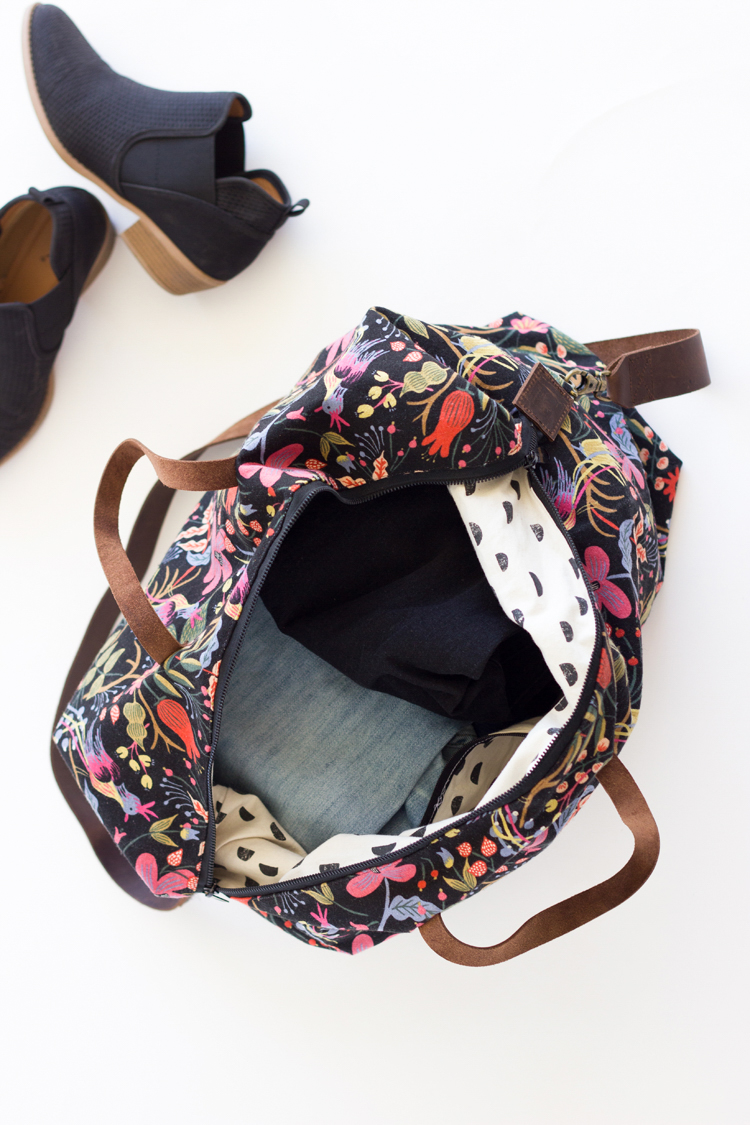
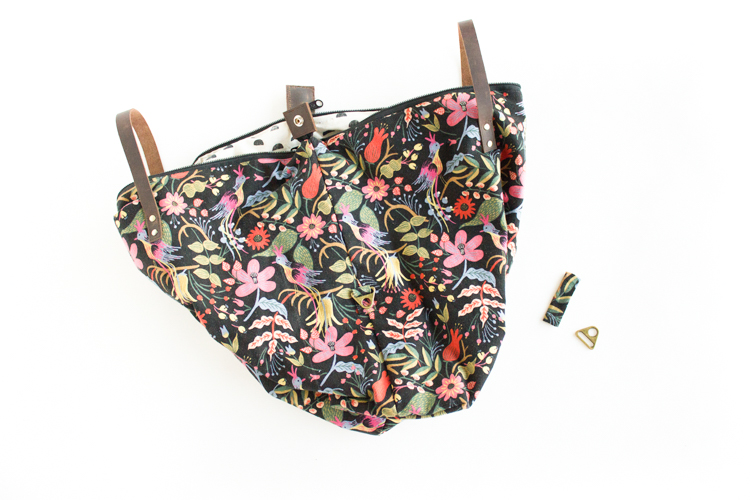
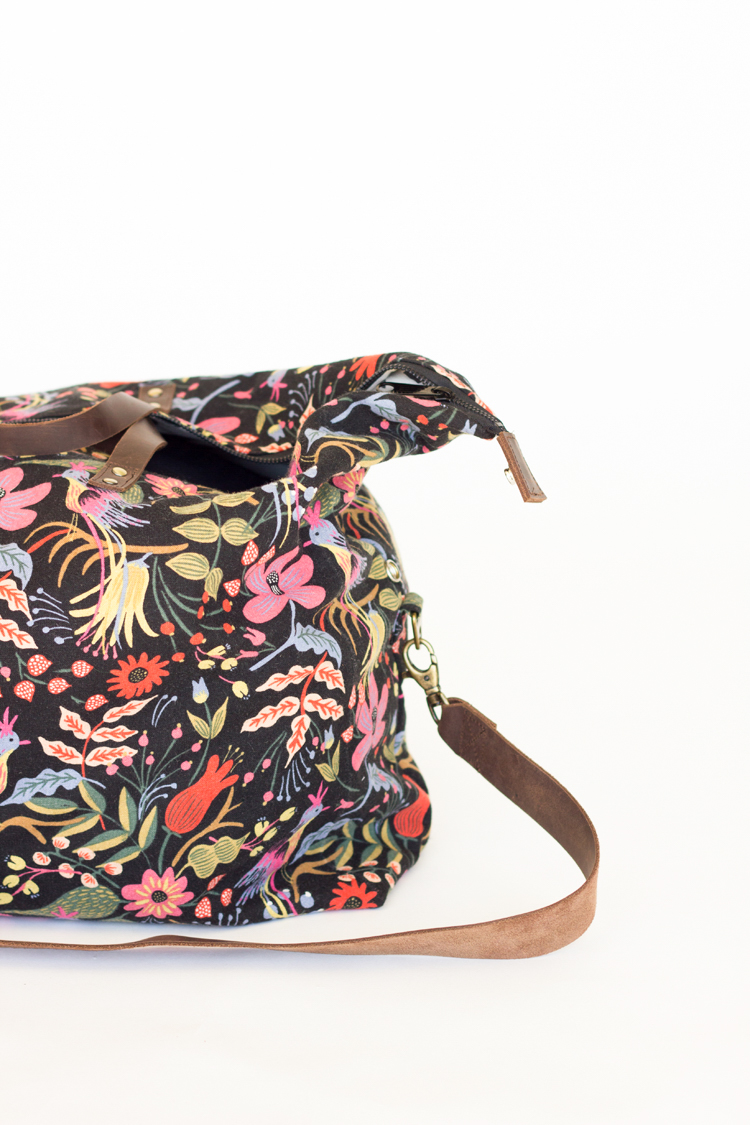
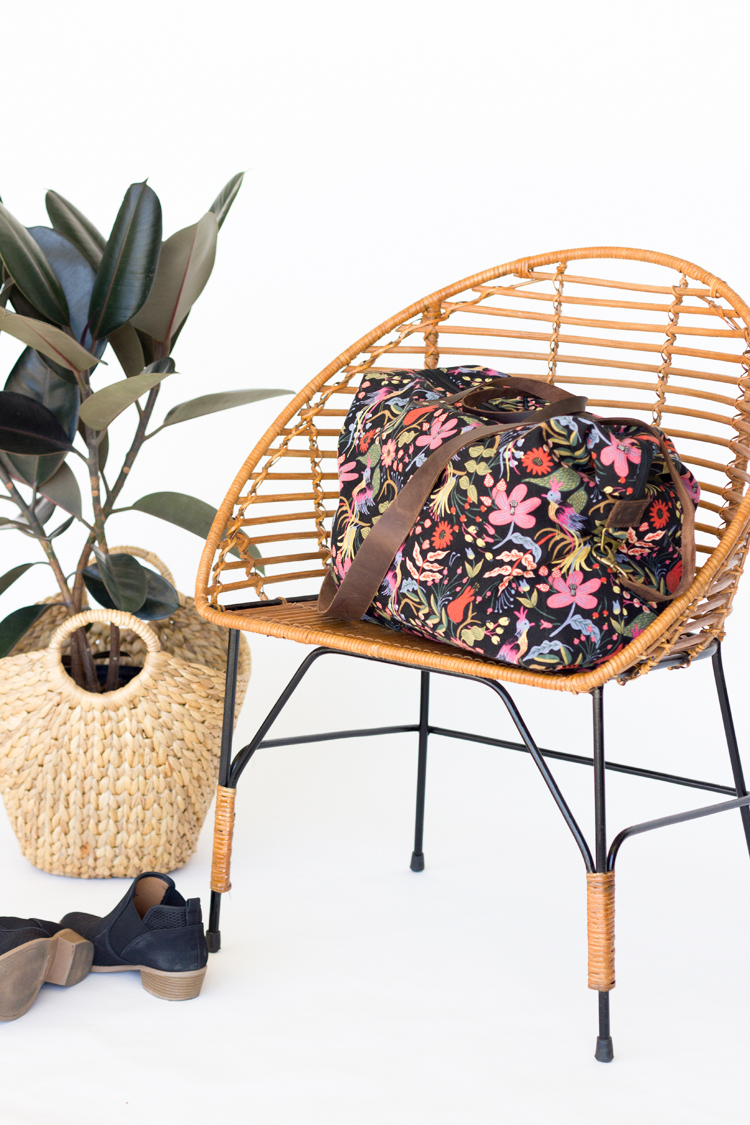
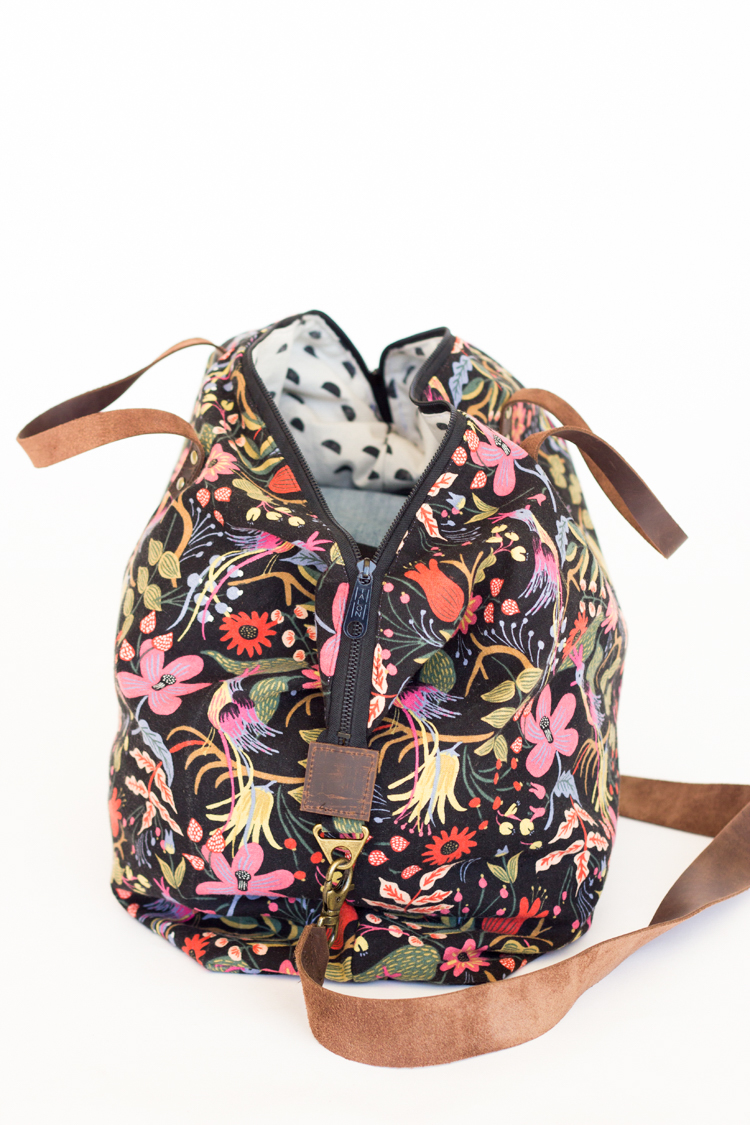
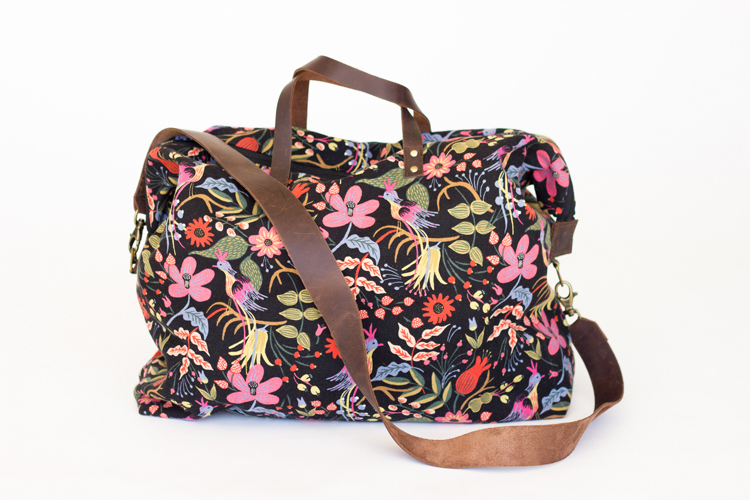
It’s a spacious weekender bag that sports an inside pocket, a leather shoulder strap, and just enough room for a quick getaway.
It makes a great gift for someone else or for yourself! 😉
Most of my tutorials are directed toward beginners and quick easy sews. This one is a little different. I recommend this tutorial for adventurous beginners with at least some sewing experience.
It is not a lengthy project but this tutorial is pretty long because I provide as much detail as I can in each step to help you be as successful as possible in making this bag.
Let’s get to it!
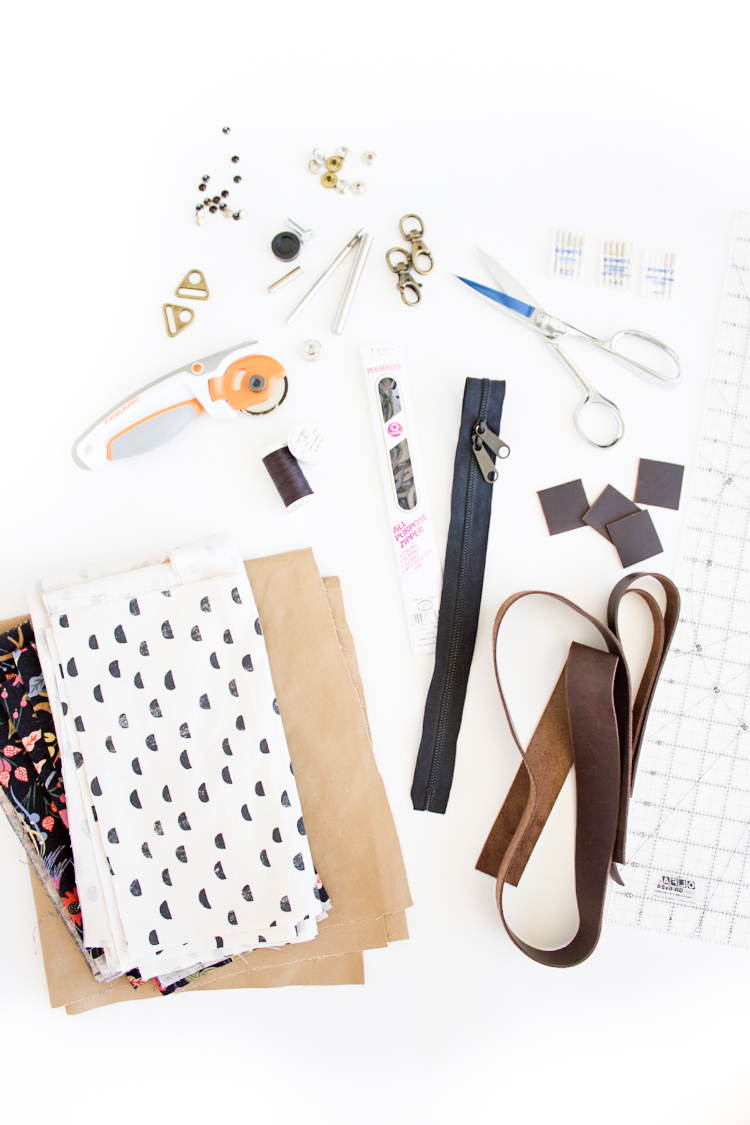
Materials
- 1 1/3 yards (1.25 m) cotton or linen canvas as main fabric (45 inches wide)
- 1 1/3 yards (1.25 m)cotton canvas as interfacing (45 inches wide)*
- 1 1/3 yards(1.25 m) cotton or other fabric as lining (45 inches wide)
- Matching thread
- Universal sewing machine needle
- Heavy-duty or denim sewing machine needle
- Leather sewing machine needle
- Heavy duty zipper, 24 inches (61 cm) preferably a purse zipper with two zipper pulls
- Leather strapping, 2 packages of 1.5 inches (4 cm) wide x 42 inches (107 cm) long (I bought mine from Michael’s)
- Heavy duty scissors
- Rotary cutter, ruler, and mat
- Pins and quilting clips (or small binder clips)
- Zipper foot
- Small rivets, 8 pairs + rivet tools
- Leather punch
- 2 D-rings or equivalent (I used triangle rings)
- 2 Swivel hooks
- Iron and ironing board
- Sewing machine
- Hammer (to use with rivet and snap tools)
*You may use fusible interfacing instead, but you will likely have to adjust the amount needed.
Optional:
- Nylon zipper, 7 inch, for lining zipper welt pocket
- Heavy duty snap, 2 pairs + snap tools
- Spray baste
Tutorial
Before you begin, pre-wash and press all fabrics as there may be some shrinking and wrinkling.
Note: Seam allowance is 1/2 inches unless otherwise listed.
Step One: Cut and prepare all materials.
Use these cutting guidelines:
– main fabric: 2 pieces 25 in (63.5 cm) wide x 20 in (51 cm) tall, 2 pieces 3.5 in x 2.75 in (9 x 7 cm)
– cotton canvas interfacing: 2 pieces 25 in (63.5 cm) wide x 20 in (51 cm) tall
– lining fabric: 2 pieces 25 in (63.5 cm) wide x 20 in (51 cm) tall, 2 pieces 12 in wide x 13 in tall (31 x 33 cm), 1 piece 11 in wide x 8 in tall (28 x 20 cm).
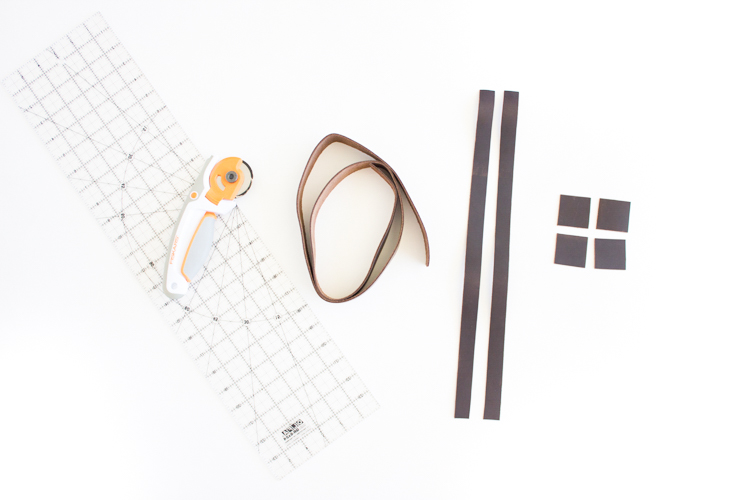
– leather shoulder strap: 1.5 in (4 cm) wide x 42 in (107 cm)
– leather tabs: 4, 1.5 x 1.5 in (4×4 cm) squares
– side leather straps: .75 in wide x 16 in (2 x 41 cm) Tip: Cut leather strapping in half, width wise.
Step Two: Apply interfacing to main fabric.
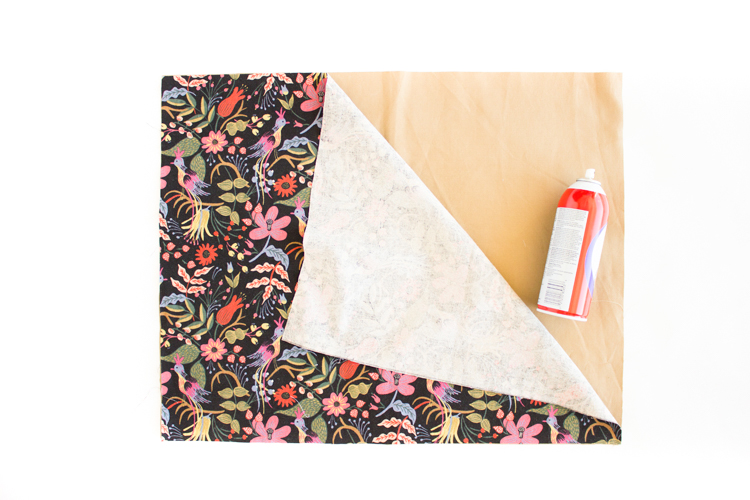
If using cotton canvas, it helps to use a thin layer of washable spray glue to temporarily adhere or baste the main fabric and the cotton canvas interfacing together.
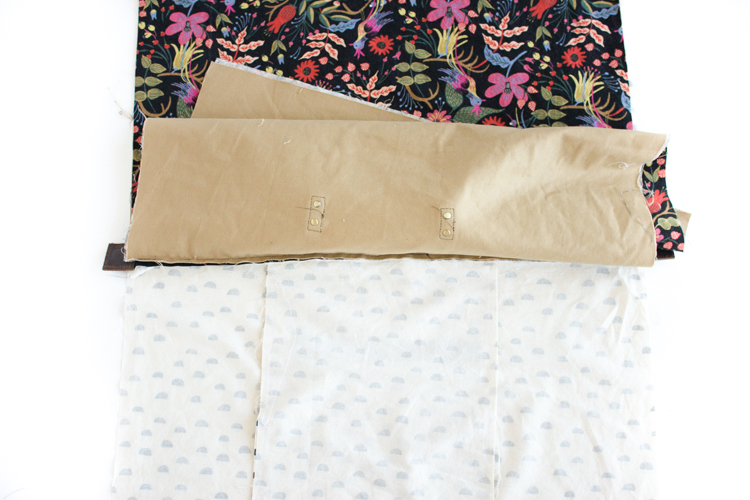
Step Three: Sew pockets into lining.
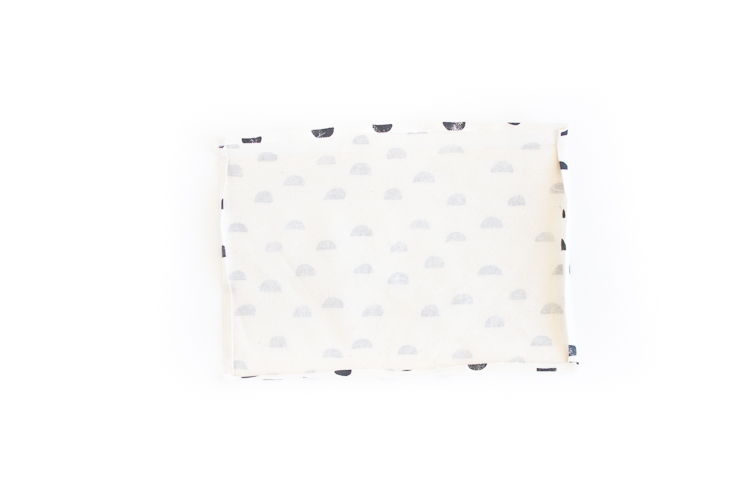
OPTION A: Basic pocket
– Fold and press the sides and the bottom of the 11 in wide x 8 in tall (28 x 20 cm) pocket under 1/4 in (6 mm), twice, with a hot iron.
– Fold and press the top of the pocket under 1/4 in (6 mm), and then again 3/4 inch (19 cm). Top stitch the top fold of the pocket in place close to the second fold line.
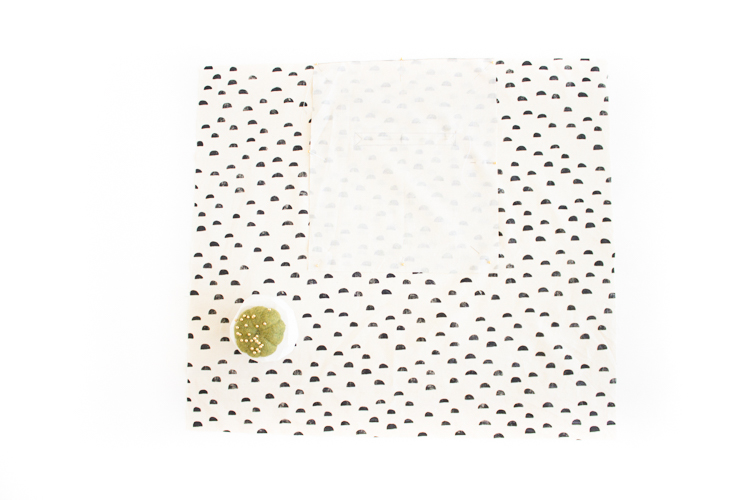
– Fold the pocket lengthwise and mark the center line. Repeat the process with the bag lining piece to which you are sewing the pocket.
– Center the pocket onto the lining piece, with the top of the pocket about 5.5 in (14 cm) from the top of the lining piece. Pin in place.
– Sew pocket in place, by sewing down one side, across the bottom, and then up the other side. Be sure to back and forward stitch several times any time you cross the top of the pocket for strength. You may also sew a dividing line or two into the middle of the pocket, if desired.
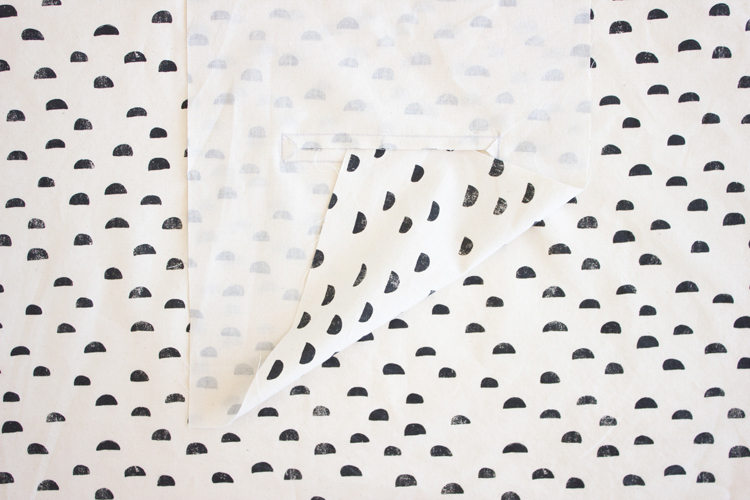
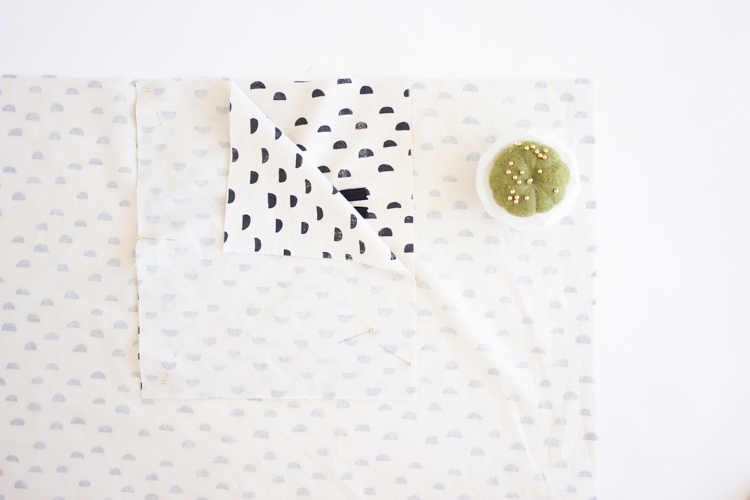
OPTION B: Zipper Welt pocket
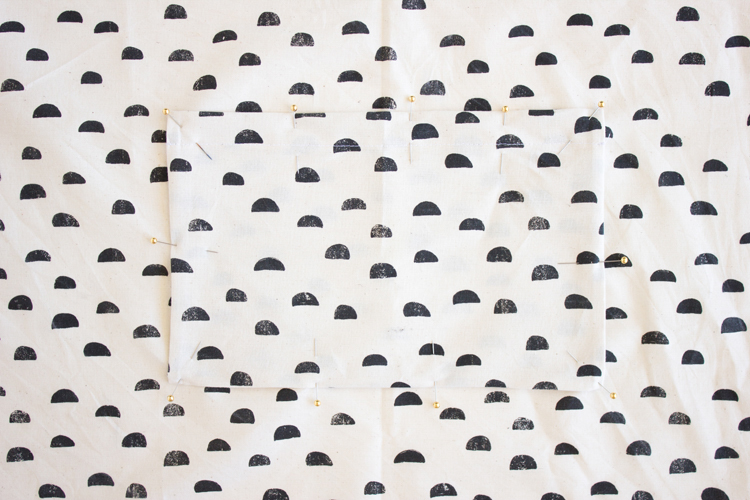
– Place one of 12 in wide x 13 in tall (31 x 33 cm) pocket piece onto the lining piece, right sides facing, with the shorter side centered and lined up with the top of the lining piece.
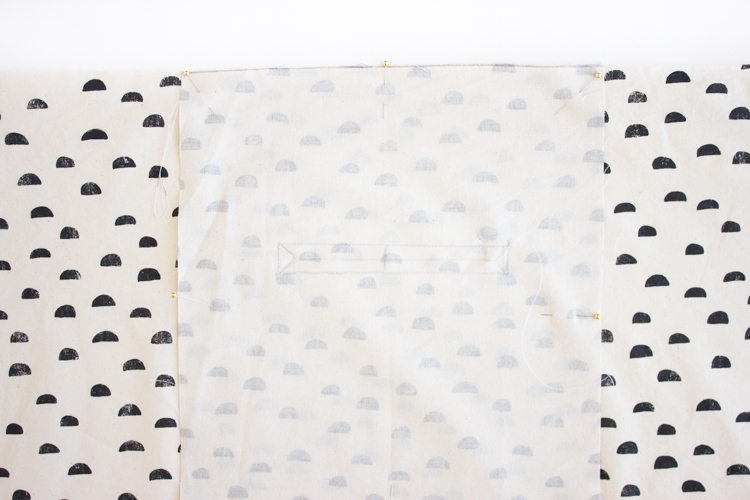
– About 5 inches (13 cm) from the top and centered , draw a rectangle 6 in wide x 1/2 in (13 mm) tall with a pencil or washable marker. Pin the bag lining and pocket together around the rectangle to prevent shifting.
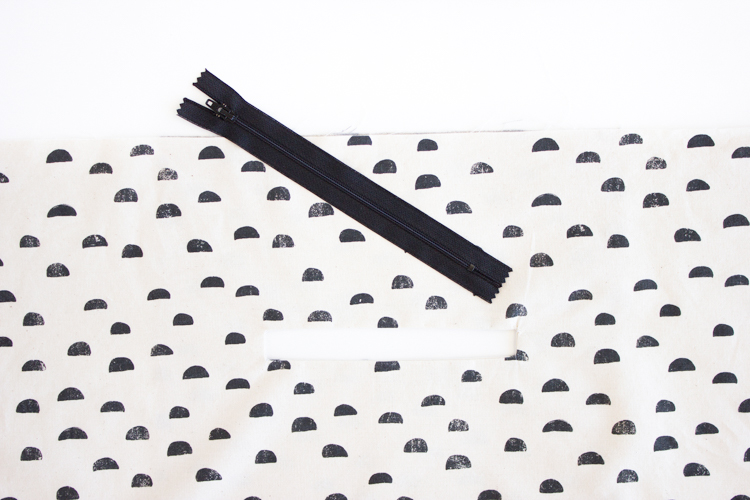
– Sew around the rectangle directly on lines you just drew.
– Cut through the center of the rectangle, catching both layers, width-wise. As our cut line nears the ends, turn and snip into the corners, being careful to get as close to the corner as you can without snipping through threads.
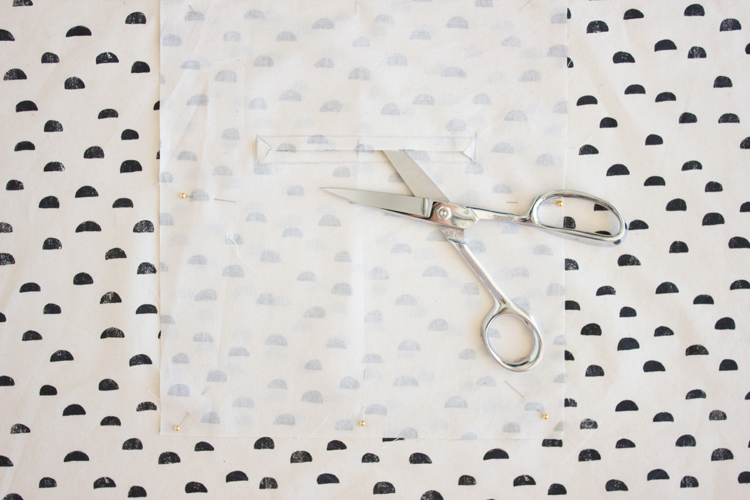
– Push the pocket lining into the opening and pull it through to the other side. You should now have a rectangular hole in the lining, with the pocket lining on the wrong side of the bag lining. Neatly press the rectangular hole flat.
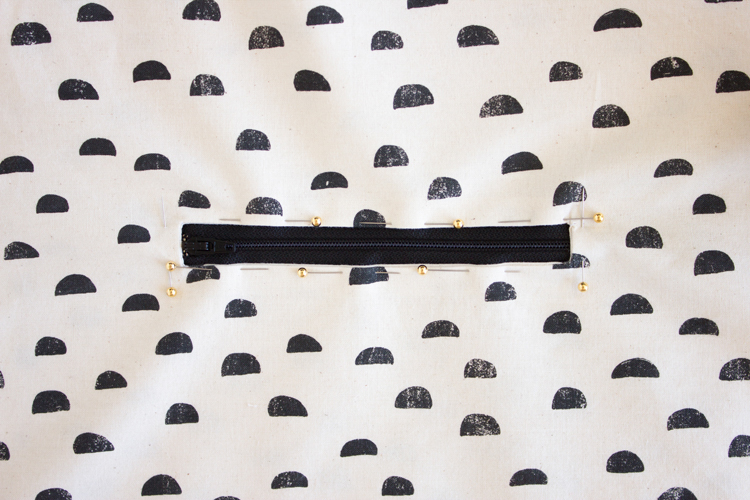
– Place the nylon zipper face up into the rectangular hole from the back of the lining. Pin the zipper in place.
– Top stitch the zipper into place.
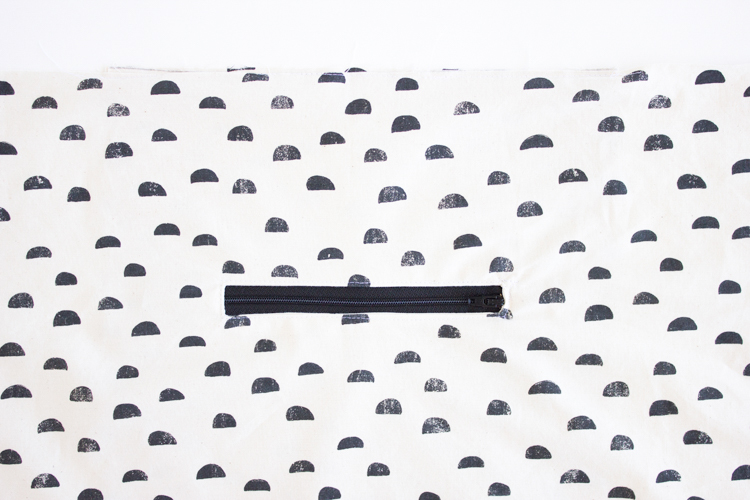
– Place the other pocket lining piece, right sides facing onto the initial pocket lining piece. Pin them together being careful not to catch the bag lining.
– Sew and complete the pocket.
– Baste the top of the pocket to the top of the lining, with a narrow line of stitching to prevent shifting in future steps.
Step Four: Prepare bag zipper.
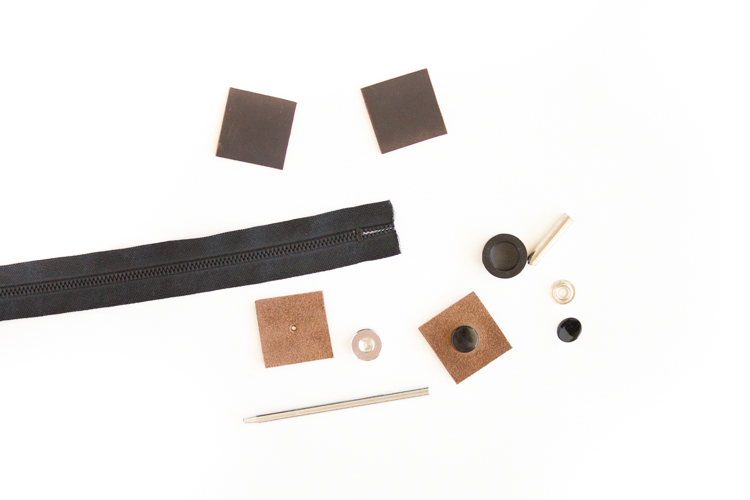
a. Optional: If installing heavy duty snaps into the zipper tabs, install one side of each snap into two tabs. Make sure the snap end is on the right side of the tab.
b. Sandwich the ends of the zipper in between two tabs (button tab on bottom if using), and clip into place. Make sure the zipper still has at least 24 inches of zipper tape exposed.
c. Sew around the perimeter of the leather tabs.
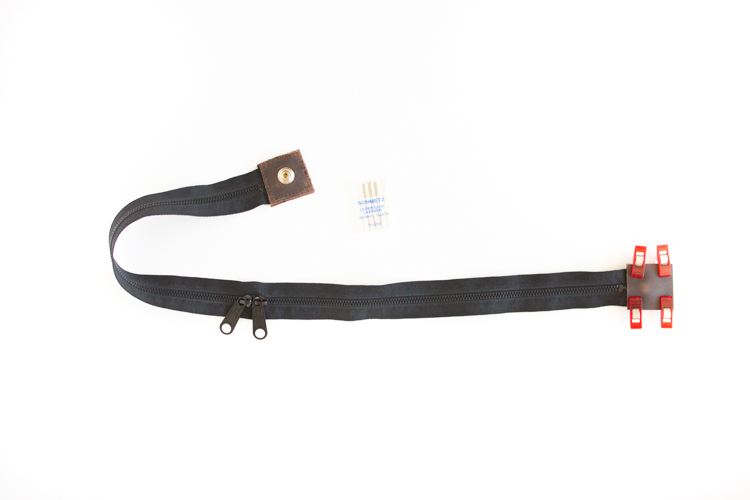
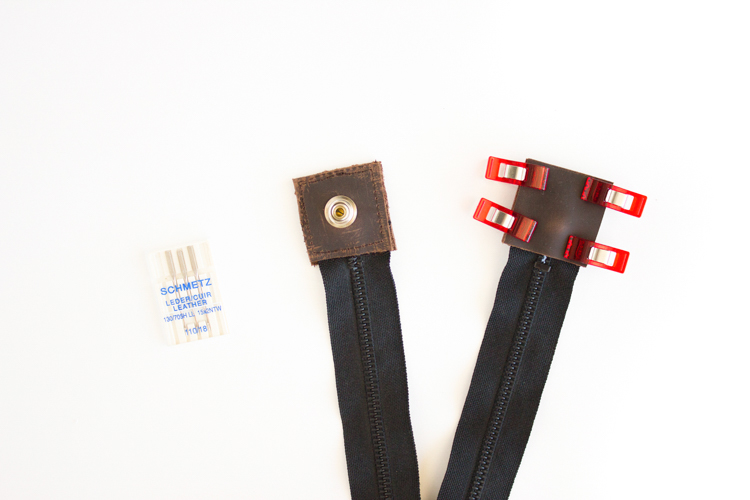
TIP: A leather needle is imperative for this step. Sew slowly and lengthen your stitch to about 3.5 or 4 mm. It also doesn’t hurt to practice first on a piece of scrap leather if you can.
Step Five: Sew main and lining pieces to zipper.
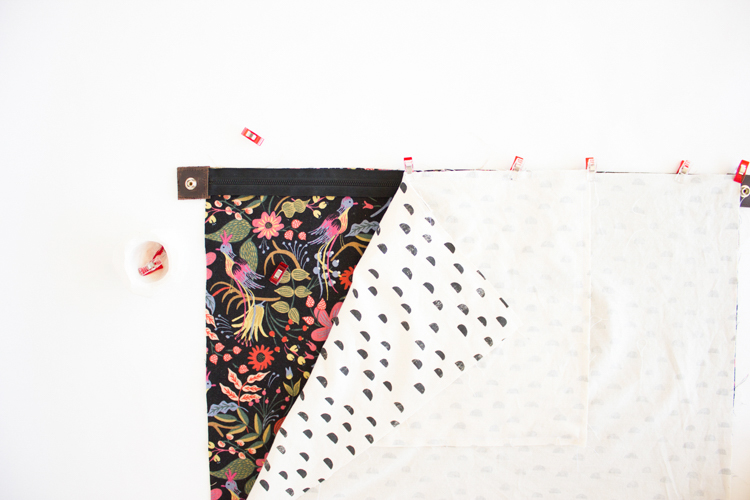
a. Lay down lining piece right side facing up. Lay zipper tape across the top of lining piece, with right side of the zipper teeth facing up. Lay main bag piece on top, and clip all layers together with quilting or binder clips.
b. Sew all layers together at the top, with a 1/4 in (7 cm) seam allowance. Leave about 3/4 in (19 mm) un-sewn at each end of the fabric. Use a zipper foot if needed.
c. Fold lining and main fabric pieces over, exposing the zipper. Press along the zipper/ fabric seam with a warm iron, being careful to not touch the zipper teeth with iron.
d. Repeat with remaining lining and main fabric pieces.
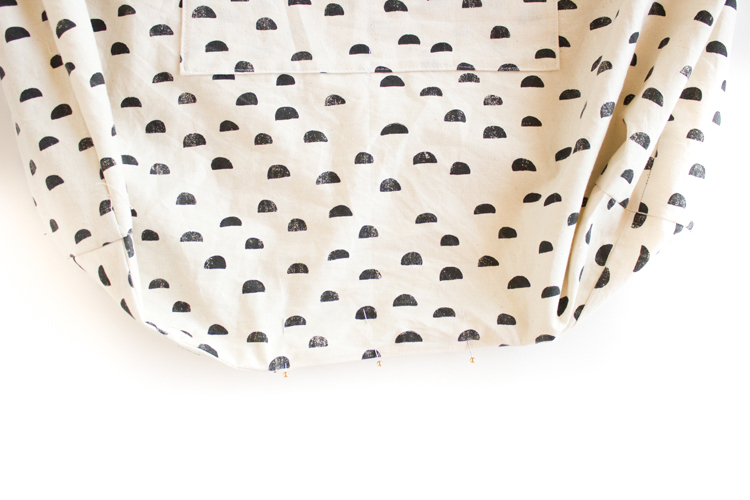
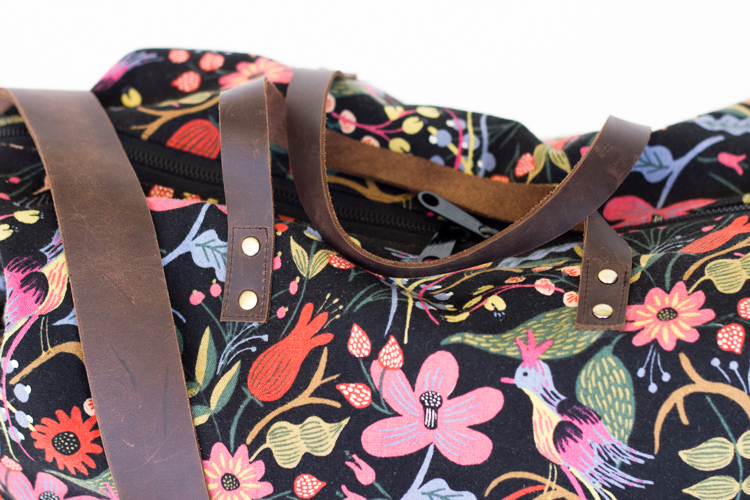
Step Six: Install small leather straps.
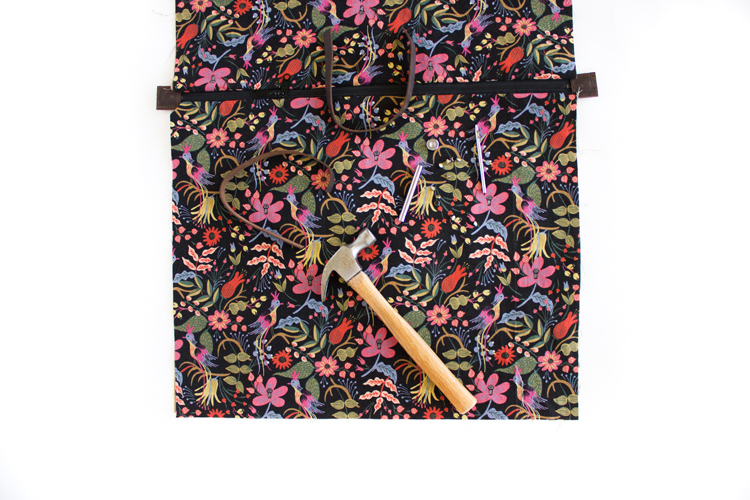
a. Decide on preferred placement of small leather straps. I recommend placing the bottoms of the straps about 3-4 in (8-10 cm) from the top of the bag and spacing the ends about 4-5 in (10-13 cm) apart.
b. Mark placement with a pencil or washable marker. You cannot pin leather in the middle of a project easily, so it is best to use the markings to place the straps after you get the bag onto your sewing machine.
c. Sew the straps in place. Sew a 1.5 in (4 cm) long rectangle at each of the four strap ends. If using rivets, go to step d. If not, sew an x through each rectangle to add strength to the straps.
d. Punch two small holes inside each rectangle you sewed in step c. Install rivets according to rivet packaging instructions.
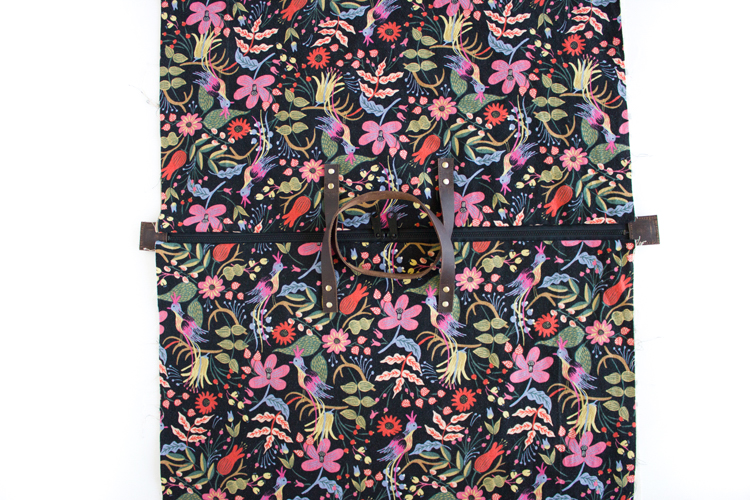
TIP: Make sure you are only sewing the straps onto the main bag pieces, and not through the lining. The reason strap placement is delayed until after the zipper is installed, is so that any shifting while sewing won’t throw the placement of the straps off, and so sewing on the zipper is less cumbersome.
Step Seven: Sew bag together.
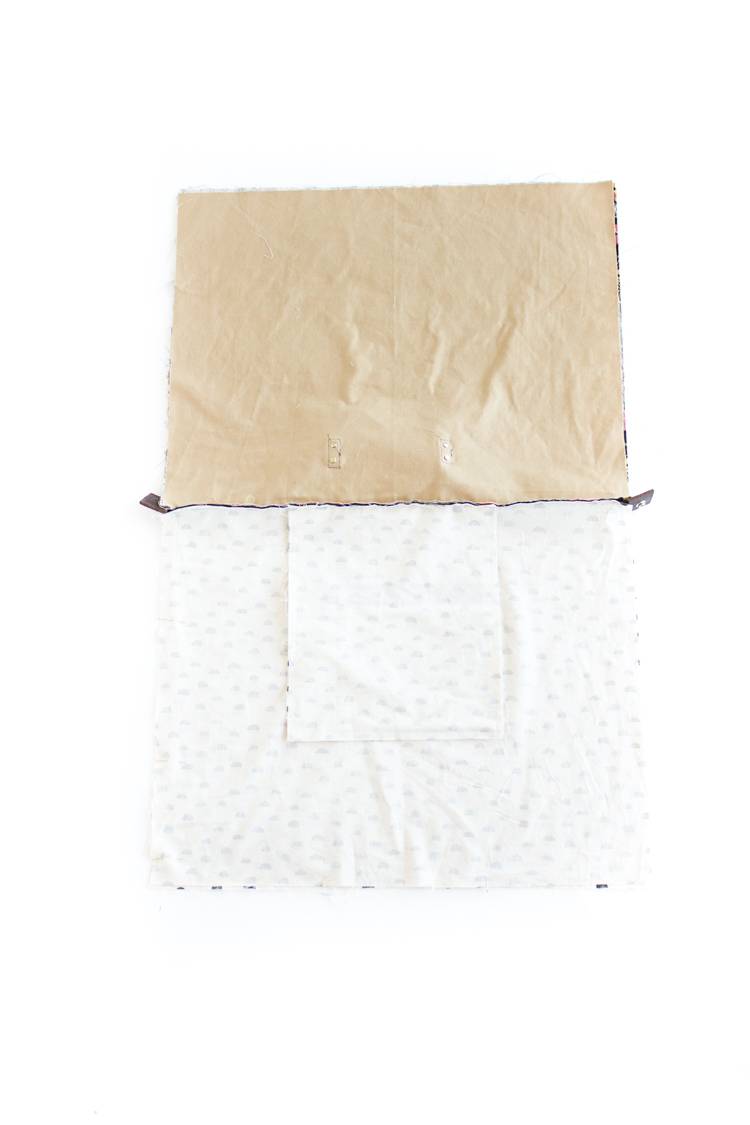
a. Pin main pieces, and lining pieces together, right sides facing. Flip the ends of the zipper up toward the MAIN fabric pieces. OPEN zipper a few inches before sewing.
b. Sew all the way around the sides and bottoms of main and lining pieces, leave a 4 inch (10 cm) opening at the bottom of the lining.
Step Eight: Sew corners.
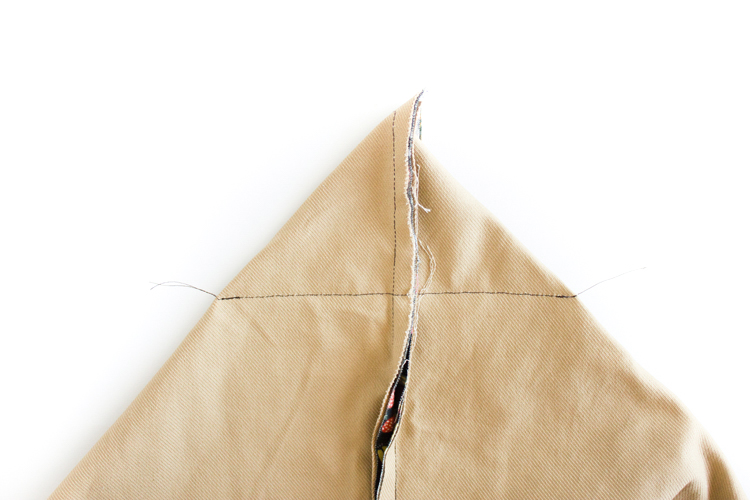
a. Fold each corner so that the seams line up, creating a triangle that is 3.5 in (9 cm) tall and 7 in (18 cm) wide.
b. Pin corner in place. 3.5 inches (9 cm) from the tip of the corner, draw the 7 in (18 cm) line.
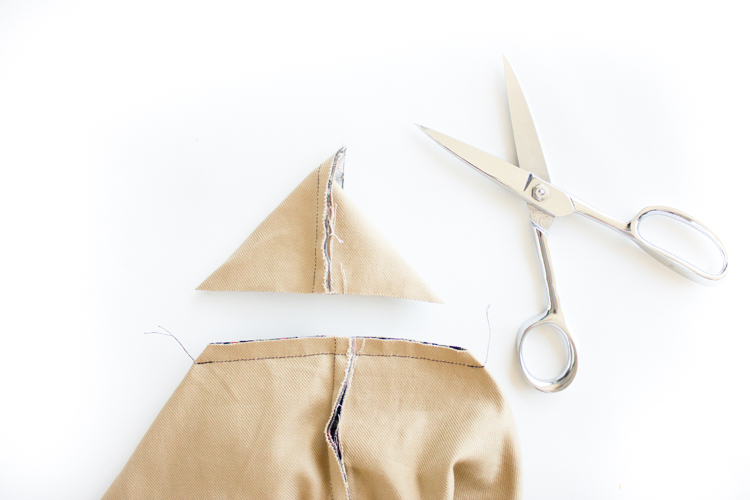
c Sew along the drawn line and trim off the excess fabric, leaving a 1/4 in (6 mm) seam allowance.
d. Repeat for all four corners.
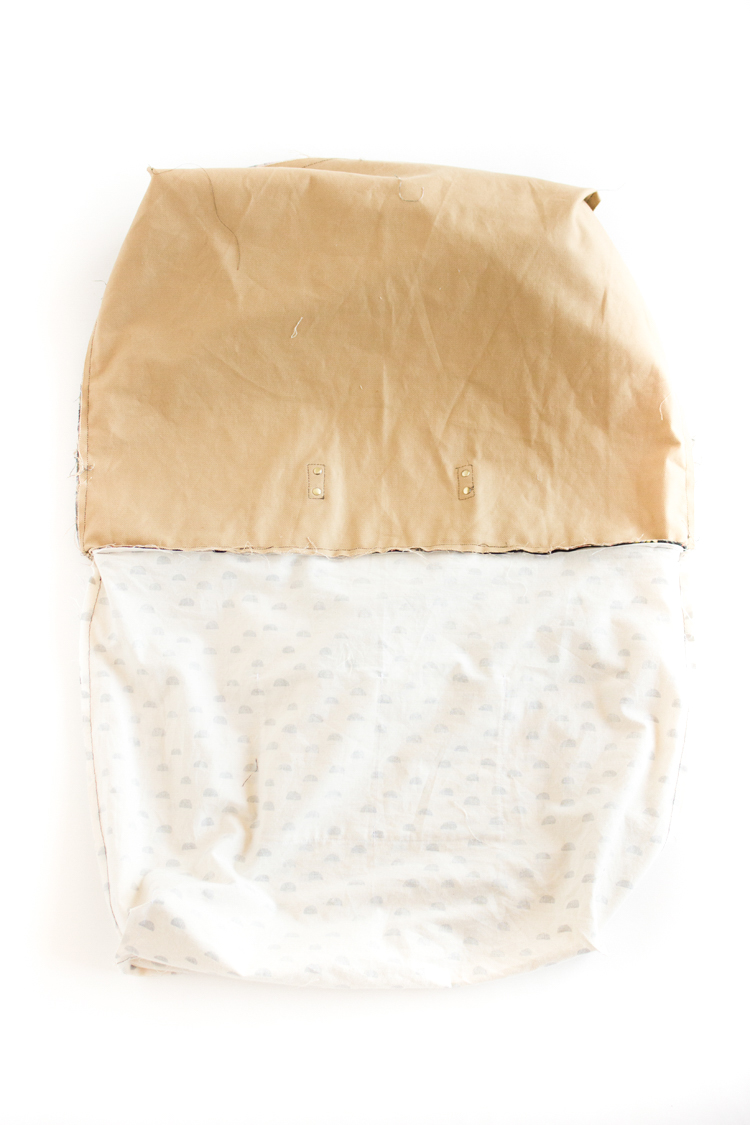
Step Nine: Turn bag right side out.

a. Turn back right side out through the opening and the open zipper.
b. Fold lining opening so that the edges are clean and even with the rest of the bottom seam. Pin closed and sew along the bottom edge of the lining bag.
c. Push lining bag into the main bag.
d. Finish the top of the bag, by top stitching around the zipper opening, along the zipper/ fabric seam. If the seams under the leather tabs is too thick, stop your stitch lines just short of the tabs.
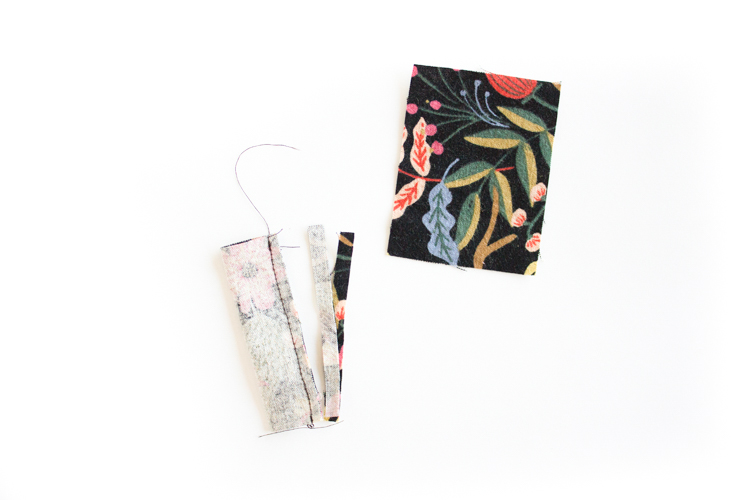
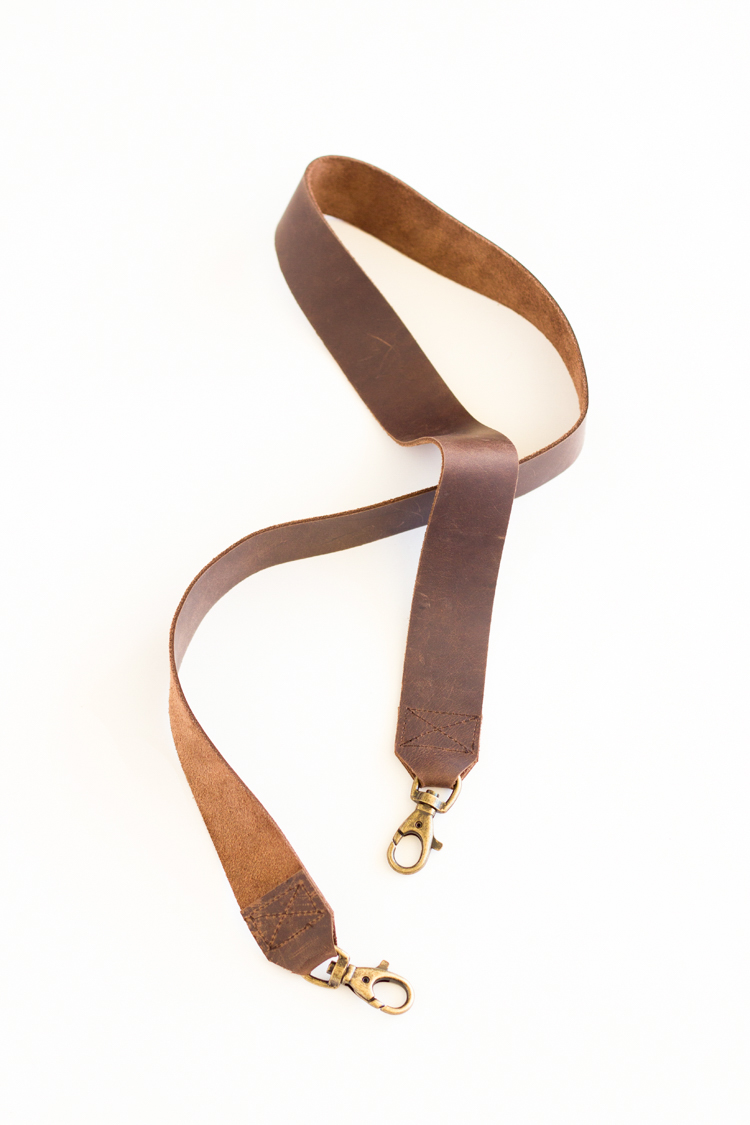
Step Ten: Sew shoulder strap.
a. Strap rings:
– Fold small 3.5 in x 2.75 in (9 x 7 cm) main fabric pieces in half and sew.
– Turn right side out, press flat, with seam centered to the back, and ends folded inward about 1/2 in (12 mm).
– Slide and fold onto ring. Place on the side of bag about 9 inches (23 cm) below the top. Sew in place by sewing a square onto the ends of the small strip of fabric, and then an X through the square for added strength.
b. Shoulder strap.
– Fold each end of the long leather strap piece under about 1.5 in (4 cm).
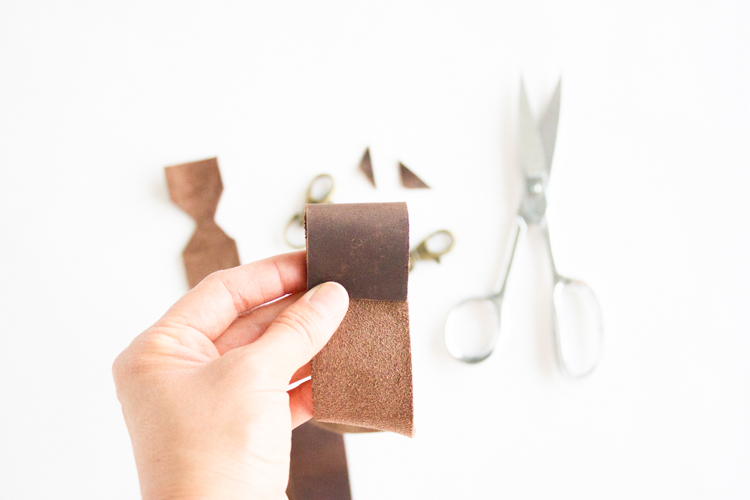
– Cut small rectangles at the bottom of each fold, reducing the width of the bottom of the fold by half.
– Unfold the strap ends and slide swivel hooks into the narrowed folds.
– Fold the strap ends over again and secure with clips.
– Sew the strap ends closed with a rectangle and an x through the middle.
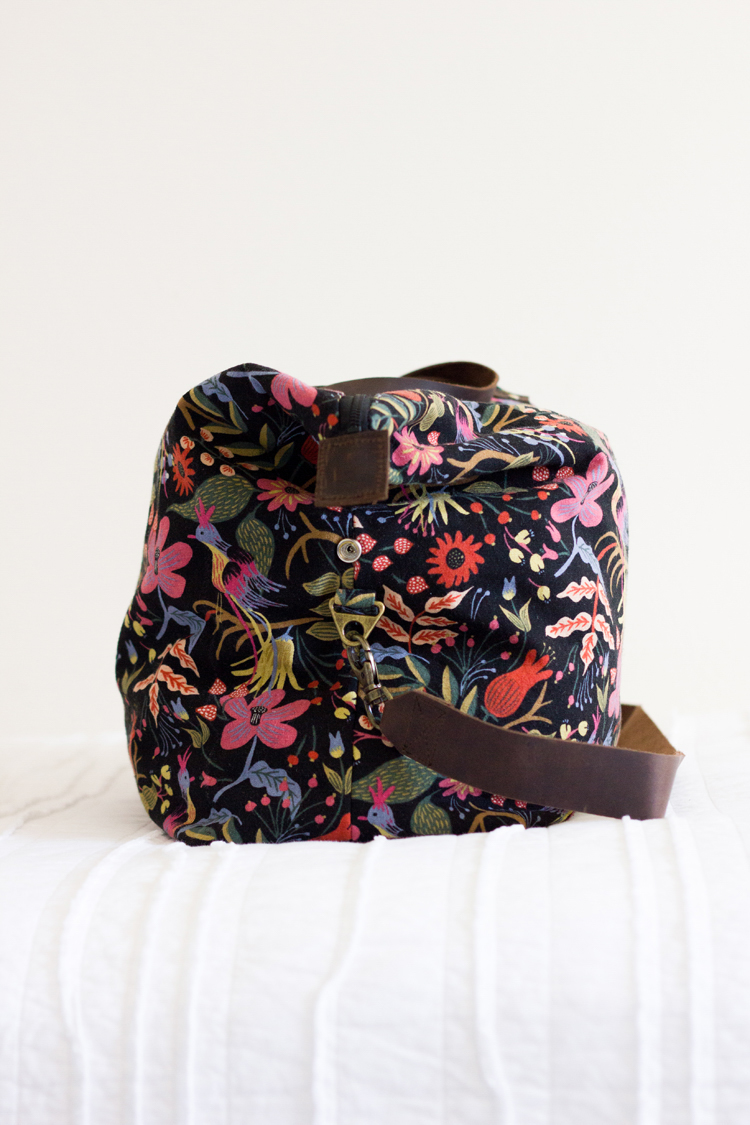
Optional: If you installed snaps into the leather tabs at the ends of the zipper, install the other half of the snaps about 1.5 inches above the shoulder strap rings on the sides.
Now you’re bag is ready to go!
Having used this bag for a year, I have some pros and cons to share. Cons…I would put the zipper snaps up a little higher than I did (I gave you improved measurements in the tutorial) so that it is a little more stable when worn snapped down. I may also add a shoulder pad of some kind to the leather strap to improve the comfort factor. With a store bought bag, I probably wouldn’t even think twice about the strap being as it is, but since I get to make it and tailor it to what I want, I would add a pad.
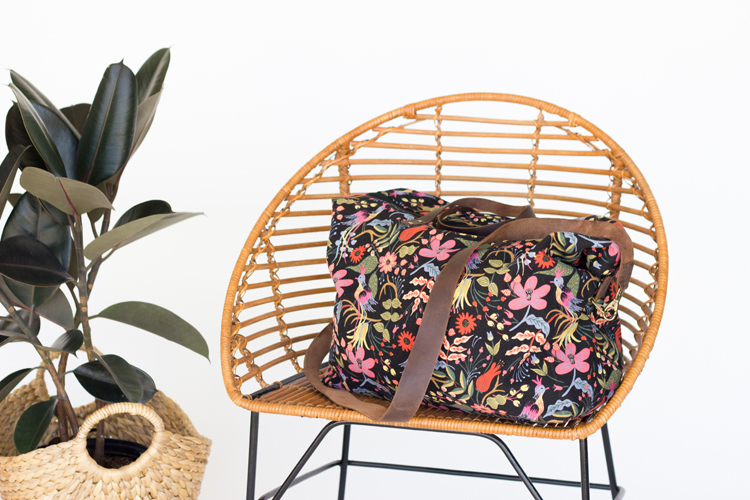
Pros…it’s durable and made from gorgeous fabrics I love.
Speaking of, here are my fabric and material sources:
The lining is Cotton + Steel Printshop Moons Black which has been discontinued, but this one is a good substitute. (affiliate link)
The outer fabric is my favorite combo Cotton + Steel and Rifle Paper Co! Here is a link.
All my leather is from Michaels.
The hardware and zippers are from Jo-Ann.
So gorgeous. I’m inspired. Where do you source your hardware?
Thank you for the tutorial. I wanted to make it, but had all the wrong materials. I’m sure it’s a bit softer than it should be, and not perfect by any means, but I think it’s nice in spite of it.
I am sure it’s beautiful! I am so glad you enjoyed the tutorial. <3
Hi, love this design and was so excited to make it. I can’t seem to get the leather to sew. I’m using a leather needle and longer stitch length but the thread keeps balling, snagging, or breaking. Any tips? Do I need way heavier thread than normal?
I am so sorry to hear that. It can depend on your leather sometimes – if it has stretch, if it’s very thick, etc. I almost always use a high quality all-purpose thread (like Gutermann) with leather because I don’t like how the heavy thread messes with the tension on my machine. You may have a different experience though and prefer the heavier thread. Other things to look for: Are you using a leather needle? This makes a huge difference in how smoothly your machine sews. Have you tried cleaning and completely re-threading the thread and bobbin as well? I don’t know why, but sometimes this fixes my issue. I liken it to “turning it off and on again” like you would with tech issues. You may also have success with a walking foot. A walking foot makes sewing with leather and knits so much easier. I personally don’t use mine that often, but I know many people have had success with one. If you have any further issues, please let me know and I’d be happy to try to help you trouble shoot.
Cute bag! Can’t wait to try it. I’m not from the Seattle area. Do you have any go to fabric stores you’d recommend me visiting when I travel there?
Thanks Trisha! Dry Goods Designs in downtown Seattle is a good one!
I have been sewing for 40 years, and I have used the hammered-in heavy duty snaps many times in the past, but for some reason I cannot get them to work with this project! I am using a lightweight faux leather for the zipper tabs but the snaps just won’t adhere. I’m sure your design is not the problem, but I am getting really frustrated. Thinking I might just go with Velcro tabs if all else fails.
Oh darn. I am so sorry you’re having trouble with the snaps. Did you punch a pilot hole in first? That can help a lot.
Any tips for putting the side snaps on? I’m at the point where I’m ready to put them on, but I can’t figure out if I should punch the pilot hole through both the outer fabric and the lining…? Thanks for a wonderful tutorial! xo
Great question! I would put it through both the lining and the outer fabric. It will help the snap hardware sit a little more securely. I can’t wait to see your finished bag! If you share it on social, will you tag me? (@deliacreates)
Hi Delia!
Well it appears I have all the materials needed for the handbags! I have one minuscule question seeing as I am going to have a faux leather bottom. What is the diameter that bag sits on the base? It looks like it would be 8” wide. I appreciate your free tutorial and will be sure to tag you in my IG post when finished!
Aw yay! A faux leather bottom sounds like a fun hack! Yes, that sounds about right. The corner of the bag is sewn about 7 inches across and that’s without seam allowances, so you should be good with 8 inches. I can’t wait to see it when it’s done! Yes, please tag me so I can share it too!
HI there,
I’m trying to figure out a good interfacing material to buy. Any recommendations?
I think it depends on the type of outer/main fabric you are using. If you want to use a lighter weight fabric, I would go for a heavier interfacing. I prefer a pellon, fusible medium interfacing for a medium weight canvas fabric, but it is really up to personal preference. I wouldn’t go as heavy as craft interfacing though because it would make the bag too stiff. Does that help? Let me know if you have any more questions and I’d be happy to try and help.
Hi! I’m having trouble sewing through the leather for the zipper tabs. Part of the issue seems to be the heavy duty snap is just in the way. I’m using an all purpose thread and a walking foot. Any tips?
Have you tried using your regular sewing foot or maybe a zipper foot? You will likely have to lift the foot manually to mimic what a walking foot does but not for every stitch. Let me know if you run into anymore issues and I’ll try to help you trouble shoot.
Hi! What are the finished dimensions of this bag? Thank you! It’s beautiful!
Thank you! So sorry for my delayed answer! I didn’t see your comment until now. It is 15.5 inches tall from the boxed corner to the top, and about 23.5 inches wide from side seam to side seam.
I just finished number 4, I love your pattern. I covered strapping with the fabric, instead of the leather, and added a few more pockets (I love pockets), but it’s a Deluacreates Weekender Bag, nevertheless.
That makes me so happy that you like the bag design! Fabric strapping sounds lovely. Thank you for your kind and thoughtful comment. <3
what are the finished dimensions of this bag?
It is 15.5 inches tall from the boxed corner to the top, and about 23.5 inches wide from side seam to side seam.
I know this is an older post, but could you help me figure out fabric dimensions if I’m using an 18” zipper? Bought a different size and am having difficulty figuring out how to adjust your measurements. Thank you! Love the detail in your bag and also in this tutorial!
Thanks Tess! You can either shrink the size of the bag, especially in the width, or you can add some main fabric to the ends of the zipper to get it to the proper length. Place a small piece of main fabric cut to the width of the zipper and probably about 1.5-2 inches to account for seam allowance. Place it right sides facing down on the zipper tape ends and then flip it over and top stitch in place before attached the leather ends. It should blend into main part of the bag fabric when it’s sewn in place. The zipper won’t zip open as wide, but I think that it won’t cause significant problems in this case. Let me know if that doesn’t make sense …actually email me: [email protected] and I’d be happy to troubleshoot with you.
Thanks so much for this tutorial ! I love this bag and how it looks sophisticated without being hard to sew. I linked back to your tutorial on my website and hope to make a bag for myself soon 🙂
Thank you Laurine! I really appreciate you sharing my tutorial.
Thank you for this beautiful pattern and tutorial! For step 10a (sewing the strap rings onto the bag) does the strap ring fabric need to be sewn through the main fabric and the lining? I’m thinking of opening the lining back up and going in through it so the strap ring fabric is only attached to the outer fabric. Thank you again!
I don’t think it needs to be sewn to the lining as well. Only attaching it to the outer fabric is a great idea!
Thank you for this tutorial. I was searching for something not overly complicated and your tutorial was perfect. Now that I’ve completed the bag, I have some questions. I was surprised you didn’t include instructions for using material other than leather for the handles and straps. (I simply made fabric strap as I’ve done for tote bags.) Also, while I appreciated the instructions for the zippered internal pocket, I wanted a larger (and more) pocket. Maybe including more pocket options would make the instructions too long? While making other tote bags, I cut out a 2″-3″ square on the bottom corners of the main and lining fabrics, matching seams and sewing them closed earlier in the process. I thought that was easier and much less bulky. Do you think this would work for this weekender? I also added a removable piece for a stronger bag bottom-eliminated sagging. I would appreciate your thoughts on that. Would you recommend using fusible fleece to add body to the bag itself, especially if it won’t be quilted? Or maybe use heavy-weight interfacing rather than adding a third layer? I can’t wait to make a few more of these bags! Thank you for any further insights you can give me.
Hi Marsha,
Thank you for your feedback. I think adding reinforcements at the bottom and the corners is a great idea. You are welcome to customize this pattern however you like. It sounds like you have some great ideas! I created this pattern for free many years ago, so I probably won’t be adding to it, but I like what you have shared and I think your comment will be useful to others who read it.
As for adding fusible interfacing. I go back and forth on that. I have heavily interfaced some bags and while the added strength and body is nice, it creases (especially with storage) and then remembers those creases. I tend to prefer my bags to be more flexible for that reason. But that’s just my preference.