

We are squarely out of the baby phase, so I love that my brother isn’t done yet and I can dote on my nieces with cute baby stuff.
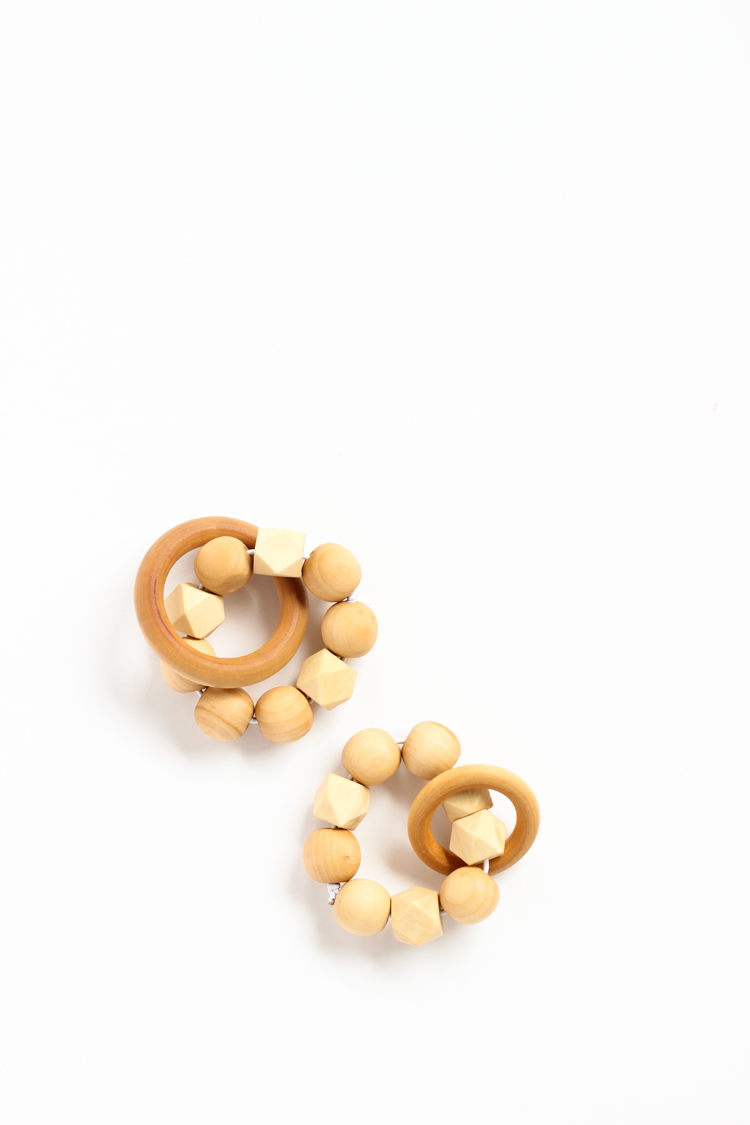
This wood teether is my new go-to, favorite baby craft.
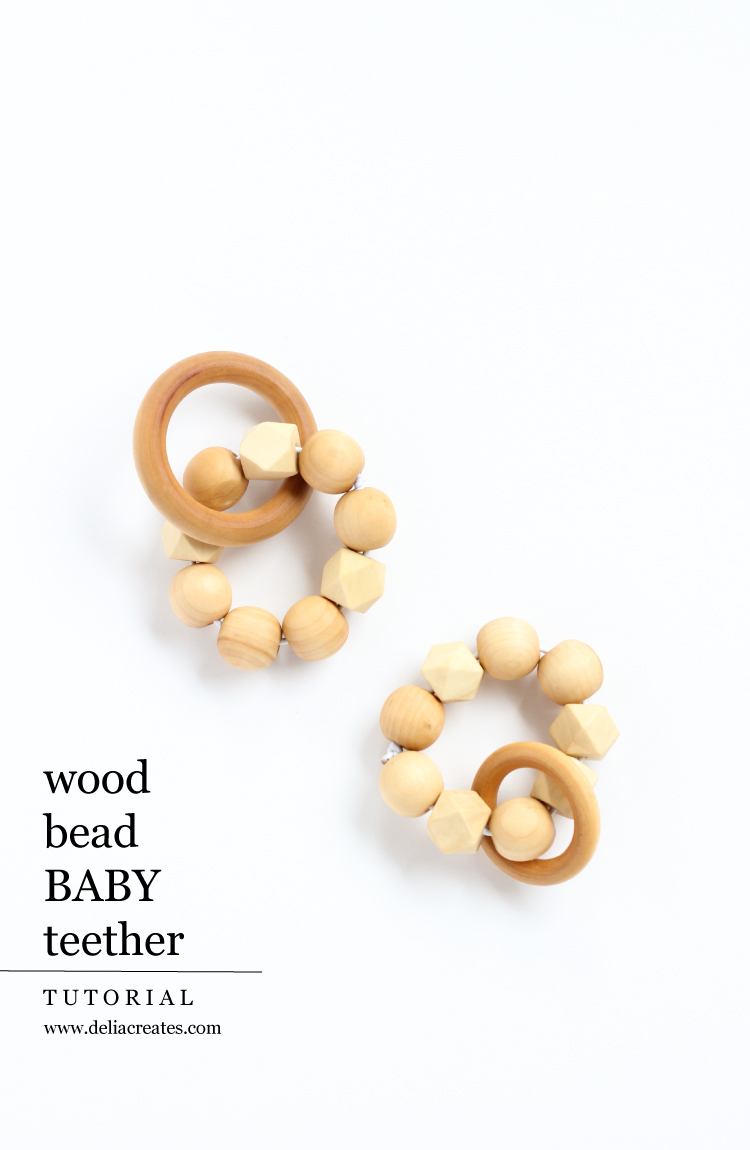
Not only does it turn out simply gorgeous, but it’s really fun and really quick to make.
I know you may be wondering about how safely the beads are tied together. I totally worry about that kind of stuff too. I cover all the details in the tutorial on how to make that knot stick and I offer the same warning most manufacturers do: Please only use the teethers with parent supervision.
MATERIALS
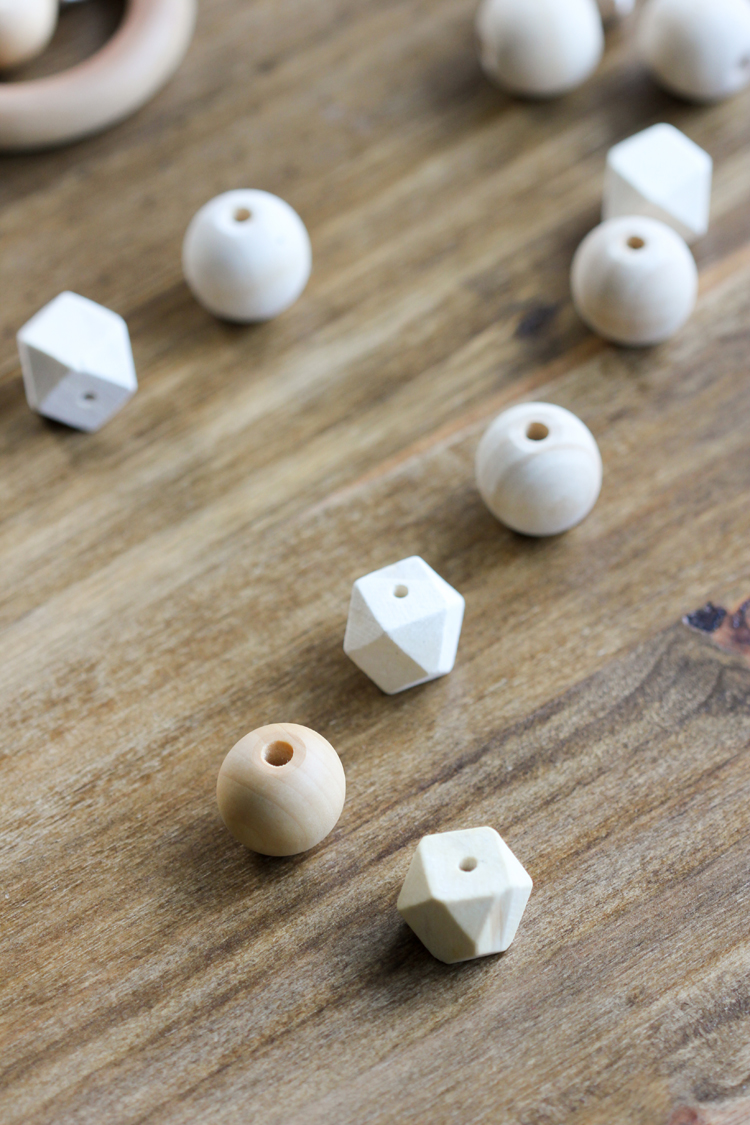
- Wood beads
- Wood ring (affiliate link)
- Clean cotton cloth
- Thick elastic cording – about 12 inches per teether
- Scissors
- High quality Coconut oil
Material Notes:
Beads – I bought my wood beads from Michaels and my geometric ones are from Etsy.
Rings – I found my smaller ring on Amazon in bulk, but you can find them on Etsy as well. I’ve had the bigger ring on hand so long, I can’t remember where it’s from. (sorry!)
Cording – My elastic cording is by the yard cording from Jo-Ann. The stuff you have to cut at the cut counter just seems thicker and more high quality to me than the bulk packages of elastic. I didn’t want to risk the teether falling apart so I went with the good stuff. Make sure to get 12 inches per teether (more explanation in tutorial).
Oil – This conditions the wood so that it can withstand being chewed on. I used organic, very high quality coconut oil. You can also use food grade mineral oil (affiliate link) like I used for these wood slice cake plates.

TUTORIAL:
1. Oil the wood beads and rings.
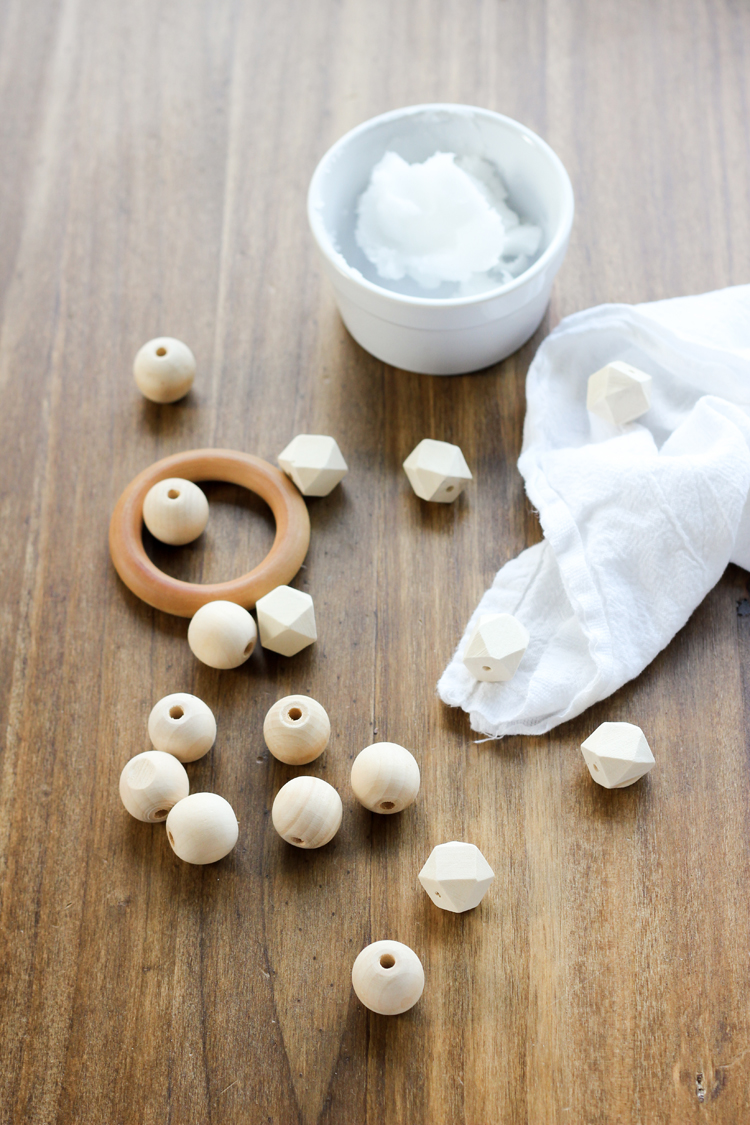
Simply take a clean, cotton cloth and work the oil into all the wood pieces. This will darken the color of the wood and protect it against moisture.
Make sure to really saturate the wood, wait a few hours, and repeat with at least one more application. I let them sit overnight after a third application and then I polished them with a clean, cotton cloth to soak up any excess oil.
This step unexpectedly ended up being my favorite part. It was a really relaxing way to keep my hand busy and it made them nice and soft afterwards because coconut oil is a natural moisturizer.
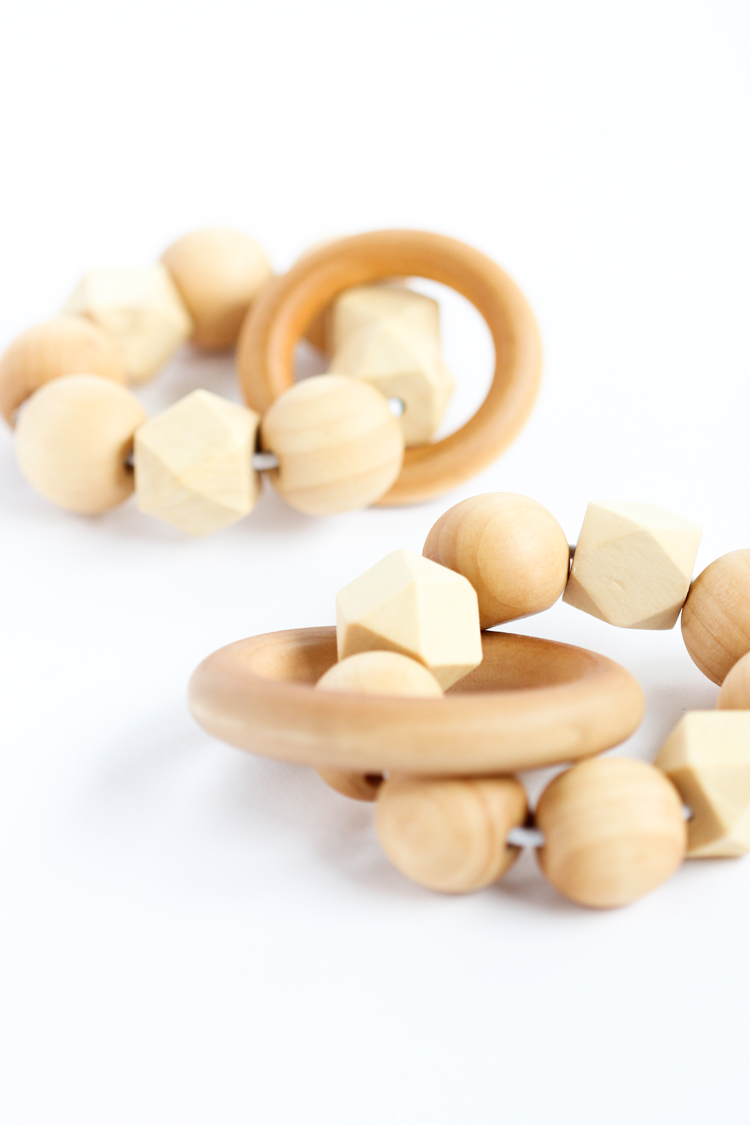
Pictured below: Unfinished beads in the back ground. Beads with one application of oil in the foreground. The geometric beads didn’t darken quite as much as the round beads, but they picked up slightly more color with more applications.
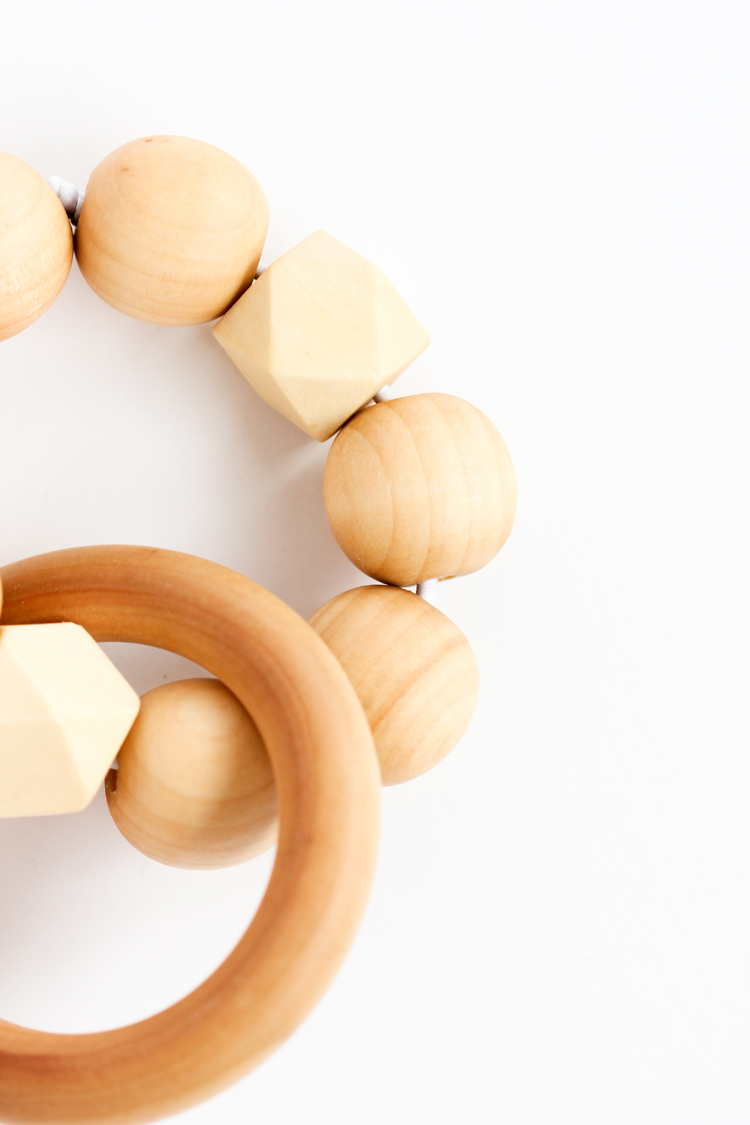
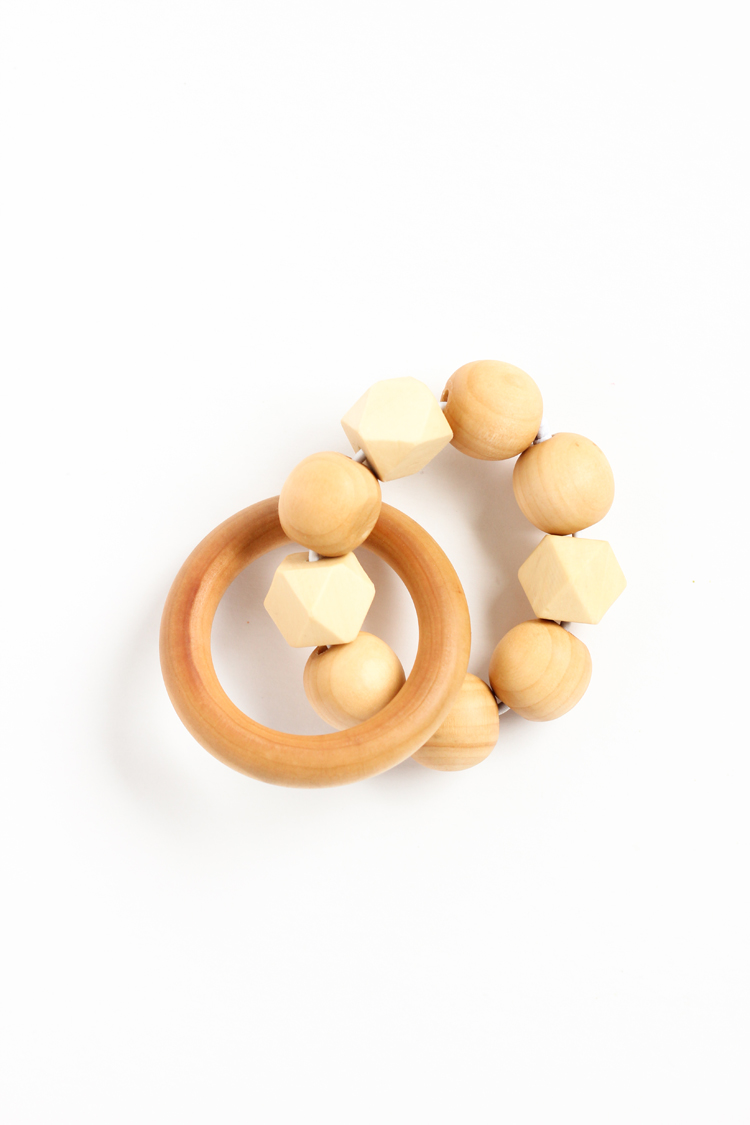
2. String on the beads and ring.
Slide the beads onto the elastic cording in the order you want it to go. Remember that the first and last beads will be neighbors when you’re done.
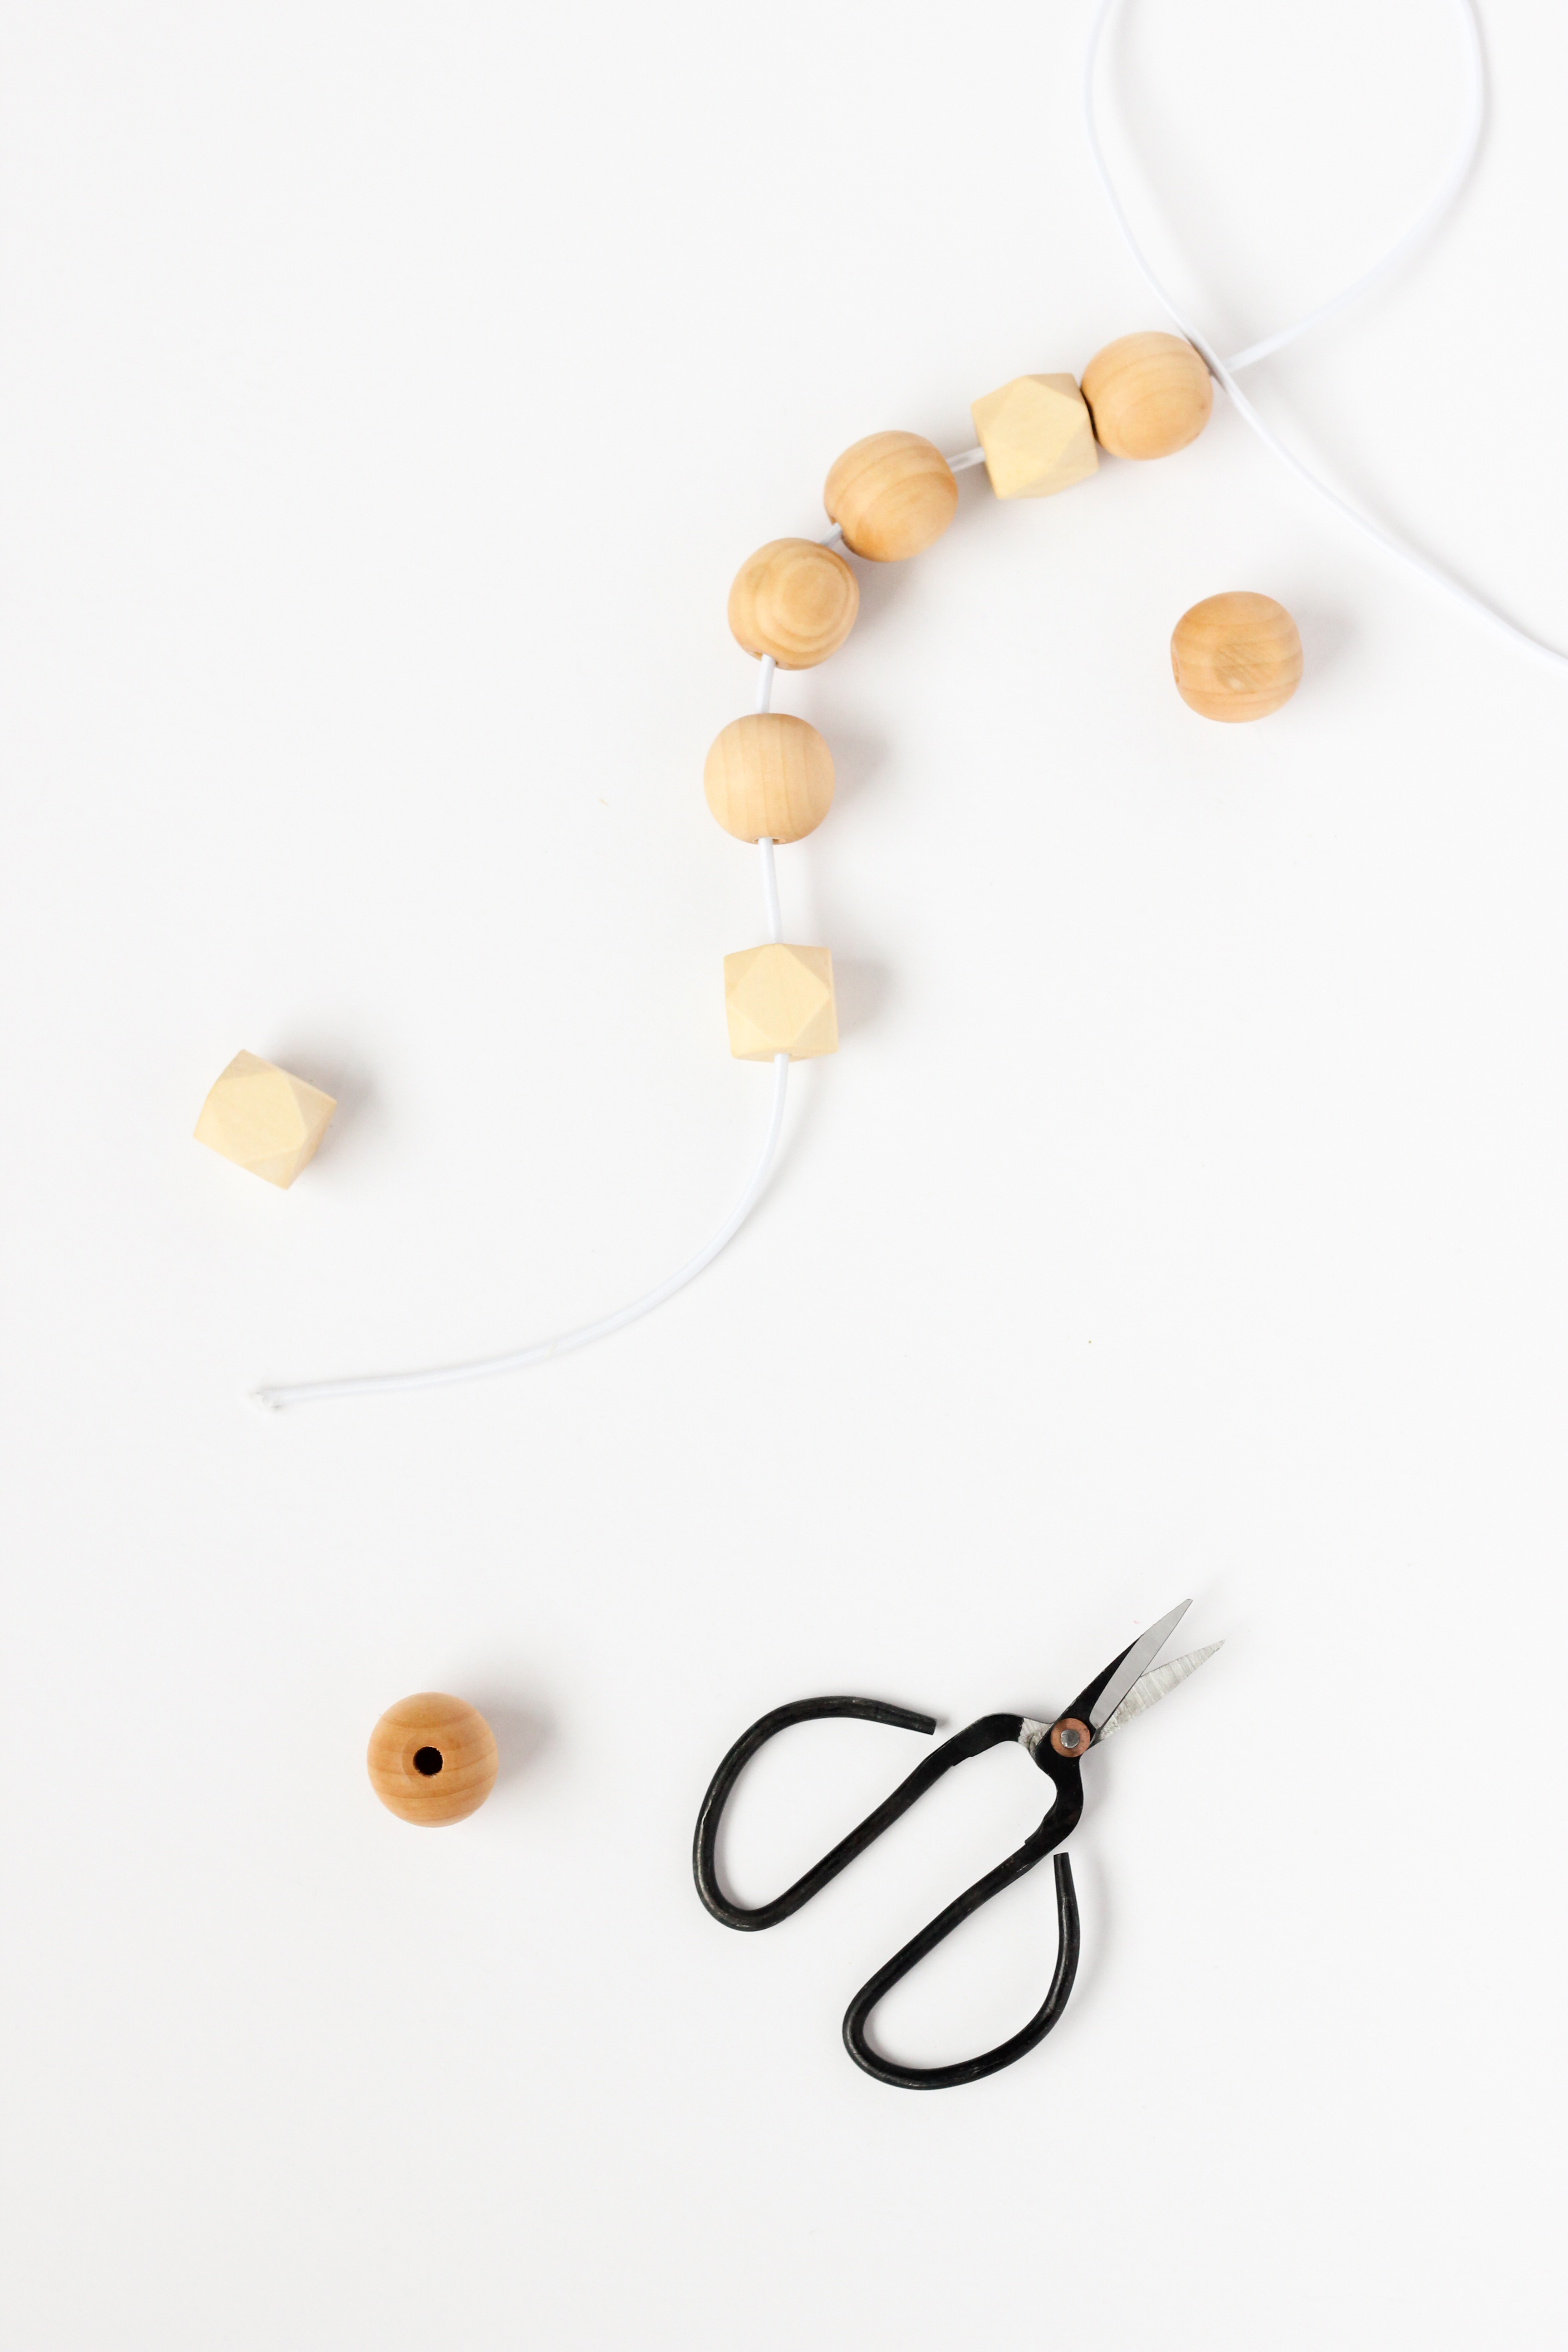
Then slide the ring over the string of beads.
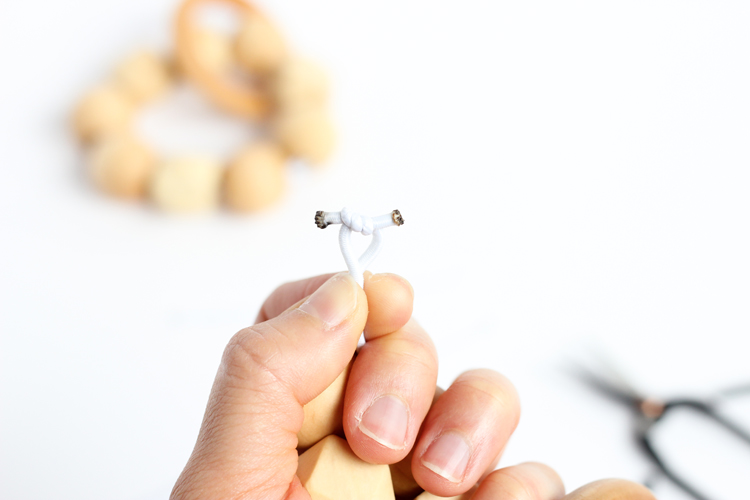
3. Tie the teether.
You first want to tie a basic overhand knot, or the first knot you tie when you tie your shoes. Pull the knot tight enough so that the beads form a tight ring.
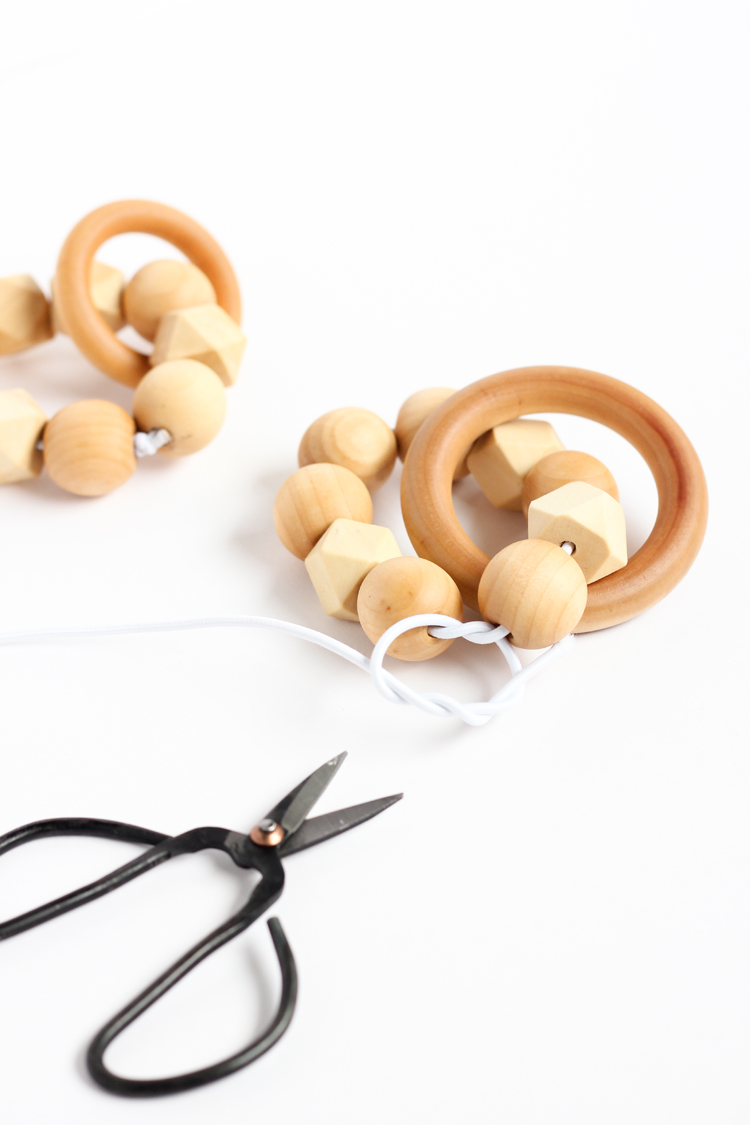
Now, you are going to tie a surgeon’s knot. This is a super sturdy knot and it will keep the knot from coming undone. A surgeon’s knot is basically like a square knot but with a few more passes through the middle loop.
Tie another overhand knot, and then pass each loose end through the middle loop at least one more time. Pull it as tight as you can. I mean REALLY put your back into! This is where the high quality cording and the long tail ends become so important.
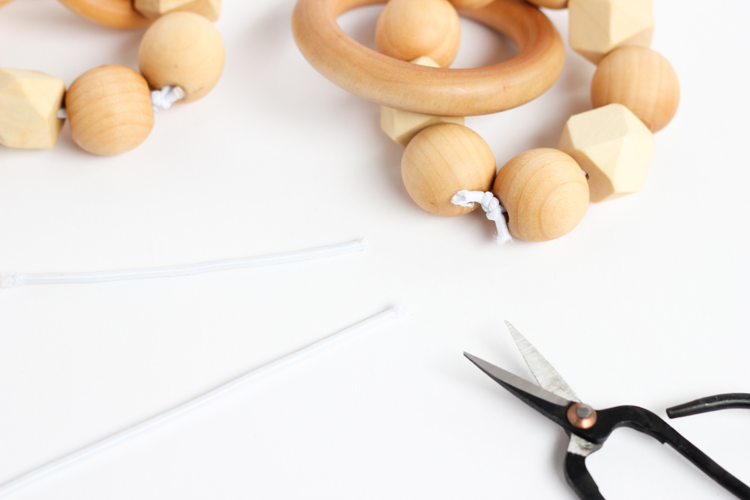
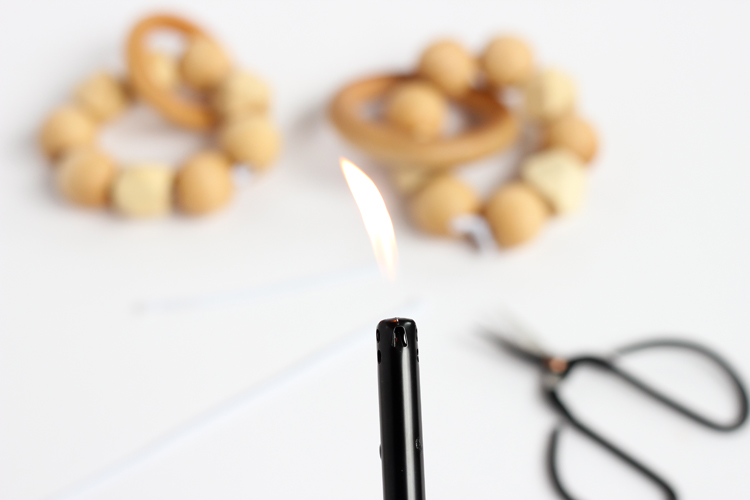
Now do some quality control testing. You should be able to pull and tug at it with a lot of force and not loosen the knot.one.bit. Once you are satisfied with the strength of your knot, trim the ends and singe them with a flame to seal them up. Do not use fray check because it is not safe for babies to teeth on.
That’s it!
Your teether is ready for the chew-chew train!

Really, it’s great for even the chews-iest baby. 😉
Too much?
Not for me, thank chew very much. Hahahaha!
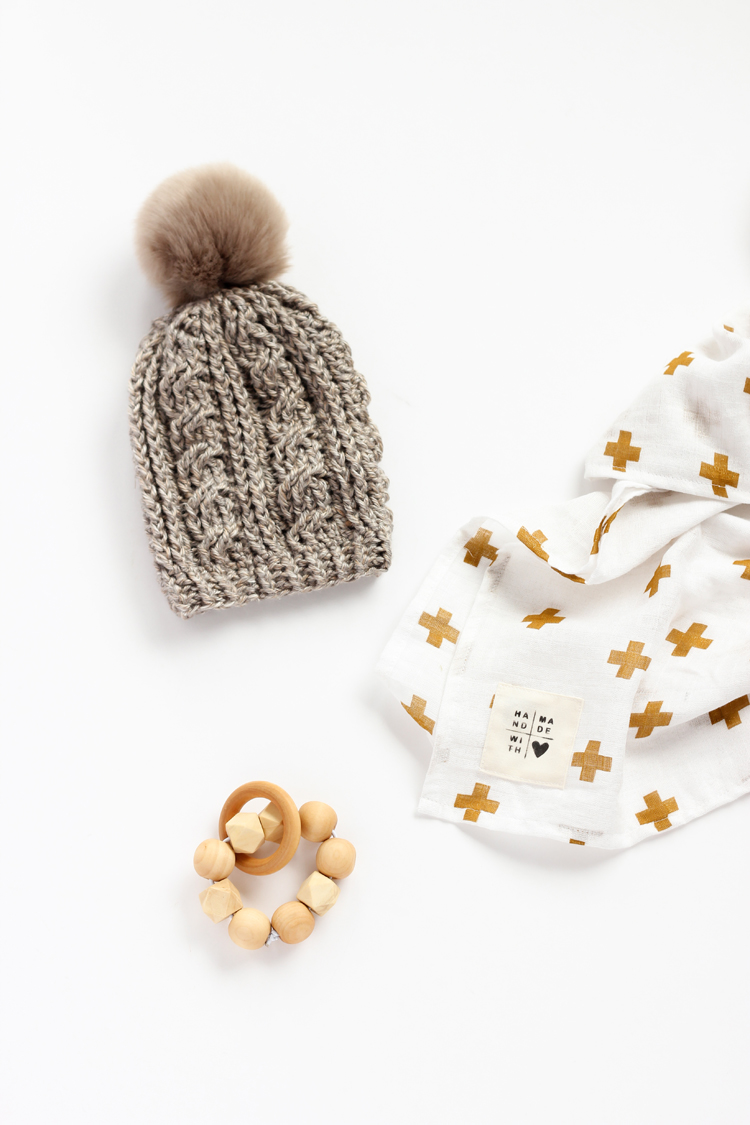
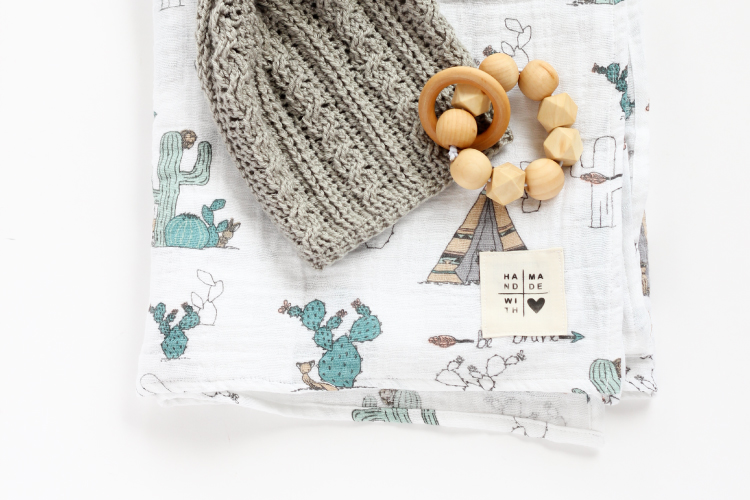
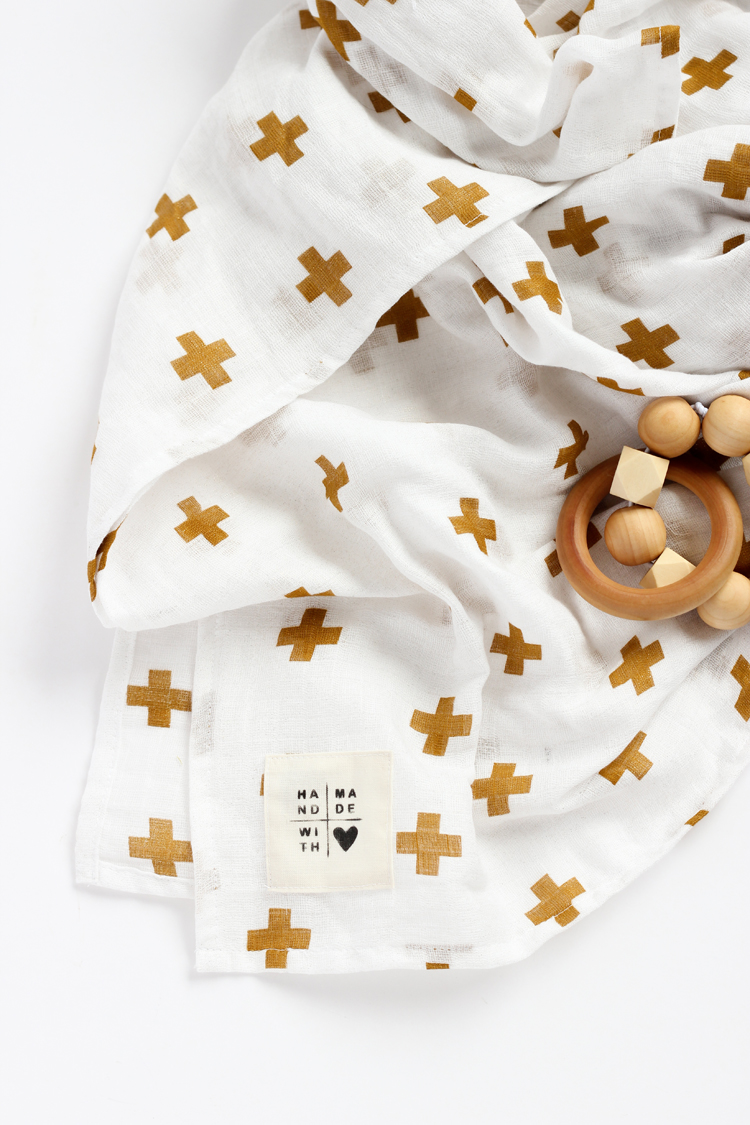
If you want more details on that gauze swaddle blanket, I have a tutorial HERE, and I have a crochet pattern for that hat HERE.
Absolutely love this!! I’ve been wanting wood teethers, but they can be unreasonably pricey. Thanks so much for sharing 🙂
Thanks Diana! Sourcing the rings can get tricky because you have to buy them in bulk to get the best price, but you’re right…even then, it’s much less expensive to make them yourself!
These are so fun! I like the geometric beads next to the round ones- they add a lot of interest!
Thank you Charity!
These are brilliant! You always are.
Goodness. Thank you Tara. That means so much coming from you. <3
I love your tags on the gauze swaddle blanket…..where are they from?
Thank you Rebecca! I made them with my Silhouette Mint. I have a post about it. Just scroll down to the second half of the post. I also have a file download for the design so you can make your own.
http://www.deliacreates.com/gauze-swaddle-baby-blanket-diy-tag-tutorial/
How many kids do I have? Zero. How badly do I want one of these? Like a ten. Lol, I’ve been seeing these wooden teething toys pop up in stores and LOVE them. Will have to add this to my “Baby Someday” board. 🙂
Haha. I love it. We are passed the baby phase so I somewhat have a sense of what you’re feeling. I plan on cranking them out for baby showers from now on though.
how do you hide your knots? all of my knots are too big for the hole in the wooden bead.. sometimes I’m able to tug and tug until the knot is crammed into the bead but lately all of my knots become undone and/or don’t fit (as with the surgeon’s knot). I’m wasting so much string and my hands hurt a lot! help!
Hi Steph,
Great question. My knots aren’t really hidden. They’re just not as noticeable after I trim the ends and singe them. If it hurts to tug the knots tightly, then you may want to use gloves or even a deflated balloon (they have great grip) to protect your fingers. I hope that helps!
Delia
Hi There!
I’ve never had kids, (and at my age, they’re definitely out of the plan), but I’d love to work a ton of these up for a local charity. What is the diameter of the beads you used? I have a lot of 25mm beads, but I’m afraid they’re too large. Thanks!
I am terribly sorry that I just now saw your comment. I know it’s probably too late but 25 mm beads is actually the right size. I hope that helps.