

As someone who usually leans more toward a modern aesthetic, I have been surprised at how much wood grain and rustic wood projects have really been calling to me lately. Pacific Northwest living must be rubbing off on me or something. 😉
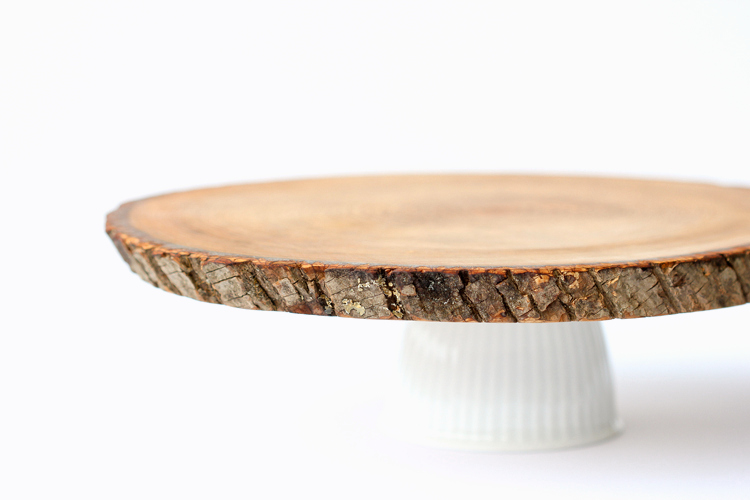
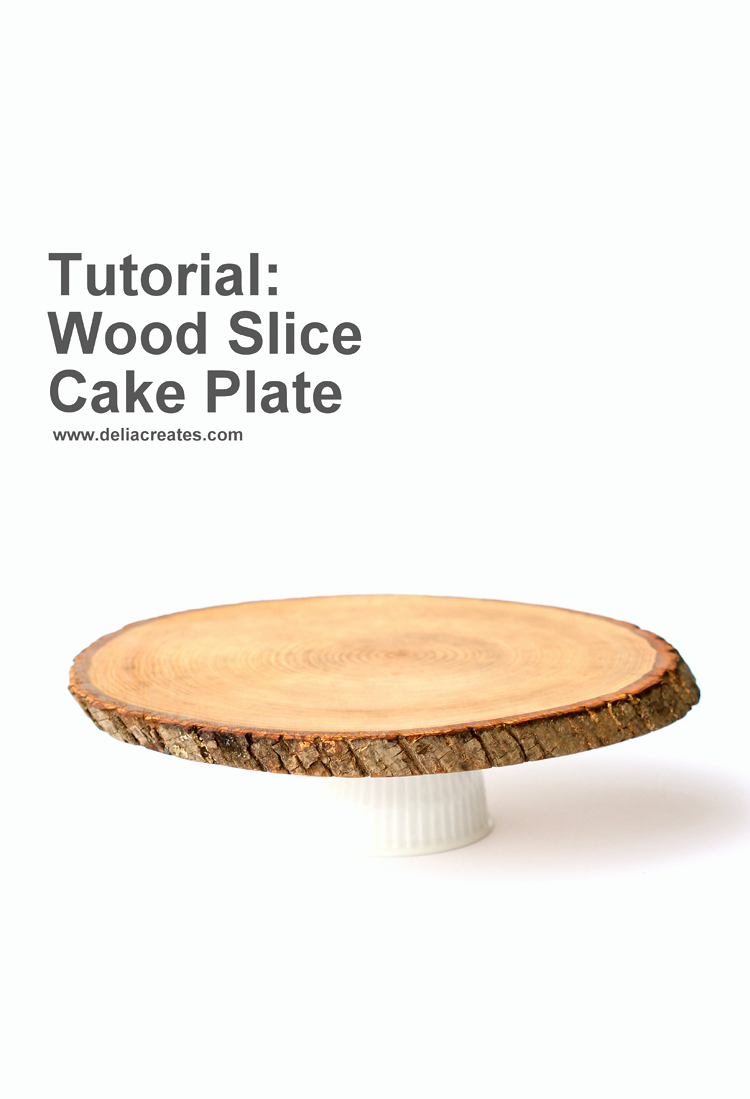 But…I’d like to think that this cake plate still imbibes a touch of modernity, with it’s simple, minimal feel.
As simple as it feels, it’s even simpler to make.
Let’s get to it!
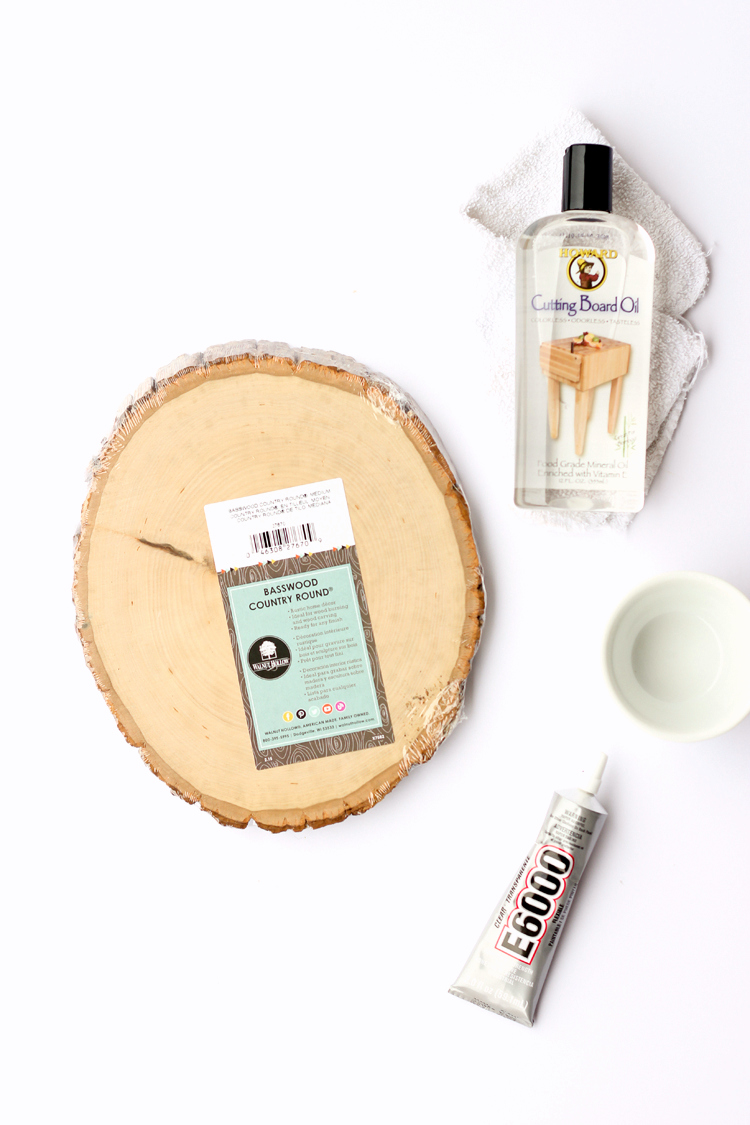 MATERIALS
Wood slice about 10-12 inches in diameter*
Small ramekin or ceramic bowl**
Food grade mineral oil***
E-6000 adhesive
120 grit sandpaper
Clean cotton rags/towels
* I purchased my wood slices/rounds from Michaels because they already come pretty smooth and ready to use. You can cut your own, or pick up some scrap rounds from a saw mill, just be sure to get them planed nice and even before you begin.
** I bought my small ramekins from Goodwill.
*** This is the same kind of oil that is used to condition butcher block counters and cutting boards. You can pick up a bottle at your local hardware store, usually in the wood stain section.
STEP ONE: Prepare wood slice.
Sand the top of your wood round until smooth. You can sand away the bark or leave it like I did. Just be sure to give the sides a decent scrub. Even the store bought rounds I got from Michaels, had moss in the bark crevices. Take care to sand those out.
Then dampen a rag with soapy water and wipe the wood round clean. Let it dry.
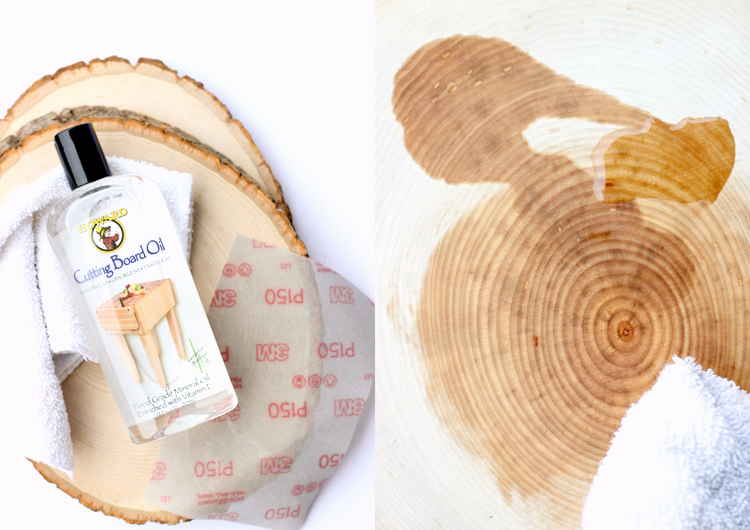
STEP TWO: Condition the wood slice.
Flood the top and sides of the wood round with mineral oil and quickly spread it over the entire surface with your sandpaper, lightly sanding it into the wood as you go. If you let it sit for more than a few seconds, it will darken the surface unevenly. This will kind of correct itself as you add more layers of oil, but it’s best to try to be consistently even from the get go.
Flood and spread more oil over the wood slice again, but this time with a cotton rag. Let it sit for about 30 minutes, and then repeat. You may repeat more applications of oil with a cotton rag 1-2 more times if you desire. The more you condition the wood slice, the better it will hold up to moisture.
Note: Take care not to get oil on the underside of the wood slice, especially the center, because it will compromise the adhesive application in the next step.
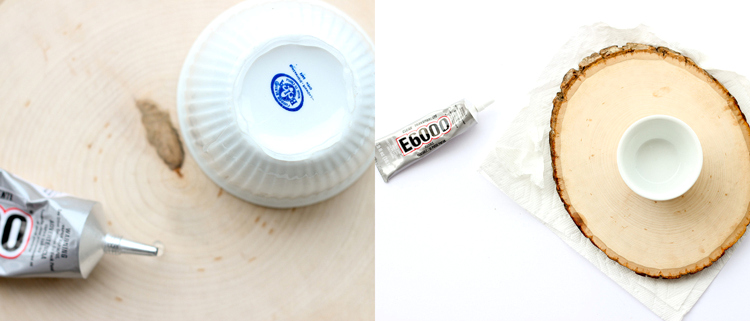
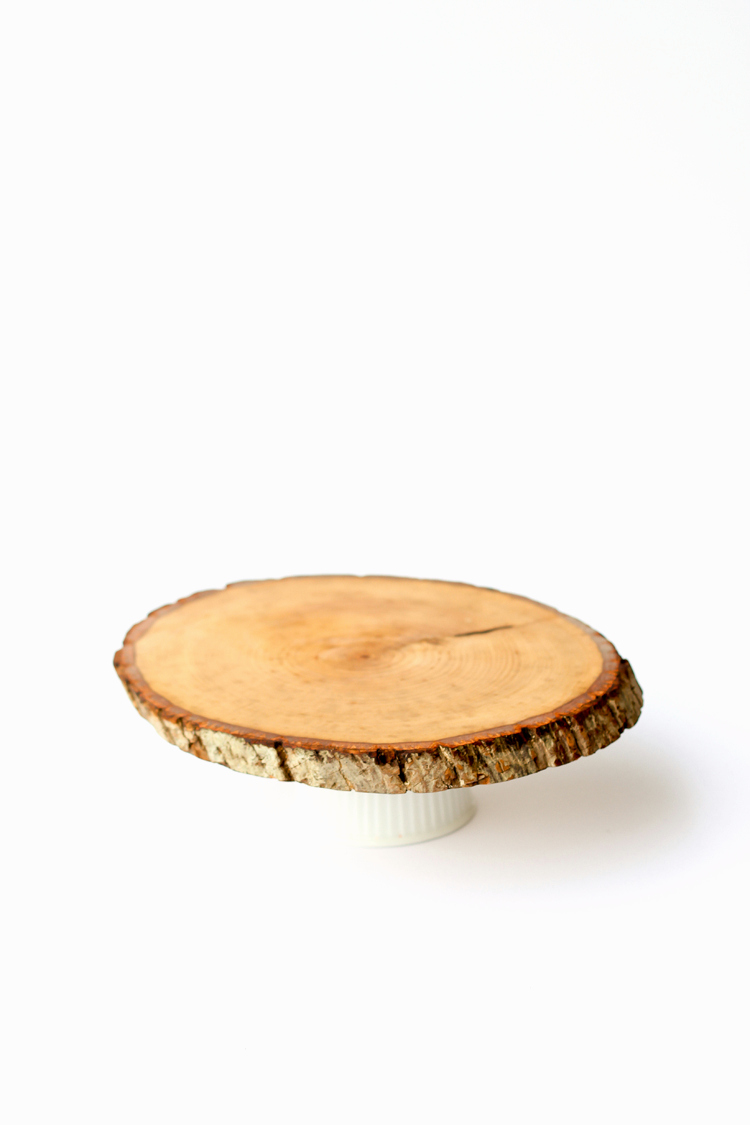
STEP THREE: Add the cake plate foot.
Clean the underside of the ramekin or bowl and let it dry. Lay down the wood slice with the conditioned side facing down. Determine the center of the wood slice as best you can. Most wood slices will not be a perfect circle, so choose a center that will help it maintain the best balance when upright.
Then apply E-6000 adhesive to the bottom of the bowl and adhere it to the center mark of the wood slice. Let it cure according to the adhesive instructions.
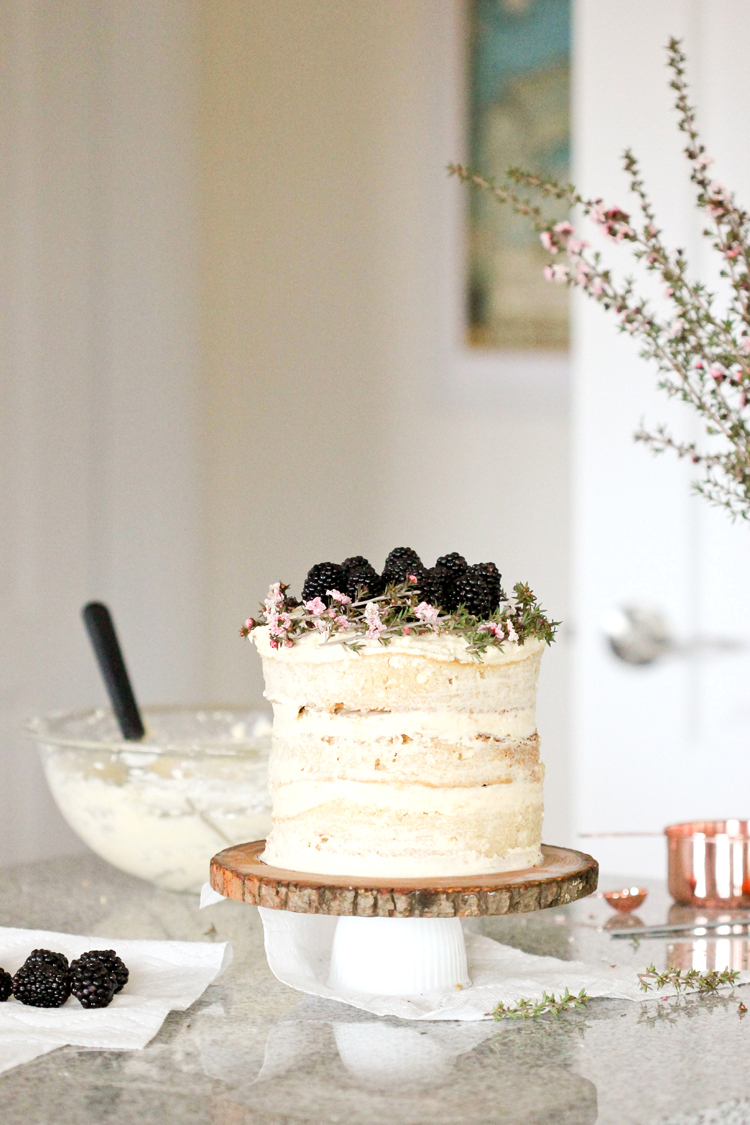
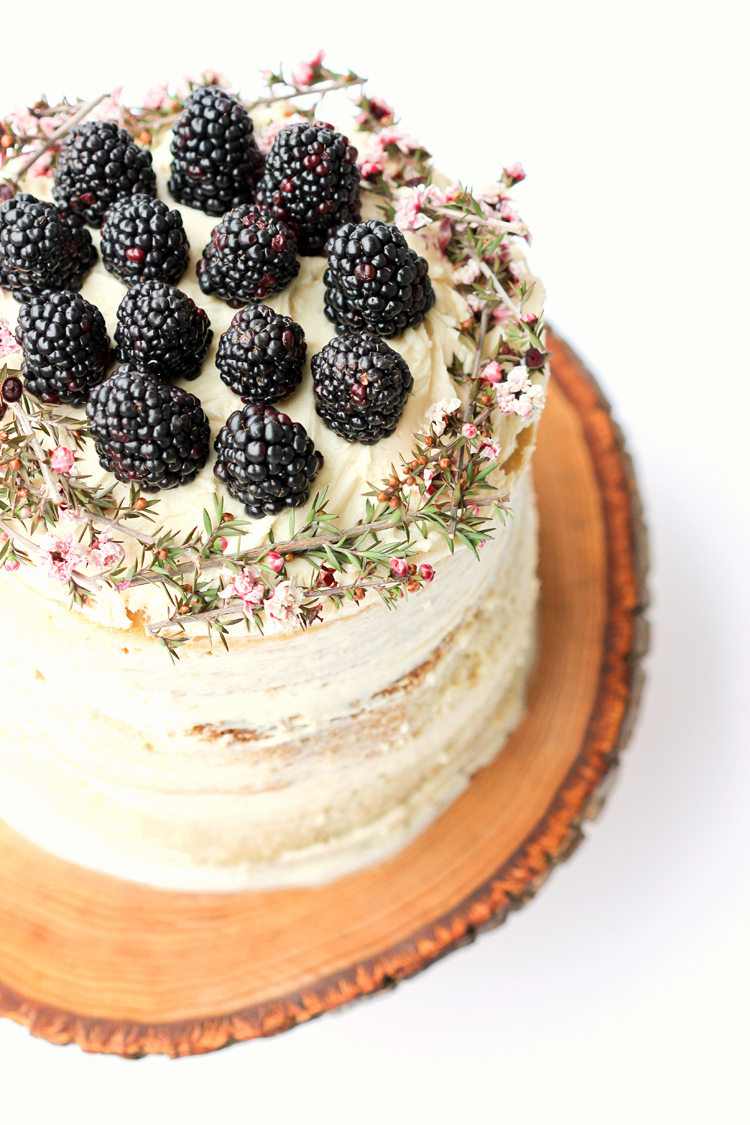
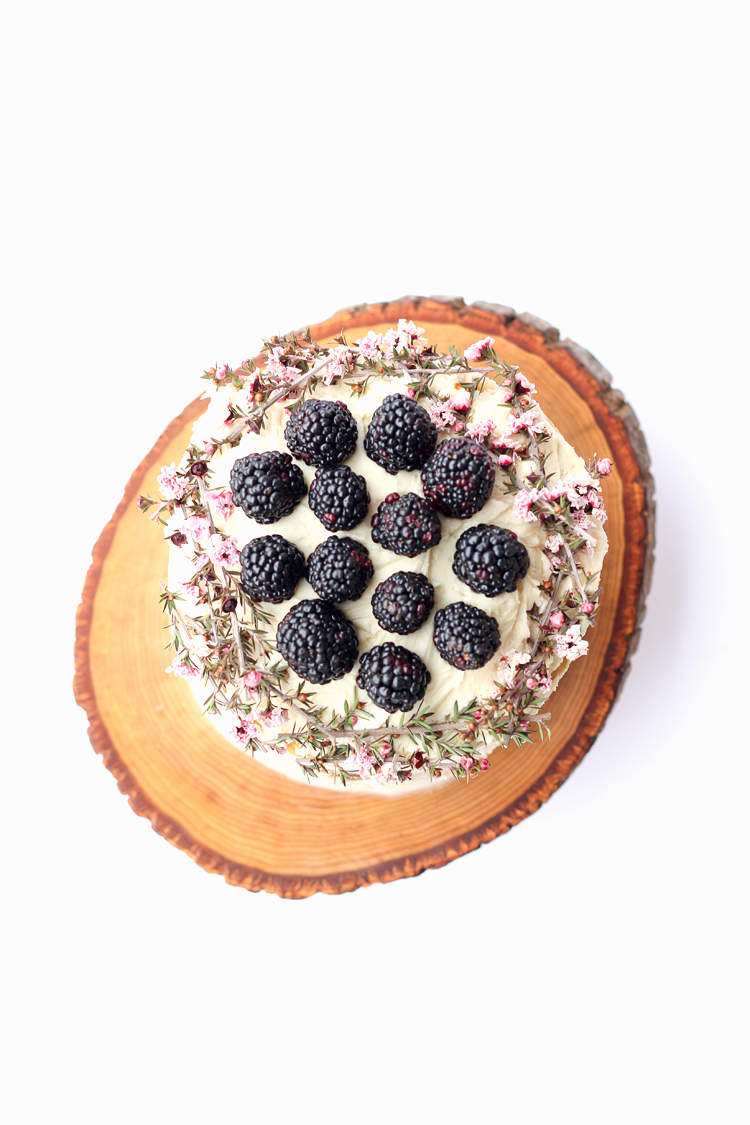
Then, get your cake on!
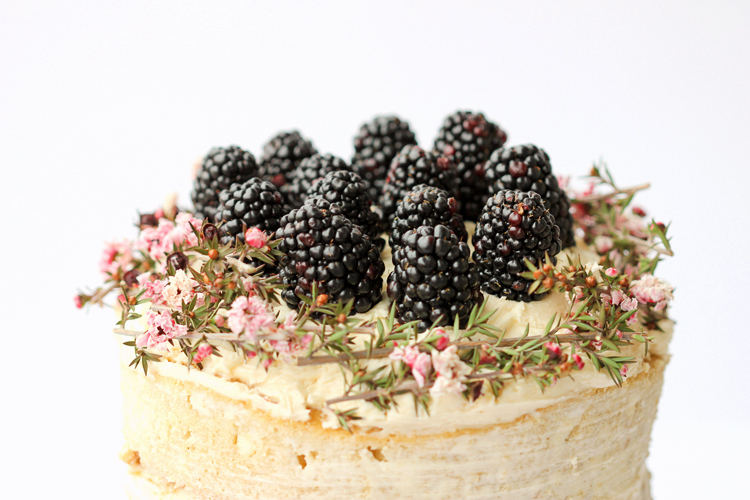
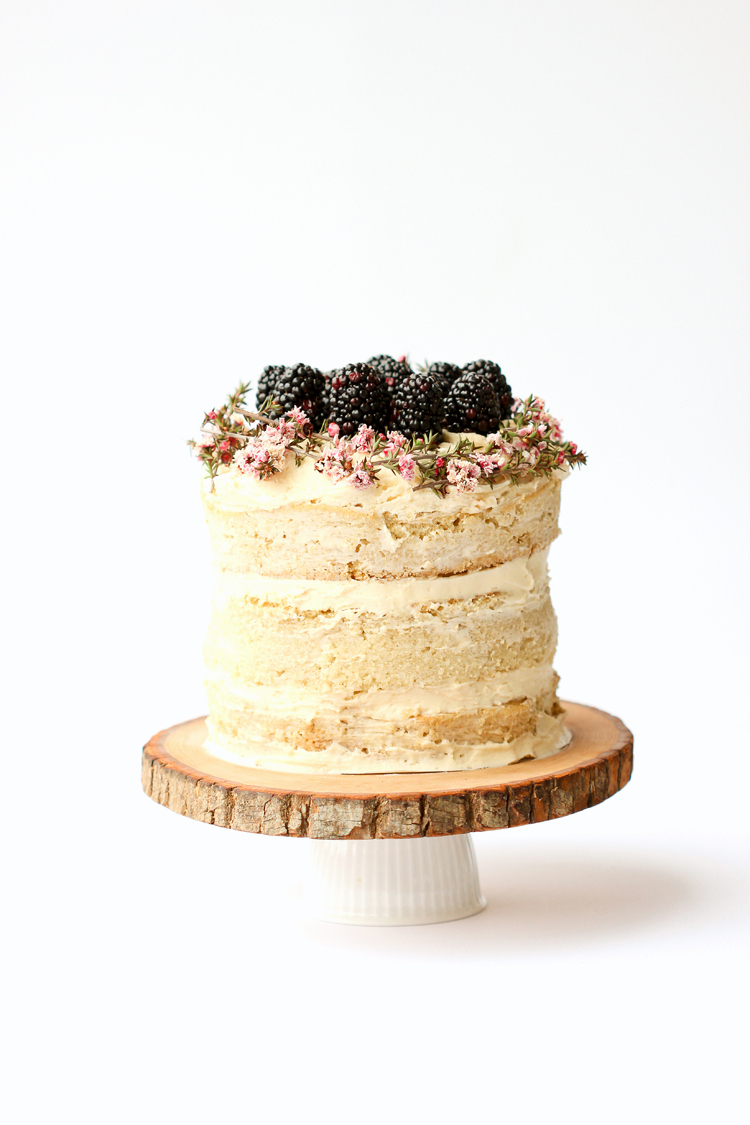
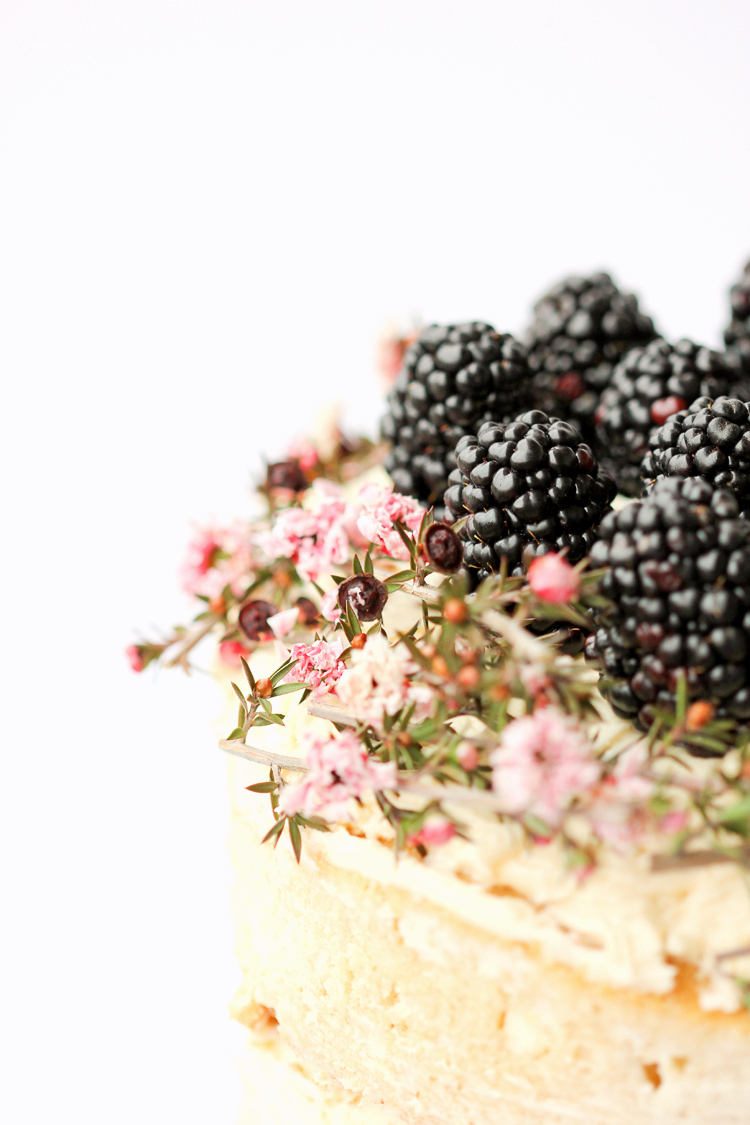
I chose a naked cake, because it seems to suit the cake plate pretty well and you know…because if I mess the cake up, it just adds to its character. Riigggghtttt? 😉 😉
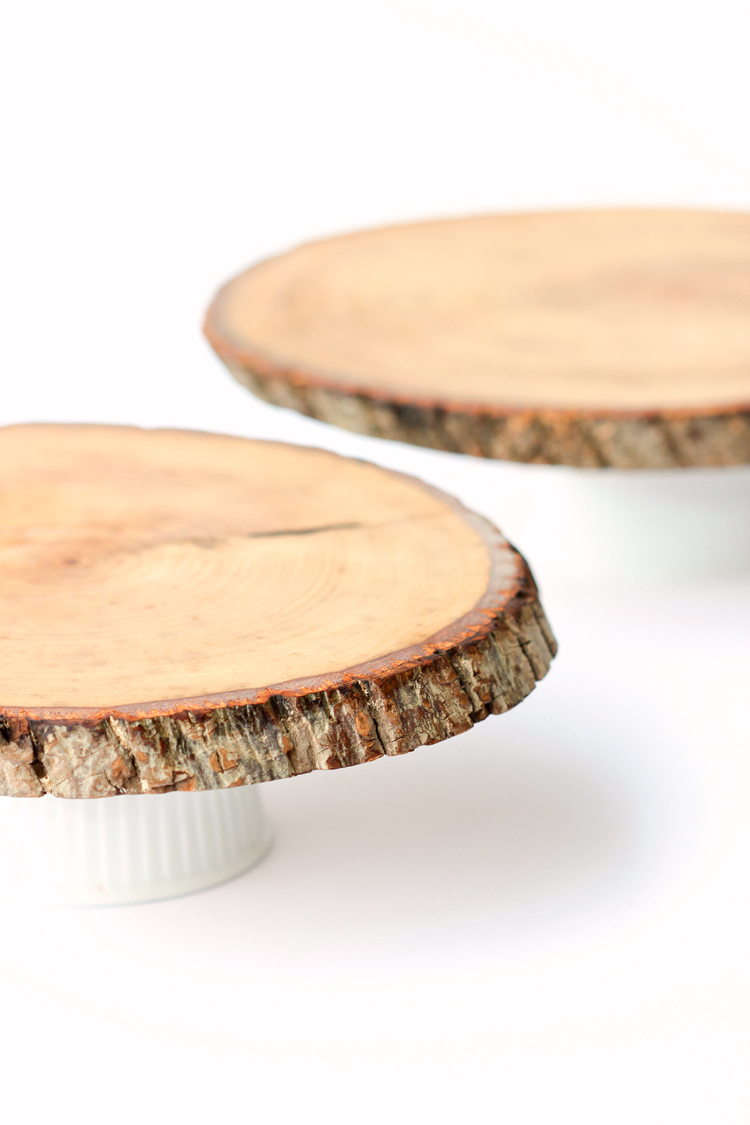
These cake plates also make great accent pieces to a table setting. Make more than one and use them as pedestals for dishes, or for fruit. I’ve used them to help dress up a food table at a party. They are adorable, handy things to have around! I’m even considering making them in miniature.

USE:
You can place food right on the cake plates because you cleaned them and conditioned them with food safe mineral oil. However, I personally like to place an undetectable piece of wax paper under the cake, to further protect the cake plate.
CLEANING AND MAINTENANCE:
To clean it, gently wash it with a soapy wet rag. Try not to soak it in water. If the wood looks like it’s drying out, condition it with another coat of mineral oil. If it accumulates stains, you can lightly sand them out, and condition the wood again.
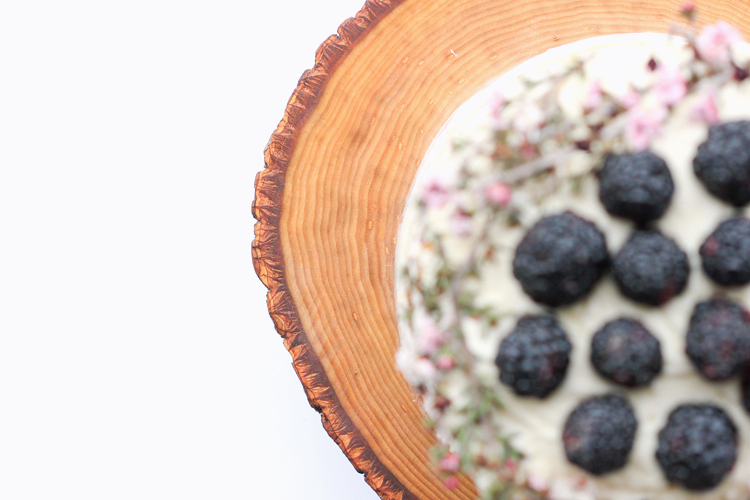
P.S. The recipe for this cake is from Milk Allergy Mom. It’s delicious and great if you have dairy and egg allergies. I’ve used it many times over here, here, and here.
So beautiful!
Beautiful!
World Market has some small wood bowls if you want to keep the whole thing rustic. I like the contrast though.
Thanks Kathleen! I found some similar bowls at Target and Home Goods, but I agree, I liked the contrast better! 🙂
I didn’t know Michael’s sold wood slices! Good to know for sure! This is a lovely cake plate, and that cake is gorgeous!
They sell birch slices too! Just be sure to use a coupon because they are kind of pricey…or pricier than I think wood should be! ha! 😉 Thank you Charity!
looks like i just found my new go to gift for friends. i LOVE it! can’t wait to make one. thank you for your on point inspiration!
So glad you like it! Thanks!
This is such a neat idea and the cake is beautiful…what cuttings/flowers is it that I see around the edge?
Thanks Rachel! Honestly, I am not sure. I just picked up some filler from the grocery store. We removed it before we ate it. Sorry I don’t have a better answer for you!
The cake stand is beautiful. The cake is beautiful. Fantastic photos. Thanks!
Thank you Jen! <3
Have you had issues with the bark chipping off? I have a similar wood slice from Michael’s I use for decor and I hardly touch it and the bark is disturbed. Wondering with use if that has happened?
Lisa,
That’s a great question. I haven’t had that issue. I’m really not sure why. If the bark does come loose. You can sand that spot smooth and then recondition it with more oil. Or, you can remove all the bark from the get go, for a raw edge look. I hope that helps!
Delia
I am a big fan of Wood Turners Gloss Food Grade Finish. It add the gloss finish.
Thanks for the tip. I’ll look into that!