

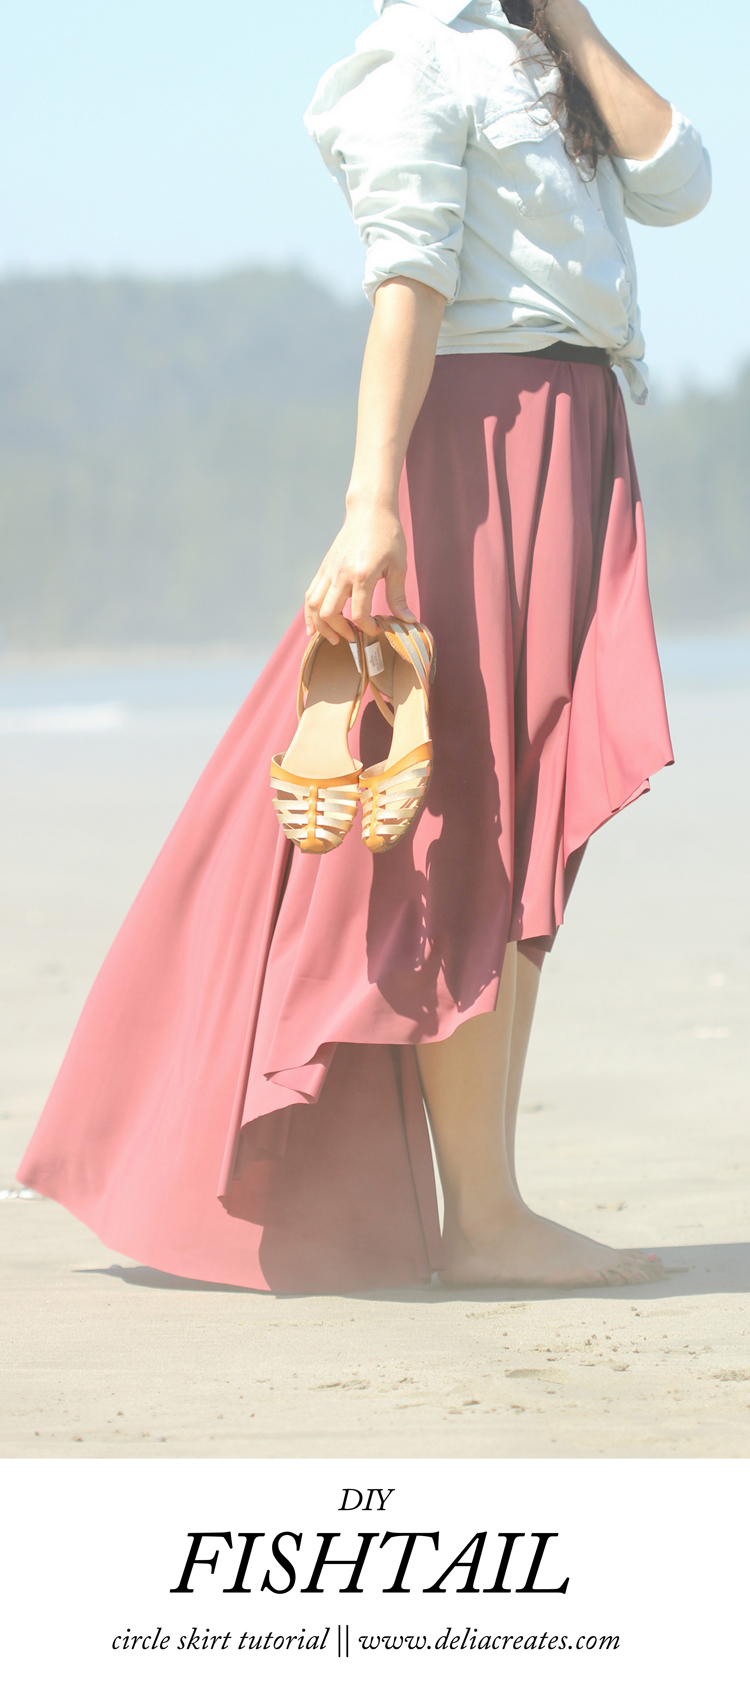
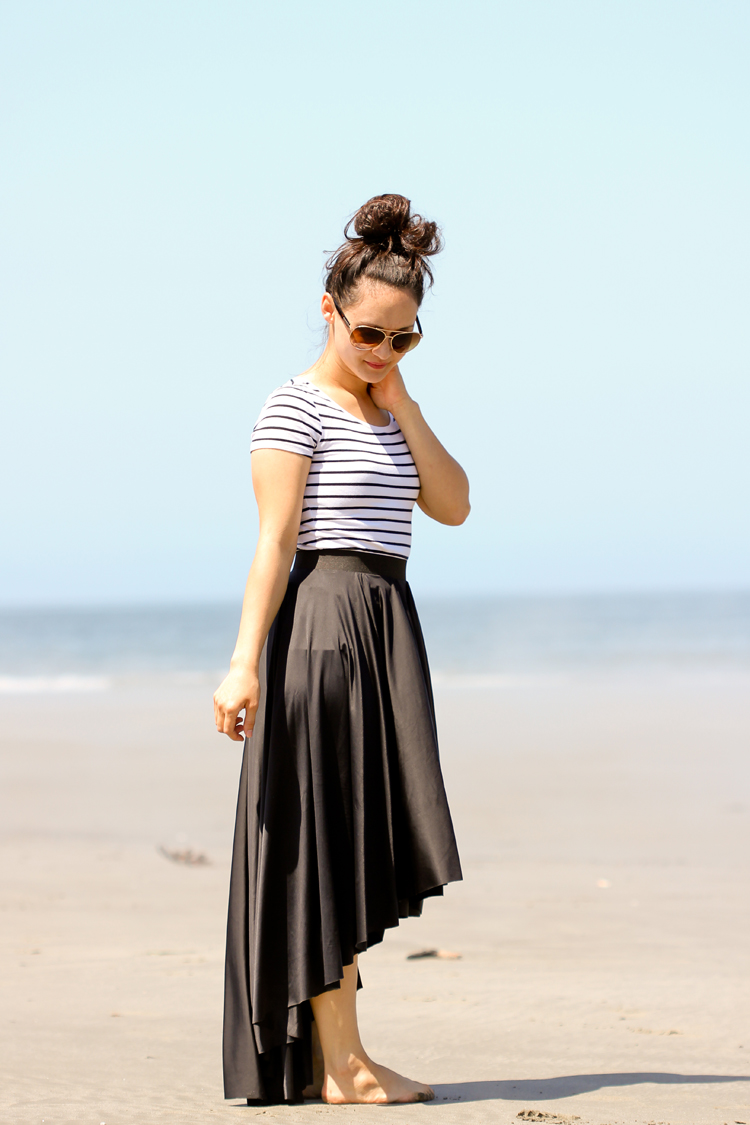
Today’s project is one of my favorites yet. It’s a knit circle skirt with a dramatic twist…

It’s official name is a fishtail circle skirt.
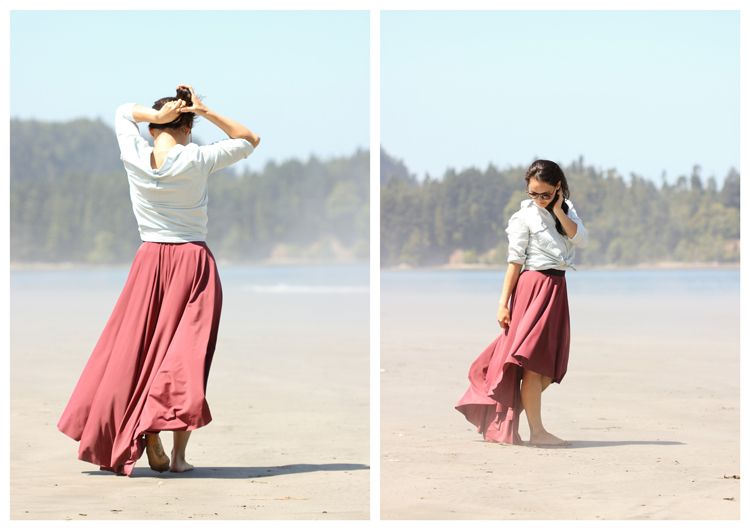
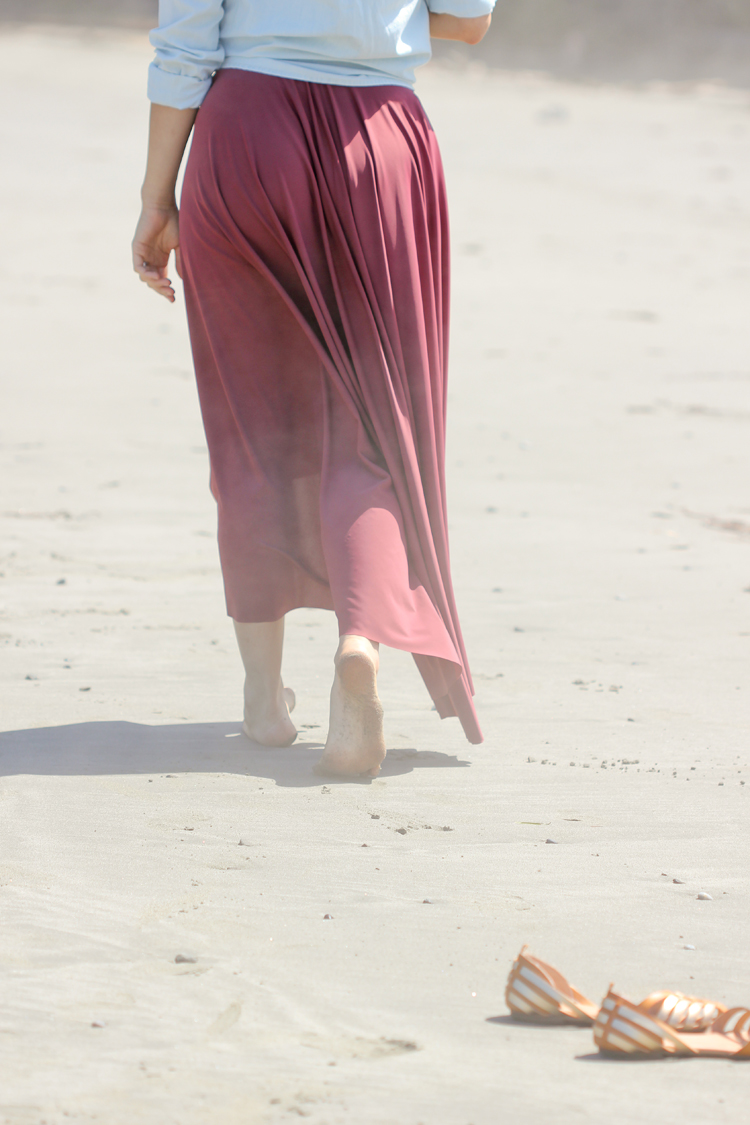
Isn’t the fog in this pic cool? One of my favorite things about the beaches in the PNW is the warm summer fog.
Anyway, back to the skirt. 😉 I took notes from MADE and The Sewing Rabbit and created a tutorial for making a women’s sized knit version.
Knit as in…NO hemming! (insert happy dance) 🙂
There’s not even a seam if you use the right fabric. I found THE perfect knit from Girl Charlee (see deets and links below). It’s light weight with fantastic drape, and it comes 74″ wide. That means you can cut out the skirt in one seamless piece, for most sizes/heights.
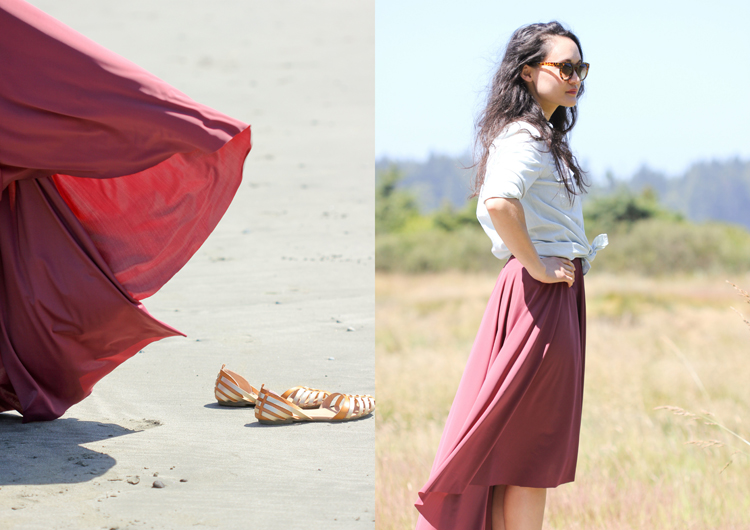
The fabric shown above is the Auburn Matte knit.
It is listed as a lining, but it’s perfectly opaque and the perfect weight for a skirt like this.
It’s also a lot lighter in color than the listing photo. I think it’s more of a mauve/marsala color, which is on trend for 2015. I am usually not a huge fan of marsala, but the tone of this fabric is lovely. It’s my favorite of the two skirts.
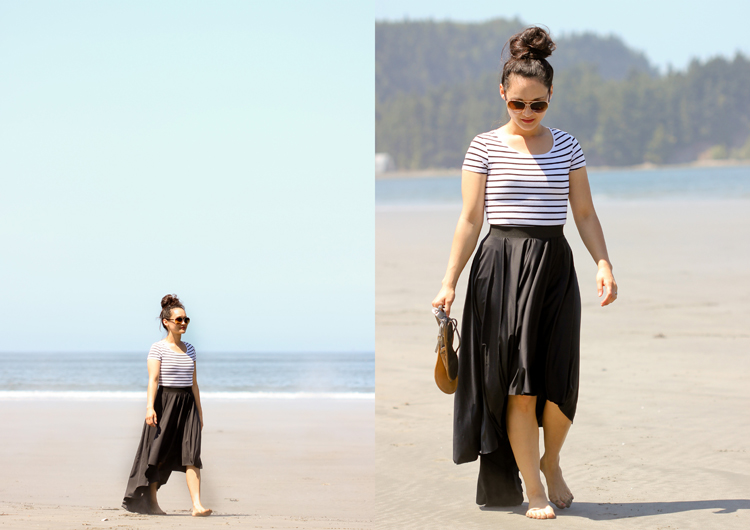
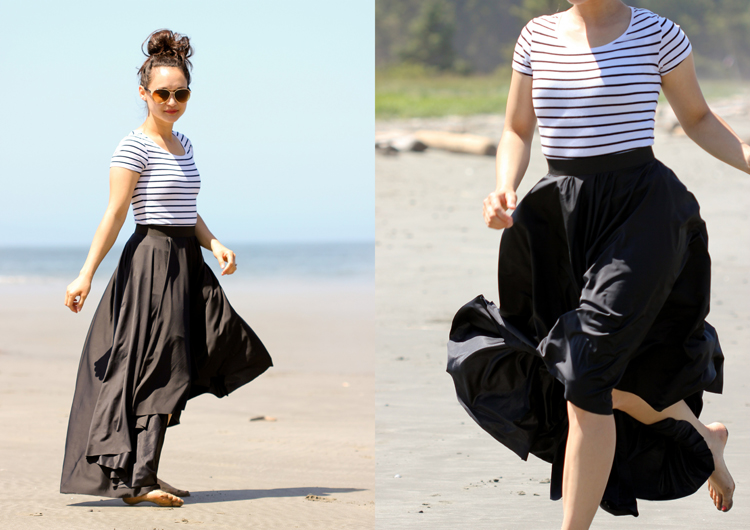
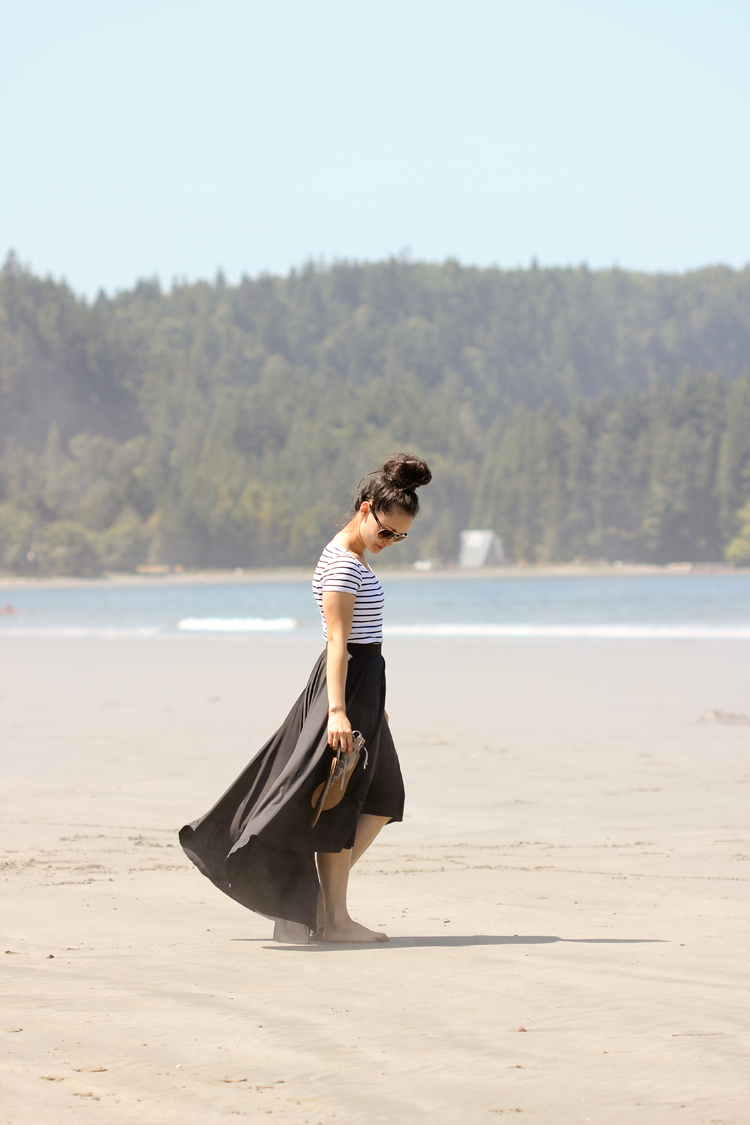
The black satin milliskin is shinier, and a little more slick, but works just as well. There is a shiny side and matte side, so you can choose which one shows. I chose the matte side, and I love how elegant it looks.
Just a warning though, the widths can vary for the black milliskin knits. If you are taller and are going to need the full 74 inches of width, then I recommend sticking with the colored milliskin knits, and double check the listed widths to be sure.
Okay…ready to make one?
Before we begin, we need to do some measuring and some math.
FIRST – Determine waist radius measurement. If you have never sewn an elastic waist circle skirt, then the very first thing you need to do is to hop over to Dana’s (MADE) circle skirt tutorial and determine your elastic waist measurement and waist radius measurement. You’ll revisit this tutorial for the last step when you attach the waist band too.
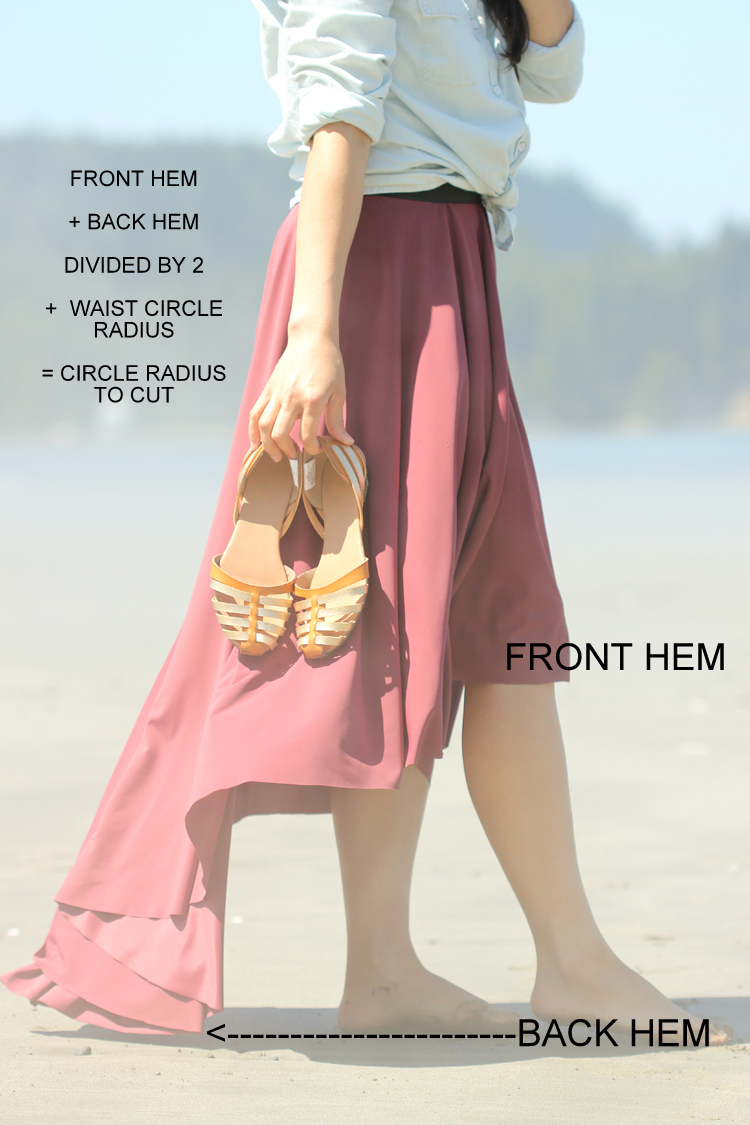
NEXT – Determine hem lengths. Measure from your waist to where you want the shortest part of the skirt to end. This is the “front hem” measurement. Do not add for hem allowance, because there will be no hem! Then measure from your waist to your heels or the floor. This is the “back hem” measurement.
TIP- Remember that this fabric is very stretchy. It will “grow” a little bit, when worn. Consider cutting your skirt 1 inch shorter than desired, if you are sure you want a very specific length. Only compensate for the front hem though. Having a little extra length in the back is fine, especially if you plan on wearing this skirt with heels.
DO YOUR MATH – Figure out how big you need to cut your circle. Add your front hem and back hem measurements, then divide by two. Next, add your waist radius. The final answer = the radius of the circle you need to cut from your fabric.
For example. I measured a 22 inch front hem, a 38 inch back hem, and had a 4.3 inch waist radius…which equals a 34.3 inch radius for my initial circle cut.
DETERMINE FABRIC REQUIREMENT – Figure out how much fabric is needed and gather materials. Double your “circle to cut radius” to determine how wide and long you need your fabric. In general, most sizes will need about 2 yards of 74″ wide fabric.
Now you’re ready to gather your…
MATERIALS:
2+ yards of 74″ wide knit fabric (yardage as determined above; see my links and notes about 74″ wide fabric toward the top of the post)
2 inch wide elastic, cut to your waist measurement + 2 inches
matching thread (match elastic color)
tailor’s chalk or washable fabric marker
_________________________NOW, LET’S SEW!_________________________
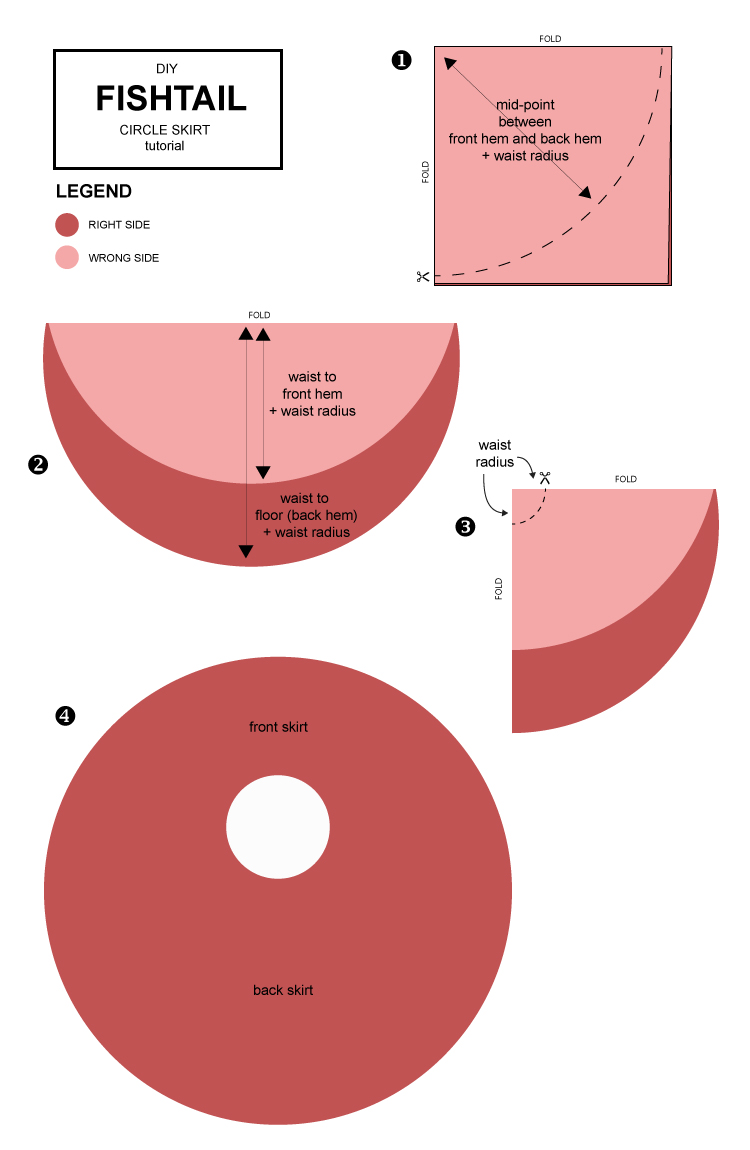
The illustrations are pretty self explanatory, but I have included some extra notes for each step that may be helpful:
1. Fold your fabric into fourths, wrong side up. Measure from the corner out using your measuring tape like a protractor, and create a quarter circle with tailor’s chalk or a washable fabric marker. Be careful not to use something that is permanent or hard to wash out. You will not be hemming this skirt, so you won’t be able to hide any stray permanent marks.
Cut along the marked line.
2. Open up your skirt to a folded semi-circle. Slide the top layer up until it’s the length of the front hem plus the waist radius. It will likely be fussy to handle. Meticulous patience is key here. Get everything to lay nice and flat and even as best as you can. Because this skirt requires minimal sewing, cutting it just right is paramount…as in, it will pretty much make or break your skirt. I promise, if you take your time and get it right, it will be worth it.
3. As carefully as you can, fold your skirt in half again, so that it is sort of in fourths. You may want to pin or clip the fold in place, so it doesn’t shift while you move the skirt. Draw out your waist radius, the same way you marked for your first circle. Cut out your waist opening.
4. When you open your skirt all the way up, this is what you should see.
5. (Not pictured) Attach your elastic waistband. You can sew them on the same way as Dana’s circle skirts, with the elastic on top, or with the elastic to the back like I did with these pleather circle skirts. I made these skirts with the elastic to the back, but either way works just as well.
Be sure that you line up the elastic seam up with the back or longest part of your skirt.
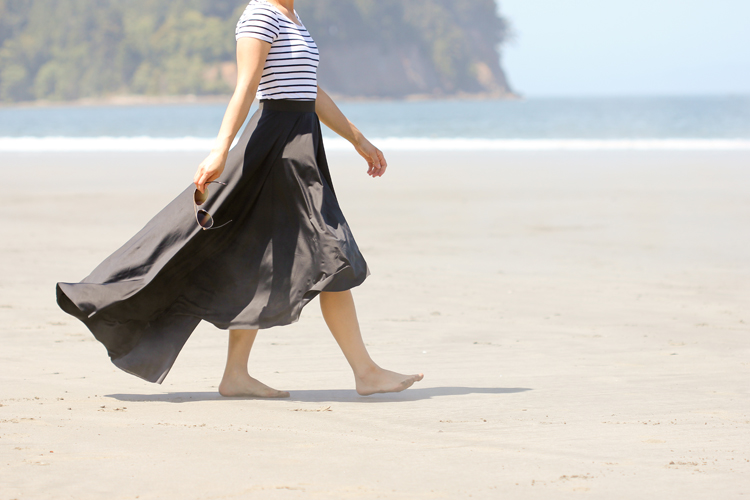
That’s it! Easy, peasy to make…
…and seriously fun to wear. I feel beautiful when I wear it. There are not many garments that can elicit those kinds of feelings so effortlessly.
ONE TIP, I learned after wearing these skirts for the photoshoot…wear a slip if you are going to tuck it in. The drapey fabric has a tendency cling to tucked in shirt lines. 😉
SKIRTING THE ISSUE
This tutorial was created for Skirting the Issue, a series put on by Simple Simon & Co. to benefit foster care girls. Every year, bloggers and sew-ers come together and sew stylish skirts for girls in the foster care system. For more information on how and where to donate and get involved, check out their 2015 announcement post.
Put your sewing super powers to use and help get these girls ready for back to school. You won’t regret it! 🙂
 More about skirting the issue…
You can check out my Skirting the Issue post from last year, for a simple basic knit skirt tutorial/free pattern for girls of all ages. It’s a great stash buster, as you can use whatever cuts you have in your stash to fit any size from newborn to juniors.
This year, I wanted to focus on the older foster girls because my guess is that they don’t get as many options. Little skirts are just easier to sew! I created this skirt to be relatively inexpensive, easy to sew, and easy to wear. This skirt comes in at about $8.50 + shipping if you use the fabric I recommend, it has no hem, and just an easy elastic waist. Even if you sew it to your measurements, it’s sure to fit sizes just above and below you, as it can be pulled up or down on the waist to accommodate varying heights. They are SO fast and easy, you can sew one for a foster care girl and one for you, in the matter of an afternoon nap.
I messed up the cutting on a couple of other attempts at formulating the tutorial for this skirt (I was serious when I said to be meticulous about the cutting! ha!…but don’t worry, my tutorial takes out the guesswork), so I cut them down to regular circle skirts. I cannot wait to donate them with my second fishtail skirt. I hope the girl who receives it, loves it and feels beautiful wearing it too!


P.S. A big thank you to Girl Charlee for donating a portion of the fabric I used to make the skirts I’m donating!
I love these, they look great! Especially the pink one! And the beach just adds to everything!!!
I’ve tried so many times to do circle skirts, and my waist measurements never come out right, ah well, practice makes perfect.
xox
Thank you Beth! Sorry to hear you’ve run into trouble with the waist measurement. Can I help you troubleshoot?
Thank you so much Delia…this skirt will be perfect for older girls…it is beautiful!!!
Thank you liZ and Elizabeth! ox
Where do you find 74″ fabric.. Around here 60 ” is the widest available. Can you give out your source?
Thanks! PS your skirts look fun to wear!
Yes, yes, definitely! I included links to the fabrics in the post, but here is a link to the auburn fabric for your convenience.
http://www.girlcharlee.com/auburn-matte-milliskin-lining-nylon-spandex-knit-fabric-p-9858.html
Most milliskin knits from Girl Charlee are 74″ wide (but always double check to be sure! They can vary from color to color). They are only $4.25 a yard too! Hope that helps. 🙂
I have some of that fabric that I’ve been using for linings… I’ll bet it feels amazing as a skirt like this! Love the way this drapes!
It does! The lightweight lining helps this skirt not feel like TOO much skirt…if you know what I mean. 😉
This skirt looks like a lot of fun! Do you know where to donate the skirts here in the PNW?
Thanks! If you click over to Simple Simon & Co. they have a list of places to donate, including a place in Oregon. If I can’t find a place nearby, I will probably ship my skirts to the Oregon location. I hope that helps!
Thank you soo much for this. Clear, simple instructions – thank you for sharing. I have been looking for a tutorial like this. Will make it on the weekend and I know my daughter will love it…..
Thanks Melanie! 🙂 Happy sewing!
Pinned it right away. You look so wonderful in these skirts. The photos are just amazingly beautiful!
Cool DIY project! :)I have to try this one day.
x M.
http://nevermindnm.blogspot.com/
Thanks Maja!
Love the skirt!!! I’m excited to attempt this! On the other hand I absolutely adore the shoes! Please please tell me where you got them! Thanks!
Thanks Allison.
They are actually from Old Navy…I think Spring line? I got them a few months ago.
These skirts are beautiful! I saw them first on your blog this morning and have already seen them shared on girl charlees email, Andreas notebook email.. Pinterest. I’d say they’re a hit! Way to go at another great tutorial.
No way! That is so cool. Thanks for telling me that! 🙂
This is gorgeous Delia! I love where you live. SO very pretty!
Thank you Dana!
I love this!! Especially the mauve color. So pretty – and I totally want to make one. Thank you for the super clear tutorial. 🙂
Thanks Alexis!
This skirt looks amazing in person! Now I’m going to have to make one too! I think I can manage the simple sewing.
Aw thanks Jen! <3 <3
So beautiful ^^
Very pretty and fun! I’m going to have to look for fabric this weekend to try this out! Thank you so much for sharing the instructions on how to make one!
I want to make the *fishtail* even longer. If the fabric is not big enough, how would I make it with two pieces (one piece for the front, one piece for the back)?
Thanks for your help!
Good question Sandy! I think the easiest way would be to piece two semi circles together, but the seams wouldn’t be quite right. You could do a bit of math to figure out where the seams would hit and then piece the circle together that way? Does that help?
Yes! That does make sense. Perhaps the circle skirt will be more of an oval instead..? Thanks for the tips!
Yes, that does sound about right. No problem. Good luck! Let me know how it turns out!
clear instruction, thank you so much, i want to use your instruction to sew my wedding skirt with satin fabric (3 meters wide) , and in floor length with the tail, do you have any advice for me?
I love the idea of a wedding skirt! You are going to love it! I always feel so fancy when I wear it. Since it’s for your wedding I recommend sewing a fitted woven waist band and zipper if you can. If not, I would splurge on some really beautiful elastic. I would absolutely love to see it when it’s done. Please tag me @deliacreates in the post or in a comment if you share it on social media. I’m so excited for you!
Thank you for answering, I’m going to use a separated waist band with pearls on it 🙂
It should be ready in 2 months, and you will be tagged in my Instagram post as soon as it be ready 🙂
I hope every thing goes well
I could’t find suitable fabric in 3 meters wide, pretty fabrics in my country have 1.5 meters wide, Do you think it is a good idea to first sew two pieces to each other to have a 3*3 square?
Or It is better to use two semi circles? I am afraid tail become short if i use two semi circles 😐 because length of skirt with petticoat should be 120 centimeters
I have attached my Instagram page link, I would be happy if you see my illustrations and small handmade things: https://www.instagram.com/mahsa_makki/
That’s tricky. I would trace it out on a giant piece of paper (or at least half of the pattern length wise. Maybe get butcher paper that school teacher supply stores often carry. Then I would play with how to best piece it so the seams won’t be obvious. If you can I would try to get the seams to be on the sides. That will take creative cutting, but it will look so much nicer than have seams in the front and back. You could even make the back extra wide and then gather it before attaching it to the waist band so you get a bustle effect. Ack! I am so excited for you. This skirt is going to be so pretty!
Thank you very much dear Delia, great idea to make back wider, I’m going to start making the dress right now
I’m trying to make a skirt like this that has a long train yet, but I’m not sure how it will work. Would you just cut it oval then instead of a circle?
That could work. I think you would need to make it a bit of a lop-sided oval…Maybe more like a tear drop shape? The front should stay circular, but you could elongate the back for dramatic effect. If you can, I would make a muslin with cheap fabric so you can mess with the shape a bit. I hope that helps!
Thank you! Will see how it goes.
Great tutorial and thank you for taking the time to share it with the sewing community. Would I need to add ease to the equation if the fabric isn’t a knit? I would like to use this equation to make high low bell/circle sleeves. Thank you!
Thanks Jen! You may need to widen the skirt opening a little bit so that it can be gathered. What a great idea to use this for sleeves!
I started this, but realized a little late that my fabric is too short, the circle pattern doesn’t fit on the fabric, I’ve got part of the circle that doesn’t fit, how can I fix this?
Oh dear! Sorry for not answering sooner. I’m not sure I totally understand your question, so please correct me if I answer incorrectly. If your fabric is too short you could just make it a regular circle skirt. If you really want that fishtail shape, then I suggest cutting your fabric into rectangles and sewing them in the length that you need. Try to center the skirt over the seam so that they become side seams of the skirt. Does that make sense? Let me know if you have further questions and I’ll try to answer quickly. So sorry again for my delayed response.
Thanks for this tutorial, Delia! I’m excited to make this with a pretty yellow fabric for a wedding I’ll be attending and singing at next month. A question – Dana’s circle skirt tutorial (which I’ve used so many times already in the past!) recommends adding 2 inches to the waist measurement before calculating the waist radius so the fabric has some give. But from what I can tell her tutorial is written with woven fabrics in mind. I’m inclined to NOT add 2 inches in my calculation for my organic cotton jersey knit since it already has give. Did you add anything to your waist for your stretchy fabrics?
Yes! I saw that on instagram. I love the elastic you chose! You ask a very good question. If your fabric has enough four way stretch, I bet you could get away with not adding to the waist measurement. That may even create a smoother look at the waist. And if you find you don’t like it, you could carefully remove the waist band and trim it down before reattaching. I did add to my waist measurement and it creates a very slightly gathered look as it come away from the band (even though it’s not gathered). I’m excited to see how yours looks without the added inches. I bet it will be fantastic!
Thank you! I was stoked to find that elastic at Hobby Lobby. I can’t wait to share the finished skirt!