

UPDATE: I have re-written this pattern to improve sizing and fit and to include sizes newborn through adult large. I have deleted the pattern here. PLEASE see THIS post for the new and improved FREE pattern.
P.S. The photo tutorial (not including the pattern), yarn details, and outfit details are still listed and linked below.
________________________________________
I don’t know about you, but I can’t help but blurt out an audible “awww” at a bonnet. They’re almost up there with kitties and puppies for me. They’re just so cute!
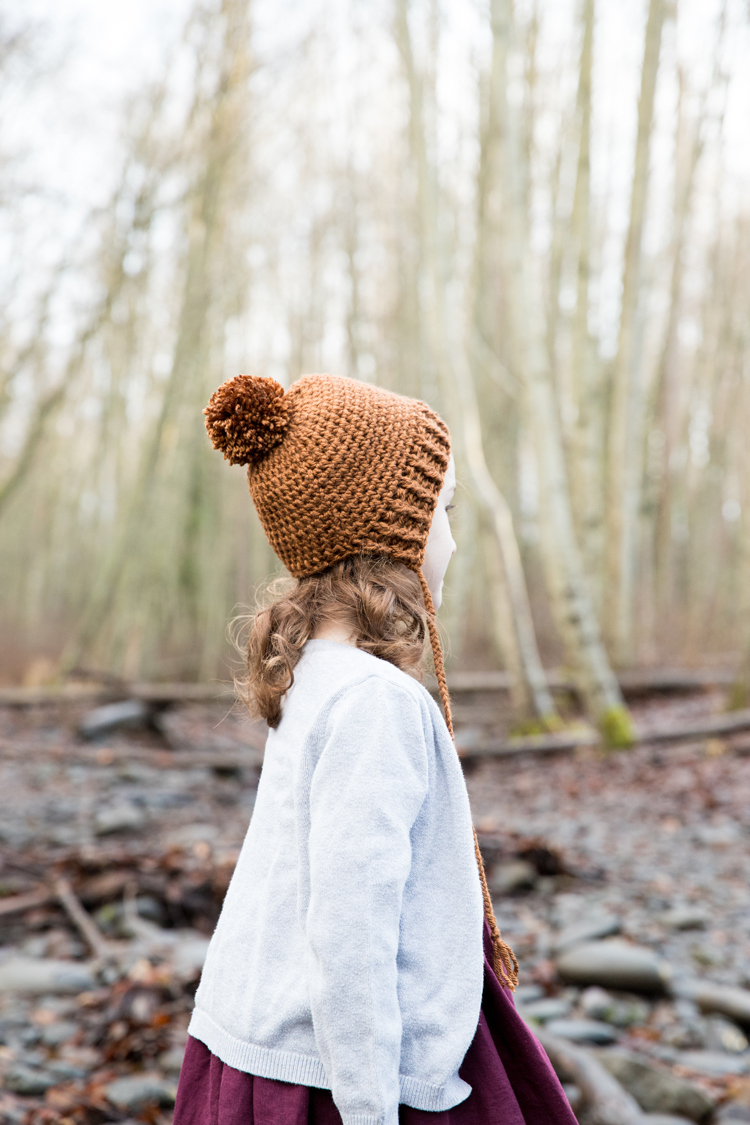
So, really it was only a matter of time before I’d make a crocheted bonnet pattern.
I actually made a couple of sewn bonnets for my daughter when she was a baby about 5 years ago – hold me! – but they’re really just for babies. *Free sewing pattern here and here.
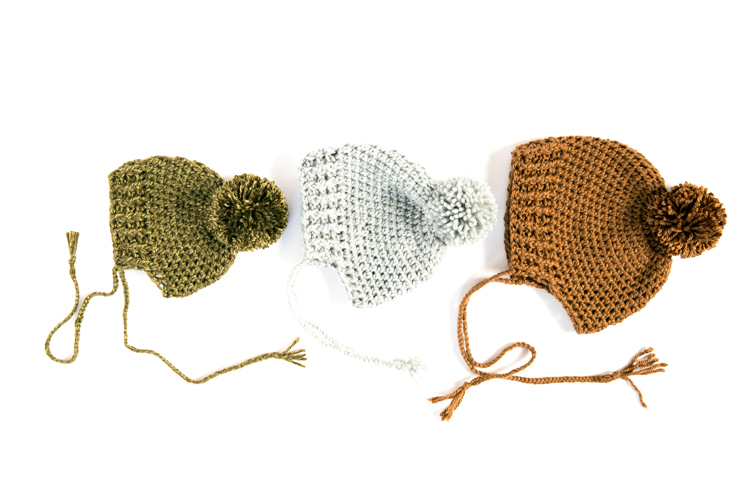
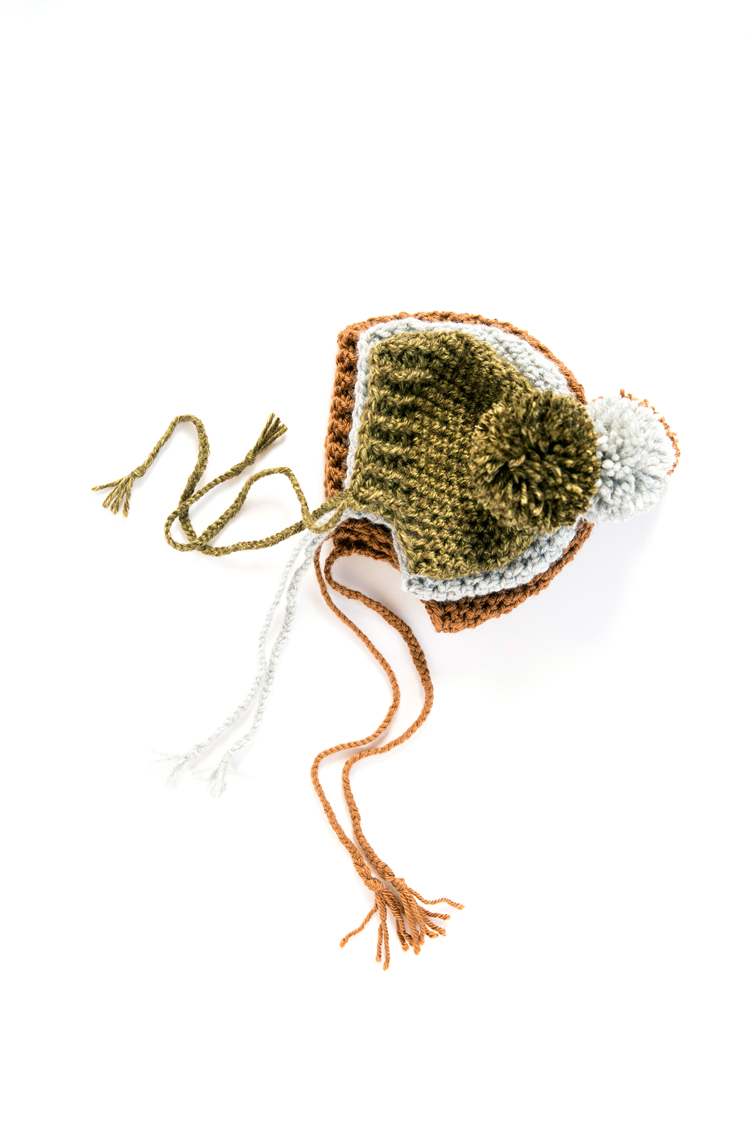
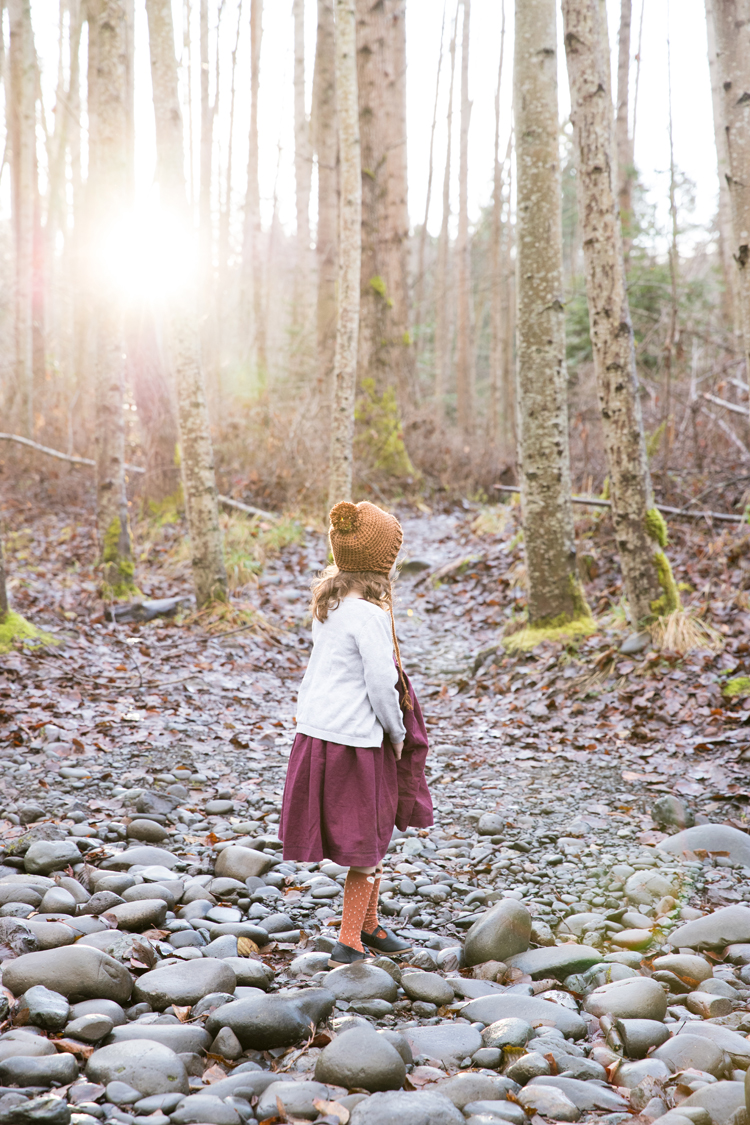
This time, I wanted to design something that would work for babies through younger kids, so I’ve included three sizes: Baby, Toddler, and Child.

It’s a great pattern for adventurous beginners. It works in the round mainly with just half double crochet stitches. For the brim there are some slightly more difficult front post and back post double crochet stitches. But, if you can double crochet with confidence, working in front and back posts is not that much harder.
Let’s get started! — GO HERE FOR THE UPDATED PATTERN—
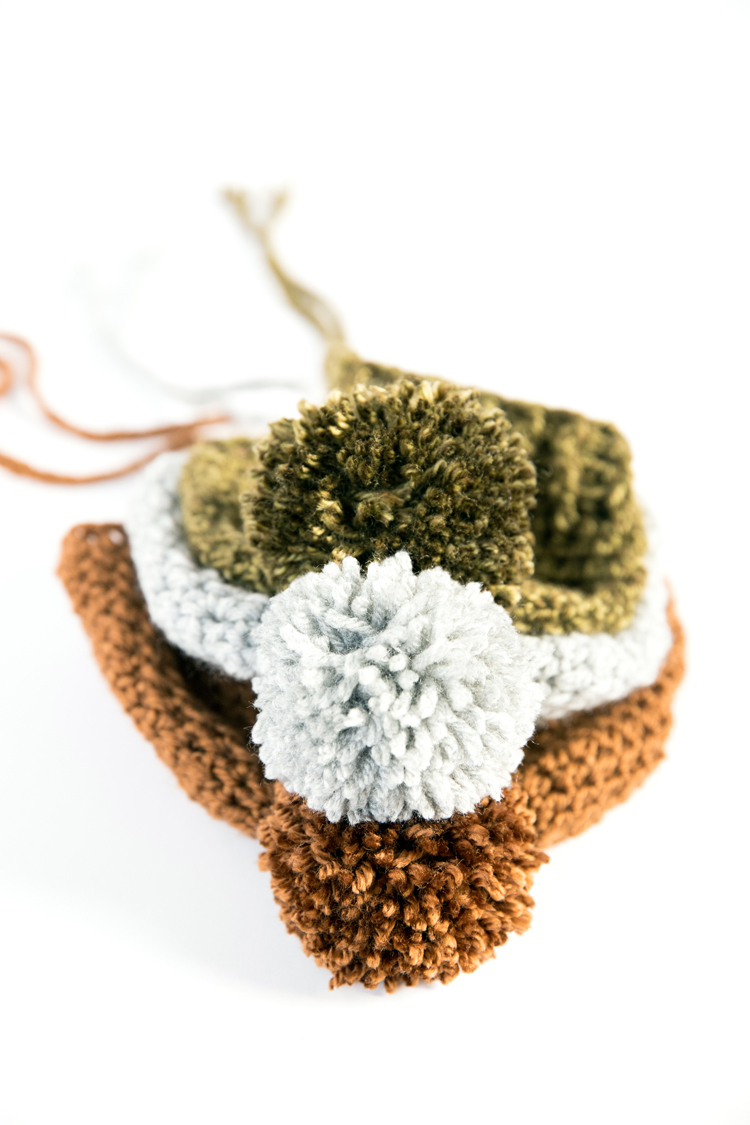
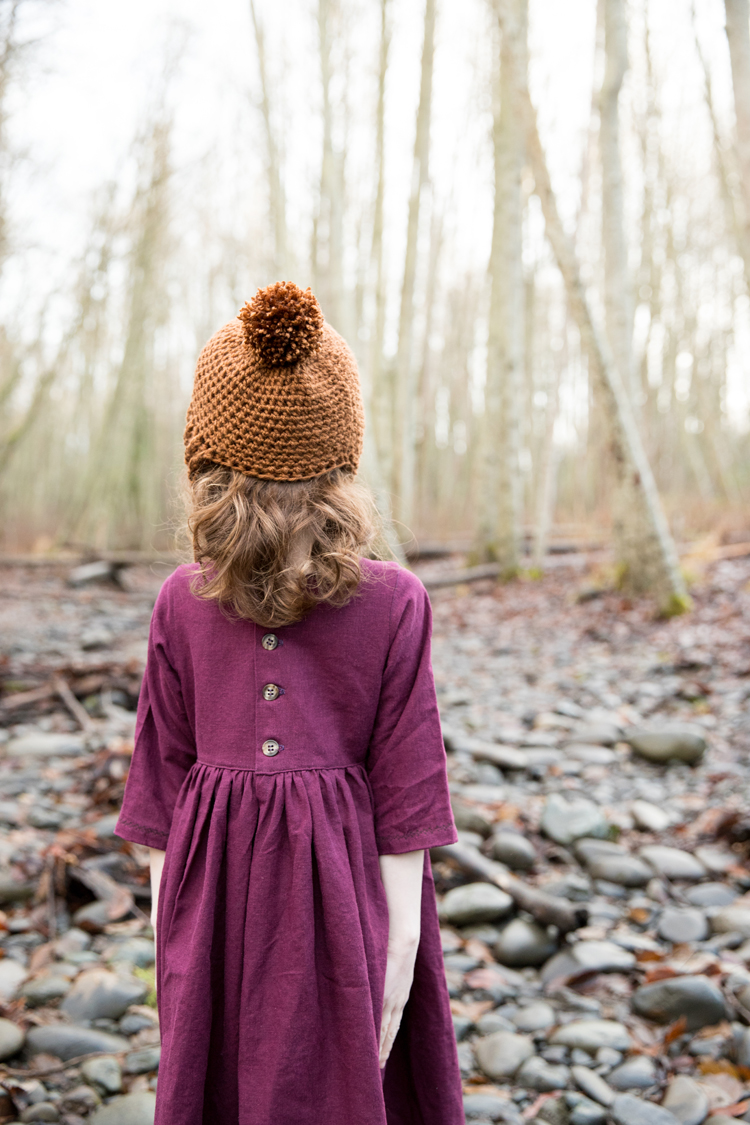
I recommend choosing a softer yarn, but any worsted weight yarn will do. I used Red Heart Soft in Toast for the child size, Lion Brand Vanna White’s collection in Silver Heather for the toddler size, and LionBrand Heartland in Joshua Tree for the baby size.
TUTORIAL
NOTE: First, I’ll share the basic structure of the pattern, stitch instructions, and lots of pictures. For the written patterns, scroll down further.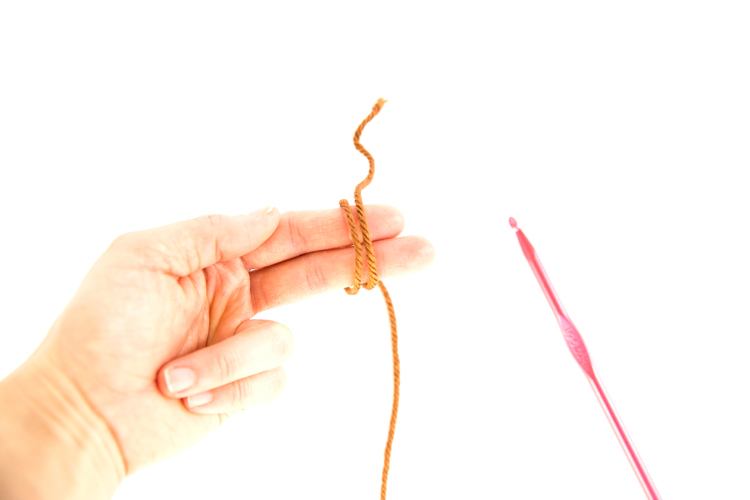
HAT

1. We’ll be working the hat in the round, so we’ll begin with a magic ring. Wrap the yarn loosely around two fingers, leaving an 8 inch tail, and start your first chain into the ring. Chain 2.
2. Work hdc stitches around the ring, according to the pattern. Pull the tail to tighten the ring.
3. Slip stitch the last hdc to the top of the Ch 2 you worked in step 1.
4. Ch 2 again to start the next row.
5. Now, we’re going to increase the rows by working two hdc into one hdc from the previous row. This will help the circle to keep getting larger and will keep the circle lay flat. Slip stitch to the top of the chain 2.
6. For the next row(s) you will alternate between working single stitches to two in the same stitch. Consult the pattern.
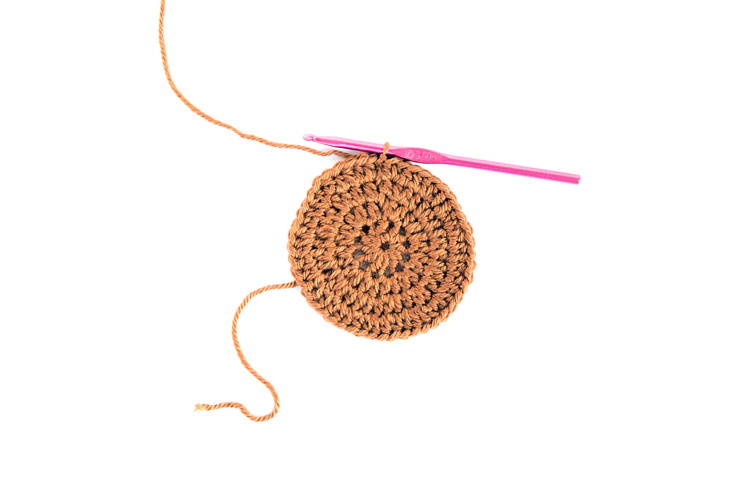
7. Once you complete the increasing rows that determine the size of the hat, you will simply work one stitch in each stitch from the previous row. This will cause the the sides of the circle to curl up and form the hat.

8. For your last row before you add the brim, work a row of dc stitches.
BRIM + TIES
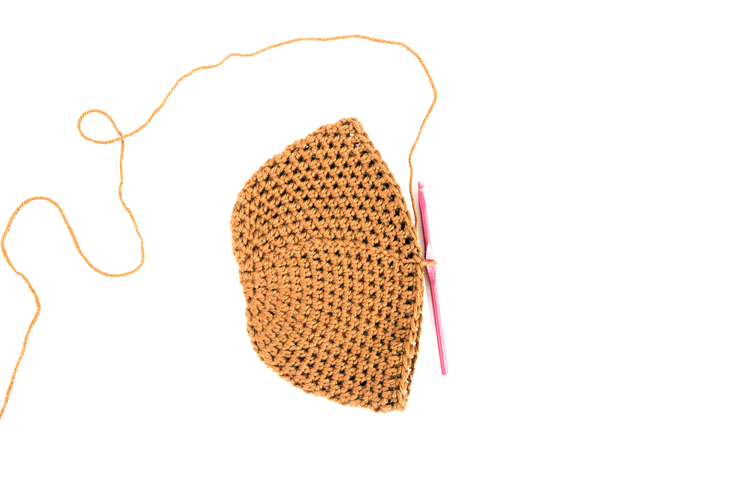
 1. Ch 2 and work fpdc and bpdc according to the pattern. Scroll down for more up close pictures of this. I also use these stitches in some of my other patterns. This beanie includes a video (fast forward to the end) and this one has more pictures (and is very similar to this pattern).
2. You will only work fpdc and bpdc about 3/4 of the way around the hat. You’ll stop, turn your work, and work the rest of the brim in rows instead of rounds.
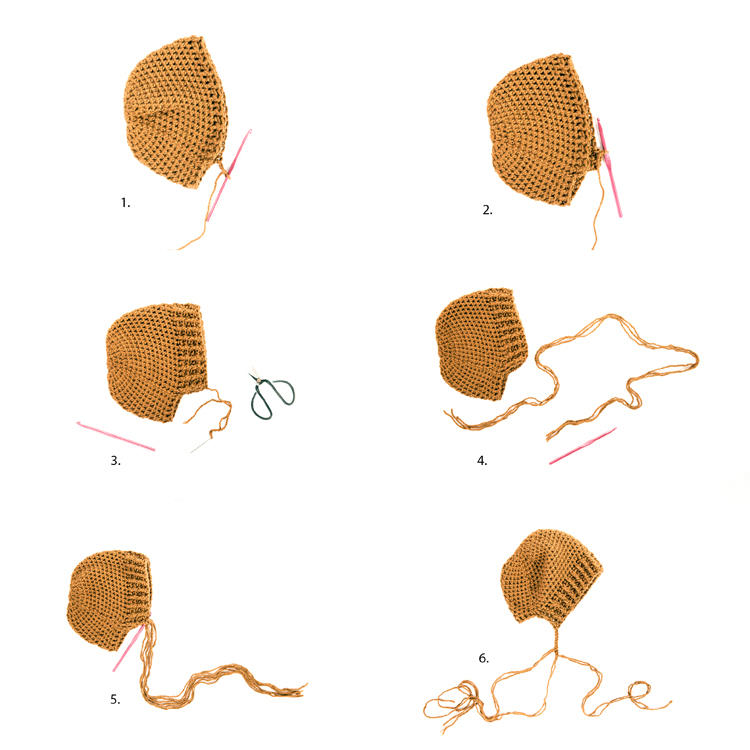
3. Once your brim is complete, tie off the end, cut a 10 inch tail, and weave it into the hat with a yarn needle.
4. Cut three strands of yarn about 1 yard long, for each tie.
5. Hook the strands into the bottom corner of the brim. Fold the strands in half, so that you have six strands.
6. Using two strands together for each section, braid the yarn. Knot it at the end. Alternatively, you can use a longer strand of yarn and chain your ties. It produces a less of a tassel at the end, but it’s much faster.
FPDC + BPDC
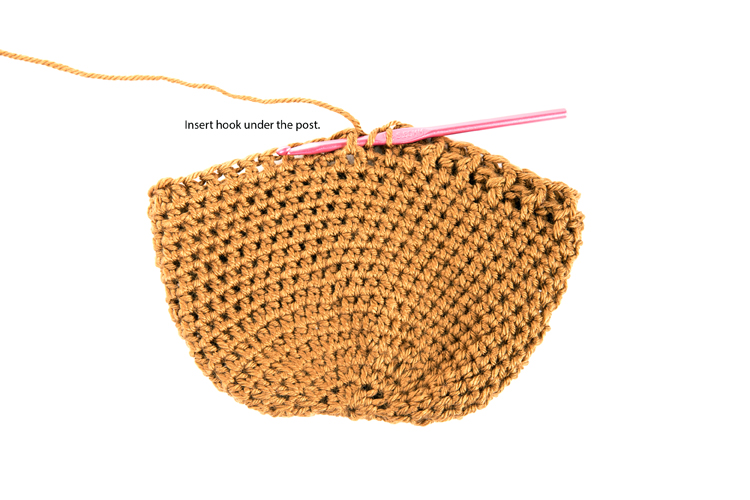
When working a front post double crochet (FPDC) you work under the posts of the stitches, instead of in the top two loops. Yarn over, insert your hook under the post of the next stitch (which pushes the post to the front), and complete the double crochet stitch.
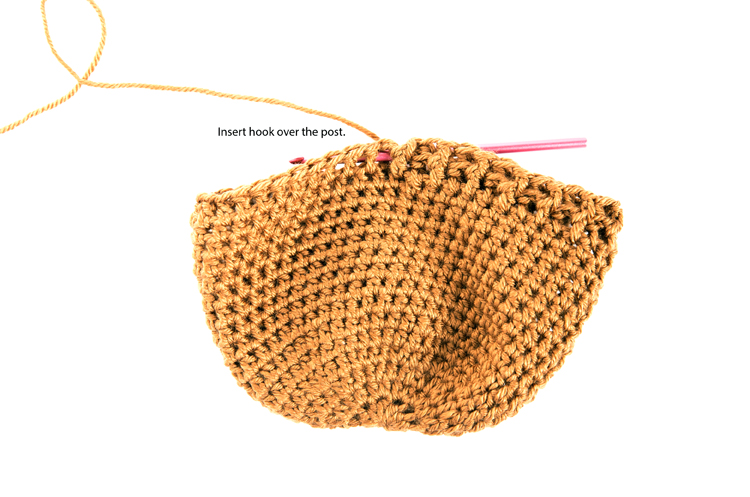
To work a back post double crochet (BPDC) stitch, insert your hook from the back and over the post. Yarn over, weave the hook in from the back of the row, over the post (so the post gets pushed to the back) and then out through the back of the row again. Complete your double crochet stitch.
This one is a little harder to do, because working from the back is more awkward. The more rows you work, the more pronounced the posts will become, and the easier it will get.
That’s it!

You can stop here, or you can add some flair…
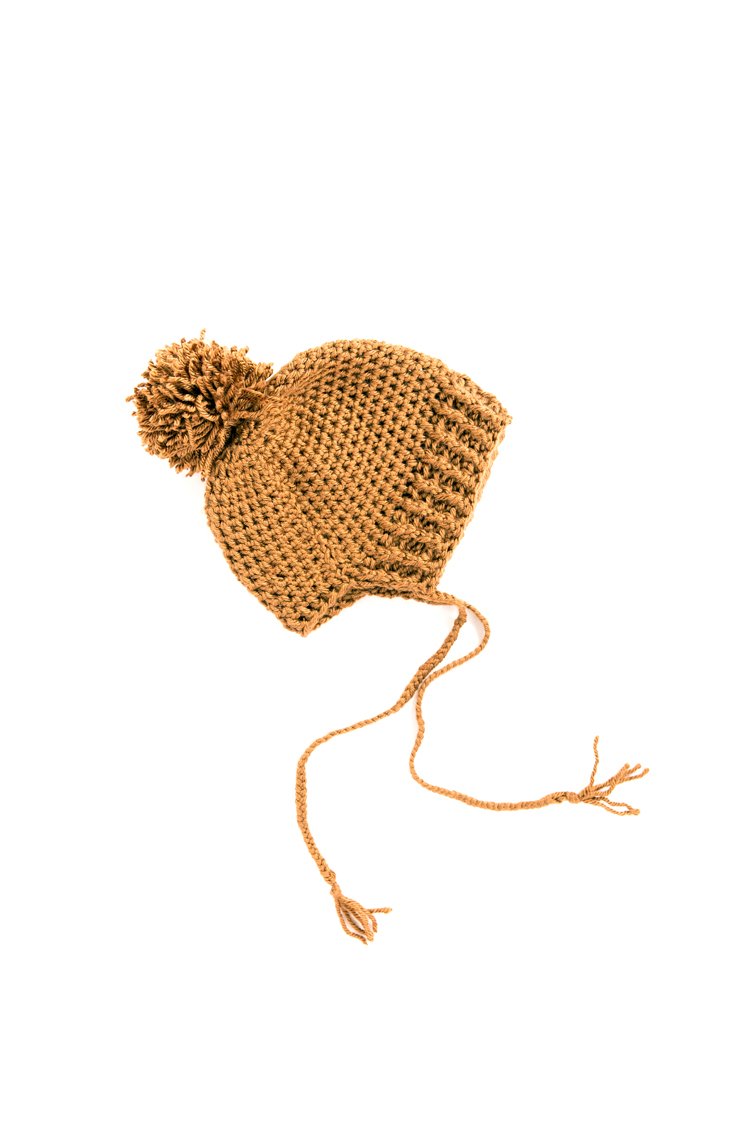
POM
For max cuteness, I always recommend a pom. 😉
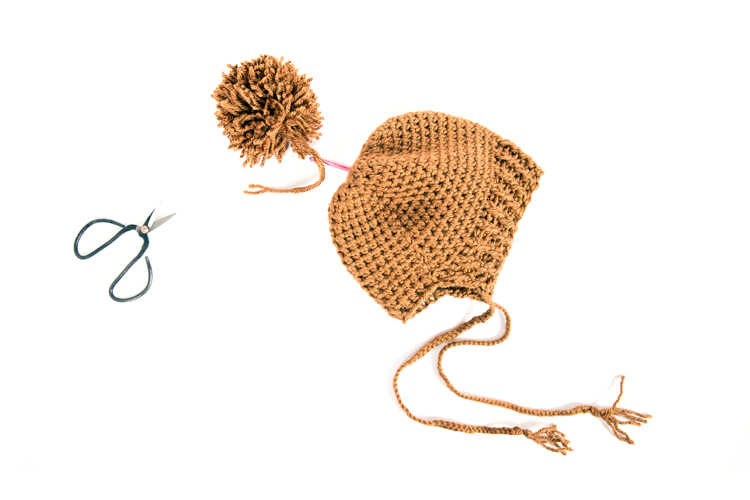
To attach your pom, pull the tails through the top of the hat with your crochet hook. I like to pull each tail through a different hole, and then tie the tails together. Then weave the tails into the hat to secure it further.
PATTERNS
—-PLEASE SEE UPDATED PATTERN AND VIDEO TUTORIAL HERE.—-
Note: The wooden bead teether in the photo below is a DIY. Click here for the tutorial.


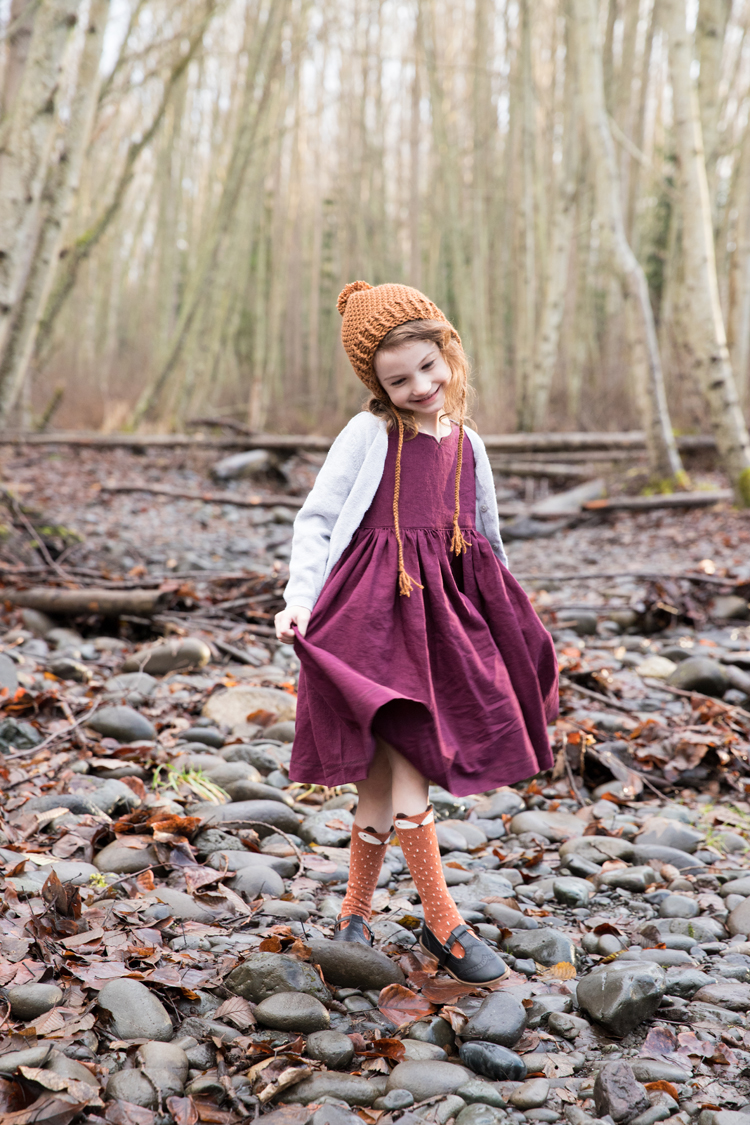
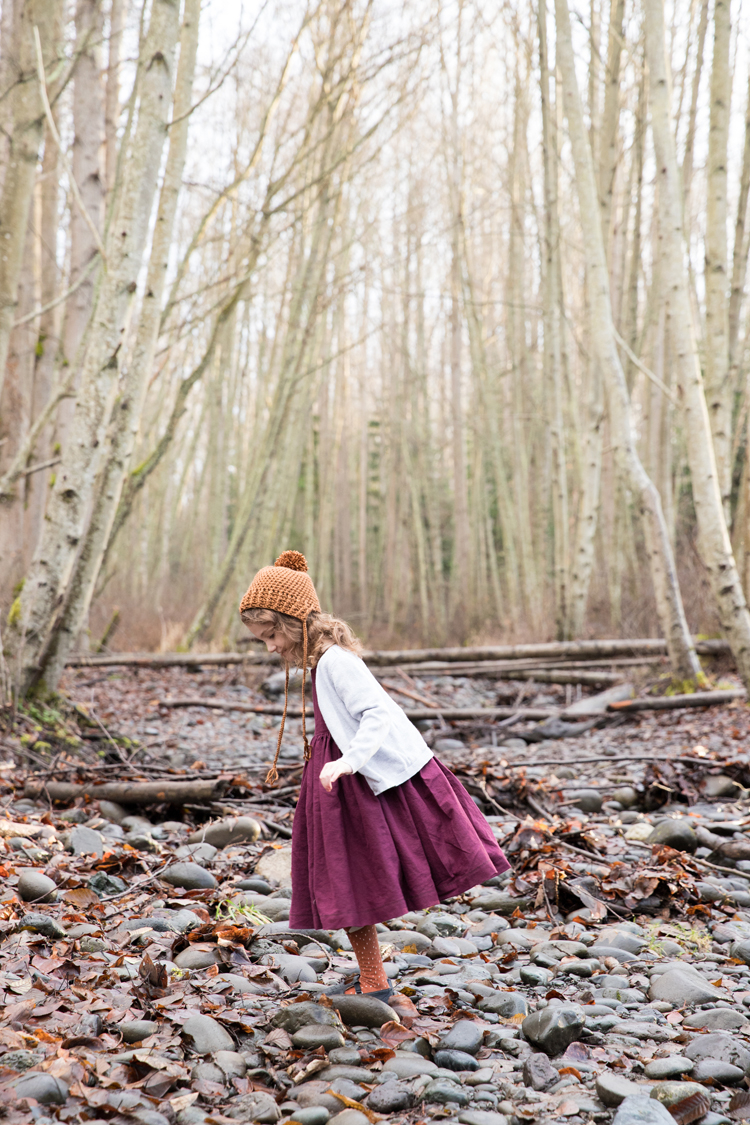
By the way…if you sew, I made this dress using Made By Rae’s Geranium XP dress pattern. It’s a great basic dress pattern for girls, which I use all the time! I recently posted about another green gingham version that also contains links to even more versions. To say I love this pattern, is an understatement. 😉
I chose this purple linen fabric from Jo-Ann as a nod to the 2018 Pantone color of the year. I love that it’s a more muted, earthy plum color. As linen does, it tends to wrinkle. For some reason I kind of like the casual, play clothes texture and feel it adds to this dress.
The beanie is darling and my granddaughter will be getting one (or a dozen!) and the dress is too cute! Did you sew it? I fso, will you share your pattern source? Thanks!!
Thank you! I did sew it. It’s the Geranium XP pattern by Made By Rae. It’s hands down my favorite dress pattern for girls. I have a link at the very end of the post if that helps.
Any chance of an adult pattern being posted?
I didn’t consider that, but if there is enough interest…maybe! 🙂 Maybe I’ll add cabling details or something?
Adult pattern! No cabling necessary… I’m going to try to figure it out. Basically a hdc beanie and copy the brim appropriately? I’ve searched the internet from end to end trying to find a earflap hat or a bonnet for adults. Something that I can wear that isn’t too tight and won’t flatten my hair.
I really need to get around to creating an adult size. My apologies. Yes…it is basically a beanie, but as you get to the bottom of the beanie, you will stop working in the round and focus just on the brim.
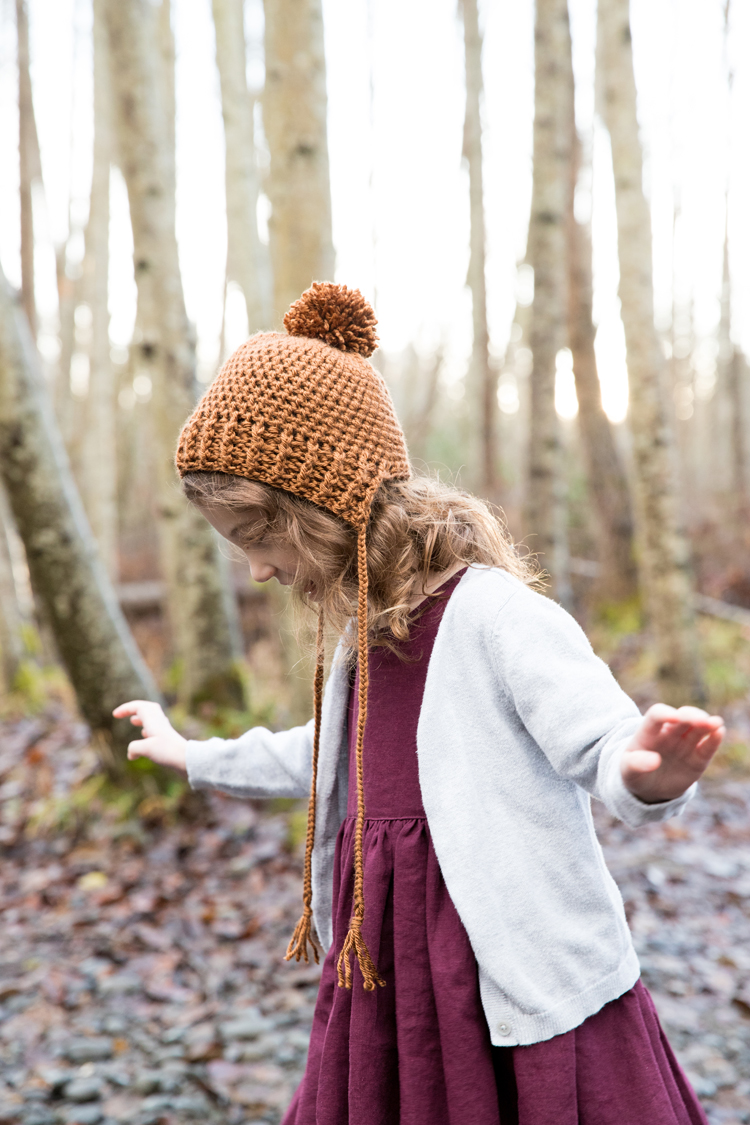
I LOVE the way Nat’s curls peek out under the bonnet- so cute! I love the dress too, and the pretty plum color.
This hat is gorgeous! I do have one question regarding the pattern. In the first row of the brim, the pattern says to slip stitch to the top of chain 2. Since the chain 2 at the start of the brim is on the other side, where do I slip stitch that first row? The rest I understand no problem.
Ack! I meant to say to turn it. I’m so glad you caught that mistake. Thank you for letting me know. I’ll fix it right now.
Phew! Okay. It’s fixed. This is adapted from another one of my patterns without a brim, so I completely spaced the turning verses working in the round. For paid patterns I usually have testers catch my typos and mistakes, but I don’t have them for free patterns. Thank you for again for speaking up. I appreciate it! <3
Do you have a pattern for puppies
I’m sorry. I don’t. Good luck!
I also would be interested in an in adult size. Thank you for sharing such a wonderful pattern.
Thank you for your pattern. I’m at a stump with what hook size. I have an I/9-5.5mm & the other is MI3/9.00mm.
I’m confused which hook you are meaning.
Thank you!
Oh goodness. Another typo. So sorry. I’s an 1/9 5.5 mm hook. So sorry for the confusion!
I’ve been trying the toddler size, by the time I get to row 4 I have 43 loops when I should have 40. I’ve done it 5/6 times, I couldn’t every time to make sure I’m following the pattern correctly, I get 43 every time! How do I fix this?
Hi Miquela,
I’m sorry to hear you’ve run into a snag. To help me trouble shoot with you, I have a few questions. Are you counting the stitches for every round? So, do you have 30 stitches at the end of round 3? If yes, I wonder if maybe you’ve accidentally added extra two hdc in the same stitch sets? Or maybe started the round at the base of the chain 2? Let me know…and we can work it out from there. 🙂
Delia
I am having the same problems with the stitch count of the toddler size, if you do what you say it does not equal the stitch count you are saying. So if I do round 1 counting the chain 2 as a stitch that is 10, round 2 if I do the 2 hdb in each stitch that gives me only 18 unless I count the ch 2 as a stitch again which is 19, so then by round 3, I would only have 26(27 if I count ch 2) based on your directions. I think you need to redo your toddler size.
I will look into that. Thank you for your feedback. The ch 2 will always count as a stitch in this pattern. You should work a ch 2 and a hdc into the first stitch (which counts as 2 in the same stitch), and then 2 in each of the remaining stitches for a total of 20 stitches in the round. I realize that I didn’t make this clear in the pattern. I apologize for that.
I have been meaning to update and improve the sizing for this pattern for some time. I will also write the pattern in clearer terms and include video. Thank you for your feedback which is helping me see the weak spots that need improving.
Hi Delia:
Could this be made in an adult size?
Thanks so much!
It could be adapted for adult sizes. I have not created an adult version yet. You would have to play around with the pattern to get it right, but you can definitely do it! 🙂
Would Love to see this in adult sizes. You do awsome work.
Thanks Nancy!
Hello I love this pattern however I’m a little confused about row three am I doing 1 hdc in one stitch and two in the next and alternating between 1 & 2 the rest of the way? I’m just a bit confused by the directions! This is super cute tho!!!!!!!
I am so glad you like the pattern. Yes, that is correct. Row 3 is an increasing row that makes the circle (or top of the hat) larger. To do that you need to work hdc in the same stitch for every other stitch. This type of increasing occurs in some of the rows following, but it will not be every other stitch. Once the top of the hat is the correct size (according to the pattern), there will be no more increasing and the pattern becomes a lot more straightforward. I hope that helps. Please let me know if you have any more questions and I will do my best to answer them.
I’m off to make one for my boys, if it fits well I will be making more for sure. Tie on hats are so helpful for toddlers that like to rip off their toques! I will also add I would be interested in adult sizes as well ?
Hi!!! Love this pattern. Wondering if it is okay to make and sell, with of course giving you credit for the pattern?
Thank you
Of course! I love to support fellow small businesses. All that I ask is that you tag me on social media and give credit to Delia Creates in your listing. Best wishes with your shop!
Hello, thanks for the sharing, I want to use DMC wolly yarn for making newborn, bu the weight of the yarn is light, so I couldn’t decide how much to increase, can you help? Thanks:)
I’m so sorry for the delay. I just saw your comment. Changing yarn weight can be tricky. You may need to experiment with adding more increasing rounds to get the circumference right. I don’t know by how much. You would really just have to try it out and tinker with it. Good luck!
Hi, I’m loving this pattern,
Can i ask how old the girl is in the photos and why size she is wearing. Did you make any alts to the pattern to make it bigger.
I made a child size and it barely fit my 16mo, don’t know if my stitches were too tight. But though I’d ask, before I attempt another.
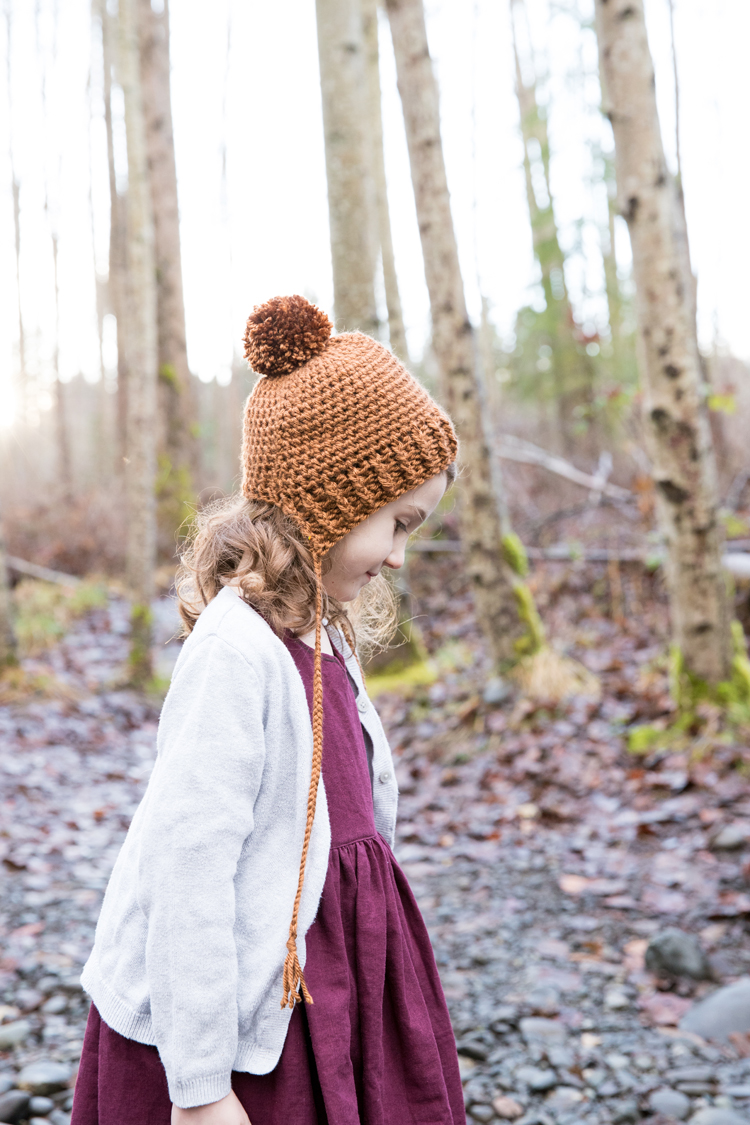
Good question. The girl in this photo is 6 years old, almost 7. I didn’t make any adjustments to make it bigger. Does the gauge match? I would try going up a hook size to see if that helps. The type of yarn can affect sizing too. Softer yarns seem to stretch better than stiffer ones. I hope that helps. Let me know if you have any more questions and I’ll try to help the best I can.
Love the hat! If I went a hook size up do you think it would fit a adult small?
Thank you! It may fit an older child but I’m not sure it would be large enough to be an adult small.
Thanks for sharing the pattern! I used a 5.5mm hook with worsted weight yarn and the “baby/toddler” pattern fit my infant’s 15.5” head circumference snugly.
After my first attempt, I ended up adding an additional 4 columns of ribbing (total of 35 sts.) so the ribbing part would amply cover baby’s ears (and she is petite).
Thank you for the feedback. I really need to take another look at this pattern and explore what might be happening. I myself have noticed a difference in sizing depending on the type of yarn I use and it could be that I need to improve the sizing. I will look into to revamping this pattern and maybe releasing a new version this Fall. Thank you for your input. I really appreciate it.
Thank you for this lovely pattern Delia. I seem to have run into the same issue has some of the previous commentators. I used the 5.5 mm hook and required yarn however it did turn out quite small. The “child” sized one would fit a toddler. Maybe instead of the hdc a double crochet throughout? I spent almost 3 hours working on this hoping the sizing would even out eventually and yet it did turn out small. Looking forward to hearing from you soon.
I’m sorry to hear that. Can I ask if your gauge matches mine as well? If not, I would try going up a hook size or two to see if the sizing improves. If you want to contact me on instagram (@deliacreates) I can work through this with you in messages.
Also…truly, the last thing I want is for you to feel frustrated with this project. If you’re willing to give me more detailed feedback in instagram messages or email ([email protected]) I’d love to know what your gauge is and get more information on how to pinpoint exactly where I need to adjust the pattern. I asked another person who expressed a similar concern in the comments above but they never got back to me on what their gauge was. Specific feedback from you will help a lot. I am truly sorry that what was supposed to be a fun project, turned out really frustrating for you.